3 Getting Started Managing Capture Workspaces
This chapter includes the following sections:
3.1 Before You Begin
As described in About Capture Administrator and User Roles, the Capture system administrator installs Oracle WebCenter Enterprise Capture, starts the server, performs its initial configuration, and monitors its overall performance, including batch processor logging. This section assumes these steps are complete.
Items You Need
To get started managing a Capture workspace, you need the following from the Capture system administrator:
-
URLs for accessing the Capture workspace console (Accessing the Capture Workspace Console) and the Capture client (Starting the Capture Client).
-
A user ID and password to access the Capture workspace console.
-
A user ID and password to use the Capture client.
Optional Items
To manage workspaces, you may also need the following from the Capture system administrator:
-
Data sources for connecting to an external database, needed for creating database lookups and database choice lists.
-
For scanning, you need access to a TWAIN-compliant scanner or multi-function device. Instead of scanning documents, you can import them from your file system, as described in this chapter.
-
For importing, you may want to have TIFF image files, PDF documents, and Microsoft Word or Excel documents available.
-
For scanning and recognition, you may want to have pages with bar codes and patch codes available.
3.2 Accessing the Capture Workspace Console
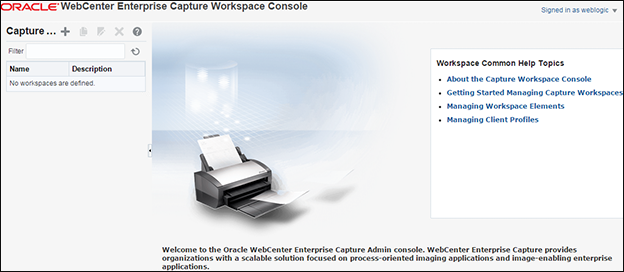
Follow these steps to access the workspace console, where you create and manage workspaces. If needed, ask the Capture system administrator for sign-in information.
3.3 Creating Your First Workspace and Elements
Follow the steps in these sections to create a workspace and add metadata fields and profiles.
3.3.1 Example: Creating a Workspace
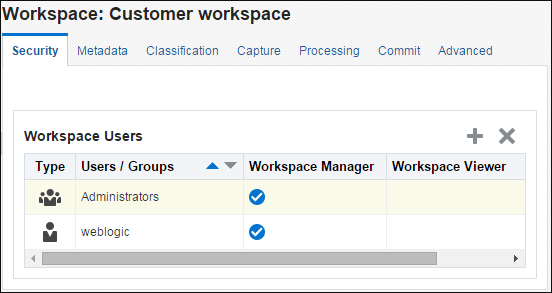
If you are the first workspace manager to use the workspace console, no workspaces are present. To add a workspace:
3.3.2 Example: Creating Metadata Fields
Now create several metadata fields to hold metadata values for captured documents.
-
On the Metadata tab, click the Add button in the Metadata Fields table.
-
Create several metadata fields.
-
In the Field Name field, enter
Customer IDand select the Required field. Click Submit. The new field displays in the Metadata Fields table.For more information about creating metadata fields, see Managing Metadata Fields.
-
Add another field called
Customer Name, make it required, and click Submit. -
Add another field called
Correspondence Type, and click Submit. -
Add another field called
Purchase Order Number, and click Submit.Figure 3-3 Metadata Tab With New Metadata Fields Added
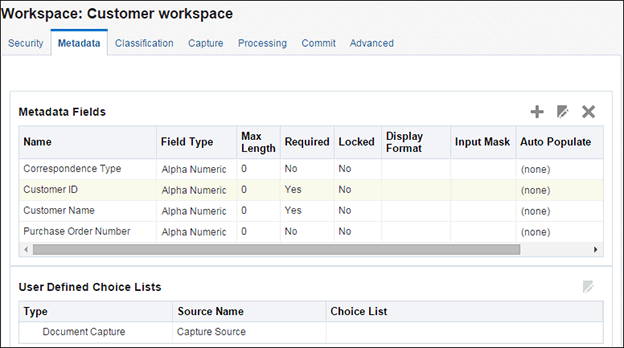
Description of "Figure 3-3 Metadata Tab With New Metadata Fields Added"
-
3.3.3 Example: Creating Attachment Types
In this section, you create an attachment type, which defines the type of attachment that is associated with a primary document.
3.3.4 Example: Creating Document Profiles
In this section, you create a document profile, which defines the set of metadata fields that apply to a specific type of document and also specifies any attachment types that can be assigned to attachments used by the document profile.
-
On the Classification tab, click the Add button in the Document Profiles table.
-
In the Name field, enter the type of document (for example,
Correspondence Documents). -
Move all of the fields except
Purchase Order Numberto the Selected Metadata Fields list.For more information about creating document profiles, see Managing Document Profiles.
Figure 3-4 New Document Profile With Its Set of Metadata Fields Selected
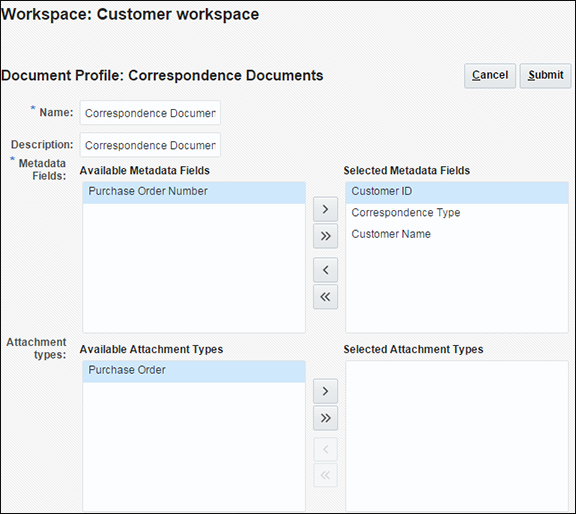
Description of "Figure 3-4 New Document Profile With Its Set of Metadata Fields Selected"
-
-
Create another document profile called
Purchase Orders, select the following metadata fields for it, and order them as follows.-
Purchase Order Number
-
Customer ID
-
Customer Name
Move the
Purchase Orderattachment type to the Selected Attachment Types list, and click Submit.For more information about creating attachment types, see Managing Attachment Types.
-
3.3.5 Example: Creating a Client Profile
In this section, you create a client profile, which defines the settings used when users select it to scan, import, and index documents in the client.
-
On the Capture tab, click the Add button in the Client Profiles table. Screens for selecting settings (known as train stops) display in the right pane.
-
Complete settings on the General Settings train stop.
-
In the Profile Type field, select 2 - Capture and Index. Users will use this profile to capture (scan or import) documents and then index (complete metadata values) for them.
-
In the Profile Name field, enter a name to display to users (example,
Import Customer Documents). For example, you might use the name to indicate how users should use the client profile. -
In the Batch Prefix field, enter a naming prefix (for example,
CUST_DOC). Capture names batches as they are created by appending an incremented number to this prefix.
-
-
On the Image Settings train stop, select Import in Native Format in the Non-Image File Import Action field.
This action allows users to use this client profile to import non-image files such as PDF files or Microsoft Word documents in addition to image files. It also sets non-image files to be retained in their original format.
-
In the Document Profiles field on the Document Indexing Settings train stop, select the
Correspondence DocumentsandPurchase Ordersdocument profiles you created. -
On the Security train stop, grant a Capture client user security access to the client profile.
This step requires a user or group assigned the CaptureUser role in the policy store. The Capture system administrator is responsible for assigning Capture User roles to groups or users.
-
Click the Add button in the Client Profile Users table.
-
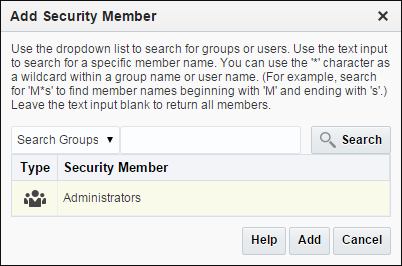
In the Add Security Member window, specify whether to search groups or users assigned the CaptureUser role, and click Search. From the search results that display in the table, select a security member, and click Add, as shown in Figure 3-5.
Figure 3-5 Granting Client Profile Access to a Capture User
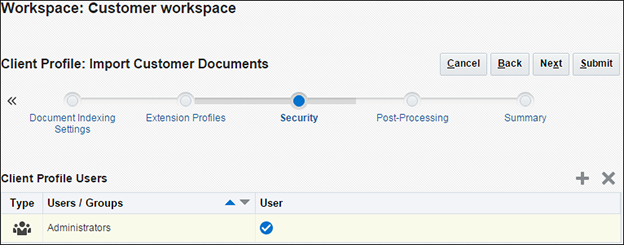
Description of "Figure 3-5 Granting Client Profile Access to a Capture User"The user or group you added displays in the Client Profile Users table, as shown in Figure 3-6.
Figure 3-6 Capture User Authorized to Use the Client Profile
Description of "Figure 3-6 Capture User Authorized to Use the Client Profile"
-
-
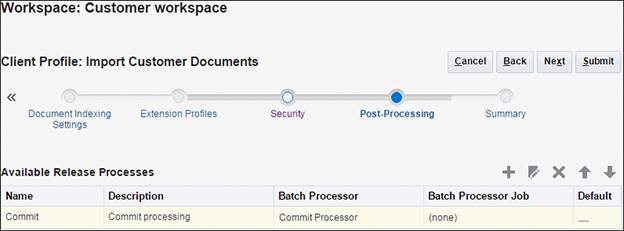
On the Post-Processing tab, click Add in the Available Release Processes table to add a release process. In the Release Process Settings window, enter a name for the release process and select Commit Processor in the Batch Processor field, as shown in Figure 3-7.
After users release batches created with this client profile, the batch's documents are output by the Commit Processor.
Figure 3-7 Commit Processing Set as the Client Profile's Next Post Processing Step
Description of "Figure 3-7 Commit Processing Set as the Client Profile's Next Post Processing Step" -
Save the client profile by clicking Submit. For more information about client profiles, see Managing Client Profiles.
3.3.6 Example: Creating a Commit Profile
In this section, you create a commit profile. This commit profile defines how documents are output after client users using this client profile release batches. For this example, you configure output to a local or network folder, using the Text File commit driver.
-
On the Commit tab, click the Add button in the Commit Profiles table.
-
Complete settings on the General Settings train stop.
-
In the Commit Profile Name field, enter a name (
Commit to Text). -
In the Commit Driver field, select Text File.
-
In the Document Output Format field, select PDF Image-Only.
-
In the Attachment Document Output Format field, select PDF Image-Only.
-
In the Restrict Commit to Document Profiles field, select the
Correspondence Documentsdocument profile. This restricts this commit profile's processing to only those documents assigned to the selected document profile.
-
-
Complete settings on the Commit Driver Settings train stop. These settings are specific to the commit text file driver you selected in step 2b.
-
On the Text File Folder tab, enter a location in the Commit Text File Folder field to write commit text files. A commit text file contains delimited metadata values for each document output in the batch. For the commit folder, you must either specify a folder on the Capture server or a network path accessible from the Capture server. For this example, you might specify a shared folder on your system. If the Capture server is running on Windows, you might specify a UNC path to a network share, such as
\\USER-SYSTEM\commit.In the File Prefix field, enter
TEXT_FILE.In the File Extension field, enter
txt. -
On the Document Folder tab, enter a location in the Document Folder field to write the document files (in this case, PDF files). As with the text file folder, either specify a folder on the Capture server or a network path accessible from the Capture server. For this example, you might specify a shared folder on your system. If the Capture server is running on Windows, you might specify a UNC path to a network share, such as
\\USER-SYSTEM\commit.Select the Create a folder per committed batch field.
-
On the Formatting tab, move
Correspondence Type,Customer ID,Customer Name, and<Batch Name>to the Selected Fields list. This specifies the metadata values to be written to the text file.Note:
Fields specified within <> are system fields. For example,
<Batch Name>. -
On the Document File Naming tab, complete settings.
Select the Name document file based on metadata field values field to determine the document file name from the selected metadata field values of the document, then move
<Batch Name>andCustomer IDto the Selected Fields list.In the Field Delimiter field, enter an underscore (_).
-
-
Click Submit to save the commit profile.
Similarly, create another commit profile, restrict commit to the Purchase Orders document profile, and complete settings on each train stop.
3.4 Starting the Capture Client
Follow these steps to start up the Capture client application, where you test your client profile as an end-user by importing several documents.
3.5 Testing Your Workspace Settings in the Client
Follow the steps in this section to test your workspace configuration in the client. See Getting started with Capture in Using Oracle WebCenter Enterprise Capture.
3.5.1 Example: Capturing Batches Using Your Client Profile
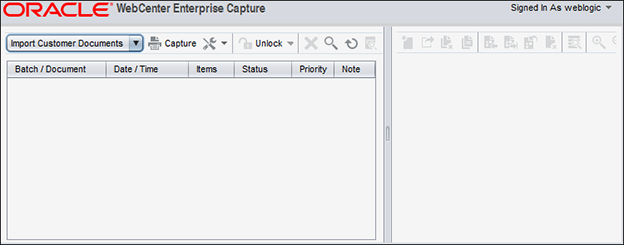
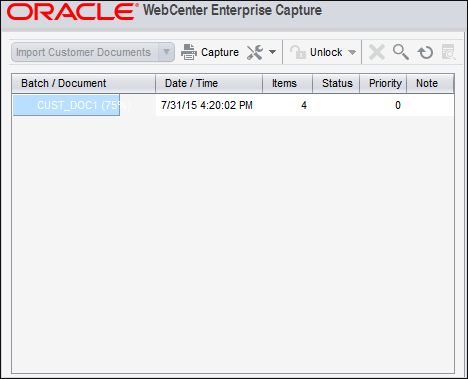
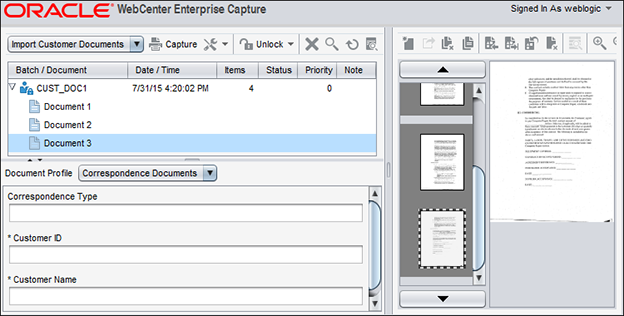
The client provides a single window whose upper left pane, the batch pane, is fixed, while its other panes change, depending on the batch pane selection. See Scanning and importing documents in Using Oracle WebCenter Enterprise Capture.
Figure 3-9 Capturing New Batches in the Client Window
Description of "Figure 3-9 Capturing New Batches in the Client Window"
3.5.2 Example: Indexing Batches
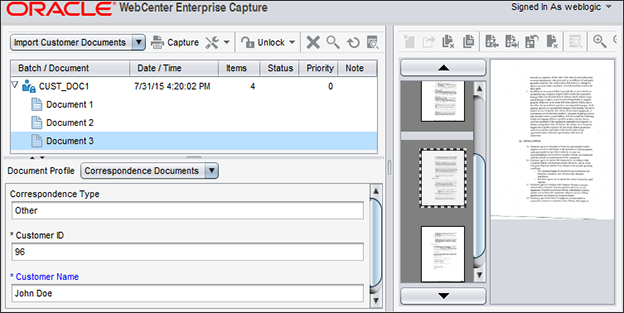
After reviewing and editing documents, follow these steps to complete the metadata fields you configured. When a selected client profile is configured for indexing, metadata fields display in the lower left pane when a document is selected in the batch pane. See Indexing documents in Using Oracle WebCenter Enterprise Capture.
3.5.3 Example: Releasing Batches
When you are done working on a batch's documents, the next step is to release it. What happens when client users release batches depends on the client profile's release process selected by the user. When configuring the client profile in Example: Creating a Client Profile, you set Commit Processor as the post-processing step, then created a commit profile to output to text file in Example: Creating a Commit Profile.
3.5.4 Example: Viewing Batch Commit Results
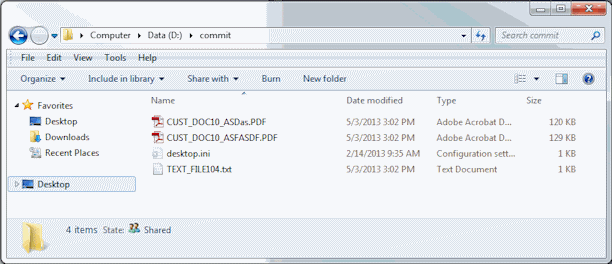
After commit processing completes and one or more released batches are removed from the batch list, check for the committed batch results (commit text file and documents) in the folder you specified when creating the commit profile in Example: Creating a Commit Profile.
