10 Managing Networks
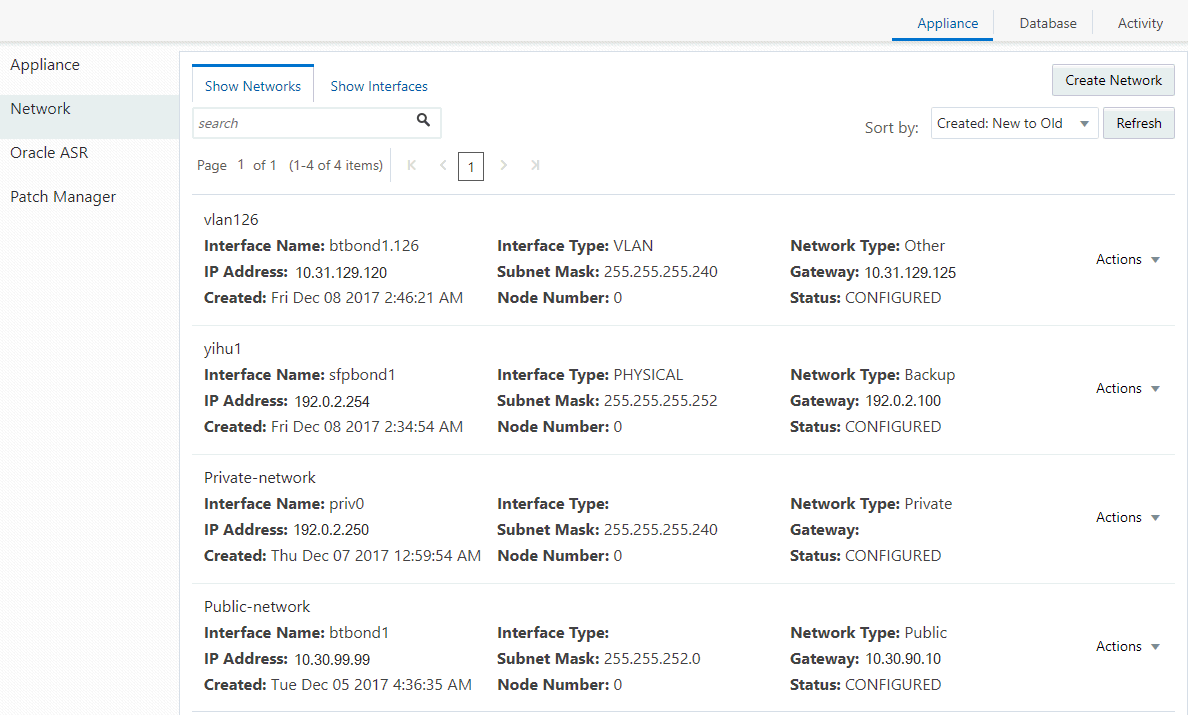
View the public and private networks that are configured on your Oracle Database Appliance.
- About Managing Networks
Create and manage virtual local area networks (VLANs) to provide network security isolation for multiple workloads that share a common network. - Viewing Configured Networks and Network Interfaces
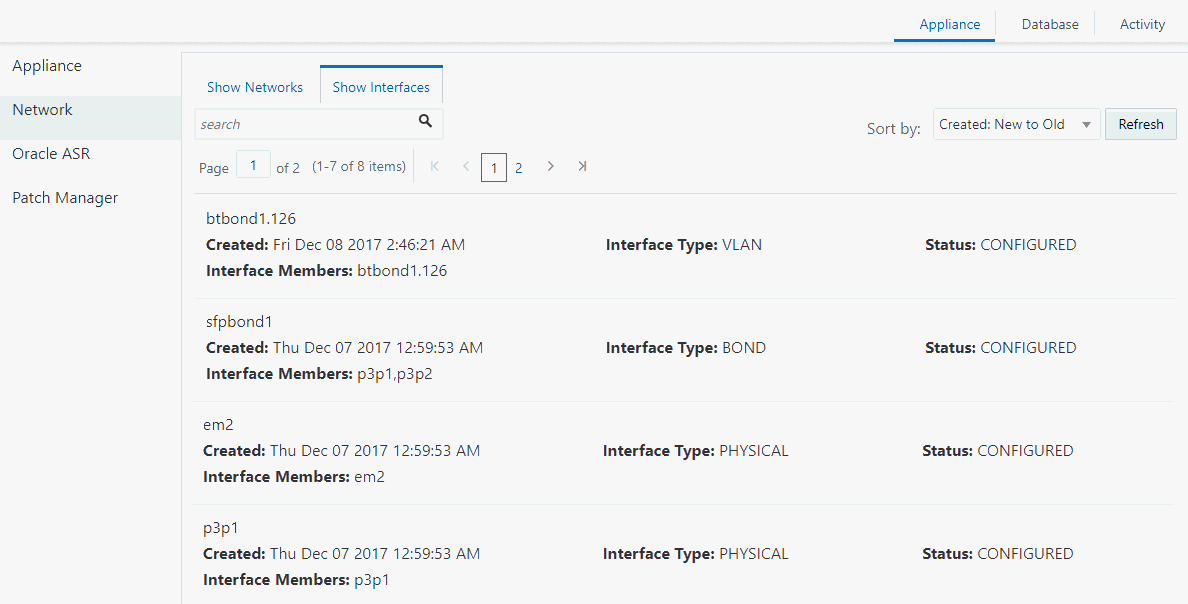
Use the Web Console to display a list of configured networks, network details and interfaces. - Creating a Network
Create a new network for the appliance. - Updating a Network
Update a network to revise the IP address, subnet mask, gateway, or type of network. - Deleting a Network
Delete a configured network.
About Managing Networks
Create and manage virtual local area networks (VLANs) to provide network security isolation for multiple workloads that share a common network.
Oracle Database Appliance supports multiple virtual local area networks (VLANs) on the same network port or bond. VLANs are multiple logical networks that are created from a single physical network switch port. Each VLAN acts as an independent logical network operating with other VLANs over the same physical connection. The VLAN tag associated with the data packet and network define the network. You can create a collection of isolated networks to enhance network security and bandwidth and keep data packets separated. For example, application, backup, and management networks.
You can create VLANs using either the copper ports or SFP+ fiber physical ports for the network. You cannot add host bus adapters (HBA). The network interfaces differ, depending on your Oracle Database Appliance hardware. The physical ports in the system at deployment (either copper or fiber) are bonded as btbond0 in single node platforms and bond0 in multi-node platforms. Depending on the platform, the VLANs are created on btbond0 or bond0.
Managing Virtual Local Area Networks (VLANs)
The command-line interface enables you to create, list, and delete VLANs. For a bare metal deployment, use the odaadmcli commands to manage the following types of VLANs:
-
Public: For public access. This is the default public interface.
-
Backup: For backup operations.
-
Management: For management traffic.
-
Custom: For usage defined by the customer. For example, for applications.
The public VLAN is setup when you configure the first network using the command configure-firstnet. You can set up only one public VLAN. Use the command-line interface to create other VLANs. For multi-node systems, the IP addresses for Node 0 and Node 1 cannot be the same. Oracle Database Appliance does not support Dynamic Host Configuration Protocol (DHCP) to provide IP addresses, subnet mask and default gateway.
You can use the command-line interface to list all networks, or use the Web Console to display all physical and virtual networks.
.See Also:
Oracle Database Appliance: Virtual Local Area Network White Paper at http://www.oracle.com/technetwork/database/database-appliance/overview/oda-vp-vlan-2418821.pdf
Viewing Configured Networks and Network Interfaces
Use the Web Console to display a list of configured networks, network details and interfaces.
Creating a Network
Create a new network for the appliance.


