| Oracle Agile Engineering Data Management Server Installation Guide on Windows and UNIX Release e6.2.1.0 E69109-01 |
|

 Previous |
 Next |
| Oracle Agile Engineering Data Management Server Installation Guide on Windows and UNIX Release e6.2.1.0 E69109-01 |
|
Previous |
Next |
|
Note: This chapter describes the manual creation of the Database schema. Keep in mind that on UNIX, only the manual creation can be performed. For the automatic creation on a Windows operating system see chapter Installation with the Agile e6 Installer. |
Before creating the database instance, the database listener needs to be configured.
Start the Oracle Net Configuration Assistant.
Windows
1. Start the Oracle Net Configuration Assistant.
2. Click Start > All Programs > Oracle - OraDb12c_home1 > Configuration and Migration Tools > Net Configuration Assistant.
UNIX
1. Open a new terminal and start the Oracle Net Services Configuration Tool with the following command:
$ORACLE_HOME/bin/netca
The Oracle Net configuration Assistant - Welcome screen is opened.
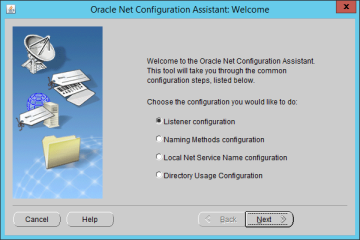
Select the Listener configuration and click Next.
The Oracle Net configuration Assistant - Listener Configuration, Listener screen is opened.
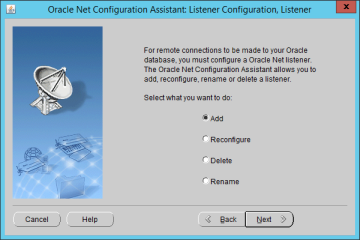
Select Add and click Next.
The Oracle Net configuration Assistant - Listener Configuration, Listener Name screen is opened.
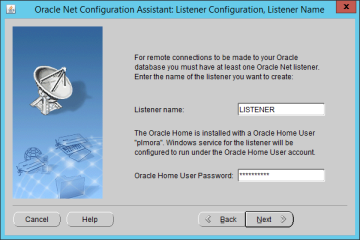
Enter the Listener name to be created and click Next.
If you created the Oracle home user with non-Windows-Built-In Account while installing oracle database server, the password for the Oracle home user is here required.
Click Next.
The Oracle Net configuration Assistant - Listener Configuration, Select Protocols screen is opened.

Make sure TCP is listed in the Selected Protocols list and click Next.
TCP is the default selection.
The Oracle Net configuration Assistant - Listener Configuration, TCP/IP Protocol screen is opened.
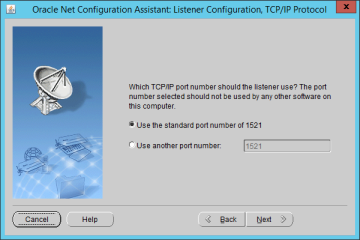
Select the standard port number of 1521.
You may choose any port number that has not been used yet.
Click Next.
The Oracle Net configuration Assistant - Listener Configuration, More Listeners? screen is opened.
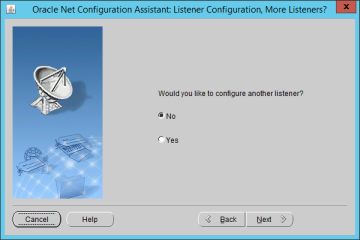
Select No and click Next.
The Oracle Net configuration Assistant - Listener Configuration Done screen is opened.
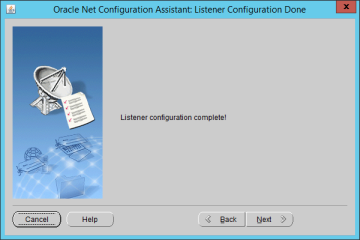
Click Next and finish to close the Listener Configuration.
Your database listener is now created and started.
This section describes the manual configuration of the Database Net Service Name.
|
Note: The following instruction is only necessary for the database! |
|
Note: On UNIX, only the manual configuration can be performed. For the configuration on a Windows operating system see chapter Installation with the Agile e6 Installer. |
Start the Oracle Net Services Configuration Assistant.
Windows
Click Start > All Programs > Oracle - OraClient12Home1_32bit > Configuration and Migration Tools > Net Configuration Assistant.
UNIX
Enter the command: $ORACLE_HOME/bin/netca
The Welcome to the Oracle Net Configuration Assistant screen is opened.

Select the Local Net Service Name configuration and click Next.
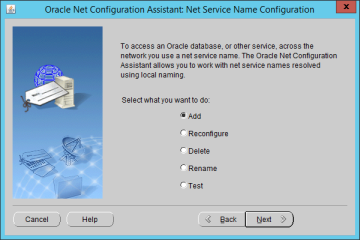
Select Add and click Next.
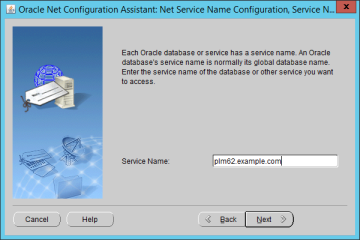
Enter the Service Name.
This is the global database name you provided by the database creation. In the example it is plm62.example.com.
Click Next.
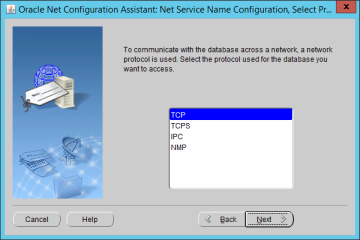
Select the TCP protocol and click Next.
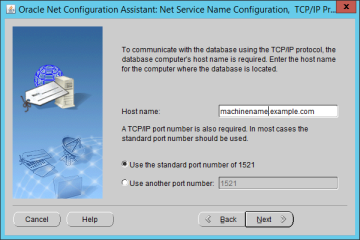
Enter the fully qualified host name - where the Oracle database is located and click Next.
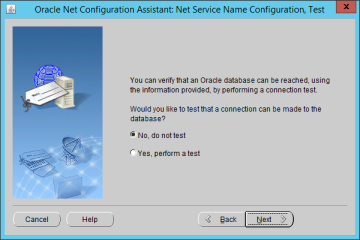
Select No, do not test and click Next.
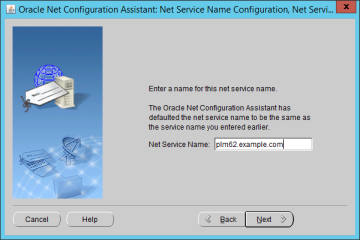
Enter the Net Service Name and click Next.
This is the same name as entered above.
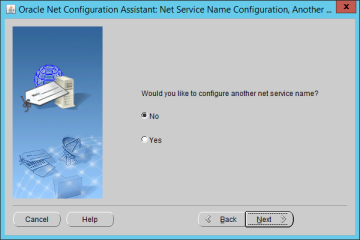
Select No and click Next.
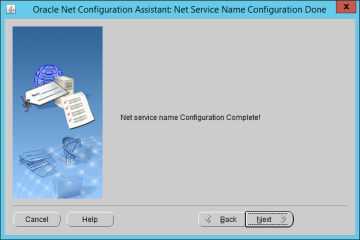
The Net service name configuration is completed.
Click Next.
Click Finish to quit.
The database is created by using the Database Configuration Assistant (DBCA) templates. DBCA templates include database options, initialization parameters, and storage information for data files, table spaces, control files and redo logs.
Five different templates are predefined to meet different requirements according to the purpose, size, and number of users of the Agile e6.2.1.0 database installation.
For additional information on significant database parameters and settings of each template, refer to the Hardware Sizing Guide for Agile e6.2.1.0.
|
Note: In all the examples given in this chapter, the name of the Oracle Home for Oracle Database installation is OraDb12c_home1. You may use a different name in your installation. |
Refer to the downloaded media pack - Oracle Agile Engineering Data Management Application (Release e6.2.1.0).
Windows
1. All the templates are in the db_addon\axalant\db_util\oracle\windows\templates directory.
2. Copy the required DBCA template file (e.g. plm_prod_medium.dbt) to the %ORACLE_HOME%\assistants\dbca\templates directory.
3. Start the Oracle Database Configuration Assistant from the Windows Start menu.
Search for application Database Configuration Assistant and start it.
UNIX
1. All the templates are in the addon/db/unix/templates directory.
2. Copy the required DBCA template file (e.g. plm_prod_medium.dbt) to the $ORACLE_HOME/assistants/dbca/templates directory.
3. Start the Oracle Database Configuration Assistant
$ORACLE_HOME/bin/dbca
The Database Configuration Assistant: Welcome screen is opened.
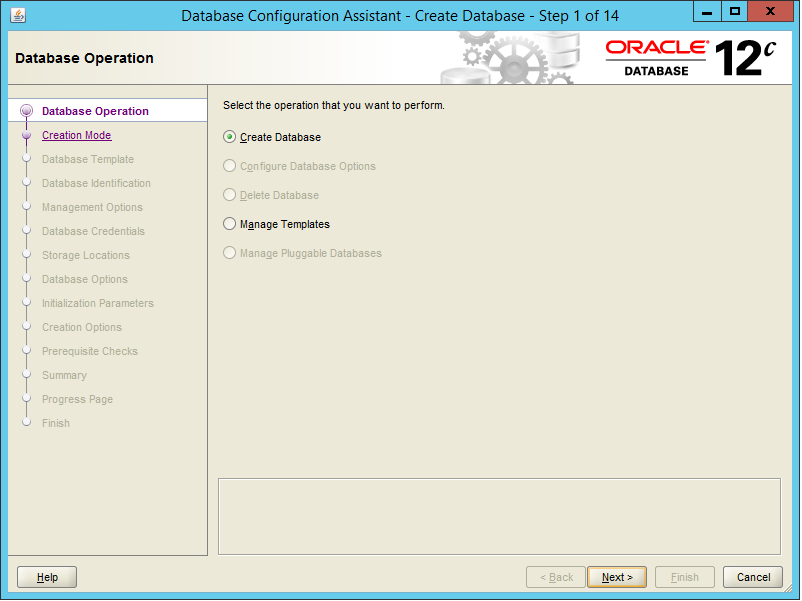
Select Create a Database and click Next.
The Database Configuration Assistant - Creation Mode screen is opened.
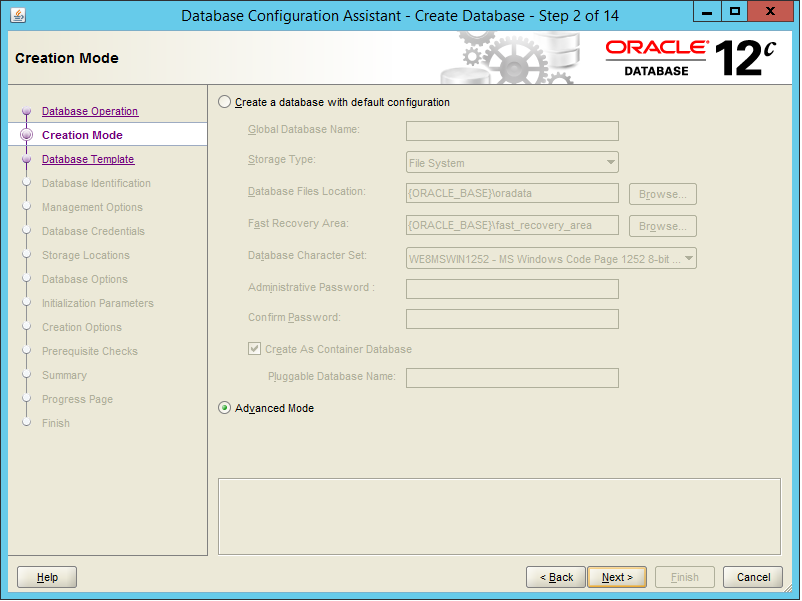
Select Advanced Mode and click Next.
The Database Configuration Assistant - Database Template screen is opened.
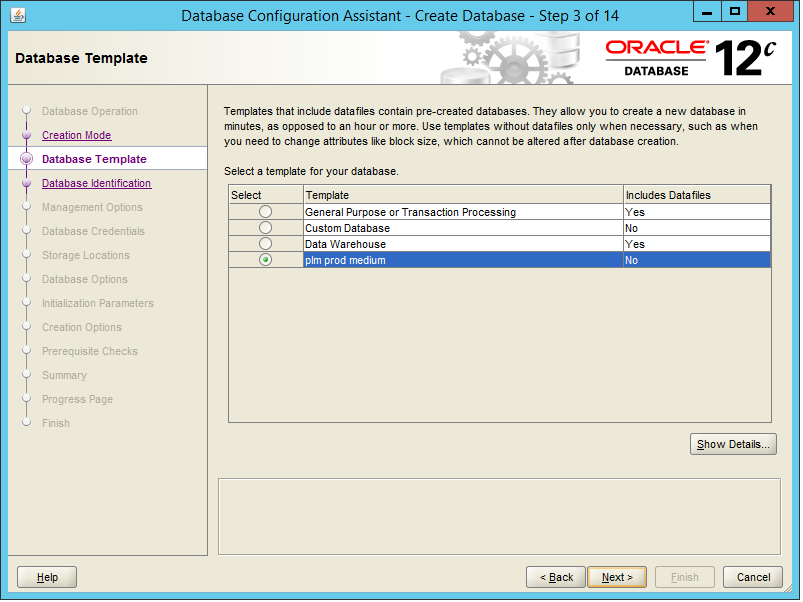
The template that you have chosen and copied is available in this list.
Select the template you want to use and click Next.
The Database Configuration Assistant - Database Identification screen is opened.
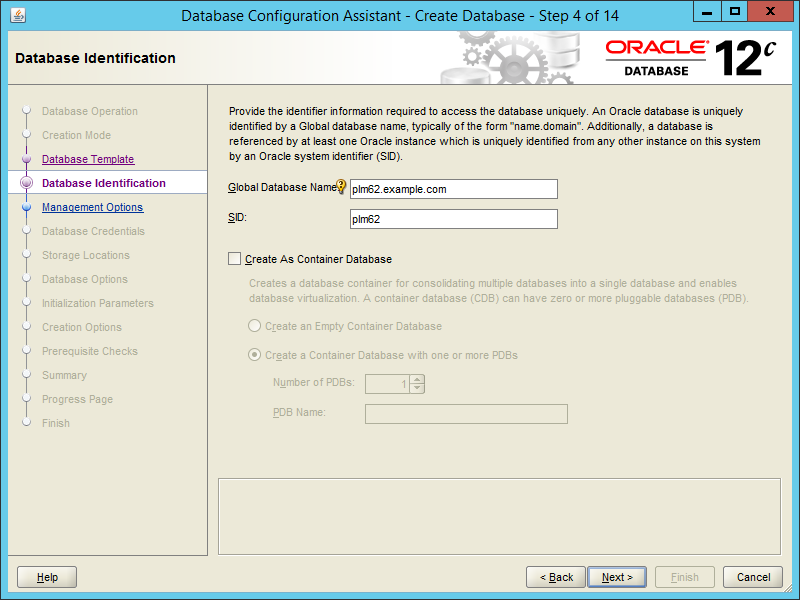
Enter the Global database name and database SID.
The default SID is plm62. It is recommended to set the global database name to SID.<domain name>; for example, plm62.example.com. But it can also be left with the same name as the database SID.
|
Note: Do not leave this field blank. |
Click Next.
The Database Configuration Assistant - Management Options screen is opened.
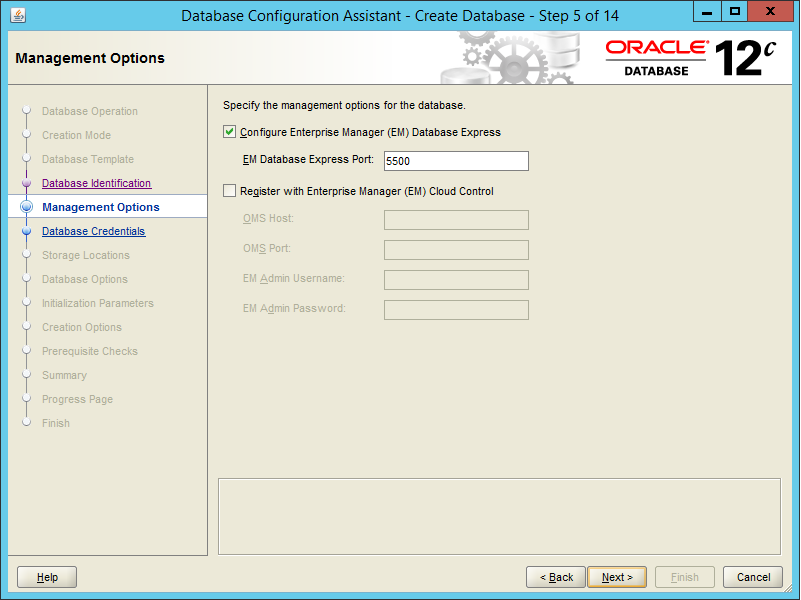
With Oracle Database 12c the Enterprise Manager (EM) Database Express can be installed in two ways:
EM Database Express
Oracle Enterprise Manager Database Express is a web-based database management tool that is built inside each Oracle database. All the SQL commands you normally type have been translated into a graphical point-and-click interface. EM Database Express even supports RAC database management.
EM Express is not a direct replacement for DB Control. EM Express is built inside the database server and there are limitations as to what it can do. EM Express is also focused on providing performance management and monitoring functionality, and is not meant to be an all around database administration tool.
EM Cloud Control
Cloud Control provides Web-based management tools for managing individual database instances, as well as central management tools for managing your entire Oracle environment, including multiple databases, hosts, application servers, and other components of your network. It can even be used to manage non-Oracle databases.
For more information about centrally managing the databases, application servers, hosts, and other components of your network, see Oracle Enterprise Manager Administration Guide.
Select the option Configure Enterprise Manager (EM) Database Express.
The Oracle Configuration Assistant - Database Credentials screen is opened.
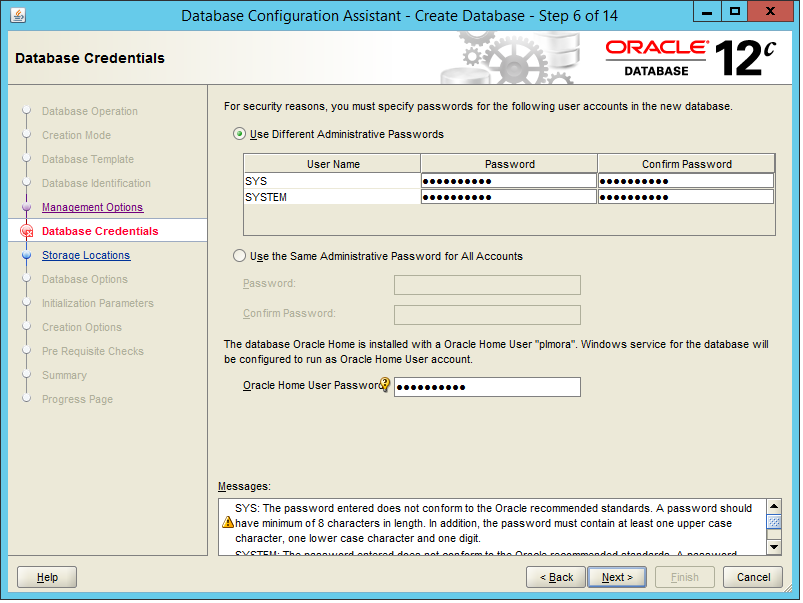
Enter passwords for SYS, SYSTEM and click Next.
|
Note: It is highly recommended to use different passwords for these accounts. |
|
Note: Each password needs to meet the Oracle recommended standards. A password should have a minimum of 8 characters. In addition, the password must contain at least one upper and one lower case character, and one digit. |
|
Note: If your Oracle home user is not the Windows built-in account, please use the password of the Oracle home user for the Windows service configuration. |
The Database Configuration Assistant - Network Configuration screen is opened.
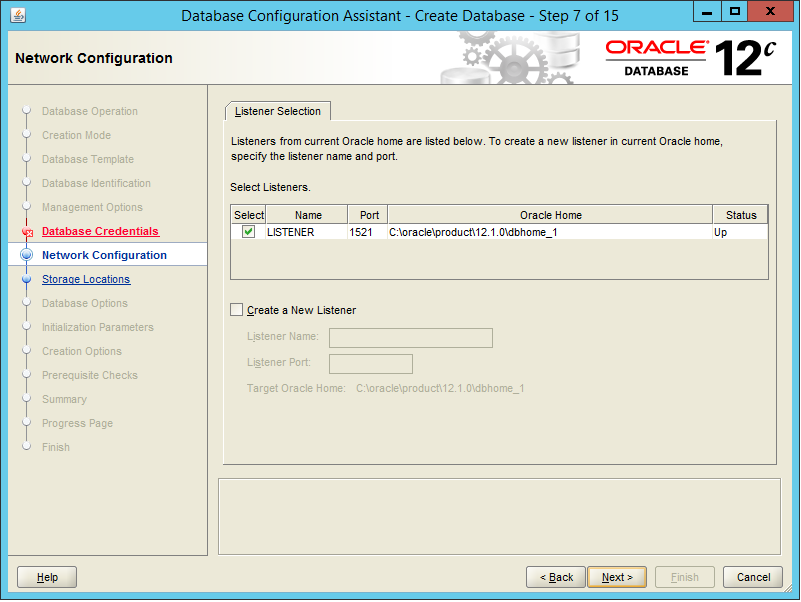
Now you can see the listener you created and configured before in the list with the status up. Select it and click Next.
The Database Configuration Assistant - Storage Locations screen is opened.
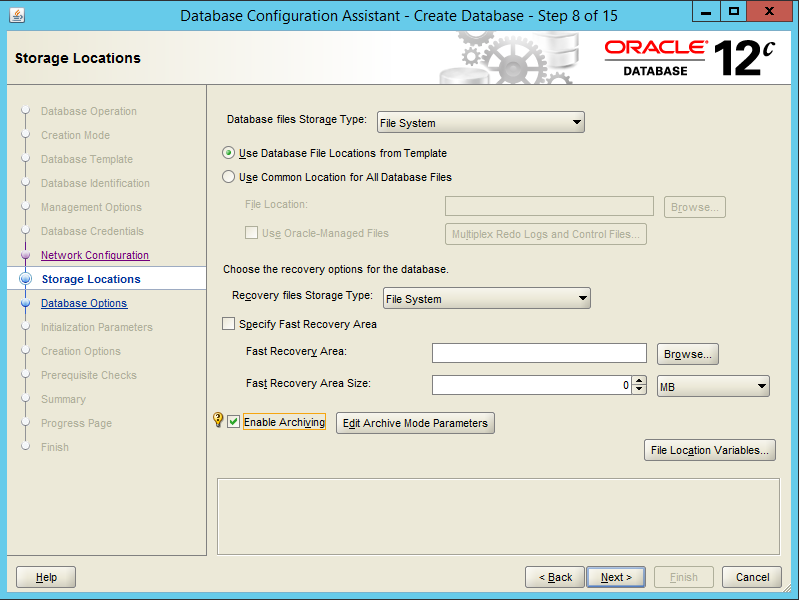
Select Use Database File Locations from Template.
Click the File Location Variables… button.
The File Location Variables screen is opened.
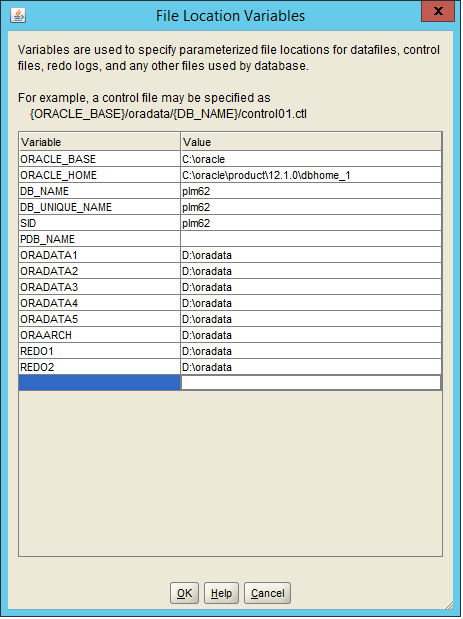
Enter the value for the variables.
The values that you have to provide are the directories created, as described in chapter Oracle Database Prerequisites (example E:, F:, H:). DBCA will create the subdirectory plm62 in the directories where the database data files will be created.
|
Note: If missing, please add File Creation Variables as described below. |
Example: Depending on the selected template, the following table provides information on predefined file destination variables.
| Variable | Description |
|---|---|
| ORADATA1 | Directory for data files of tablespaces EDB, EDB_LOB, EDB_TMPIDX |
| ORADATA2 | Directory for data files of tablespaces EDB_IDX, EDB_TMP |
| ORADATA3 | Directory for data files of temporary tablespace TEMP |
| ORADATA4 | Directory for data files of undo tablespace |
| ORADATA5 | Directory for data files of tablespaces SYSTEM, TOOLS, USERS |
| ORAARCH | Directory for Archive log files |
| REDO1 | Directory for redo log files |
| REDO2 | Directory for redo log files |
The following listing gives values that you can set for the variables when you have different number of disks:
| Number of Disks | Contents |
|---|---|
| 1 | There is only one directory - e.g. /data1)
Disk1: ORADATA1, ORADATA2, ORADATA3, ORADATA4, ORADATA5, REDO1, REDO2, ORAARCH - all variables will be set to /disk1 |
| 2 | There are two directories - e.g. /data1, /data2
Disk1: ORADATA1, ORADATA4, ORADATA5, REDO1 - they get the value of /data1 Disk2: ORADATA2, ORADATA3, ORAARCH, REDO2 - they get the value of /data2 |
| 3 | Disk1: ORADATA1, ORADATA5
Disk2: ORADATA2, ORADATA4, REDO1 Disk3: ORADATA3, ORAARCH, REDO2 |
| 4 | Disk1: ORADATA1, REDO1
Disk2: ORADATA2, REDO2 Disk3: ORADATA3, ORAARCH Disk4: ORADATA4, ORADATA5 |
| 5 | Disk1: ORADATA1, REDO1
Disk2: ORADATA2, ORAARCH Disk3: ORADATA3, ORADATA5 Disk4: ORADATA4 Disk5: REDO2 |
| 6 | Disk1: ORADATA1
Disk2: ORADATA2, ORAARCH Disk3: ORADATA3 Disk4: ORADATA4 Disk5: ORADATA5, REDO1 Disk6: REDO2 |
| 7 | Disk1: ORADATA1
Disk2: ORADATA2 Disk3: ORADATA3 Disk4: ORADATA4 Disk5: ORADATA5, ORAARCH Disk6: REDO1 Disk7: REDO2 |
| 8 | Disk1: ORADATA1
Disk2: ORADATA2 Disk3: ORADATA3 Disk4: ORADATA4 Disk5: ORADATA5 Disk6: ORAARCH Disk7: REDO1 Disk8: REDO2 |
Click OK.
Deselect the option Specify Flash Recovery Area.
Depending on your backup strategy and used template, archiving can be enabled.
|
Note: For a productive database it is highly recommended to archive the database. To specify the destination of the archive directory, click the button Edit Archive Mode Parameters button (predefined by the variable ORAARCH). |
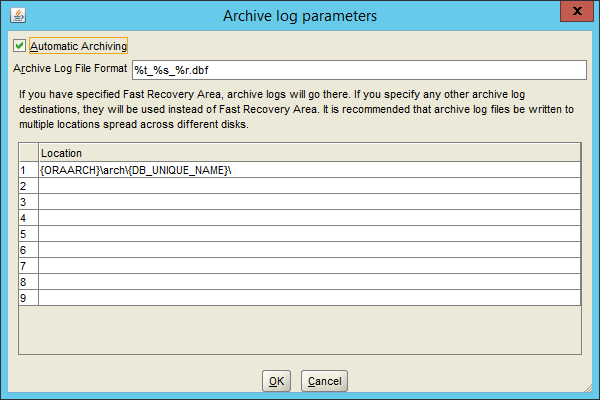
After editing this screen, click OK to return to the Storage Location screen.
Click Next.
The Database Configuration Assistant - Database Options screen is opened.
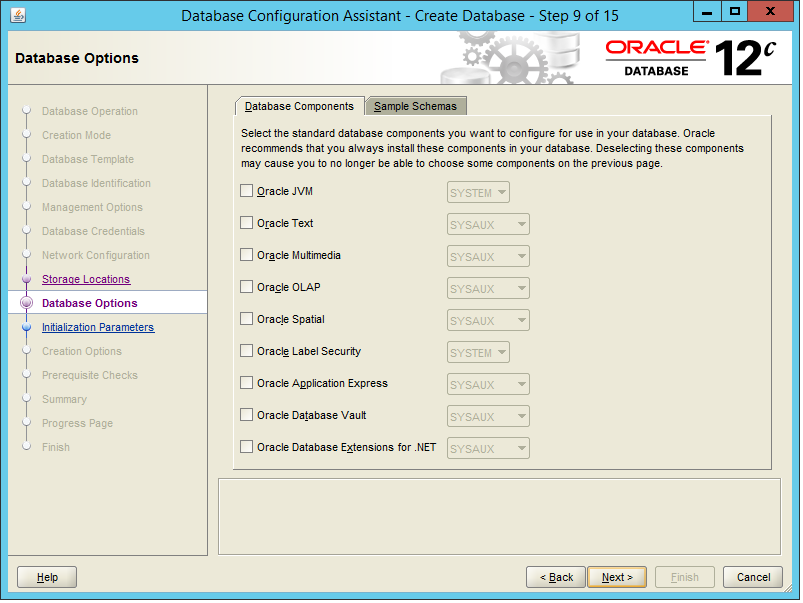
This screen provides database features as well as the possibility to run custom scripts after the database creation.
We do not recommend changing the settings provided by the template.
|
Note: If you have selected Oracle Application Express for customer specific installation, you have to change the initialization parameter max_string_size to standard.After the initial creation of the database, the parameter needs to be changed back to extended. Please follow the guideline in the Oracle Database documentation |
Click Next.
The next screen provides different database parameters. You can navigate to the setting of memory, character sets, database sizing, and connection mode. Usually all parameters are set by the selected template and you don't need to change them. Experienced users can modify some parameters, depending on the database size and number of users.
For complete information on additional parameters, e.g. memory, refer to the Hardware Sizing guide for Agile e6.2.1.0.
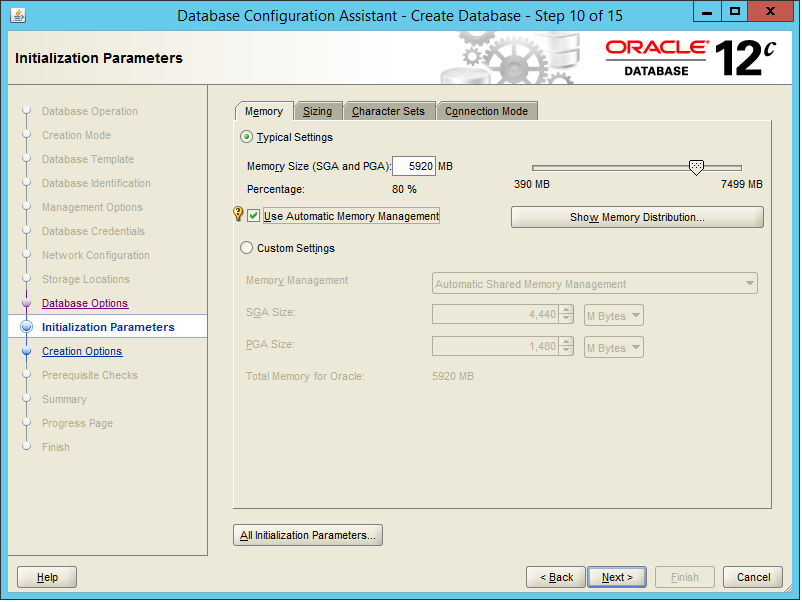
Click All Initialization Parameters button to review all server parameters.
The All Initialization Parameters screen is opened.
Click Show Advanced Parameters.

|
Note: Ensure that the value of memory_max_target is greater than the value of memory_target. |
Click Close and then click Next.
The Database Configuration Assistant - Creation Options screen is opened.

Click the Customize Storage Locations button to review the storage parameters for database creation.
The Customize Storage screen is opened.
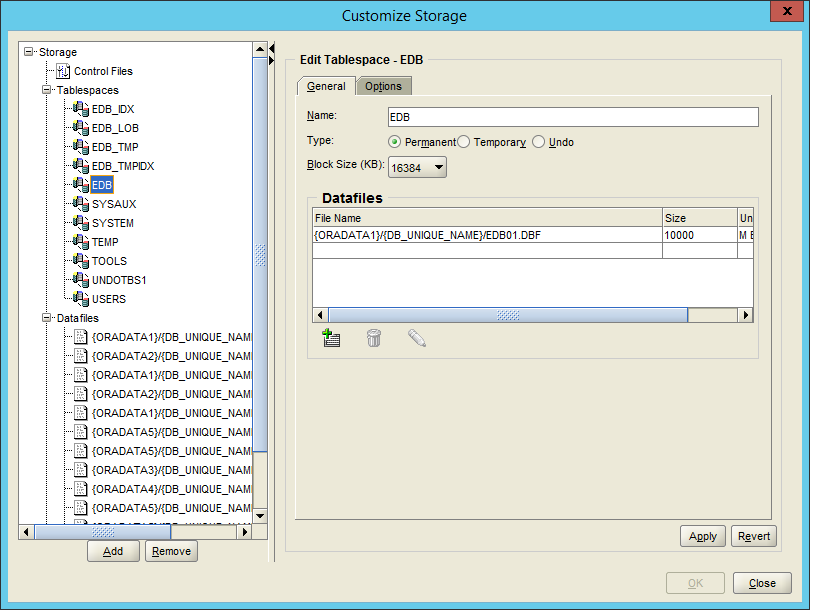
Click Close to return to the Database Configuration Assistant - Creation Options screen.
Select Create Database, Save as a Database Template, and Generate Database Creation Scripts.
Click Next.
The Database Configuration Assistant - Summary screen is opened.
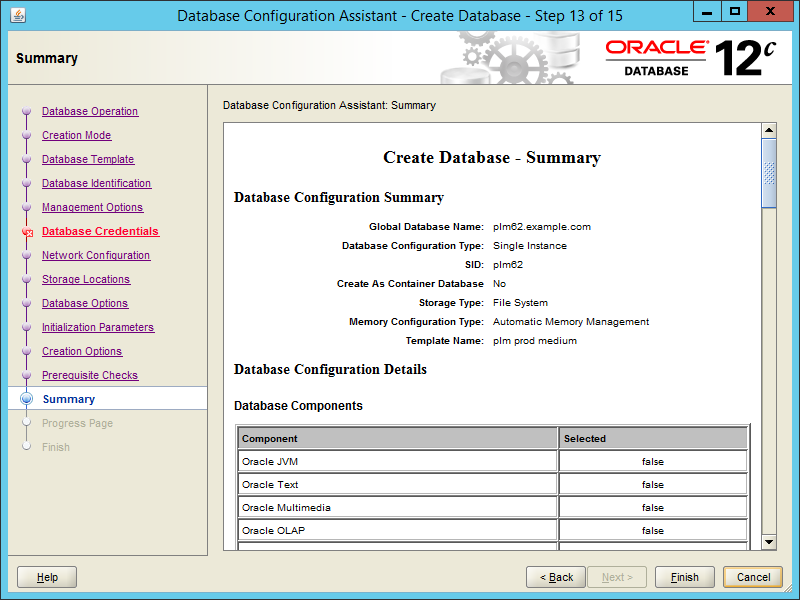
A summary of the database parameters is shown.
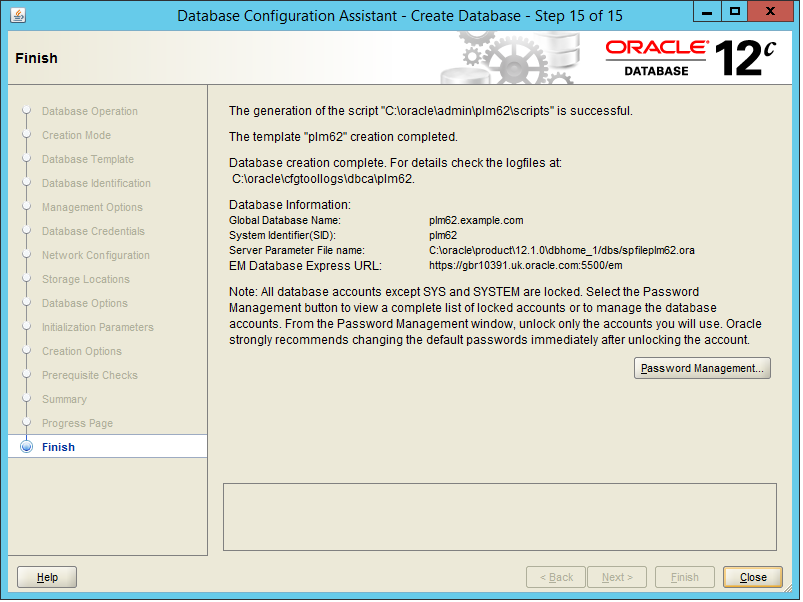
Click Finish.
The database creation process is started.
When the database creation is done, the summary screen is shown.
The EM database Express URL is listed for your access.
Click Close to finish the process.
Test the database connection with the following command:
sqlplus system@plm62/<SYSTEM password>
Start the Oracle Net Manager.
Windows:
Click Start > All Programs > Oracle - OraDb12c_home1 > Configuration and Migration Tools > Net Manager.
UNIX
Enter the command: $ORACLE_HOME/bin/netmgr
Expand the view for Local and click on Profile.
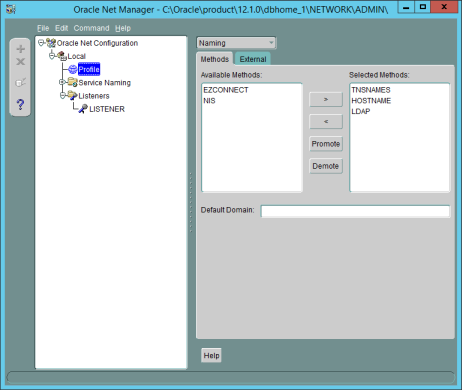
On the tab Methods, enter your domain name in the field Default Domain.
In the main menu, click File > Save Network Configuration.
Click File > Exit.
The sqlnet.ora and tnsnames.ora under $ORACLE_HOME/network/admin/ will be created or updated.
|
Note: This section describes the manual modification of the Database. Keep in mind that on UNIX only the manual modification can be performed. |
Create a directory which will be used for the Oracle Data Pump Export/Import Utility with two subdirectories - system and user (for instance D:\ora_dmp\system; D:\ora_dmp\user).
Open an SQLplus session and connect as user 'system'.
sqlplus system/<system password>
Run the script ddl_pump_dir.sql.
It is located in the addon/db/sql directory of the downloaded Oracle Agile Engineering Data Management Application (Release e6.2.1.0) package.
SQL>@<full path to the file ddl_pump_dir.sql>
Enter the path to the main directory created under step 1 (for instance d:\ora_dmp).
The script will create two directory objects - one for system users, and one for normal users and will give rights for the second directory to user PLM.
You will need to create the Agile e6.2.1.0 database user and role and provide the necessary privileges and quotas. You can do this by using the following commands, or by using the Oracle Enterprise Manager Database Control as described in the section below.
You can create AGILE_E_ROLE role and plm schema also by executing the script cre_plm_usr.sql in the directory …/addon/db/sql.
SQL>@<full path to the file cre_plm_usr.sql>
Username (e.g. PLM) and password have to be provided.
Check if the plm role exists.
Open an SQLplus session
Connect as SYS or SYSTEM.
Execute the following command:
select role from dba_roles where role='AGILE_E_ROLE';
If string 'AGILE_E_ROLE' is returned, the role exists.
If it exists, skip the role creation and continue with Using SQL to Create a User.
Otherwise, the role has to be created.
Use the SQL code below to create the role AGILE_E_ROLE:
CREATE ROLE AGILE_E_ROLE;
GRANT CONNECT TO AGILE_E_ROLE;
GRANT CREATE TABLE TO AGILE_E_ROLE;
GRANT CREATE VIEW TO AGILE_E_ROLE;
GRANT CREATE SYNONYM TO AGILE_E_ROLE;
GRANT CREATE DATABASE LINK TO AGILE_E_ROLE;
GRANT CREATE SEQUENCE TO AGILE_E_ROLE;
GRANT ALTER SESSION TO AGILE_E_ROLE;
GRANT CREATE PROCEDURE TO AGILE_E_ROLE;
GRANT CREATE TRIGGER TO AGILE_E_ROLE;
GRANT ALL ON DIRECTORY ORA_DMP TO AGILE_E_ROLE;
Use the SQL code below to create the plm schema (e.g. PLM):
CREATE USER PLM
IDENTIFIED BY <PASSWORD>
DEFAULT TABLESPACE "EDB"
TEMPORARY TABLESPACE "TEMP"
PROFILE DEFAULT
QUOTA UNLIMITED ON "EDB"
QUOTA UNLIMITED ON "EDB_IDX"
QUOTA UNLIMITED ON "EDB_TMP"
QUOTA UNLIMITED ON "EDB_TMPIDX"
QUOTA UNLIMITED ON "EDB_LOB"
ACCOUNT UNLOCK;
GRANT "AGILE_E_ROLE" TO PLM;
ALTER USER PLM DEFAULT ROLE AGILE_E_ROLE;
How to find the port on which EM Express is configured:
When dbca completes, it indicates the port on which EM Express is configured.
If that information is no longer available, there are two ways to find the HTTP/HTTPS port for EM Express:
> lsnrctl status | grep HTTP (DESCRIPTION=(ADDRESS=(PROTOCOL=tcps)(HOST=xxx.us.oracle.com)(PORT=5500))(Security=(my_wallet directory=/u01/oracle/app/oracle/admin/plm62/xdb_wallet))(Presentation=HTTP)(Session=RAW))
or from SQL*Plus:
SQL> select dbms_xdb.getHttpPort() from dual;
GETHTTPPORT
-----------
8080
SQL> select dbms_xdb_config.getHttpsPort() from dual;
GETHTTPSPORT
------------
5500
You can access the Oracle Enterprise Manager Database Express as follows:
Open your browser and enter the following URL:
https://<hostname>:<port>/em
Enter your user credentials and click Login.
In the top menu bar, click Security and then select Users.
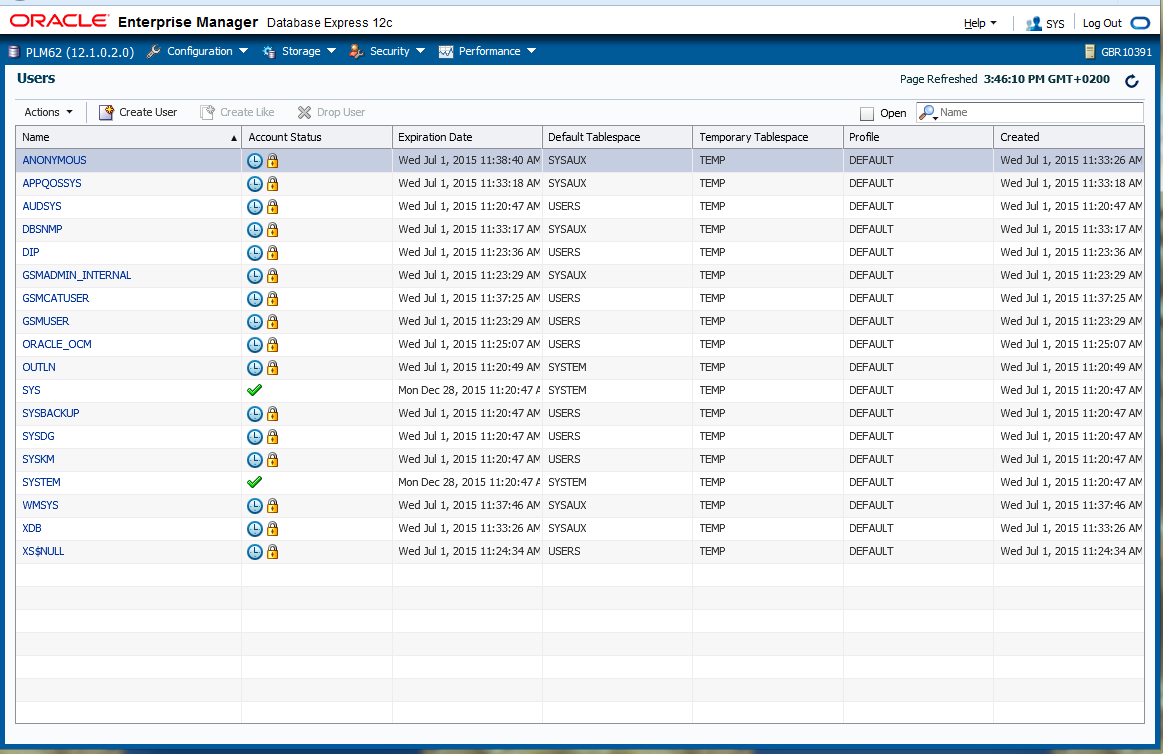
Click Create User on the user list.
Insert a user name and password in the pop-up dialog.
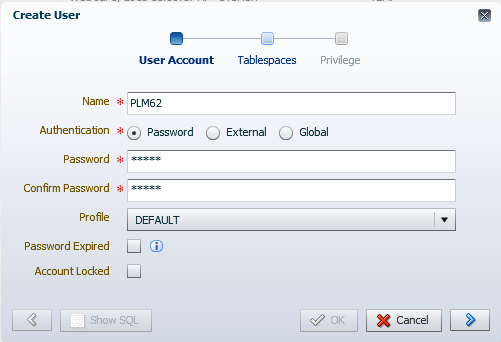
Assign default and temporary table space for this user.
From the list with Available Roles, select the role AGILE_E_ROLE.
The role AGILE_E_ROLE was created in the previous section("Create a Database User and Role").
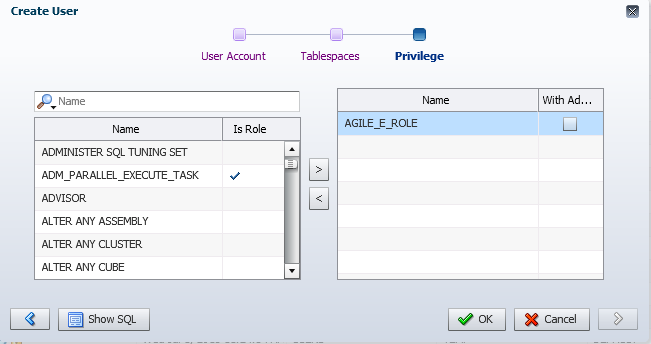
Click Move.
The role is moved to the Selected Roles list.
Click OK.
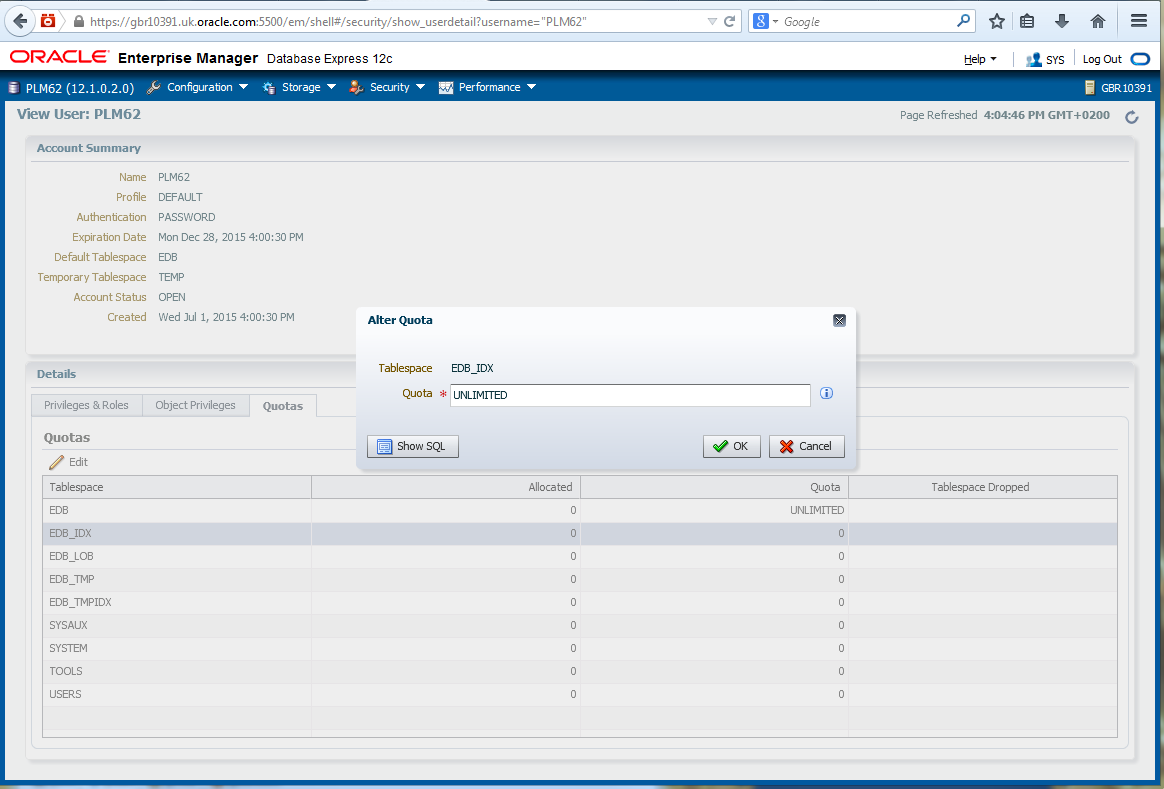
Click the newly created user and open the tab Quotas.
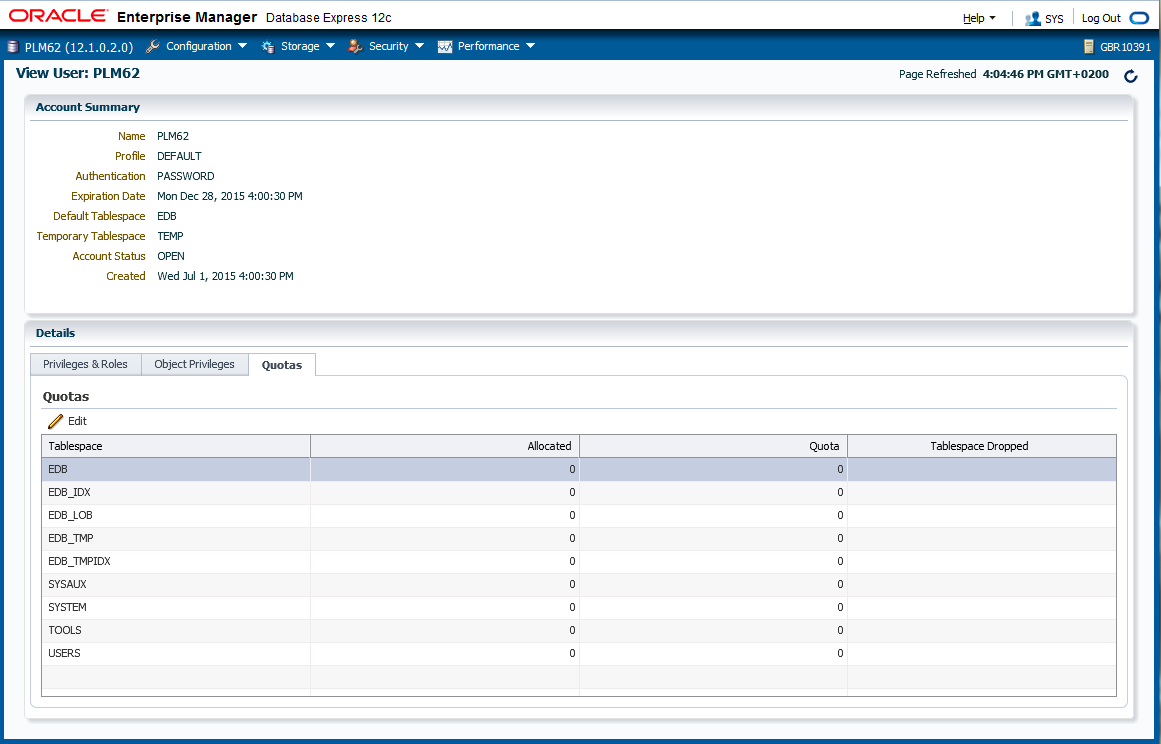
Assign unlimited quota to EDB, EDB_IDX, EDB_LOB, EDB_TMP, and EDB_TMPIDX.
The user creation is finished.
Import the Agile e6.2.1.0 dump, using the following commands, and then check the log file for errors.
Windows
Make sure that the variable NLS_LANG is set to AMERICAN_ AMERICA.AL32UTF8.
Check the registry for the value of the variable NLS_LANG - HKEY_LOCAL_MACHINE\SOFTWARE\ORACLE\KEY_<12c installation>
UNIX
Make sure that the correct value is set for the environment variable NLS_LANG (value from the file csh_ORA12.1.0 - AMERICAN_AMERICA.WE8MSWIN1252).
Start the import.
imp username/pass@plm61 file=plm62.dmp log=plm61.log buffer=500000 commit=y statistics=none full=y
|
Note: username/ pass are the name and the password of the user you created in the database. |
| commit=y | Rollback segments cannot get too small |
| statistics=n | No statistics will be created |
| buffer=500000 | Necessary for lobs, better performance |
| full=y | Imports full dump, even if the dump was exported by different users |
|
Note: You can import only your own e6 dmp files which were created in a database in which the initialization parameter max_string_size =standard. Be aware that the e6 database has set this parameter to extended. Please use data pump utilities (expdp, impdp) instead. For more details, see Oracle 12c Database documentation.All standard dmp files delivered on Oracle edelivery for e6.2.1.0 can be imported with imp/exp utility. |
After importing the Agile e6.2.1.0 dump, some objects might be invalid. This can be verified by the following way:
Open an SQLplus session and connect as 'sys' - as sysdba.
sqlplus sys/<sys password> as sysdba
SQL> select count(*) from dba_objects where status <> 'VALID' and owner='PLM';
If the returned message is 'no rows selected', then you have no invalid objects.
2. Otherwise, execute the script utlrp.sql.
The script will compile all invalid objects in the database.
SQL> @?/rdbms/admin/utlrp.sql
Verify that there are no invalid objects:
SQL> select count(*) from dba_objects where status <> 'VALID' and owner='PLM';
In Oracle 12c, the default value for the OPTIMIZER_MODE initialization parameter is ALL_ROWS, which means that a cost-based approach will be used for all SQL statements. Oracle highly recommends creating statistics in order to avoid performance losses. This should be done after the dump import and has to be repeated periodically.
Calculate statistics of all tables and indexes in db schema PLM:
SQL> EXECUTE DBMS_STATS.GATHER_SCHEMA_STATS('PLM',CASCADE =>true);
|
Note: Statistic information can be viewed, e.g. in user_tables and user_indexes. These views provide information about average width of the row and number of rows. |
For more information about statistics management please refer to the Oracle Database manuals.
When having problems with the database creation, perform the following checks:
Database creation logs: ${ORACLE_BASE}/cfgtools/dbca/<db name>
Instance Parameter file: ${ORACLE_BASE}/admin/<db name>/pfile/init.ora
Instance SPFILE: ${ORACLE_HOME}/dbs/spfile<db name>.ora
Database Diagnostics: ${ORACLE_BASE}/diag/rdbms/<db name>/<db name>
Network configuration: ${ORACLE_HOME}/network/admin/*.ora
