3 Post Discovery Configuration and Verification
Once the Oracle Exalytics Machine has been discovered through Enterprise Manager Cloud Control 12c, you must complete the following post-discovery configuration:
3.1 Configure the Compute Node ILOM SNMP for Enterprise Manager Monitoring
The compute node ILOM targets are responsible for displaying a number of disk failure alerts for their respective compute node that are received as SNMP traps. To configure the ILOM SNMP:
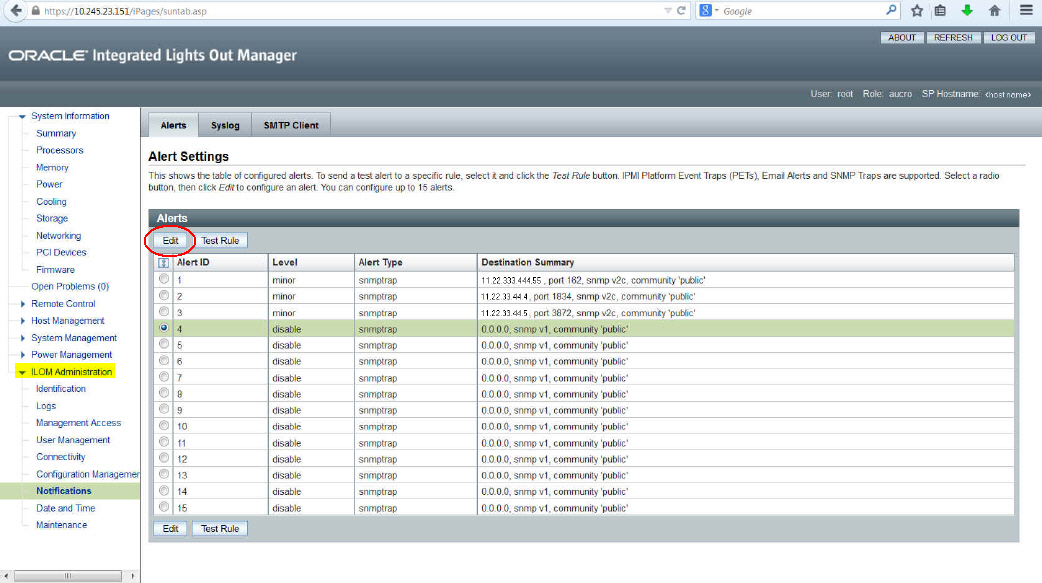
- In the left-hand navigation, select ILOM Administration, then select Notifications. Select a rule that has a disable level and click Edit as shown in Figure 3-1:
Figure 3-1 Creating a New ILOM Alert Rule
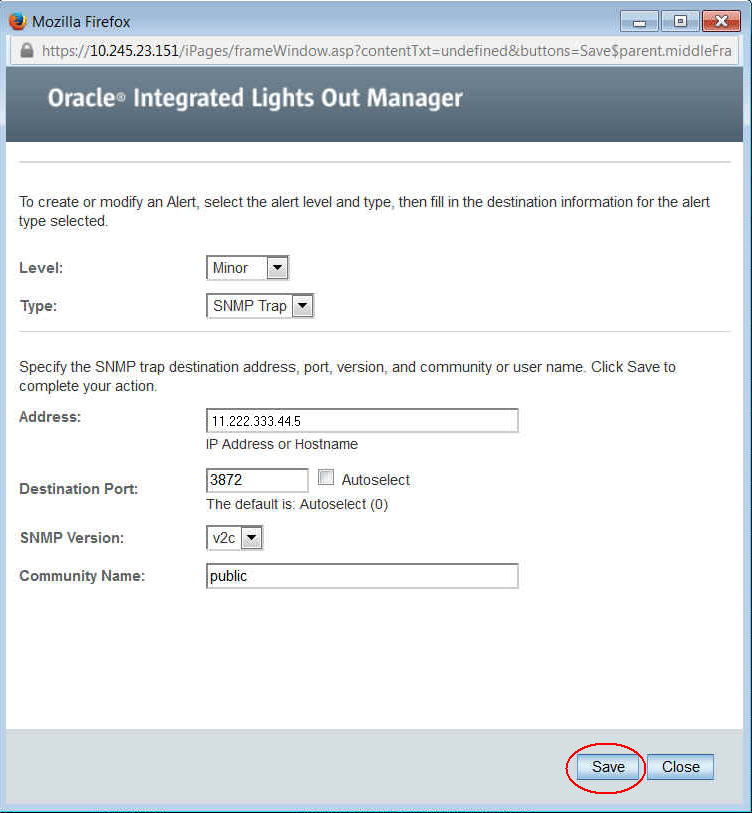
- In the Edit pop-up window, enter the following information:
-
Level: select Minor from the drop-down menu.
-
Type. select SNMP Trap from the drop-down menu.
-
Address: enter the IP address of the host where agent monitoring the ILOM is running.
-
Destination port: enter the agent port number.
-
SNMP Version: select v2c from the drop-down menu.
-
Community: enter public.
Click Save to save the changes, as shown in Figure 3-2:
Figure 3-2 ILOM Alert Rule Settings
-
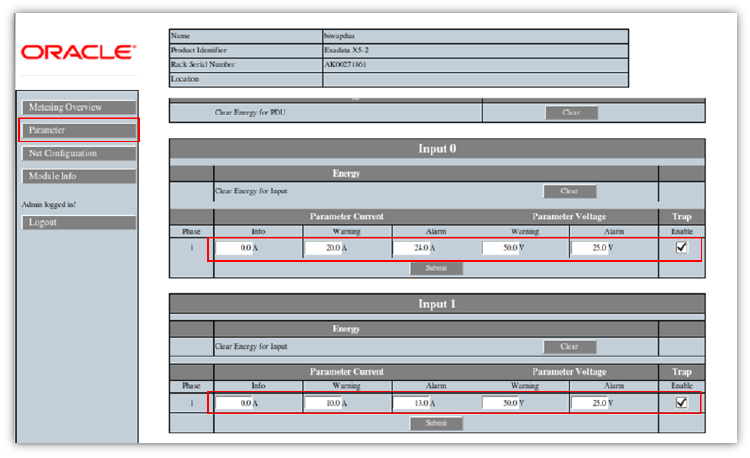
3.3 Setting Up Enhanced Power Distribution Unit (PDU) Monitoring
This section provides instructions for setting up SNMP for PDU targets.
To complete setup for Enhanced PDU Monitoring, follow these steps:
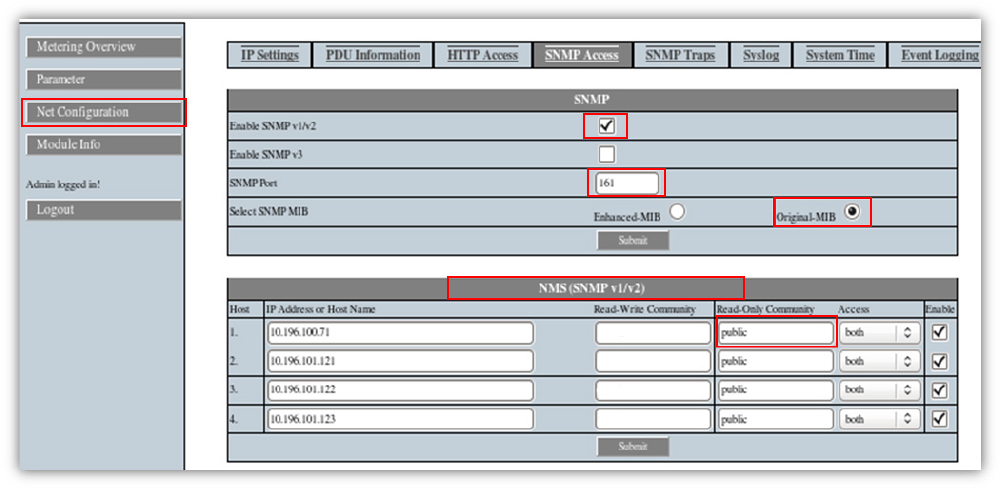
- Select the Net Configuration tab.
- Check Enable SNMP v1/v2.
- Set SNMP Port to:
161 - Select Original-MIB radio button.
- In the NMS (SNMP v1/v2) section, set agent IP address and community name (under Read-Only Community).
- Select the Parameter tab.
- On input section: select trap enable and set the appropriate threshold value for each input. Refer toOracle® Exadata Database Machine Installation and Configuration Guide 12c Release 1 (12.1) to learn more about PDU threshold.