Using PeopleSoft CTI
This section discusses how to use the PeopleSoft Computer Telephony Integration (CTI).
Getting started with PeopleSoft CTI is a three-step process that involves:
Signing in to the PeopleSoft system.
Specifying your extension information.
Connecting to your CTI middleware.
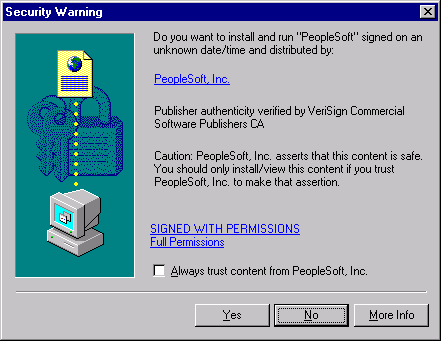
The first time that you access PeopleSoft CTI using the applet-based solution, a Security Warning dialog box may appear prompting you to trust information from PeopleSoft. Click the Yes button.
Image: Security Warning dialog box
This example illustrates the Security Warning dialog box.
The Security Warning dialog box may not appear if:
You have previously accepted PeopleSoft applets as trusted.
The system is not correctly installed.
Note: If you have any questions or concerns about this warning, contact your system administrator.
To sign in to PeopleSoft CTI:
On the PeopleSoft sign-in page, enter your PeopleSoft user ID and password as you normally do to sign in to the PeopleSoft system.
Click the MultiChannel Console link in the universal navigation header.
On the CTI control bar, set your configuration by performing the following actions:
Ensure that your agent ID appears beneath the CTI Agent ID label.
Ensure that the appropriate queue name appears beneath the Queue label.
Queues are discussed in a subsequent section.
If you are signing in from a workstation with a different extension, enter the current extensions in the Extension field.
The Extension Type field indicates whether an agent can receive calls by way of a queue or just from a directory number (DN).
If this value is set to Queue, the console offers options that are queue-specific, such as being able to log on to a queue.
Click the Activate button to sign in to your CTI middleware.
The CTI console appears.
Change any registration parameters if necessary and click Set or Activate (depending on your version). After you do so, the CTI interface appears, which looks similar to the following:
Note: Note that the PeopleSoft CTI interface operates within the MultiChannel Framework Console. CTI users will see the MultiChannel Console only if their user ID belongs to a role that has MCF_AGENT or MCF_SUPR real-time event notification (REN) permissions, and WEBLIB_MCFLINK web libraries in their role's permission list.
Image: The CTI Console
This example illustrates the fields and controls on the CTI Console. You can find definitions for the fields and controls later on this page.

Note: Do not open two consoles for the same user on a single machine. Doing so can result in an error.
|
Field or Control |
Definition |
|---|---|
 (register) (register) |
Select to register and unregister with the CTI middleware. The button acts as a toggle switch. When the green check mark appears, you are registered; when the red X appears, you are not registered. |
| Lines |
Select the option to the left of the telephone icon to activate the associated line. The icon that you select determines the active line. All call actions that you choose apply only to the active line. The color of the icon reveals the activity on the line. The colors are:
|
| Select Call Action |
Select actions related to calls, including Answer, Hold, and Transfer. Which call action options appear depends on your current status. For instance, the Hold call action is valid only while you are on the line with a caller. Call action options are discussed in detail in the following section. |
| Status |
Displays the agent status, as in Ready or Not Ready (to receive calls). It can also show Ready/DND (do not disturb) if the agent is not using a queue. |
| Q (queue) |
If the agent belongs to an automatic call distributor (ACD) group, the group appears here. |
| Messages |
Informational messages appear in the right corner of the CTI Console. Examples of such messages are Dialing, Connected, and Released. These messages do not persist. Note: Error messages appear in separate windows. |
| Call Duration |
The system tracks the amount of time spent on calls for each line. |
| Incoming Call Information |
Displays the string associated with the Descr call variable. For example, Gold Customer. |
Note: In the applet-based solution, some CTI systems will automatically sign out the CTI agent when the CTI console is closed. For CTI systems in which this is not automatic, the option can be set on the agent Personalization page (select )
The Select Call Action drop-down list box contains all of the options that you have for handling calls. Depending on the status of the agent or the telephone line, certain selections from the drop-down list box are not available.
After you select a call action, two buttons, the Go performs the selected call action.
The following list describes the call actions:
|
Field or Control |
Definition |
|---|---|
| Dial |
When you are in Agent Ready or Agent Not Ready mode, you can call another party. |
| Answer Call |
This button appears and flashes when an incoming call is waiting to be answered. |
| Transfer Mute |
Transfers the caller to the desired number without speaking to the intended recipient. A dialog box appears enabling you to enter the extension of the person to whom you want to transfer the caller. Note: In the applet-based solution, this action is not supported on Aspect switches. |
| Transfer |
Transfers the caller to the desired number. You have the opportunity to speak with the recipient before transferring the caller. A dialog box appears enabling you to enter the extension of the person to whom you want to transfer the caller. |
| Conference |
Enables you to add one or more individuals to your call. |
| Hold |
Places the caller on hold. |
| Retrieve |
Takes the caller out of Hold status. This option appears only when the caller is on hold. |
| Release |
Disconnects the caller. This option is available as a selection only after a call is answered. |
| Change |
When an agent status is unknown, the system sets the status to Change so that the user can set the status manually to match the status for the telephone. |
Note: You can transfer to or initiate a conference call with individuals who are not enabled to access PeopleSoft CTI. Their phone rings, but remember that the pop-up window showing customer data does not appear.
In the applet-based solution, the following call actions are available depending on whether you are using a DN or Queue configuration:
|
Field or Control |
Definition |
|---|---|
| Queue |
Select from: Log on: Enables the agent to log an extension on to a queue. Ready: Indicates that the agent is ready to receive incoming calls. This option is available when the extension is associated with a queue and the status bar reads Agent Not Ready. Not Ready: Stops incoming calls. This option is available when the extension is associated with a queue and the status bar reads Agent Ready. Log off: Enables the agent to log an extension off a queue. When logged off, the agent is no longer participating in the queue. |
| DN |
This option is available when the extension is not associated with a queue. Ready: Indicates that the agent is ready to receive incoming calls. |
In the adapter solution, the availability and meaning of the call actions are determined by the third-party CTI vendor. Consult your CTI vendor for details.
After you have signed in to PeopleSoft CTI, you can receive calls. For each incoming ACD call to your extension, the telephone extension icon turns red. After you have accepted a call, the system does not send you more incoming calls until you have completed the current call.
To answer a call:
Select the radio button to the left of the telephone icon that has turned red.
The Answer option is automatically selected as the current option in the drop-down list box when an incoming call arrives.
Click Go.
The pop-up browser launches with the appropriate PeopleSoft transaction page displayed. The system determines which page to display based on caller information sent by the CTI middleware.
After you have answered a call, you enter the not available status.
If an agent erroneously cancels a call instead of clicking Go when accepting an incoming call, the agent can recover the call by:
Selecting a call option.
Selecting the line that is receiving the incoming call.
Note: If CTI screen pop-ups are configured, the CTI console attaches a CTI miniconsole to the screen pop-up page. This miniconsole takes a few seconds to initialize before it can be used.
In the Javascript console, you can configure whether the miniconsole appears.
Occasionally, you need to transfer callers to other agents. PeopleSoft CTI supports two types of transfers:
Transfer Mute: This option enables you to transfer a call without speaking to the target agent before transferring the call.
Transfer: This option is also known as a consultative transfer, which means that you consult with the target agent before transferring the call.
Note: You can always transfer or invite users to a conference call even if the called party is not CTI-enabled. The non-CTI-enabled users do not get pop-up windows, but their phones still ring.
When you initiate a transfer or conference call on the Cisco system using the applet-based solution and the contacted party does not answer, wait until the system notifies you of the unsuccessful connection before attempting another action. This wait can be 20 to 30 seconds.
In the applet-based solution, Cisco ICM does not notify client applications about some call events during two-step transfers or conferences. As a result, the state of the PeopleSoft CTI Console may not stay synchronized with that of the teleset, especially if the teleset is used to initiate or complete these call actions. The CTI console should automatically resynchronize with the teleset when the call is completed.
To perform a transfer mute:
Select the appropriate telephone line.
The selected line must be green.
From the Select Call Action drop-down list box, select TransferMute.
In the Phone No. edit box, select the number that you want to dial.
The drop-down list box contains all of the numbers from the shared phone book and agent phone book. If the number that you want to dial does not appear, click Dial other number and manually enter the number.
Click Go.
This connects the caller to the new agent and releases your line.
The system prompts the recipient of the transfer that it is transferring a call from your extension. When the recipient accepts the transfer, the PeopleSoft page connected to the caller’s case opens as it did when you first received the call.
To perform a transfer (consultative):
Select the appropriate telephone line.
The selected line must be green.
From the Select Call Action drop-down list box, select Transfer.
In the Phone No. edit box, select the number that you want to dial.
The drop-down list box contains all of the numbers from the shared phone book and agent phone book. If the number that you want to dial does not appear, click Dial other number and manually enter the number.
Click Go.
When you use one extension with two lines, the outbound call you make to the agent to whom you are transferring the incoming call gets initiated on your second line and the incoming call gets placed on hold. When the outbound call is established, you can consult with the recipient and place that call on hold. To complete the transfer, you need to return to the first line and select Complete and click Go. This action releases the call on the second line and transfers the call on the first line to the recipient of the transfer.
When you use two extensions, each with one line, the CTI Console does not have access to the outbound call to the intended recipient of the transfer. When the outbound call is established, you can consult with the recipient. You do not have to toggle between the two lines, and you cannot put the recipient on hold.
To complete the transfer, select Complete and click Go.
If you need the assistance of other agents to answer a caller's questions, you can use the conference feature to include the appropriate agents on a call.
To initiate a conference call:
Select the appropriate telephone line.
The selected line must be green.
From the Select Call Action drop-down list box, select Conference.
From the drop-down list box of all numbers from the shared and agent phone books, select a number to be dialed.
If the number is not there, select Dial other number to access an edit box and enter the number to be dialed.
Click Go.
The system notifies the target agent of the incoming call (conference). The PeopleSoft page associated with the caller’s case opens for the target agent as it did for you when you first received the call.
This feature depends upon two parameters set up by the administrator:
Default Screen Pop-up URL.
Personalization: Screen Pop-up Mode.
If the default URL for screen pop-up is set and the screen pop-up mode is 0 (pop up when incoming) for the second agent, the agent gets the screen pop-up as soon as the call is transferred.
If the screen pop-up is set to 1 (pop up after answer), the screen pops up only after the first agent completes the transfer or conference call. However, if the default URL for the screen pop-up is not set, then whether the mode is 0 or 1 doesn't matter. In that case, the second agent gets the screen pop-up only after the first agent completes the transfer or conference call.
When you use one extension with two lines, the outbound call that you make to the agent to whom you are inviting to the conference gets initiated on your second line and the incoming call gets placed on hold. After the outbound call is established, you can consult with the third party, and place that call on hold. To complete the conference, you need to return to the first line and select Complete and click Go. This action releases the call on the second line and starts the conference on the first line.
When you use two extensions, each with one line, the CTI Console cannot access the outbound call to the third party. When the outbound call is established, you consult with the target agent. You do not have to toggle between the two lines, and you do cannot put the recipient on hold. To start the conference, select Complete and click Go.
After consulting with the target agent, select Complete from the Select Call Action drop-down list box, and click Go.
Putting calls on hold and retrieving calls on hold is likely to be the call action that you perform most.
To place a call on hold:
Select the appropriate telephone line.
The selected line must be green.
From the Select Call Action drop-down list box, select Hold.
Click Go.
To retrieve a call on hold:
Select the appropriate telephone line.
The selected line must be green.
The retrieve option is automatically selected as the current option in the drop-down list box when a call is on hold.
Click Go.
After you have finished a call, you need to release the call.
To release a call:
Select the appropriate telephone line.
The selected line must be green.
On the console control bar, select Release from the Lines drop-down list box.
Click Go.
If you are using the applet-based solution, the system automatically places you in wrap-up mode, which enables you to complete any remaining work before accepting more incoming calls. Technically, when you are in wrap-up mode, your status is Agent Not Ready.
If you are using the adapter-based solution and you have configured wrap-up mode in your CTI middleware, the console can automatically place you in a Not Ready or Work Not Ready state, which enables you to complete any remaining work before accepting more incoming calls.
When you are ready to accept incoming calls, select Agent Ready.
Your agent status determines whether you can receive incoming calls.
In the applet-based solution, agent statuses include:
Agent Ready
To activate Agent Ready status:
From the Select Call Action drop-down list box, select Agent Ready.
When you are ready, the system routes incoming calls to your extensions.
Do Not Disturb
To activate Do Not Disturb status:
From the Select Call Action drop-down list box, select DND.
With Do Not Disturb, your extensions do not accept incoming calls.
Note: This status is not available to agents associated with an ACD queue.
Agent Not Ready
To activate Agent Not Ready status:
From the Select Call Action drop-down list box, select Agent Not Ready.
This status is typically used when agents are at their desks, but temporarily unable to receive calls. While you are not ready, the system routes calls to other available agents.
Note: This status applies only to agents associated with an ACD queue.
Note: In the adapter-based solution, the adapter provider is responsible for determining what states and statuses are available in the drop-down list boxes, as well as the meaning of those states.
You can use PeopleSoft CTI to place a call while the agent status is either Agent Ready or Agent Not Ready.
Note: If you have multiple extensions assigned to you, do not call one of your extensions from the other.
To place an outbound call:
Select your status from Agent Ready or Agent Not Ready.
Select the option next to the telephone icon representing a free line.
For example, if you had a customer on hold on one line, you would select the icon for the second line.
From the Select Call Action drop-down list box, select Dial.
From the drop-down list box showing all numbers from the shared and agent phone books, select a number to be dialed.
If the number is not there, select Dial other number to get an edit box and enter the number to be dialed.
Click Go.
As with any other call you receive, you can access all the call actions for calls that you initiate. You can transfer the person that you’ve called, place the line on hold, or initiate a conference with another party.
Note: If you are using the applet-based solution, the system places you in Agent Not Ready status until you release the call. If you are using the adapter-based solution, you must configure your CTI middleware call actions.
When you make an outbound call:
You can specify a URL to display a page.
When you display the page, the outbound call data is also attached to the URL so that an application can collect information such as the automatic number identification (ANI), dialed number identification service (DNIS), and so on.
A context ID (such as a customer case number or an invoice number) is attached to the call data.
This allows PeopleSoft application context to be passed on to CTI middleware, where it can be stored. This context can be used to establish a relationship between the outbound call and the application context when the call was made.
When you disconnect or release a call from the miniconsole, the system disconnects you from the CTI middleware, and the miniconsole becomes disabled (unavailable for entry). However, the PeopleSoft page remains active so that you can finish updating information if needed.
The availability of an agent to accept incoming calls depends on how the system administrators of the agent have set up the agent's CTI middleware.
Hot keys are combinations of keyboard buttons that you can press instead of using a mouse. To help you easily select options, PeopleSoft CTI offers the following hot keys:
|
Hot Key |
Description |
|---|---|
|
Alt + R |
Registers your phone extensions with the CTI middleware. |
|
Alt + 1 |
Makes Extension 1 the active line. |
|
Alt + 2 |
Makes Extension 2 the active line. |
|
Alt + S |
Presents a list of applicable call actions for you to select. |
|
Alt + P |
Presents a list of frequently called telephone numbers for you to select. |
|
Alt + G |
Enables you to perform a call action. |
|
Alt + C |
Enables you to cancel a call action. |
|
Alt + Z |
Enables you to check agent status. |