Loading Multi-Column Numeric Data
Oracle Hyperion Financial Data Quality Management, Enterprise Edition enables you to load data for multiple dimension members of a selected dimension in a single row of data. The definition of the members to load can be included in a header record in the load file, or in the import format definition.
- text data file with multi-columns of numeric data with no headers to contiguous periods by executing a data load rule with start and end periods.
- text data file with multiple columns of numeric data to a period or any other dimension as a column header by specifying the:
- column header in the data file
- column header member list in the import format
- column header member in the data rule
- Excel data file with multiple columns of numeric data to a period as a column header. The Excel file may or may not contain a header.
To load multi-column numeric data:
-
On the Setup tab, under Integration Setup, select Import Format.
-
In the Import Format summary task bar, select Add.
In the upper grid of the Import Formats screen, a row is added.
-
In Name, enter a user-defined identifier for the import format.
You cannot modify the value in this field after a mapping has been created for this import format.
-
In Description, enter a description of the import format.
-
In Source, select File for the source.
-
From File Type drop-down, select Multi Column - Numeric Data as the format of the file.
-
From the File Delimiter drop-down, select a type of delimiter.
Available delimiter symbols:
-
comma (,)
-
exclamation (!)
-
semicolon (;)
-
colon (:)
-
pipe (|)
-
tab
-
tilde (~)
-
-
In Target, select EPM and select any EPM application as a target.
-
Optional: In Drill URL, enter the URL used for the drill-through.
-
In the Mapping section, select the Amount dimensions
and click .
.
-
From the Expression Type drop-down, select Column=start,end.

-
In Expression value, specify the columns to import.
You can import a contiguous set of columns or a non-contiguous set of columns. To use a range of Amount (data) columns, specify columns using a comma (,). To use non-contiguous amount columns, specify columns using the pipe (|) delimiter.
You specify contiguous columns by using starting and ending columns. For example,
5,10indicates columns5through10.You specify non-contiguous columns by using
column1 | column2 | column3. For example,5|7|10indicates import columns5,7, and10.
-
Optional: Specify any drivers and header rows of the file for the expression.
-
Click OK.

- Click Save.
To load a text data file with multiple columns of numeric data to a period:
-
Complete steps 1-12 in the To load multi-column numeric data.
-
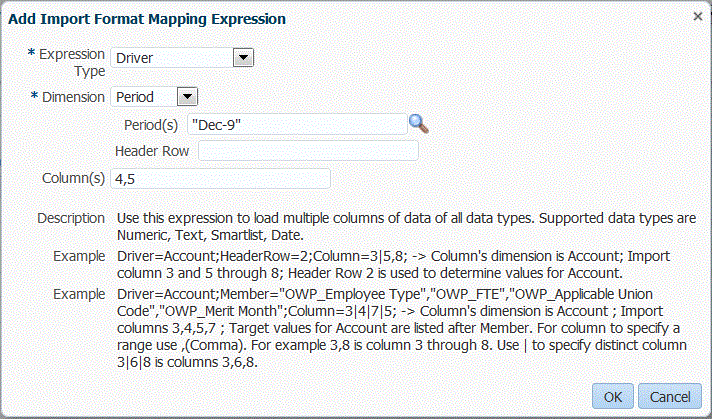
From the Expression Type drop-down, select Driver.
-
On the Add Import Format Mapping Expression, in Dimension, leave the default driver dimension Period.
-
In Period(s), select the period driver dimension member to load and click OK.
Specify the period using quotes. For example, you might enter "Dec-9".
If you do not specify a period driver member dimension on the Add Import Format Mapping Expression, you can specify period members in the data load rule. See steps 5-11.

-
On the Workflow tab, under Data Load, select Data Load Rule.
-
On the Data Load Rule screen, select the POV to use for the data load rule.
-
Add or select the data load rule to use for the multi-column numeric data load.
-
In Import Format, select the import format set up for the multi-column numeric load.
-
Optional: From the Source Options tab, specify any source options.
-
Select the Column Headers tab, and specify the start date and end date of the numeric columns.
You are prompted to add the start and end dates on the Column Headers tab when:
- a text data file has no header in the header record of the data file, in the import format, or data rule.
- you are using an Excel file in all cases. If header information is specified in the Excel file, only periods that fall within the start and end period range are processed.

-
Save and execute the data load rule.