Ad Hoc Reporting
To create and run custom reports:
-
On the toolbar, click System/Utilities, and then click Ad Hoc Reporting.
-
From the Main File drop down menu, select the desired file.
-
Enter a query title in the Query Title field.
-
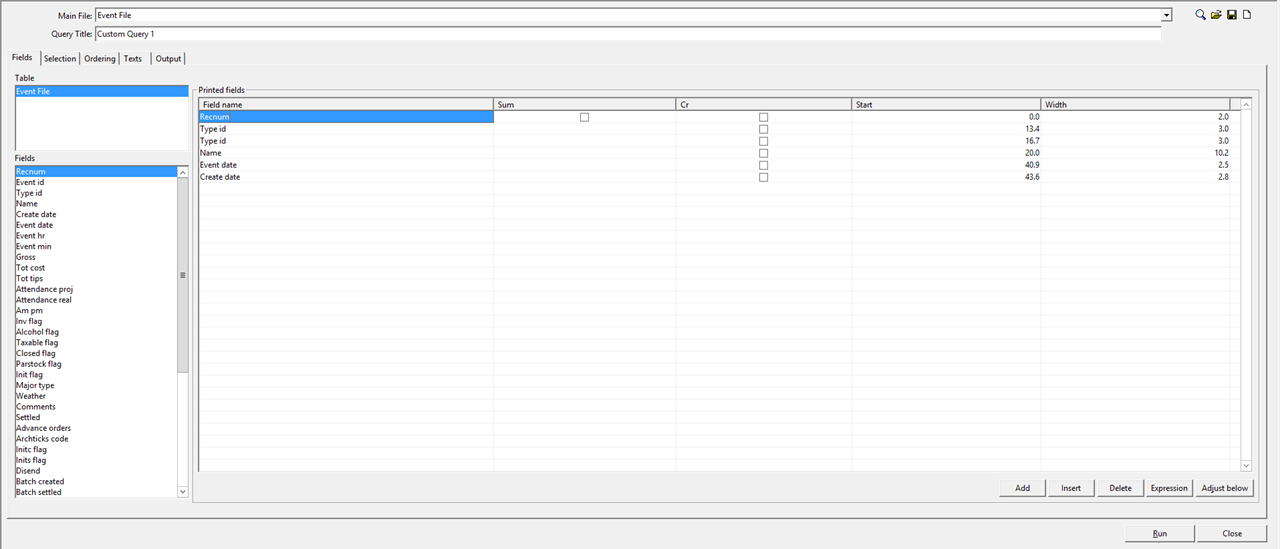
In the Fields tab:
Figure 1-177 Fields Tab

-
Select the desired fields from the Fields table, and click Add.
-
To add multiple fields of the same type, select the field, and then click Insert.
-
To delete a field, select the desired field, and then click Delete.
-
To edit how the column for a selected field appears, select the desired field, and then click Expression. After editing the column parameters, click OK.
-
-
In the Selections tab:
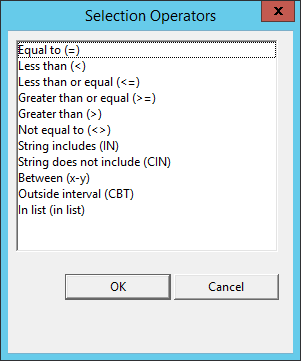
Figure 1-178 Ad Hoc Reporting – Selection Tab – Selection Operators

-
Select the desired fields from the Fields table, and click Add. The Selection Operators window opens.
-
Set the desired Selection Operator from the list, and then click OK.
-
To add multiple fields of the same type, select the field, click Insert, and then repeat Step 2b.
-
To delete a field, select the desired field, and then click Delete.
-
To edit the selection criteria expression, click Expression
-
To edit the values of the fields, click Default Value.
-
-
In the Ordering tab, edit the Ad Hoc report appearance by specifying how the report is ordered and indexed after being run.
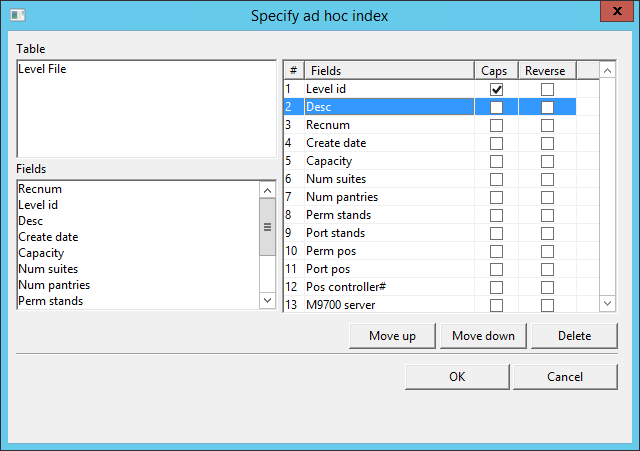
Figure 1-179 Ad Hoc Reporting – Ordering – Ad Hoc Index

-
From the Ordering drop down menu, select Ad hoc index. The Ad hoc button to the right of the field becomes functional.
-
Click Ad hoc.
-
Double-click the fields to edit. The fields then appear in the right hand column.
-
Mark the Caps check box to display the field in capital letters.
-
Mark the Reverse check box to display the field in reverse order.
-
Select a field, and then click Move up or Move down to sort the ordering of where the fields display in the report.
-
Click Delete to remove a field from the ordering list.
-
Click OK.
-
-
The newly ordered fields now appear in the main tab. Mark the check box under the Break column to break the report on that field.
-
-
Enter a Before report and After report message in the Texts tab.
-
In the Output tab, set the desired report destination:
-
If the destination is to a printer, mark the Printer radio button, and set the desired parameters, such as printer destination, font, formatting, and selection criteria.
-
If the destination is a preview, mark the Preview radio button, and set the desired parameters (similar to the Printer selection).
-
If the destination is a file, mark the File radio button, and set the desired parameters, including:
-
File path
-
Use of ANSI characters
-
Inclusion of column names
-
Use of semicolon as a delimiter
-
File format (HTML, XML, etc.)
-
-
-
Click Run.
Parent topic: System/Utilities