4 Deploying Oracle Software on Oracle Database Appliance
Complete these tasks to deploy the Oracle Database Appliance software.
- About Deploying Oracle Database Appliance 18.1
Review this information to understand how to deploy Oracle Database Appliance 18.1. - Re-imaging Oracle Database Appliance with an Oracle Database 18.1 Image
Use Oracle Integrated Lights Out Manager (ILOM) to re-image Oracle Database Appliance with an Oracle Database 18.1image. - Updating the Repository with the GI and RDBMS Files
Download the Oracle Database Appliance GI and RDBMS Software Clone File from My Oracle Support and update the patch repository. - Deploying a Single Node Bare Metal Platform
Configure the system, network, user groups, and database and deploy the single node Oracle Database Appliance (X7-2S, X7-2M, X6-2S, X6-2M, or X6-2L.) - Deploying a Multi-Node Bare Metal Platform
Configure the system, network, user groups, and database and deploy Oracle Database Appliance X7-2-HA.
About Deploying Oracle Database Appliance 18.1
Review this information to understand how to deploy Oracle Database Appliance 18.1.
Oracle Database Appliance ships from the factory with a bare metal configuration, default ISO image, and Appliance Manager installed. To deploy Oracle Database Appliance to use Oracle Database 18.1, you must re-image the machine with the 18.1 image. Re-imaging uses ILOM to install Oracle Database Appliance software for Oracle Database 18.1 on the local (boot) drive.
After imaging is completed, redeploy the End User image, then restore from backup, as needed.
Re-imaging does not patch the firmware or update the component versions, it only re-images the local system disk from an OS perspective. Re-imaging with older release of Oracle Database Appliance software does not rollback the firmware version.
To reimage the Oracle Database Appliance node, use the Oracle Integrated Lights Out Manager (ILOM) interface that you configured as part of readying the system for deployment .
To complete the first part of the deployment, you can either connect a monitor and keyboard to the system or connect a laptop to the serial port. If you use the serial port, ensure that the baud rate speeds match. After the first network is configured, you can perform the remaining deployment steps on the Oracle Database Appliance system or from a remote system.
Re-imaging and deploying Oracle Database Appliance requires a direct connection to the system to configure the Oracle Integrated Lights Out Manager (ILOM) and the first network.
The procedure to deploy software consists of the following steps:
-
Ready the system, including configuring the ILOM interface.
-
If you are re-imaging an appliance that is already deployed, create a backup, if needed.
-
Download the Oracle Database Appliance 18.1 image.
-
Re-image the system with Oracle Database Appliance 18.1.
-
Download the Oracle Database Appliance GI and DB software.
-
Update the repository with Oracle Database Appliance GI and DB software.
-
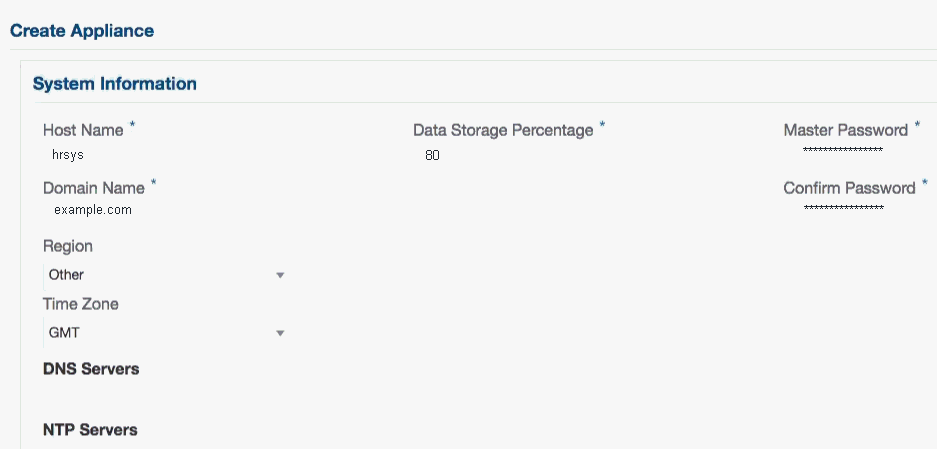
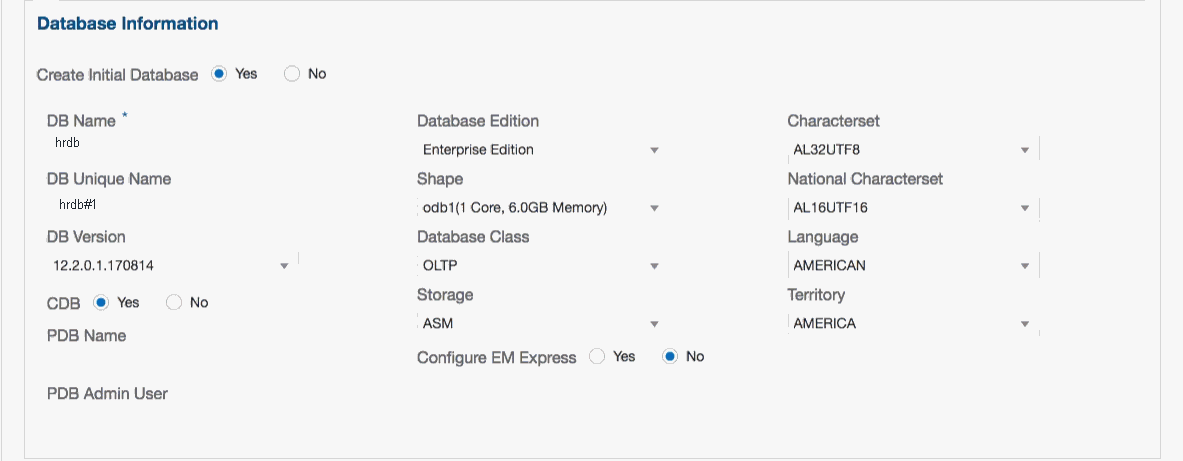
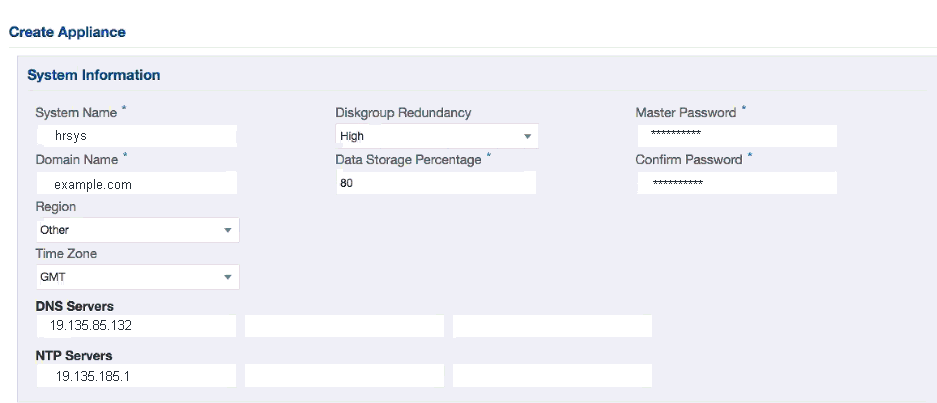
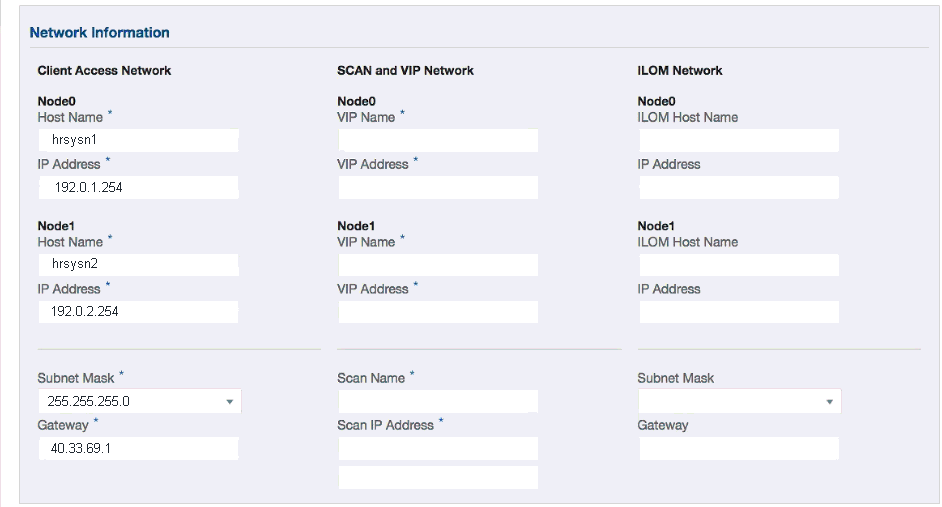
Launch the Web Console to deploy your configuration. The Web Console provides all of the fields necessary to deploy Oracle Database Appliance, including configuring the system, network, database, and optionally, Oracle Auto Service Request (Oracle ASR).
-
Restore from backup, if needed.
Note:
Oracle Database Appliance 18.1 is only available for bare metal DCS platforms. When you deploy Oracle Database Appliance 18.1, the only database version available is Oracle Database 18.1.1.0.0.
Re-imaging Oracle Database Appliance with an Oracle Database 18.1 Image
Use Oracle Integrated Lights Out Manager (ILOM) to re-image Oracle Database Appliance with an Oracle Database 18.1image.
Before downloading the image, ensure that the initial network connection is configured. To use scp or sftp, you must first set up a static IP address (for example, oda_host) and configure Oracle Database Appliance with that address by using the configure-firstnet command. This command ensures the system is available in your network, enabling you to use the Oracle Appliance Manager Web Console to deploy Oracle Database Appliance.
Updating the Repository with the GI and RDBMS Files
Download the Oracle Database Appliance GI and RDBMS Software Clone File from My Oracle Support and update the patch repository.
Update the patch repository with the following patch files:
-
GI Clone: Contains the latest Grid Infrastructure components needed to deploy, or create, an Oracle Database Appliance.
-
RDBMS 18.1.1.0.0Software Clone file: Contains the components needed to create database homes and databases in Oracle Database Appliance.
The patches are available for download in My Oracle Support. You must download the GI and DB software files to an external client and then copy the files from the external client to a /tmp directory on the appliance. If there is more than one zip file for a patch, unzip and then concatenate the zip files. In some cases, there might not be sufficient space in the /tmp directory. Consider creating a /tmp directory in the /u01 directory.
Copy the file using a Secure Copy (scp) or Secure File Transfer Protocol (sftp) protocol. To use scp or sftp, you must first set up a static IP address (for example, oda_host) and configure Oracle Database Appliance with that address by using the configure-firstnet command. This command ensures the system is available in your network, enabling you to use the Oracle Appliance Manager Web Console to deploy Oracle Database Appliance.
Deploying a Single Node Bare Metal Platform
Configure the system, network, user groups, and database and deploy the single node Oracle Database Appliance (X7-2S, X7-2M, X6-2S, X6-2M, or X6-2L.)
Use the checklists that you completed earlier as a reference for the configuration settings needed to deploy the appliance.
Before deploying Oracle Database Appliance, complete the tasks in “Preparing for Oracle Database Appliance Installation” and “Readying Oracle Database Appliance for Deployment”.
Complete the following tasks to prepare for deploying Oracle Database Appliance:
-
Register your hardware SI and new software licenses that you received with Oracle Database Appliance to your My Oracle Support profile.
-
Plan your configuration options.
-
Gather your system requirements and complete the checklists for your deployment. You can use the checklists as a reference for the configuration settings needed to deploy the appliance.
Complete the following tasks to ready the system before deploying Oracle Database Appliance:
-
Attach the network cables.
-
Perform a first startup of the appliance.
-
Configure Oracle Integrated Lights Out Manager (ILOM).
-
Configure an initial network connection.
-
Download the latest version of the Oracle Database Appliance Software and copy it to the appliance.
-
Log into the Web Console. When you launch the Web Console on an unconfigured appliance, the Appliance page notifies you that the appliance is not configured and provides a link to the pages needed to configure and create the appliance.
See also:
Your browser determines how you log into the Web Console. In some cases, you must accept credentials for the DCS-controller on port 7093, and DCS-agent on port 7070. If you experience problems launching the Web Console, see Logging into the Web Console for more information.
The job to create the appliance takes time to complete. To monitor the job progress, click the Activity tab . Click the job number to view the tasks.
The deployment is complete when the word SUCCESS appears after each task. To check the status from the command line, run the commandodacli list-jobs . A job is not complete if the status is running.After deployment, the root and database users SYS, SYSTEM, and PDBADMIN are set to the master password. The oracle and grid passwords are set to password. Change these passwords to comply with your user security protocols.
Deploying a Multi-Node Bare Metal Platform
Configure the system, network, user groups, and database and deploy Oracle Database Appliance X7-2-HA.
Use the checklists that you completed earlier as a reference for the configuration settings needed to deploy the appliance. When you launch the Web Console on an unconfigured appliance, the Appliance page notifies you that the appliance is not configured and provides a link to the pages needed to configure and create the appliance.
See Also:
Your browser determines how you log into the Web Console. In some cases, you must accept credentials for the DCS-controller on port 7093, and DCS-agent on port 7070. If you experience problems launching the Web Console, see Logging into the Web Console for more information.
Before deploying Oracle Database Appliance, complete the tasks in “Preparing for Oracle Database Appliance Installation” and “Readying Oracle Database Appliance for Deployment”.
After deployment, the root and database users SYS, SYSTEM, and PDBADMIN are set to the master password. The oracle and grid passwords are set to the default password. Change these passwords to comply with your user security protocols.
