System Administration
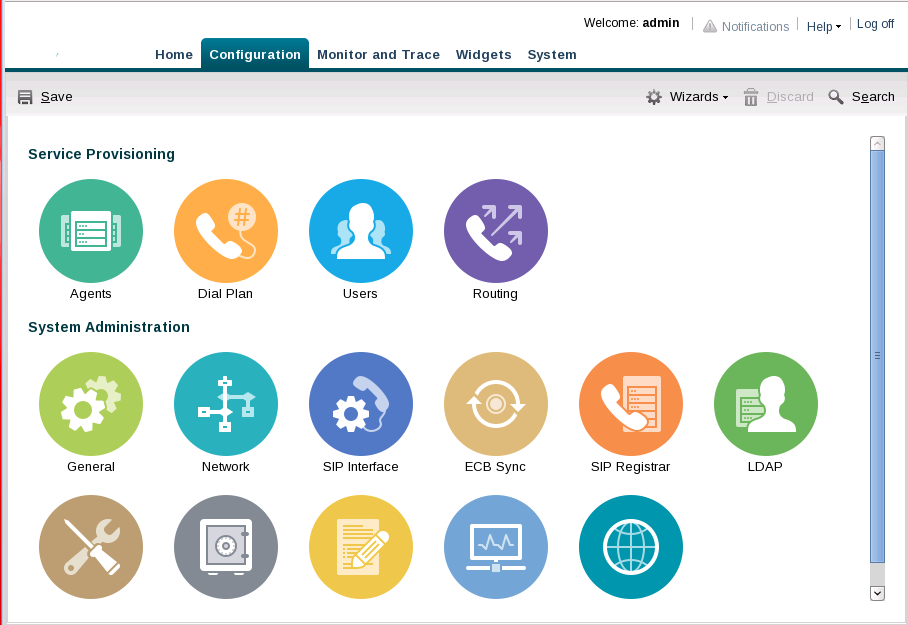
The Oracle Enterprise Communications Broker (OECB) GUI displays controls for administering the system under System Administration. In contrast, The OECB GUI displays tools used by network architects and service provisioning technicians under Service Provisioning. Service provisioning is the focus of the Oracle Enterprise Communications Broker User's Guide.
See "Configuration Icons" for an explanation of each icon.

Configuration Icons
The following information provides high-level descriptions of the Service Provisioning and System Administration controls on theOracle Enterprise Communications Broker (OECB) Configuration tab.
Service Provisioning
- Agents—Add agents that specify SIP and ENUM devices. An agent is usually a SIP-aware device that serves as a transit target or source for signaling managed by the Oracle Enterprise Communications Broker. Agents are often specified as next-hops for the purposes of routing.
- Dial plan—Add multiple dialing-contexts and dial-patterns. Dialing-contexts define the system behavior for calls placed to and from either a corporate of geographic focus. Dialing-contexts include multiple dial-patterns, which define the normalization required to most effectively manage diverse signaling structures.
- Users—Add user and other key phone numbers associated with the enterprise. The user database can specify each entry’s number or pattern, dialing context, agent, and policy, which can provide a starting point for processing the logic behind a user’s call treatment.
- Policy—Add policies that specify the codec and time conditions, as well as the routing, redirect, outbound translation, constraints, header normalization, and cnam masking actions.
- Routing—Add routing tables. Routing entries specify strict paths for signaling traffic, allowing you to specify policy and cost for traffic based on source and destination.
System Administration
- General—Specify standard system management information parameters, such as system identification information, system management information interfaces (SNMP and Syslog), and global service configurations including Denial of Service and High Availability settings.
- Network—Specify your network and High Availability settings, and add host routes.
- SIP Interface—Specify the SIP interface and add SIP service ports. Configure SIP monitoring and SIP monitoring filters.
- ECB Sync—Specify Sync configuration settings and add Sync agents. Provides control over multiple Oracle Enterprise Communications Broker synchronization processes, including defining applicable Oracle Enterprise Communications Brokers and initiating the synchronization.
- SIP Registrar—Create and manage a SIP registrar object on the Oracle Enterprise Communications Broker to offload Agent of Record registration processes from other network elements.
- LDAP—Define servers and server access rules for using an external LDAP database as a source for user authentication and routing procedures.
- HMR—Create header manipulation rules that change session service messages for interoperability, policy, and other deployment purposes.
- Security—Configure login authentication, certificate records, and TLS profiles. Generate certificate requests and import certificates. Add a public key. Enable audit logging.
- Accounting—Configure connections to RADIUS servers to collect Call Detail Records (CDR) generated by the system.
- SNMP—Specify SNMP community for allowing access to READ functions and trap receivers.
- Web Server—Specify web server functionality, including HTTP and HTTPS operation. Specify the applicable TLS profile and inactivity timeout.
Save and Activate
The GUI retains configuration changes until you send them to your device or discard them from the GUI. Configuration dialogs include an OK button that sends your changes to the device.
You must also Save, then Activate your changes before your device can apply your changes. The Save link, appearing as a disc icon towards the top left corner of each GUI page, initiates configuration Save and Activate procedures to the system.
When you click Save, the GUI either saves the configuration to your device or prevents you from saving invalid data. The system highlights any fields containing invalid data, allowing you to find and correct the mistake.
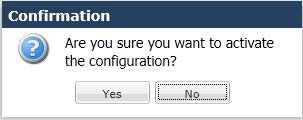
After the save is complete, the GUI displays a dialog asking you if you want to activate this configuration. Note that you can save without activating, for example, when you want to wait for a preferred maintenance window to apply the changes to avoid any service disruption.

The confirmation dialog defaults to “No,” which leaves your changes saved to your system but not activated. Select "No" if you want to activate your configuration at a later time. Select "Yes" to activate the changes now. The GUI provides a final confirmation message indicating success when activation finishes.
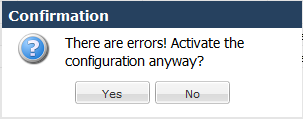
The GUI also checks your configuration for errors every time you click the Save button, the system displays the following dialog if any errors occur.

The system displays any configuration errors in a list at the bottom of the GUI. You can navigate to each object in the list by clicking the item in the Object column. The following screen capture shows an example of the errors list.


