Working with the Reports Page
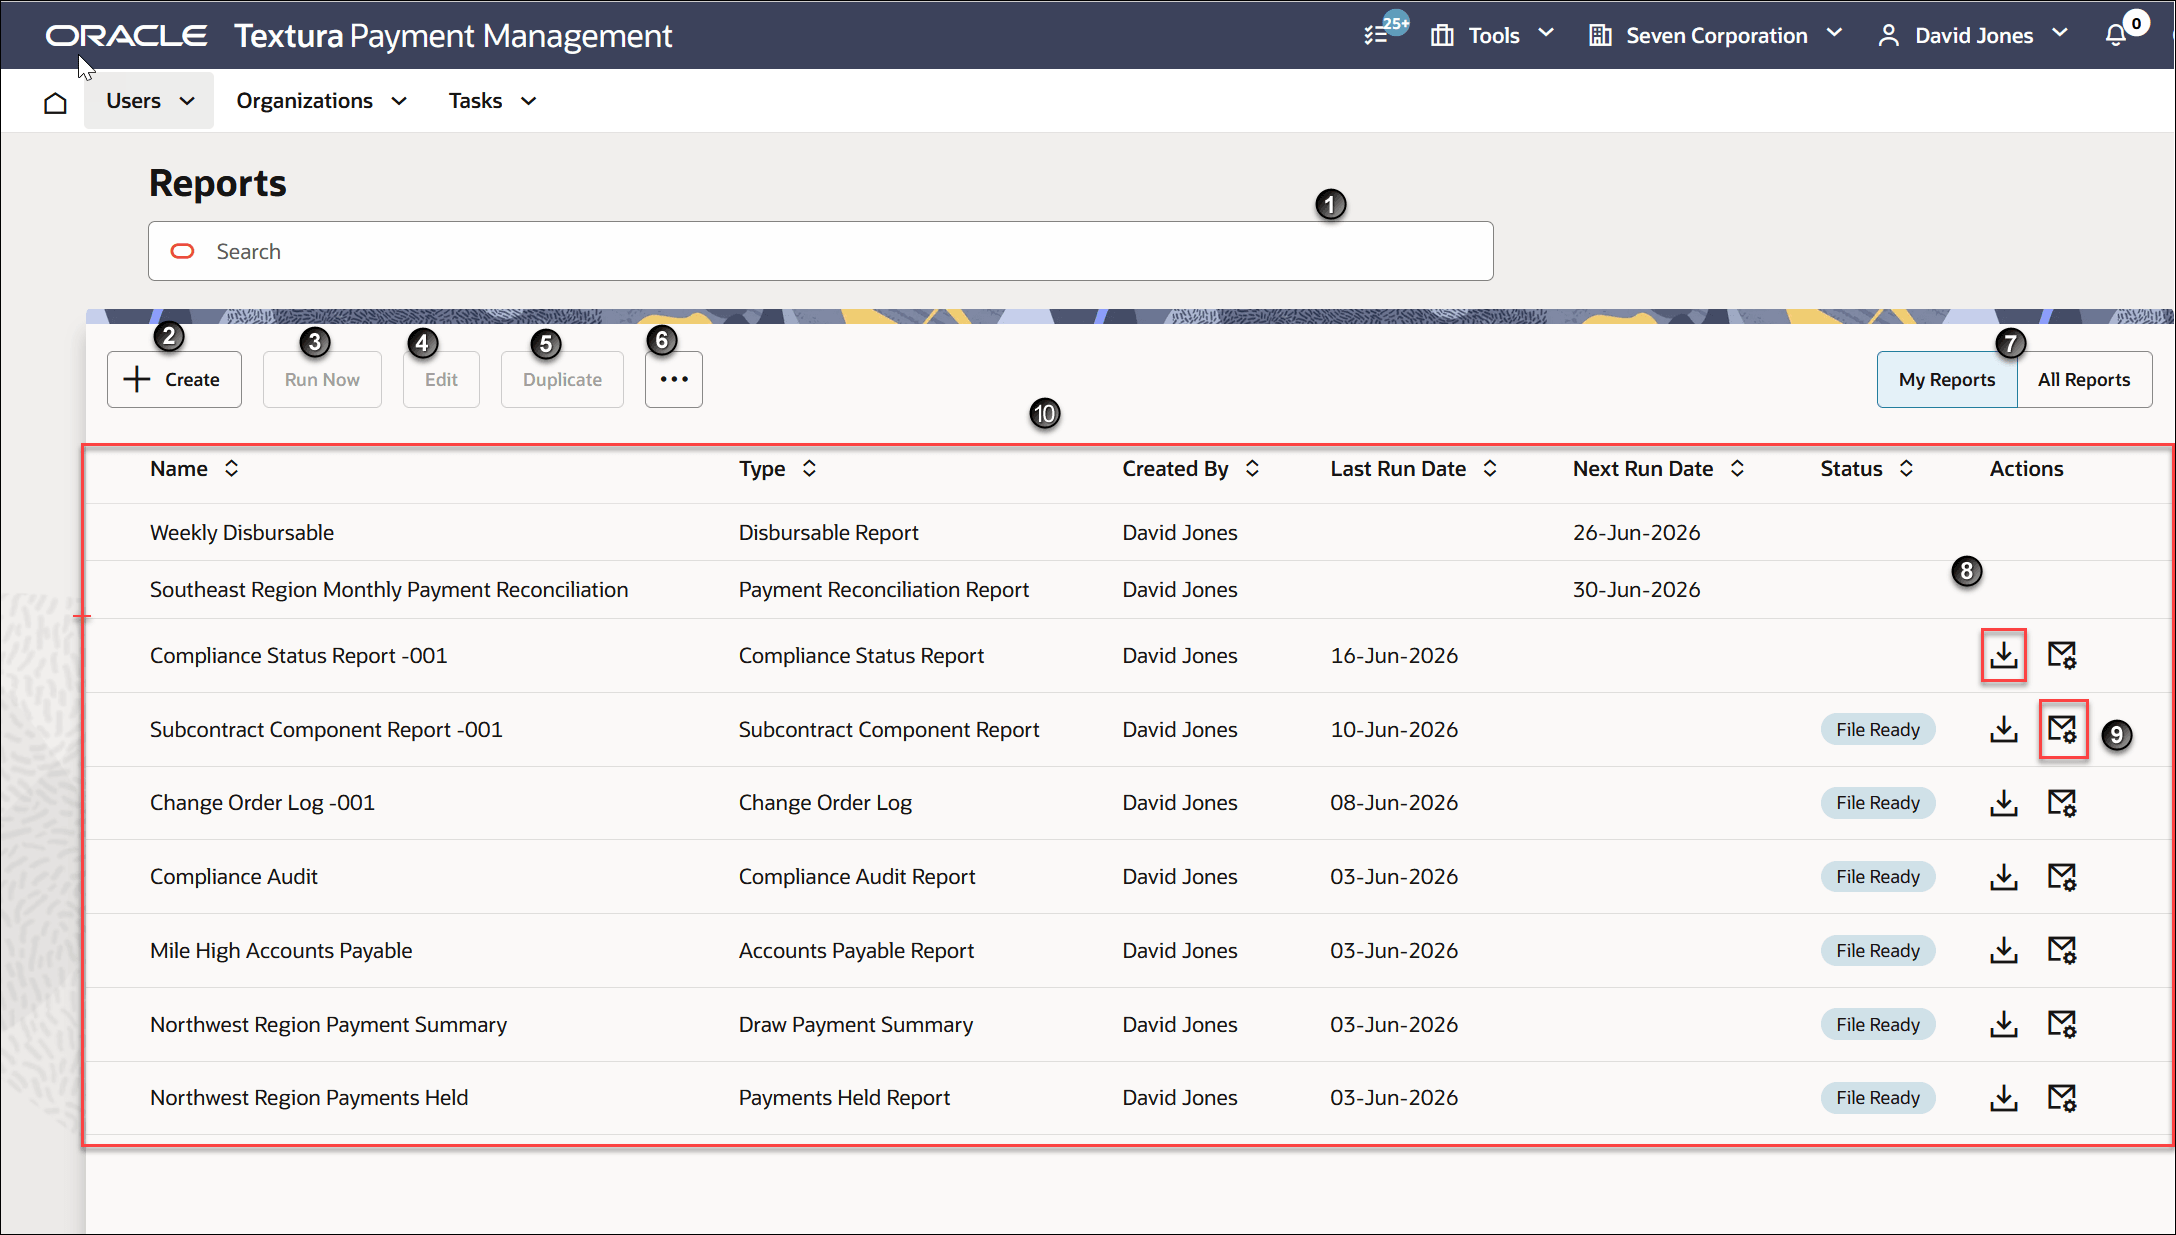
- Search: Enter a partial report name or type to narrow the list of reports displayed in the table.
- +Create: Opens the Report Guided Process where you can select and customize the settings for your report.
See Creating a Report for how to generate a new report.
- Run Now: Choose a report from the Reports table and select Run Now to generate a report you defined in the past. The report will follow the settings you last set when you either created or edited the report.
- Edit: Choose a report from the Reports table and select Edit to change the settings associated with a report. You can change the report file type, projects included in the report, or other criteria depending on the report type.
See Editing a Report for more information.
- Duplicate: Create a report from an existing report.
See Duplicating Reports.
- Actions Menu: Choose a report from the table and then select the ... (Actions) menu to view additional actions you can perform on the Reports page.
- View History: Opens a History drawer on the right side of the page. The drawer lists records for each time Textura or someone in your organization ran the selected report. A listed record includes the date the report was generated and a report number. You can also download the reports listed or audits of the respective report jobs.
Note: The History drawer only maintains records for reports generated in the past 60 days from the current date.
- View Settings: Opens a Settings drawer on the right side of the page. Settings include: Report Type, Report Description, Output Format, and Fields. Depending on the type of report, the drawer may include additional settings, such as User Status or Projects. Reports set up to automatically run at a given interval will include information about the frequency and time when Textura generates the report.
Select Edit to update report settings on the Edit Report page.
- Delete: Opens a confirmation dialog box with the action to delete the selected report. You cannot recover deleted report definitions or historical files of the report generated from the previous 60 days.
- View History: Opens a History drawer on the right side of the page. The drawer lists records for each time Textura or someone in your organization ran the selected report. A listed record includes the date the report was generated and a report number. You can also download the reports listed or audits of the respective report jobs.
- My Reports | All Reports: The My Reports tab displays by default. View all reports you defined across your projects on Textura. Users with the proper permission can select the All Reports tab to see report definitions created across their organization.
- Download: Choose a report from the table and then select the Download icon to save the most recently generated version of the report. The downloaded file type is dependent on the output file type selected when you first set up the report.
- Notification Setting: Select a report in the table, and then select the Notification Setting icon to open the Notification Settings drawer. Use the Notification Settings drawer to manage report notifications.
- Receive Notifications: Turn on Receive Notifications to receive email notifications when the report is ready.
- Email Content: Notification emails include a secure authenticated download link for the report.
- Attach Report File to Email: If your organization permits email attachments, you can attach the report file to the notification email. When this option is unavailable, the organization has disabled report email attachments.
- Update or Cancel: Select Update to save your changes or Cancel to discard them.
- Reports Table: Lists the reports you or other users in your organization generated, depending on if you chose to view My Reports or All Reports.
- Name: The name given to the report at the time when you defined it.
- Type: Lists the type of the Textura report.
- Created By: The name of the user who defined the report.
- Last Run Date: The most recent date someone in the organization ran the respective report.
- Next Run Date: Only applicable when a report runs on a schedule; the date Textura will next generate the report, based on the schedule set in the report settings.
- Status: Displays the current status of a generated report.
- In Progress: Textura is currently generating your report.
- Failed: The report encountered an error when generating. You can attempt to run the report again. If you continue to experience errors, contact Oracle Support.
- Deactivated: The report schedule was deactivated. For more information see topic, Reactivating a Disabled Schedule Report.
- No Status: A report successfully generated or has not yet generated.
- Actions: Use the icon in the Actions column to download the latest generated file or view the audit associated with the latest report run or manage notification settings per report.
Last Published Friday, June 26, 2026