| Oracle® Retail Enterprise Inventory Cloud Service User Guide Release 18.0 F13734-03 |
|

 Previous |
 Next |
| Oracle® Retail Enterprise Inventory Cloud Service User Guide Release 18.0 F13734-03 |
|
Previous |
Next |
The configuration chapter covers functionality found within the configuration menu of EICS.
Features include:
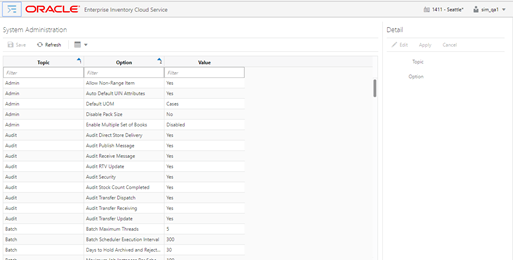
The System Administration in EICS is an admin screen used to setup the system configurations for both EICS and SOCS. The user can access this screen by selecting the 'System Administration' from Configuration menu under the Admin menu.
The users need to have proper permissions to access this screen.
Some of the system configurations cannot be changed to protect the data integrity of the system.
The user can select the parameter and edit the settings on the detail portion and apply the changes. The details of the individual configuration settings are described in a separate section.
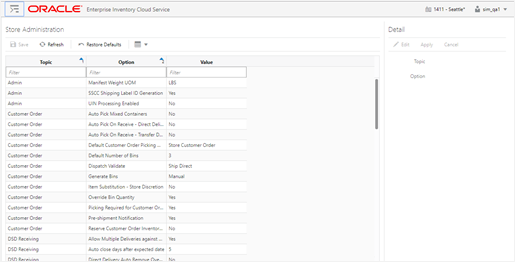
The Store Administration in EICS is an admin screen used to setup the store level configurations. The user can access this screen by selecting the 'Store Administration' from Configuration menu under the Admin menu.
The users need to have proper permissions to access this screen.
The user can select the parameter and edit the settings on the detail portion and apply the changes. The details of the individual configuration settings are described in a separate section.
The Restore Defaults option can be used by the user to restore the default parameters for the store. The system will update all the store parameters of the current store to the default store parameters.
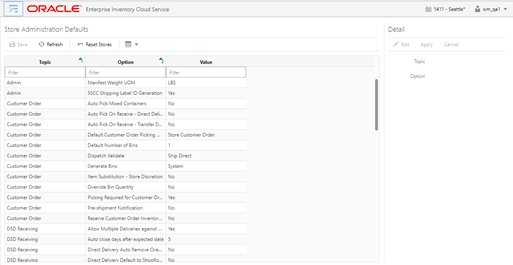
The Store Administration Defaults in EICS is an admin screen used to set default values for store level configurations that control a variety of behavior in EICS and SOCS. The user can access this screen by selecting the 'Store Administration Default' from Configuration menu under the Admin menu.
The users need to have proper permissions to access this screen.
The user can use the Reset Stores option to change the current value of a parameter to all the stores.
The changes done in this screen with the exception of Reset Stores option will not default automatically to the store parameters, it will only be considered to default the store parameters when a new store is data seeded.
|
Note: Making changes to this screen does not impact already existing store administration values. |
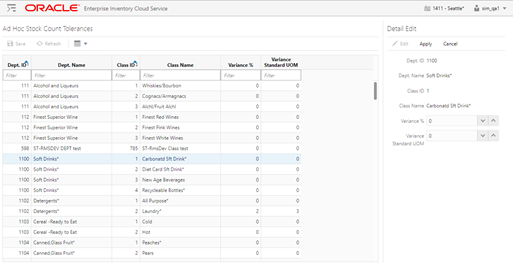
The Ad Hoc Stock Count Tolerances screen is an admin screen used to maintain tolerances which are used to determine discrepant items within Ad Hock stock counts. These tolerances are maintained on a per store basis. The screen is accessed from Admin / Configuration within the menu.
|
Note: Ad Hoc stock counts can only be executed with SOCS. |
Tolerances are set up at the class hierarchy level and can be defined for variance percentages as well as variance standard unit of measures. There is a record for each class in the system, and initially upon install both variances will be set to zero. Variances must be whole numbers. At least one of the tolerances must be set up for each class, both cannot be left blank.
When counting an ad hoc stock count the system will look at the variances defined for the class that the item belongs too. If the difference between the counted quantity and the stock on hand exceeds the variance, the item will be considered discrepant. The user must be within the lowest defined variance. A variance of zero for either field means that the count must be exact and cannot be discrepant.
Example: Item TV has SOH of 10 Units. Tolerance defined for 2 Variance SUOM and 10% Variance Percent. If the user counts 8 that exceeds the variance and it would be considered discrepant.
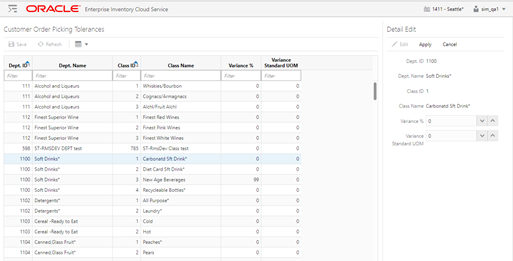
The Customer Order Picking Tolerances screen is an admin screen used to maintain tolerances which are used within Customer Order Picking. These tolerances are maintained on a per store basis. Because variable unit of measure items can be difficult to pick exactly, tolerance can be needed. Tolerances define if and how much variable UOM items can be over picked. The screen is accessed from Admin / Configuration within the menu.
Tolerances are set up at the class hierarchy level and can be defined for variance percentages as well as variance standard unit of measures. There is a record for each class in the system, and initially upon install both variances will be set to zero. Variances must be whole numbers. At least one of the tolerances must be set up for each class, both cannot be left blank.
When performing a pick, the pick quantity cannot exceed the suggested pick quantity by more than the variances defined for the item's class. The user must be within the lowest defined variance. This is applicable only to items that are not unit/each items, for example pounds. A variance of zero for either field means that the suggested pick quantity cannot be exceeded.
Example: Ordered 2 KG bananas. Tolerance defined for 1 Variance SUOM and 10% Variance Percent. User is not able to pick exactly 2 KG and picks 2.1 KG. This is acceptable as the .1 KG does not exceed the defined variances.
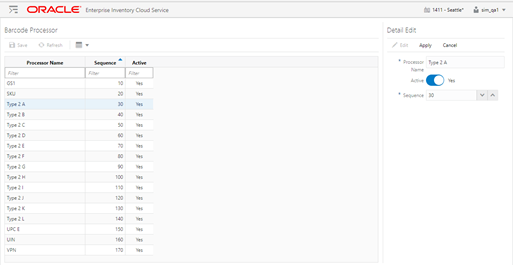
The Barcode Processor screen is an admin screen used to manage which barcode processors execute and the sequence in which they should be called. The user can mark a barcode processor inactive or active. The Barcode Processor screen will be accessed via the menu: Admin / Configuration / Barcode Processor. User must have Access Barcode Processor permission for the Barcode Processor menu option to display. The screen will display a set of Barcode Processors which were created via the data setup script.
List of Barcode Processors:
These barcode processors are inserted via the data setup script.
| Name | Description | Active | Process Sequence |
|---|---|---|---|
| SKU | SKU | Y | 10 |
| GS1 | GS1 | Y | 20 |
| VPLU_A | Type 2 A | Y | 30 |
| VPLU_B | Type 2 B | Y | 40 |
| VPLU_C | Type 2 C | Y | 50 |
| VPLU_D | Type 2 D | Y | 60 |
| VPLU_E | Type 2 E | Y | 70 |
| VPLU_F | Type 2 F | Y | 80 |
| VPLU_G | Type 2 G | Y | 90 |
| VPLU_H | Type 2 H | Y | 100 |
| VPLU_I | Type 2 I | Y | 110 |
| VPLU_J | Type 2 J | Y | 120 |
| VPLU_K | Type 2 K | Y | 130 |
| VPLU_L | Type 2 L | Y | 140 |
| UPC_E | UPC E | Y | 150 |
| UIN | UIN | Y | 160 |
| VPN | VPN | Y | 170 |
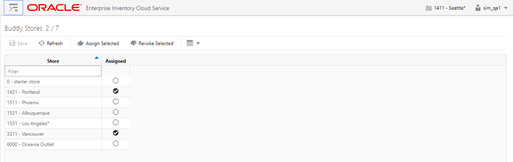
The Buddy Stores screen allows the store user to define stores that they normally transfer items to, in other words the store's "buddy". Each store can define their own list of buddy stores. Buddy stores presents a shortened list of stores to select from when creating a transfer/transfer shipment. The user can still transfer items to stores that not buddies, a buddy is simply a short list for ease of use.
The Buddy Stores screen is accessed by selecting Admin / Configuration / Buddy Store.
The list of stores to select from will be all stores for the same transfer zone as the user's store or no transfer zone. If the user's store does not have a transfer zone, then all stores will be displayed. The user can select the desired stores to move over to the buddy stores block to become buddy stores. It is not necessary to set up buddy stores.
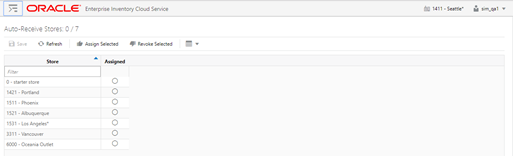
The Auto Receive Stores screen allows the user to select those stores that they want to Auto-Receive transfer shipments from. Each store can define their own list of auto receive stores. If a store defined as an auto receive store, the stock on hand of the receiving store is automatically adjusted as soon as the defined auto receive store dispatches the transfer. The receiving store will not be able to receive exceptions, or record damages to the transfer.
The Auto Receive Stores screen is accessed by selecting Admin / Configuration / Auto Receive Store
|
Note: In addition to this selection, the auto receive admin setting needs to also be setup. |
The list of stores to select from will be all stores for the same transfer zone as the user's store or no transfer zone. If the user's store does not have a transfer zone, then all stores will be displayed. The user can select the desired stores to move over to the auto receive stores block to become an auto receive store.
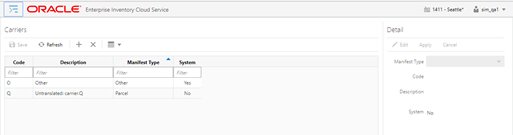
The Carriers screen is an admin screen in EICS for the user to setup and maintain the Carrier data. This screen can be accessed by the user by selecting the Carrier option from the Admin/ Configuration menu.
The system will have a default Carrier record 'Other' under the manifest type 'Other'.
Carrier codes that are marked as system cannot be deleted.
The data created are available on the BOL screens when the Carrier Type of Third Party is selected.
This information should be coordinated with the Order Management System and / or manifest system.
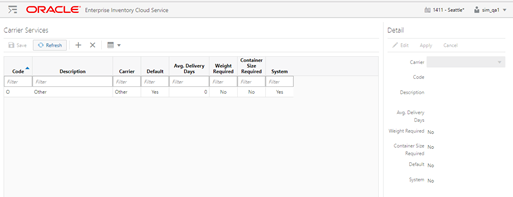
The Carrier Services screen is an admin screen in EICS for the user to setup and maintain the Carrier Services data. This screen can be accessed by the user by selecting the Carrier Services option from the Admin/Configuration menu.
The system will have a default Carrier Service record 'Other' under the 'Other' carrier.
Carrier Service codes that are marked as system cannot be deleted.
The user has to capture the Average delivery days the carrier takes to deliver, indicate whether weight is required, whether container size required and also indicate a carrier service as a default service when creating a carrier service record in the system.
This information should be coordinated with the Order Management System and / or manifest system.
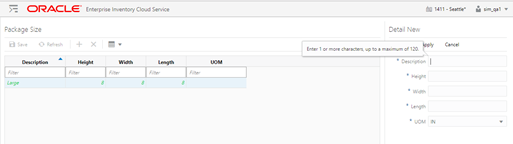
The Package Sizes screen is used to setup and maintain Package dimensions for all shipments to supplier, finisher, warehouse and store for the entire system.
Package Size is used within:
RTV Shipment and Transfer Shipment
Container Info and Edit Container
Customer Order Deliveries
BOL Info and Edit Delivery
The Package Size dialog will be accessed via the menu: Admin / Configuration / Package Size. The screen will initially default with a set of Package Sizes which were created at setup. Package Sizes can be created, edited and deleted. Values include: description, height, widths, length, and Unit of Measure.
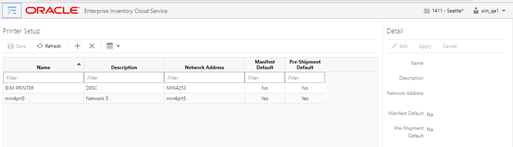
Printer details are sent as part of Manifesting or the pre-shipment notification. The Printer setup screen is an admin screen that would enable a user to create new printers and assign the network address. Printers can be added, modified and deleted using this screen. The printers that are setup in this screen are specific to the store. User will also be able to specify the default printer for manifesting and pre-shipment notifications.
The screen is accessed via the menu: Admin / Technical Maintenance/ Print Setup / Printer Setup.
The user must have Access Printer permission in order to access this screen.