Manage Authorization Services
Use the Authorization Services link on the Admin page of the ISR Dashboard to manage 3rd party servers in the ISR network.
The ISR supports 3rd party authorization services, sometimes referred to as single sign-on. Once a third-party authorization service is properly configured on the ISR, users registered with the third-party platform log into the ISR Dashboard with authorization from the added service. The user’s account is then associated with unique fields and values returned from the authorization service. These fields and values can also be found in the metadata of certain sessions stored in the ISR. When the user requests the recordings listing in the Dashboard, only the recordings with matching metadata are shown and playable.
Once the registered third-party user has logged in successfully through the ISR Dashboard, the user’s account is registered with the local ISR platform as well. This enables administrative features for that user, such as changing ISR Dashboard settings, specific permissions (ie., allowing recording edits and deletes) or level of access.
As a default security measure, third-party authorization users have only Tenant User privileges when they first log in. For example, in a deployment enabled for Broadworks third-party authorization, a successful Broadworks log in returns a user ID and group ID unique to that user. Initially the user can only see and hear recordings specific to their user and group ID. However, an administrator can update a user’s privileges and level of access. If given Account Administrator status, the third-party authorization user can see and hear their own recordings, as well as recordings for everyone within their group. For more information on user level access, see Managing Users.
Select Authorization Services from the Admin page to manage Authorization Services.
Note:
Only Super Users and Account Administrators have access to managing Authorization Services for other users.Authorization Services Page

The following table describes the information displayed on the Authorization Services page.
| Column | Description |
|---|---|
| Name | Name of the Authorization Service. |
| Service URL | Specifies the Uniform Resource Locator (URL) associated with the Authorization Service. |
| Status | Identifies the current status of
the Authorization Service on the ISR. Values can be:
enabled - Authorization Service is enabled. disabled - Authorization Service is disabled.
|
| SRC Type | Session Recording Client (SRC) type associated with the 3rd Party server. For example, Broadworks. Default is default. |
| Displays details of the Authorization Service and allows you to edit the details. | |
| Deletes the Authorization Service. |
Adding an Authorization Service
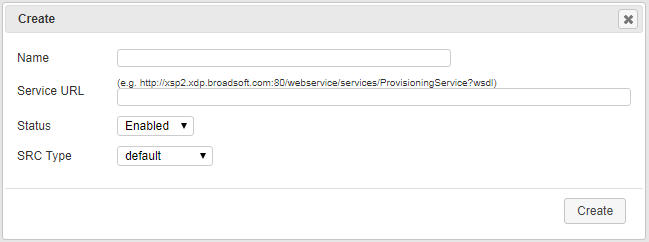
You can add an Authorization Service associated with a 3rd party server (such as the Broadworks server) that controls the secure login and authorization of users using the ISR and logging into the ISR Dashboard. Add an Authorization Service using the New Authorization Service link on the Authorization Services page.
Note:
Access to an Authorization Service is dependent on your access privileges (Super Users and Account Administrators only).To add an Authorization Service:
Editing an Authorization Service
You can edit the details of an Authorization Service (3rd party server) as required.
Note:
Access to an Authorization Service is dependent on your access privileges (Super Users and Account Administrators only).To edit an Authorization Service:
- Click Admin in the main menu (or Edit System Configurations on the Home page).
- Click Authorization Services. The Authorization Services page displays.
-
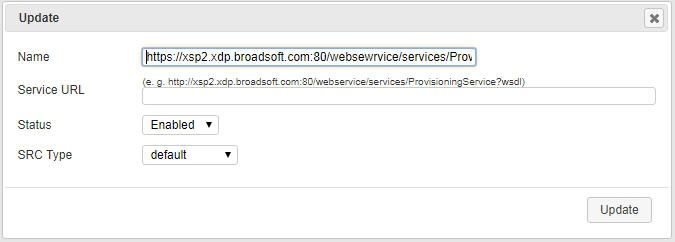
Choose an
Authorization Service and click the Details icon for that Service. The Edit
Authorization Service dialog box displays.

- Edit the parameters for the Authorization Service as applicable using the procedures defined in Adding an Authorization Service, starting at Step 4.
- When you are finished editing the Authorization Service, click Update. The changes are saved to the ISR database and display on the Authorization Service page.


