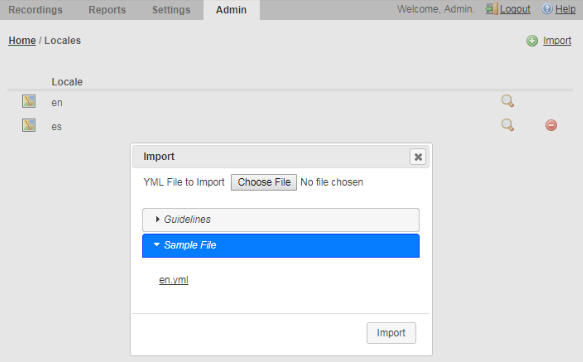
Adding a New Locale
You can create, import, and set a new locale by completing the following procedure on the Dashboard:
- In the Admin tab, click Locales.
- Click Import.
- Read the provided guidelines.
- Click the provided "en.yml" English sample for a template for your locale.
- Copy the content starting at the root element "en" and ending at "multi_page_html" and paste it into a local text file or editor.
- Save the file as "<root_element>.yml", where <root_element> is the ISO language code. A comprehensive list of ISO-639-1 language codes can be found in https://www.w3schools.com/tags/ref_language_codes.asp.
- Update the strings with the translations appropriate for the chosen language/locale.
- Click
Choose
File, select the file, and click
Import.

- Set the "Preferred Language" for the User or Account (in "Branding and Language") to the new locale root element value.
- Log in and confirm your changes.


