Requesting and Installing the Secure Sockets Layer (SSL) Certificate
This topic describes the steps for creating a self-signed Secure Sockets Layer (SSL) certificate for use with the Microsoft IIS Web server.
Note: This topic is written for Microsoft Windows 2000 Professional.
About SSL Certificates
When a browser points to a secure domain on the World Wide Web, an SSL certificate authenticates the server and browser, and initializes a secure, encrypted session between the server and browser to guarantee privacy and integrity.
Creating the SSL Certificate Request
To create the SSL certificate request, follow these steps:
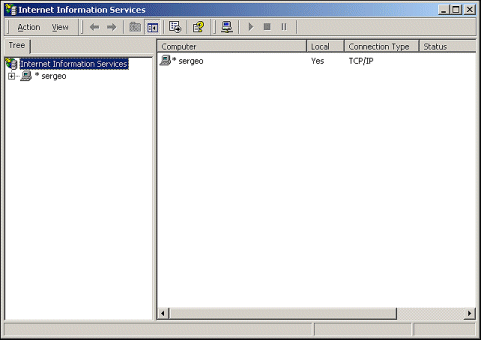
- Open the Internet Information Services (IIS) Manager by selecting Start>Settings>Control Panel>Administrative Tools>Internet Services Manager. The Internet Information Services window appears.

- Click the + to expand the tree. Then, right-click on Default Web Site and select Properties.
- When the Default Web Site Properties dialog box appears, select the Directory Security tab, then select the Server Certificate button.
- When the Web Server Certificate Wizard dialog box appears, select the Next > button.
- When the ISS Certificate - Server Certificate dialog box appears, select Create a new certificate, and then select the Next > button.
- When the ISS Certificate Wizard - Delayed or Immediate Request dialog box appears, select the Prepare the request now, but send later option button, and then select the Next > button.
- The Name and Security dialog box appears. Enter the certificate name in the Name field. You can give the certificate any name you want, however it is probably best to give it the same name as your Web site. Select 1024 in the Bit length field, and then select the Next > button.
- The Organization Information dialog box appears. Enter the organization name in the Organization field, and enter the department that the certificate will belong to in the Organization Unit field. Select the Next > button to continue.
- The Your Site's Common Web Site Name dialog box appears. Enter the Web Site name in the Common Name field. The common name is the Web site address the certificate will cover. For example, this could be www.yourcompany.com or secure.yourcompany.com. You will need a valid DNS name if you plan on accessing your secure site through the Internet. When you have finished, select the Next > button.
- The Geographic Information dialog box appears. Complete the Country/Region, State/Province, and City/Locality fields and select the Next > button.
- The Certificate Request File Name dialog box appears. Enter the path and name for the certificate request in the File Name field and then select the Next > button.
- The IIS Certificate Wizard displays a summary of the values you entered. If you find any mistakes, select the < Back button and correct them. If everything looks OK, select the Next > button.
- The Completing the Web Server Certificate Wizard dialog box appears.
- Select the Finish button. The certificate request should be sent to scry@expedia.com. Optionally, the SSL certificate can be obtained from any of the SSL issuers.
Installing the SSL Certificate
Once the Signed Certificate is received from SSL issuer, it should be copied to the Expedia interface PC. The next steps are to tell IIS to use the certificate. Once this is complete, the SSL site is secure.
To install the certificate, follow these steps:
- Open the Internet Information Services (IIS) Manager by selecting Start>Settings>Control Panel>Administrative Tools>Internet Services Manager. The Internet Information Services window appears.

- Click the + to expand the tree. Then, right-click on Default Web Site and select Properties.
- When the Default Web Site Properties dialog box appears, select the Directory Security tab, then select the Server Certificate button.
- When the Web Server Certificate Wizard dialog box appears, select the Next > button.
- The Pending Certificate Request dialog box appears. Select the Process the pending request and install the certificate option button, and then select the Next > button.
- The Process a Pending Request dialog box appears. Enter the path to your certificate or browse to it using the Browse button, and then select the Next > button.
- The IIS Certificate Wizard displays a summary of the certificate. If you notice any mistakes, select the < Back button and correct them. If everything looks good, select the Next > button.
- Select the Finish button to complete the installation.


