OXI Interfaces
The following interfaces are available under the OXI Interfaces:
- Use any of the following methods to navigate to the any of the above OXI interfaces:
- From the SU search page, select the OXI interface such as OXI Configuration Comparison or OXI Post you wish to look at and click Go.
or
- Select the OPERA Interfaces menu.
- Under OPERA Interfaces tree information, select OXI Interfaces tree information you wish to look at.

OXI POST
Note: If the database connection has not been established, connect to the database by providing the required connection credentials when the database dialog box appears.
- Use any of the following methods to navigate to OXI Post interface:
- From the SU search page, select the OXI Post interface you wish to run and click Go.
or
- Select the OPERA Interfaces menu.
- Under OPERA Interfaces, select OXI Interfaces tree information and then select the Generic > OXI POST you wish to run.
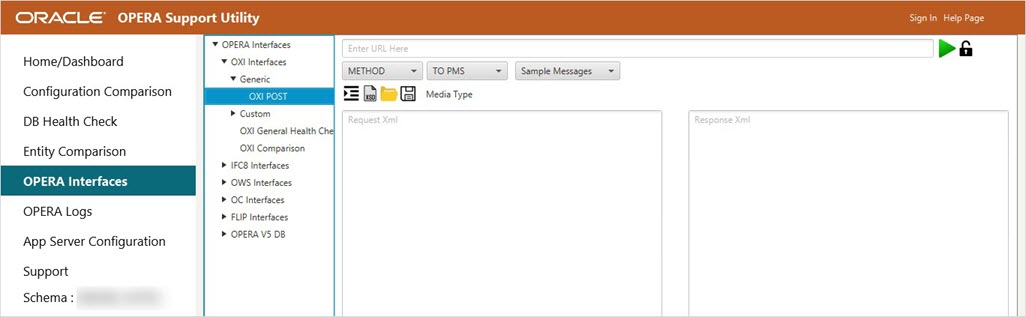
- Select the Method as POST or GET functions from the drop-down list.
- Select To PMS or To ORS from the drop-down list where you want to post your message. Once To PMS or To ORS is selected, the URL to post is auto- populated with the machine name you are connected to.
- Enter the Interface Name and Property Name in the URL you wish to post the message.
Note: If the Interface Name, Property Name, or both are not entered, the message will not be posted, and the system displays a warning message as ‘Please enter Property Name and Interface Name’.
- Select any of the Sample Messages from the drop-down list or paste your request message.
- Select the Media Type from the drop-down list.
- Click the Indent and Structure icon in the Request xml text area to check the structure of the XML request message and indentation.
It validates the details of missing tags and line numbers if the structure (tags) is not correct and displays an XML Structure Validation dialog box.
It also indents the XML request message.
- Click the XSD Validation icon to check the validation of Request XML Message against XSD (XSD files are already uploaded for Sample Messages respectively).
- Click Upload XSD File icon to upload your XSD file against Request XML Message and click Open. Click XSD Validation icon to validate XML message against XSD.
- Click Save icon to save your XML Message. This XML will be saved under OXI POST tree information.
- Click the Authentication icon to authenticate the posting of message.
- Enter your Username and Password and click Authorize.
- Click the Run icon. This displays the Response Message, Response Code, and Response Received in Response XML text area with Message received successfully.
Once the message is successfully posted, you can see a green checkmark on the top right corner.
If the message is not posted, you can see a cross mark on the top right corner
- The Track ID of the Request XML Message appears after the Message posting. Click the Track Request icon to track the details of the Request Message.
HOLIDEX
- Select the OPERA Interfaces menu.
If the database connection has not been established, connect to the database by providing the required connection credentials when the database dialog box appears.
- Under OPERA Interfaces, select the OXI Interfaces tree information and then select Custom > HOLIDEX to create the Holidex Reservation.

- Select the Sample Message as Create Holidex Reservation from the drop-down list or paste your request message.
- Once the message is selected, the URL to post is auto- populated with the machine name to which you are connected.
- Enter the Property ID in the URL to which you want to post the message.
- Select the Media Type from the drop-down list.
- Click the Indent and Structure icon in the Request xml text area to check the structure of the XML request message and indentation.
- It validates the details of missing tags and line numbers if the structure (tags) is not correct and displays an XML Structure Validation dialog box.
- It also indents the XML request message.
- Click the XSD Validation icon to check the validation of the Request XML Message against XSD (XSD files are already uploaded for Sample Messages respectively).
- Click the Upload XSD File icon to upload your XSD file against Request XML Message and click Open. Click the XSD Validation icon to validate XML message against XSD.
- Click the Save icon to save your XML Message. This XML will be saved under the HOLIDEX tree information.
- Click the Authentication icon to authenticate the posting of the message.
- Enter your Username and Password and click Authorize.
- Click the Run icon. This displays the Response Message, Response Code, and Response Received in Response XML text area with Message received successfully.
Once the message is successfully posted, you can see a green checkmark on the top right corner.
If the message is not posted, you can see a cross mark on the top right corner as shown in the image below.
MARSHA
- Select the OPERA Interfaces menu.
If the database connection has not been established, connect to the database by providing the required connection credentials when the database dialog box appears.
- Under OPERA Interfaces, select the OXI Interfaces tree information and then select Custom > MARSHA to Create Reservation, Availability Request, or Create Block.
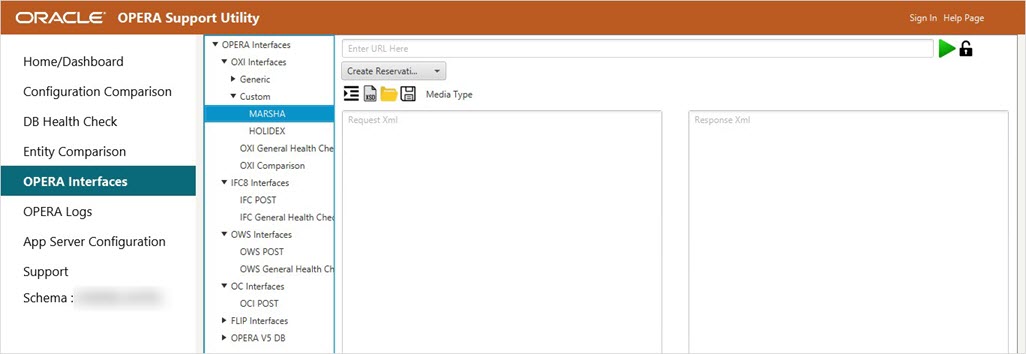
- Select any of the Sample Message from the drop-down list or paste your request message.
- Enter the URL to post the message.
- Select the Media Type from the drop-down list.
- Click the Indent and Structure icon in the Request xml text area to check the structure of the XML request message and indentation.
- It validates the details of missing tags and line numbers if the structure (tags) is not correct and displays an XML Structure Validation dialog box.
- It also indents the XML request message.
- Click the XSD Validation icon to check the validation of Request XML Message against XSD (XSD files are already uploaded for Sample Messages respectively).
- Click the Upload XSD File icon to upload your XSD file against Request XML Message and click Open. Click XSD Validation icon to validate the XML message against XSD.
- Click the Save icon to save your XML Message. This XML will be saved under MARSHA tree information.
- Click the Authentication icon to authenticate the posting of message.
- Enter your Username and Password and click Authorize.
- Click the Run icon. This displays the Response Message, Response Code, and Response Received in Response XML text area with Message received successfully.
Once the message is successfully posted, you can see a green tick mark on the top right corner.
If the message is not posted, you can see a cross mark on the top right corner.
OXI General Health Check
- Select the OPERA Interfaces menu.
- If the database connection has not been established, connect to the database by providing the required connection credentials when the database dialog box appears.
- Under OPERA Interfaces, select OXI Interfaces tree information and then select Custom > OXI General Health Check you wish to run.
- The OXI General Health Check is available under the DB Health Check Tab. The 'Do you want to navigate to it?' dialog box appears.

- Click Continue to navigate to the OXI General Health Check under the DB Health Check menu.
This directs you to the OXI tab of OPERA Interfaces under DB Health Check. View OXI Interfaces Not Running, Empty XML Messages in Outbound Queue, and OXI Delta Changes ‘Y’ Except Holidex Health check reports.
OXI Comparison
If the database connection has not been established, connect to the database by providing the required connection credentials when the database dialog box appears.
- Use any of the following methods to navigate to OXI Comparison:
- From the SU search page, select the OXI Configuration Comparison interface you wish to run and click Go.
or
- Select the OPERA Interfaces menu.
- Under OPERA Interfaces, select the OXI Interfaces tree information and then select the Custom > OXI Comparison you wish to run.
- The OXI Comparison is available under the Configuration Comparison Module. the 'Do you want to navigate to it?' dialog box appears.

- Click Continue to navigate to the OXI Comparison under the Configuration Comparison menu.
- Select the Source Interface Id and Compare Interface Id properties of your choice to compare the Interface Settings and BE Subscription.
- Click various options on the tree, such as Interface Settings and BE Subscription, to view the comparisons and check the results which differ in source and compare properties. The comparison data may take some time to appear. Click each tab to check the results.
- You can click the download icon on the top right corner to download the results in the CSV file format.
