| Oracle® Retail Xstore Office Cloud Service 18.1 User Guide Release 18.1 F18648-05 |
|

 Previous |
 Next |
| Oracle® Retail Xstore Office Cloud Service 18.1 User Guide Release 18.1 F18648-05 |
|
Previous |
Next |
The Electronic Journal component is used to view transactional data from the Xcenter (a part of Oracle Retail Xstore Office Cloud Service) database in a receipt format. The Oracle Retail Xstore Office Cloud Service Electronic Journal is similar to the Oracle Retail Xstore Point-of-Service POS Electronic Journal, and provides the ability to search for and review transactional activity within your store hierarchy. This application runs against the Xcenter database and provides visibility for transactions across all stores.The search capabilities allow you to quickly locate any transaction across the chain. You can view the detail in a receipt format that mirrors the receipt generated at the store, including the customer's signature (if captured). This feature is commonly used for credit dispute (chargeback) resolution, as well as loss prevention investigation.
This chapter contains instructions on starting the Electronic Journal function and searching for transaction data.
From the Oracle Retail Xstore Office Cloud Service menu, select Journal - Electronic Journal, or click the Electronic Journal link in the Reports panel.
The Electronic Journal page displays, showing the search parameters.
Enter your search criteria to limit the amount of data returned. The following search parameters are available:
Org Node - Enter a node ID or click the Globe icon to select a node from the hierarchy tree to restrict the search to a store (or stores) in the organization. [REQUIRED]
Register # - Enter the identifier for a specific register or leave blank for all registers.
Customer Number - Enter a customer's ID number to view information about a specific customer, or leave blank for all customers.
Customer Last Name - Enter a customer's last name to search for and view information about a specific customer, or leave blank for all customers.
Credit Card Last 4 # - Enter the last 4 digits of the credit card.
|
Note: Entry is restricted to only 4 digits. |
Tender Type - Select a tender from the list to search for a specific type of tender, or accept the default value <ALL> to view information for all tenders.
Transaction Type - Select the type of transaction from the drop-down list; the default is Retail Sale. The value <ALL> allows you to search for all transaction types.
Business Date - Enter a start date and end date, accept the default, or click the calendar icon to choose the dates. The default is the previous 30 days.
Transaction ID - Enter a transaction identifier for a specific transaction, a range of transactions, or leave these fields blank to view information for all transactions. Enter the same transaction number in both fields to locate a specific transaction number.
Cashier ID - Enter the identifier for the ringing associate's ID, a range of ringing associate IDs, or leave blank for all associates.
Click the Search button to execute the search:
The information returned from the search shows the store ID, register ID, transaction ID, transaction type, transaction status, cashier ID, business date, customer name, and transaction total.
The first 200 results are displayed on the page. If the desired result is not listed, click Electronic Journal in the breadcrumb at the top of the page to return to the search parameters. Refine the search criteria and search again.
A sorting component is available for a column, when applicable.
If a single transaction matches the search criteria, only one row is returned.
Click a transaction in the list to view additional information.
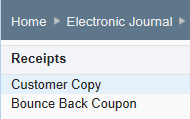
If multiple receipt types exist for this transaction, select a receipt from the list:
The selected receipt image displays.
When the receipt image displays you have the following options:
Click the Print button to print a copy of this receipt.
Select a different receipt type from the list (Figure 8-2) to view a different receipt from this transaction.
Click the breadcrumbs to navigate to a previous page:
To return to the transaction list for this location, click the location breadcrumb (for example, STORE:101).
To return to the Ejournal search parameters, click the Electronic Journal breadcrumb.
To return to the Home page, click the Home breadcrumb.