Navigation
Learning to navigate through OIPA is the first step toward being able to create and search for clients and policies. The security group a user is assigned to will determine the navigation options available to that user. There may be menu options or screen activities that are not visible to a user who is logged into OIPA. This will happen if the user does not have access for those particular menu options or activities.
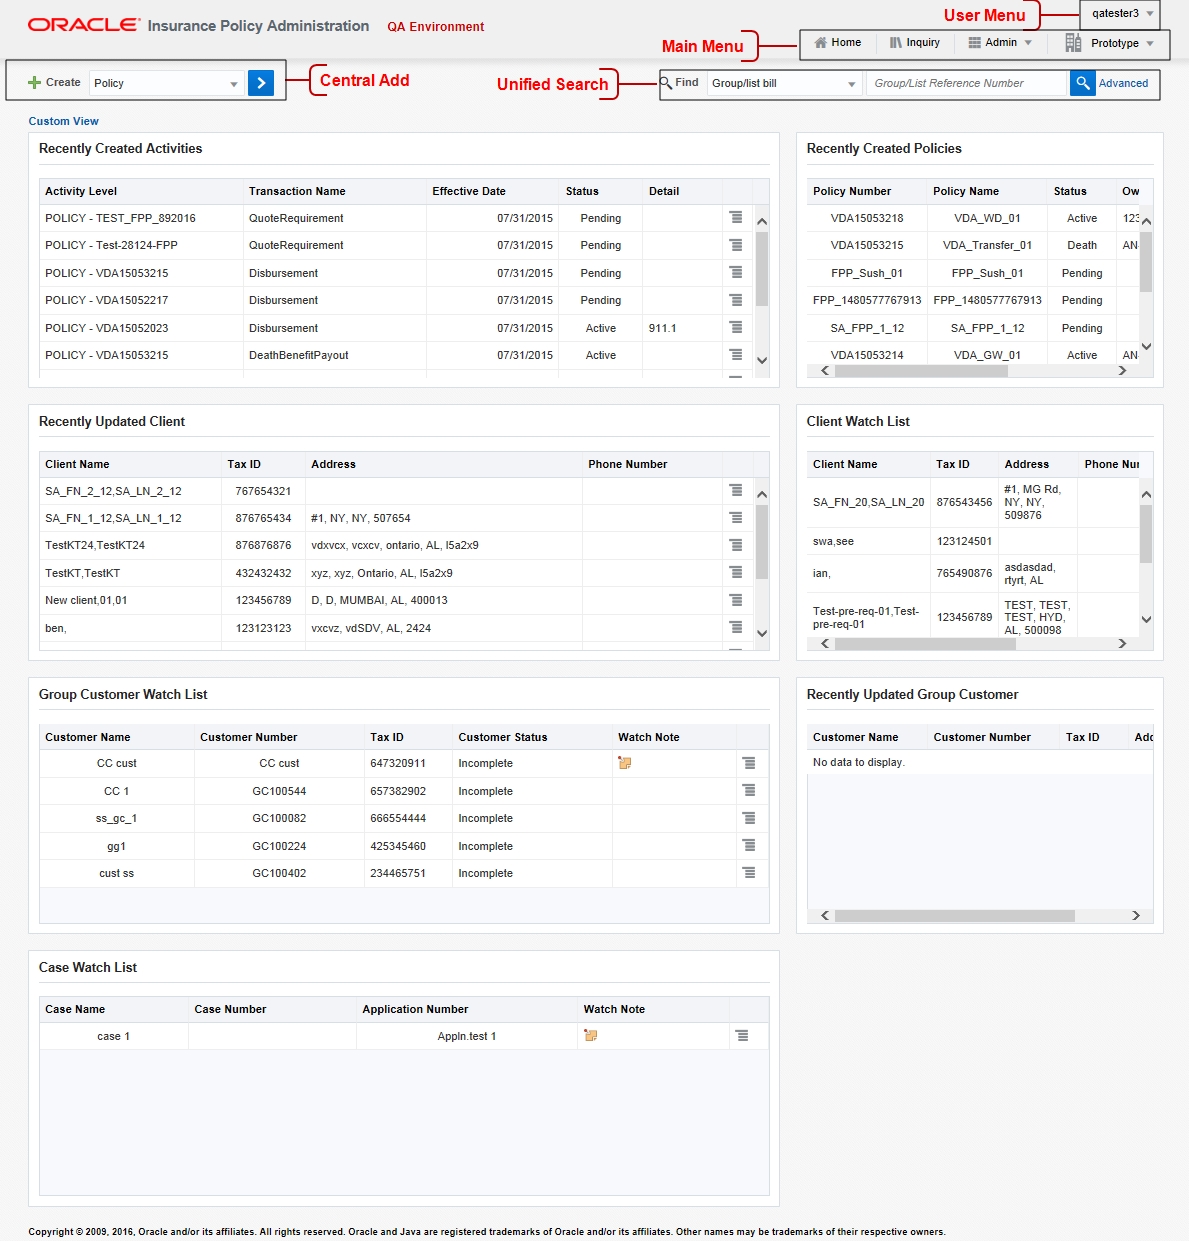
OIPA navigation is organized by function with a centralized "Create/Add and Search" locations for all the major entities like "Policy, Case, Client, Customer, Suspense, Disbursement, Batch, Group/List bill etc.
Banner/Main Menu
The Banner/Main Menu is accessible from all OIPA screens. It allows the user to work with Policy, Client, Disbursement, Suspense, Plan and Table information. The Banner area displays the Screen Validation Messages that prompts the user to enter valid data before moving to another part of the application.
Note: The options available for the user can differ depending on the level of security the user has been assigned. If a menu or action is not available, then the user has not been given security access.
Main Menu
Navigates the user to the Dashboard.
The Admin menu is accessible from the top navigation in OIPA. It is a drop-down menu that when clicked upon shows a menu consisting of Plan, Data, Requirements and Misc (miscellaneous) menu items. These menu items have related sub-menus within them.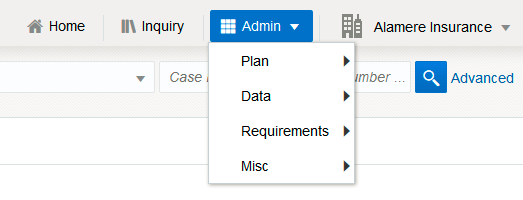
For more information on the menu items of the Admin menu, refer the following:
- Plan
- Data
- Requirements
- Misc : See the Admin Menu | Misc
User Menu
Allows the user to set Preferences, access Online Help, and Logout from the OIPA application.

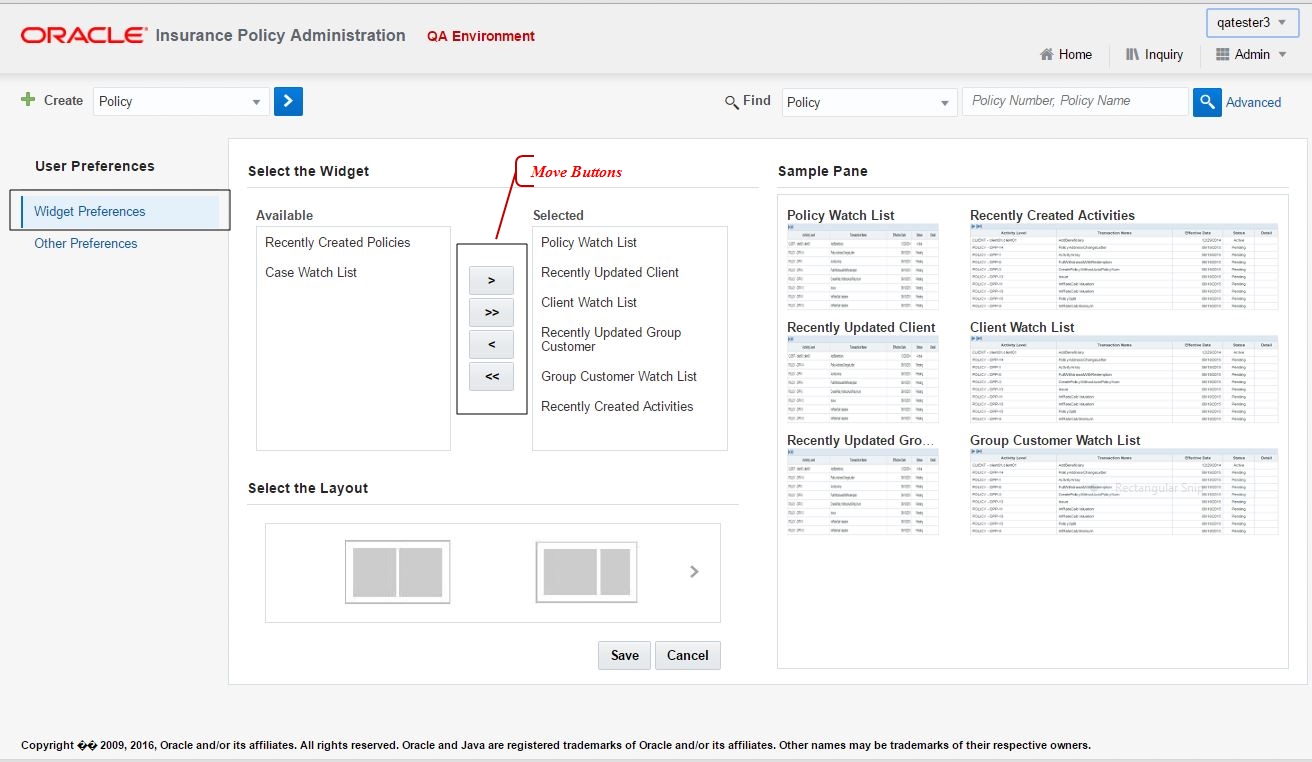
The user can set preferences for Dashboard Summary information.
Widget Preferences
To Select the Widget preference, Choose the Widget options from the Availablelist and click the Move button. Then, click Save.
- > : Moves the selected item or items from the Available list to the Selected list.
- >>: Moves all the items from the Available list to the Selected list.
- <: Removes the selected item or items from the Selected list.
- <<: Removes all items from the Selected list.
To select the layout,scroll and select the layout and click Save.
| Important | The widget order can be changed by dragging the widget to the desired position; the Sample pane will preview the order/layout in the order the widget options were selected |
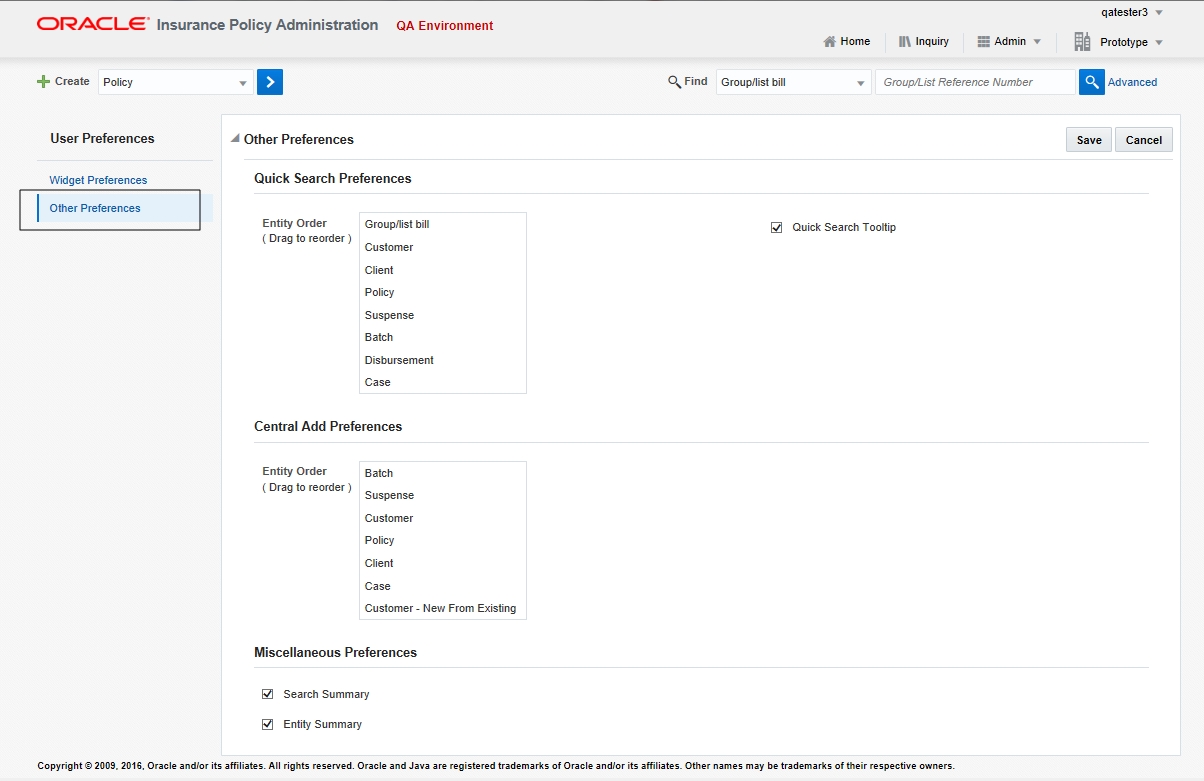
Other Preferences
Using this option, the user can set preferences for entity order in which the Quick search (unified search), Central Add drop downs should display the entity list. This can be achieved by simply dragging the entities in the list to he desired order. Also, can set preferences for other miscellaneous items.
Allows the user to access the OIPA online help.
Allows the user to exit the OIPA application.
Central Create/Add
Allows the user to create/add entities from a central location. The drop down list populates the names of the entities that can be created in the application.
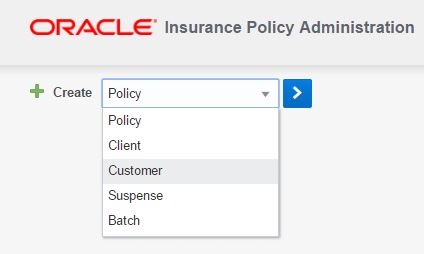
The drop-down include the possible options to create the entities:
- Policy: Allows to Create a new Policy.
- Client: Allows to Create a new Client.
- Customer: Allows to Create a new Customer.
- Suspense: Allows to Create a new Suspense.
- Batch: Allows to Create a new Batch.
- Customer - New from Existing: Allows the user to Create a new Group Customer from an existing customer details.
- Case: Allows to Create a new case.
Unified Search
The unified search combines all the different entity search mechanisms into a single search mechanism. It unify all the searches into single search with entity more frequently searched by user as default entity and attributes by which user typically searches the entity as default search criteria.
The user can perform search in 2 ways using the below options:
The Search drop-down displays options to search the specific entities among Policy, Case, Client, Customer, Suspense, Disbursement, Group/List Bill, Batch etc.
- Select the entity to search from the Search drop-down.
- Enter the search string in the text box.
Note: User can use wildcard character (%) for wild searches.
- Click the Search button. The search result is displayed for the specified criteria.
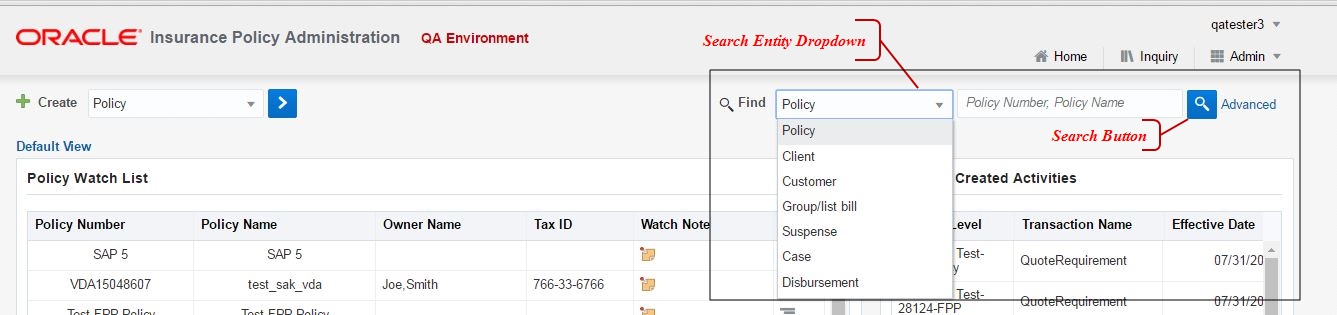
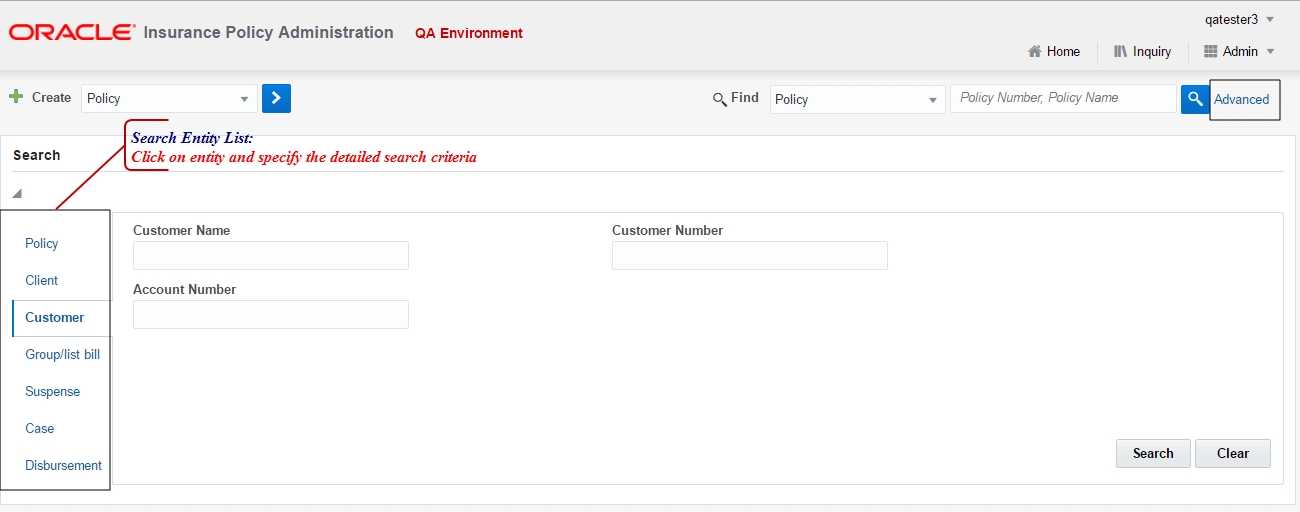
This option provides user the flexibility to go to advances search in order to refine further the search by adding more search criteria.
- Click Advanced link. The Advanced Search screen will appear with the list of entities.
- Click on entity and specify the detailed search criteria in the displayed fields.
- Click Search. The search result is displayed for the specified criteria.
If there is a single exact match, the user will be automatically navigated to the entity; if there are more matches, the user will be presented with a Search Results screen with a Hamburger menu. The menu on mouse hover shows GoToCustomer option, when clicked navigate to the user to the entity screen.

