Setting Up and Managing Fluid Benefits Statements as an Administrator
This topic discusses the process of setting up and managing fluid benefits statements as a benefits administrator.
|
Page Name |
Definition Name |
Usage |
|---|---|---|
|
BAS_STMT_OPTIONS |
Set up report templates for benefits statements. |
|
|
RUNCTL_BAS_STMT |
Run the process to generate confirmation statements for both online viewing and printing. |
|
|
BAS_STMT_LIST_FL |
Review fluid benefits statements of employees. |
Use the Benefits Statement Options page (BAS_STMT_OPTIONS) to set up a report template for the Benefits Statement preview.
Navigation
In the Workforce Administrator fluid homepage, select the Benefits Administrator tile. From the Benefits Configuration navigation collection, select Benefits Statement Options.
Image: Benefits Statement Options page for Enrollment Preview
This example illustrates the fields and controls on the Benefits Statement Options page for Enrollment Preview.
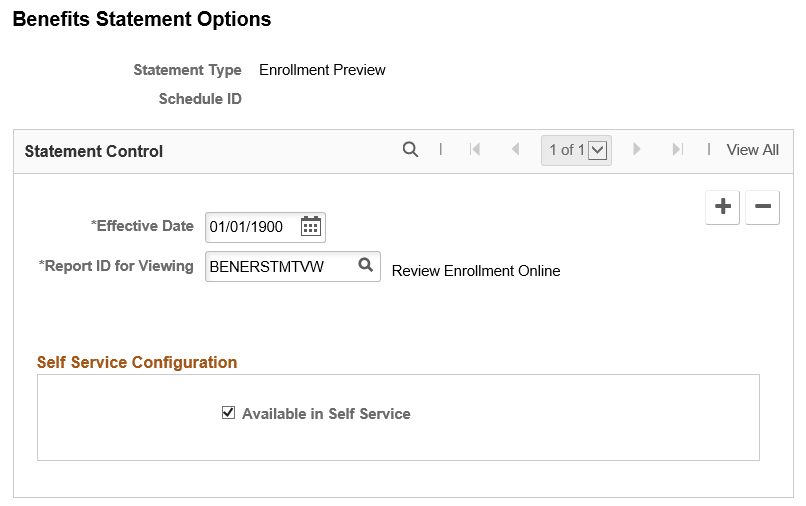
Image: Benefits Statement Options page for Confirmation Statement
This example illustrates the fields and controls on the Benefits Statement Options page for Confirmation Statement. You can find definitions for the fields and controls later on this page.

|
Field or Control |
Definition |
|---|---|
| Statement Type |
The available Statement Types are Enrollment Preview and Confirmation Statement. |
| Effective Date |
Select the effective date from which the Enrollment or Confirmation statement controls take effect. |
| Schedule ID |
Displays the Schedule ID if selected in the previous Search page. The statement control is based on the Schedule ID. Different report layouts can be specified for different Schedule Ids. A blank Schedule ID is the default configuration if you are using the same control for all Schedule IDs or if the statement process cannot find a matching Schedule ID. |
| Report ID for Viewing |
Select the XML report defined in BI Publisher for online viewing. |
| Report ID for Printing |
Select the XML report defined in BI Publisher for the ‘print file’ bulk printing (hard copy). |
| Employees Per File |
Enter the number of employees to be included in each PDF file. BI Publisher allows large print files to be split into smaller PDF files. This is to avoid potential issues while printing large files. Note: If this field is left blank, then all the employees’ records are complied into a single file. |
| Available in Self Service |
Select the check box to allow employees to view the statements online in Self Service. |
| Email Notification |
Functionality will be delivered only in a future image. |
For more information on BI Publisher settings, see PeopleTools: BI Publisher for PeopleSoft.
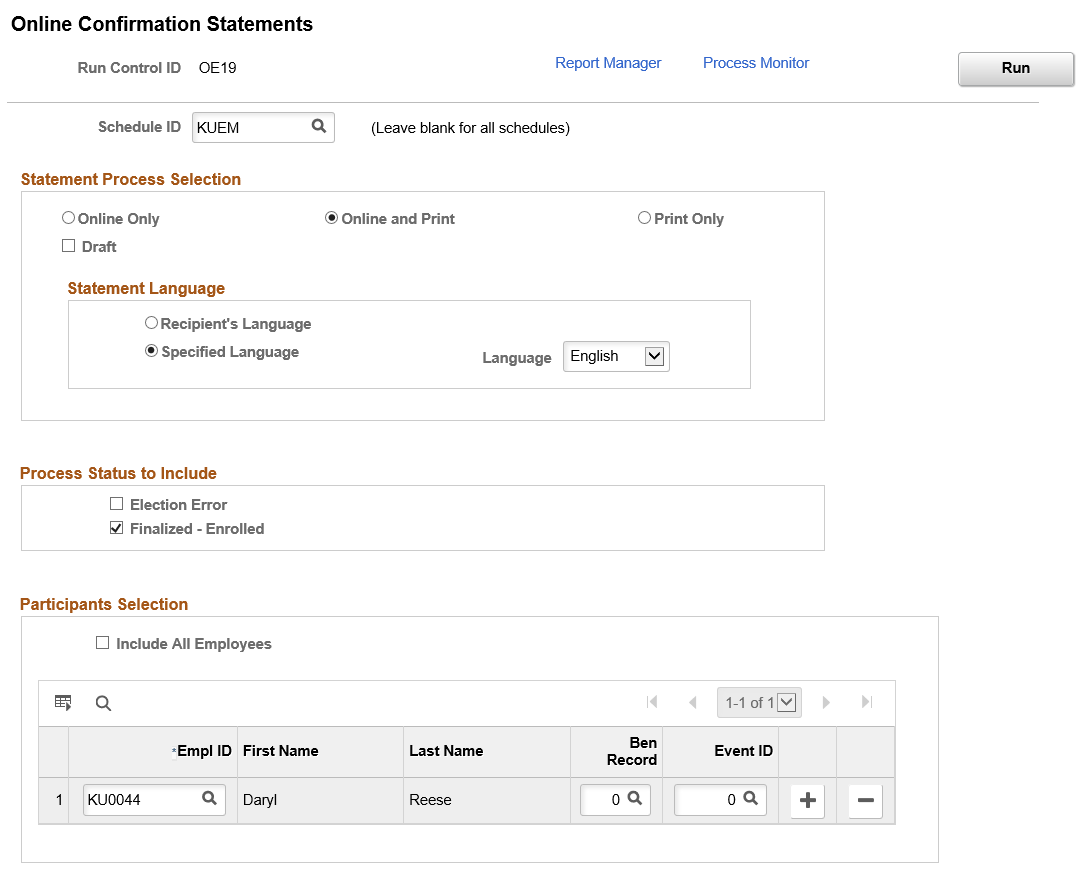
Use the Online Confirmation Statements page (RUNCTL_BAS_STMT) to run the process to generate confirmation statements for both online viewing and printing.
Navigation
In the Workforce Administrator fluid homepage, select the Benefits Administrator tile. Select the Benefits Management tab and from the navigation collection, select Online Confirmation Statements.
Image: Online Confirmation Statements page
This example illustrates the fields and controls on the Online Confirmation Statements page.
|
Field or Control |
Definition |
|---|---|
| Schedule ID |
Enter a Schedule ID or use the Look Up icon to select one from the list of available values. If the Schedule ID is left blank, the data for all employees are extracted. |
| Statement Process Selection |
Options are:
|
| Statement Language |
This group box appears only when Online and Print or Print Only is selected. |
| Process Status to Include: Election Error, Finalized – Enrolled |
Select the check box to indicate the status for the statement data to be extracted. Note: A Confirmation Statement is available to the employee only if the benefit data has a process status of Finalized - Enrolled (FE) or Election Error (EE). |
| Participants Selection |
When a Schedule ID is selected and the Include All Employees check box is deselected, a Participants group box is displayed. You can add specific employees here to generate statements for these employees only. Note: If the Schedule ID is left blank, then the Include All Employees check box cannot be deselected. |
Use the Review Employee Statements page (BAS_STMT_LIST_FL) to review fluid benefits statements of employees.
Navigation
In the Workforce Administrator fluid homepage, select the Benefits Administrator tile. Select the Review Employee Benefits tab and from the navigation collection, select Review Employee Statements.
Image: Review Employee Statements page
This example illustrates the fields and controls on the Review Employee Statements page. You can find definitions for the fields and controls later on this page.

|
Field or Control |
Definition |
|---|---|
| Return to Select Employee link |
Click this link to return to the search page to select a different employee. |
| Statement Type drop down |
The available statement types are Enrollment Preview and Confirmation Statement. |
| Filter icon |
Use the filter to select statements according to event date range, issue date, sequence and event. |
Click a row to view the benefits statement details for the selected employee. The Benefits Statement page displays the benefits enrollment details of the selected employee as collapsible sections. Expand each section to view details. Use the Print View button on the page to download the statement in a PDF format to save as a file or to print a hard copy.
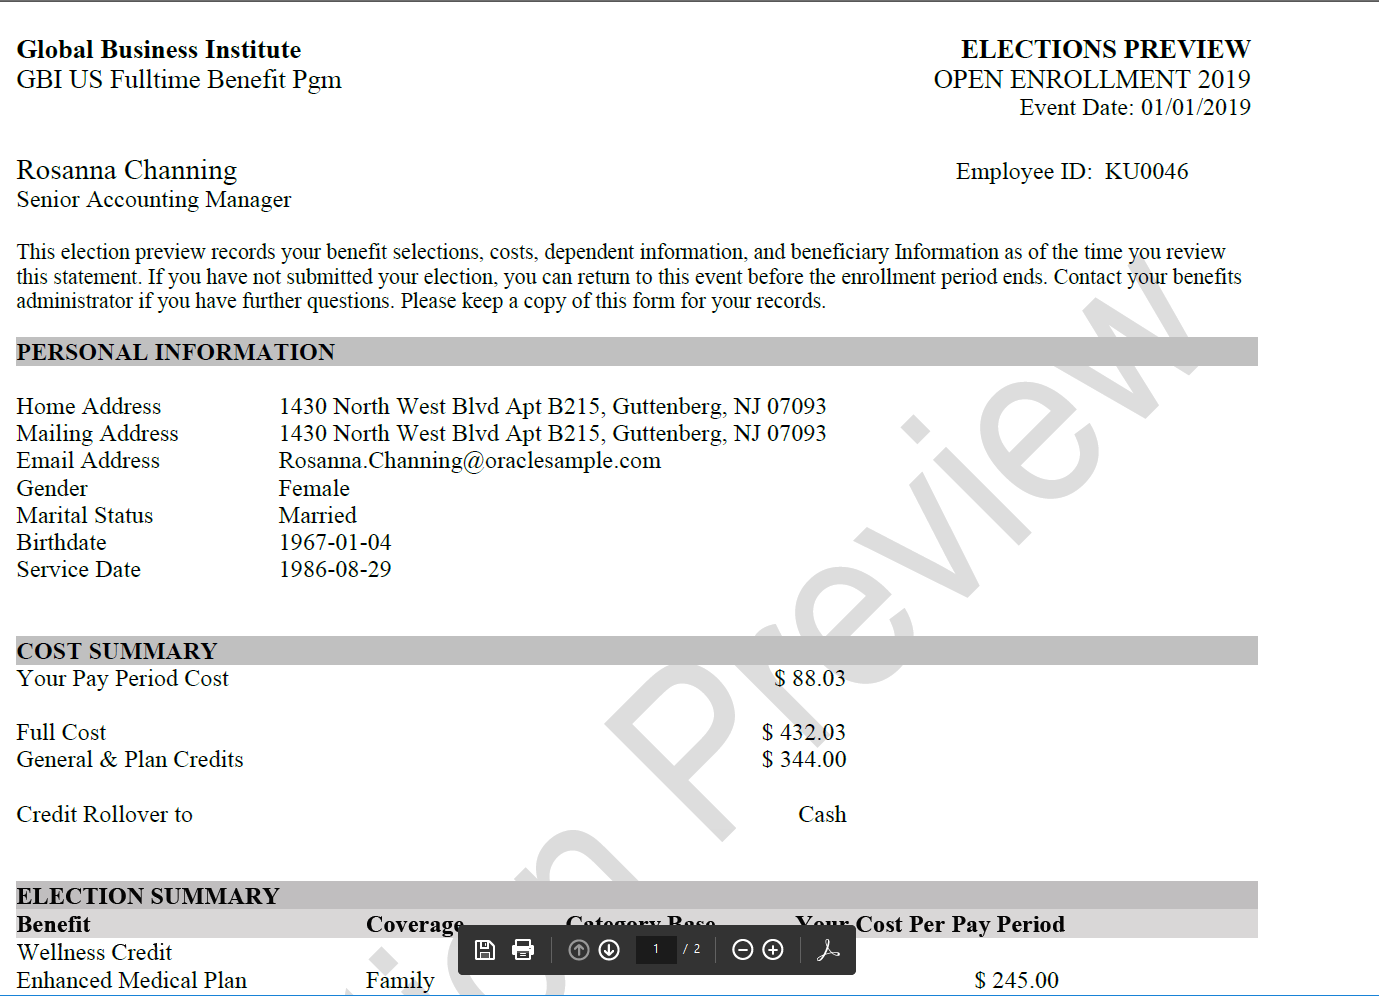
Image: Benefits Statement – Enrollment Preview
This example illustrates the fields and controls on the Benefits Statement – Enrollment Preview.
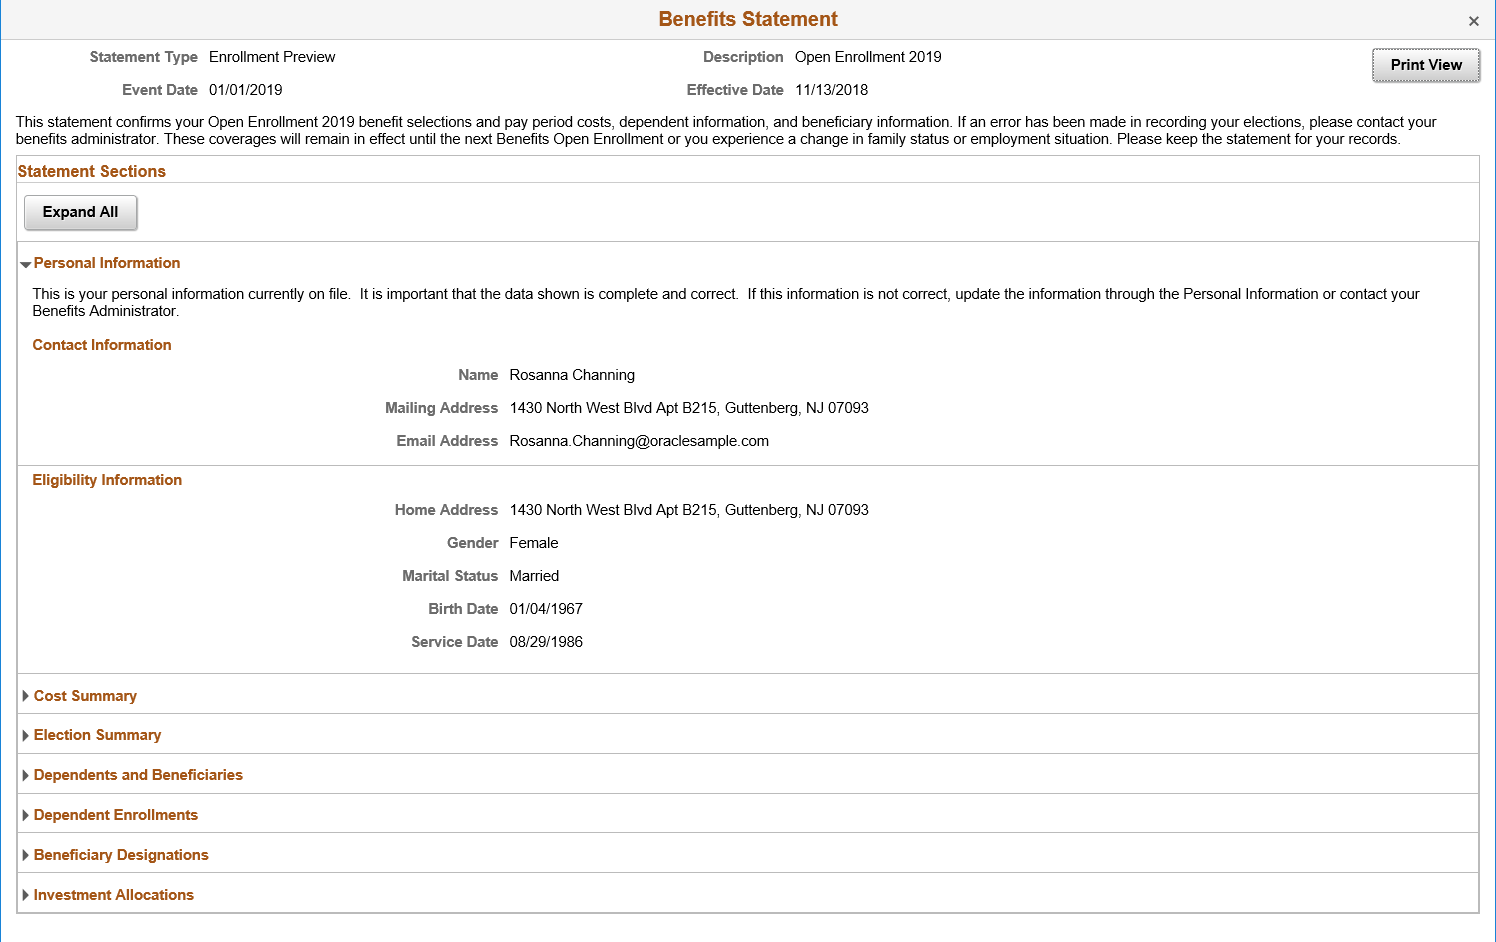
Image: Benefits Statement – Print view of the Enrollment Preview statement
This example illustrates the fields and controls on the Benefits Statement – Print view of the Enrollment Preview statement.