Entering and Tracking Additional Workforce Data
These topics discuss entering and tracking additional workforce data.
|
Page Name |
Definition Name |
Usage |
|---|---|---|
|
BADGE |
Record badge numbers that you issue to a person, including employees, contingent workers, or persons of interest. |
|
|
BUSINESS_EXPENSES |
Track a worker's business expenses, such as travel, meals, entertainment, and relocation costs. |
|
|
PRIOR_WORK_EXPER |
Track prior work experience. Enter the details of a worker's previous employers and jobs. |
|
|
EMPLOYEE_PHOTO |
Enter a worker image into the system by copying and pasting images into image fields. |
|
|
General Comments Page |
GENL_COMMENTS |
Enter a miscellaneous comment about a worker. |
Use the Badge page (BADGE) to record badge numbers that you issue to a person, including employees, contingent workers, or persons of interest.
Navigation
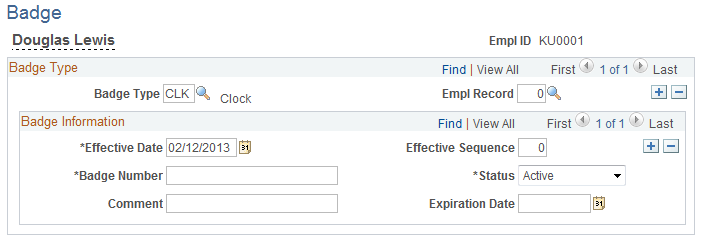
Image: Badge page
This example illustrates the fields and controls on the Badge page. You can find definitions for the fields and controls later on this page.
You must have previously entered Badge Type data on the Translate table before using this page.
|
Field or Control |
Definition |
|---|---|
| Badge Type |
Select the type of badge number that you want to enter: BA (Building Access). CCA (Computer Center Access). CLK (Clock). GB (General Badge). PA (Parking Access). Add more values if you want or enter more than one badge type for a particular worker and employment record number. |
| Badge Number |
Enter the badge number that corresponds to the badge type that you selected. The system ensures that the number that you enter isn't currently assigned to another worker. It also ensures that the number hasn't been assigned for future use by someone else. For each badge type, only one badge number per worker can be active at the same time. For example, a worker can have a row for a Building Access badge type and another row for a Parking Access type, but the component does not allow you to enter two rows for the same badge type, such as two Building Access type rows. Badge numbers can be reused. If a combination of badge type and badge number was previously assigned to a worker, but is currently inactive and hasn't been assigned for future use, you can use it for a different worker and employment record number. |
| Expiration Date |
Include the expiration date, if the badge expires. |
Use the Business Expenses page (BUSINESS_EXPENSES) to track a worker's business expenses, such as travel, meals, entertainment, and relocation costs.
Navigation
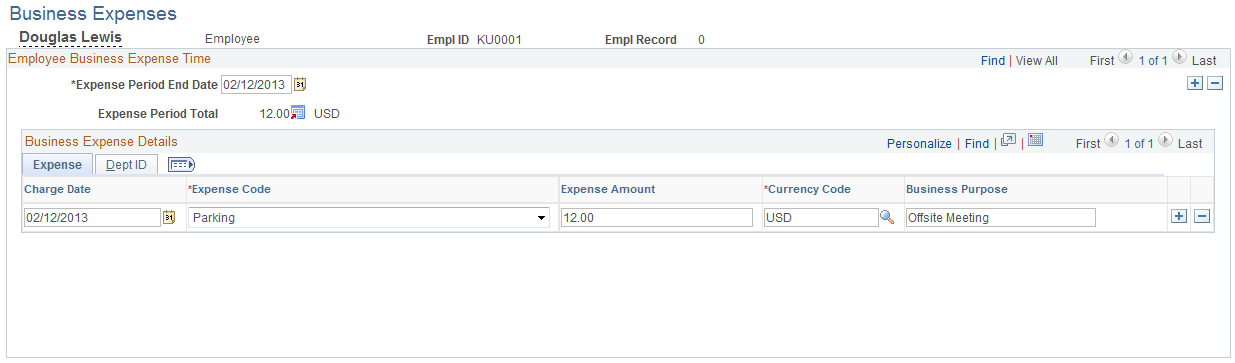
Image: Business Expenses page
This example illustrates the fields and controls on the Business Expenses page. You can find definitions for the fields and controls later on this page.
Before you can track a worker's business expenses, you must set up:
Valid expense codes on the Translate table.
User IDs on the Primary Permission List Preferences table.
Currency codes on the Currency Code table.
Departments on the Department table.
|
Field or Control |
Definition |
|---|---|
| Expense Period End Date |
Enter the expense period end date for the period to which these expenses apply. |
| Charge Date |
Enter the date of the actual expense charge. |
| Expense Code |
Select an expense code, such as Airfare, for the charge. |
Expense Tab
|
Field or Control |
Definition |
|---|---|
| Expense Amount |
Enter the amount of the expense. |
| Currency Code |
The currency that is specified for your user ID on the Primary Permissions List Preferences table appears by default. If there is no To Currency for your user ID, then the system uses the base currency that you specified for your implementation on the Installation table. Override the default currency if necessary by using the values in the Currency Code table. |
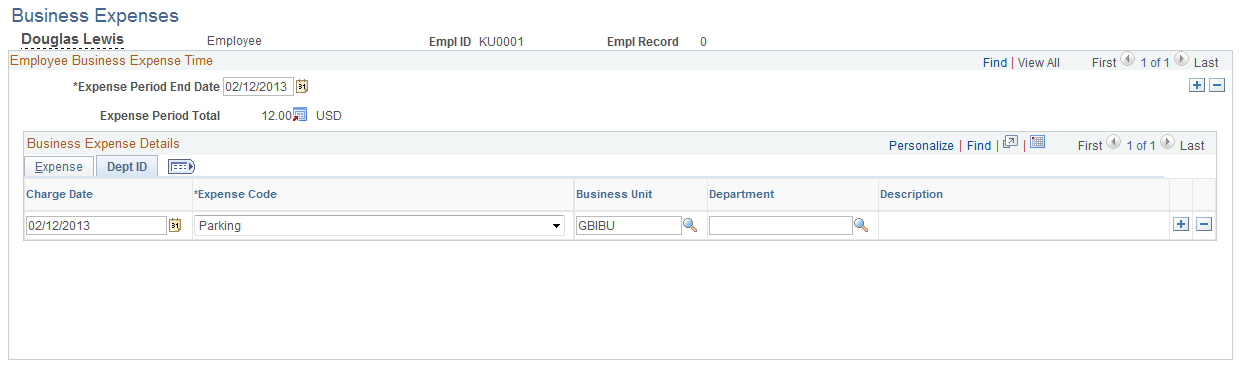
Dept ID Tab
Select the Dept ID tab.
Image: Business Expenses page: Dept ID tab
This example illustrates the fields and controls on the Business Expenses page: Dept ID tab. You can find definitions for the fields and controls later on this page.
|
Field or Control |
Definition |
|---|---|
| Business Unit |
Enter the business unit to which the expense should be charged. |
| Department |
Select the specific department to which the expense should be charged. |
Warning! The information that you enter here isn't related to PeopleSoft Payroll for North America processing of business expenses.
Use the Prior Work Experience page (PRIOR_WORK_EXPER) to track prior work experience.
Enter the details of a worker's previous employers and jobs.
Navigation
Workforce Development, Career Planning, Manage Person Profiles, Prior Work Experience
Image: Prior Work Experience page
This example illustrates the fields and controls on the Prior Work Experience page. You can find definitions for the fields and controls later on this page.
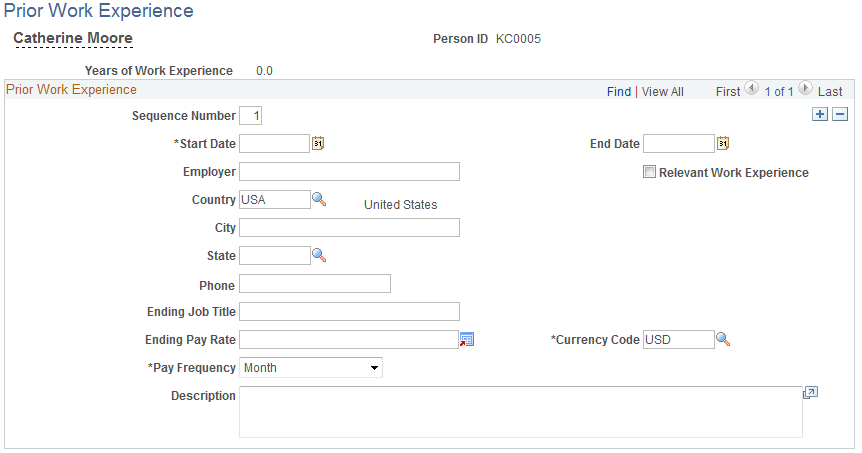
If you've tracked an applicant through the Recruiting business process in PeopleSoft Human Resources, the information that you entered for an applicant becomes part of the employee record when you hire the person. For other workers, entering prior work experience information helps you establish a complete profile for reporting purposes. It's also useful for career and succession planning.
|
Field or Control |
Definition |
|---|---|
| Years of Work Experience |
The system calculates this value if you select the Relevant Work Experience check box. If so, you must enter a start date and end date. |
| Sequence Number |
Enter a sequence number for each prior work experience record. |
| Start Date and End Date |
Enter the beginning and end of the worker's tenure with the employer. |
| Relevant Work Experience |
Select if the experience was relevant to the worker's responsibilities with your organization. |
| Employer |
Enter the name of the worker's previous employer. |
| Ending Job Title |
Enter the title in which the worker ended employment. |
| Ending Pay Rate |
Enter the pay rate at which the worker ended employment. |
| Pay Frequency |
The pay Frequency field contains a default value of Month, which you can change if the pay amount reflects a different frequency. |
Use the Employee Photo page (EMPLOYEE_PHOTO) to enter a worker image into the system by copying and pasting images into image fields.
Navigation
Click Add Photo Button to access the File Attachment page where you can browse to and upload an image (such as an employee photograph) to the Employee Photo page.
To delete an uploaded image, click Delete Photo Button or upload another image to overwrite the existing one.
Only one image per employee is allowed.
Note: Full imaging capabilities may not be supported on all database platforms.
Administrators also have the capability to resize or mass upload employee photos from a source file. For more information on this, see the Resize Employee Photos Page documentation.
For more information, see product documentation for PeopleTools: Application Designer Developer's Guide