5DISA Supported Features
DISA Supported Features
This chapter provides information about DISA features. It includes the following topics:
Inline Attachment Editing
Inline Attachment Editing allows users to edit an attachment without having to download and re-upload. It includes the following topics:
Working Process of Inline Attachment Editing
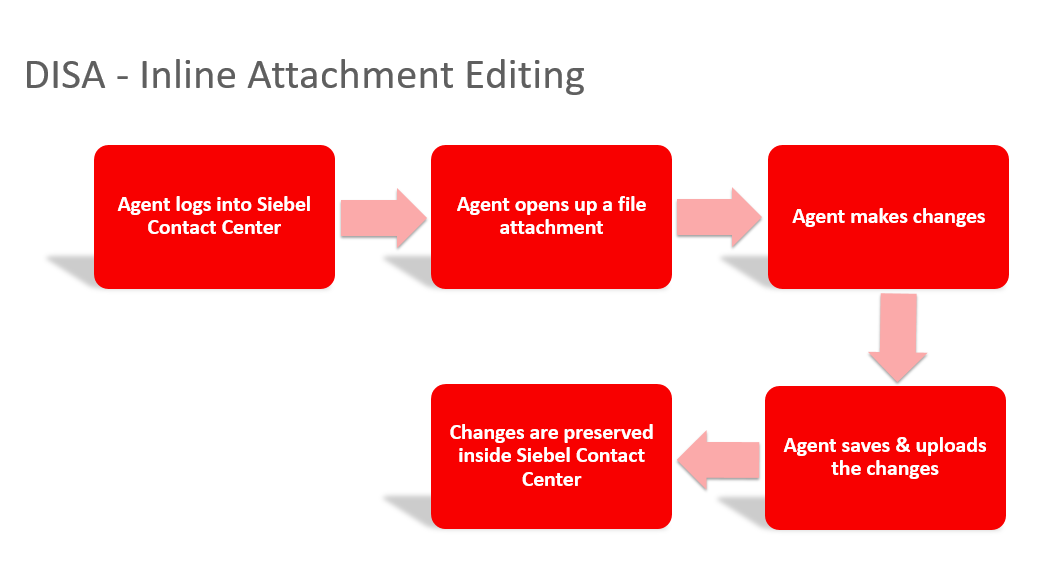
The following diagram shows the Inline Attachment Editing process that includes the following steps:
The agent logs into the Siebel Contact Center.
The agent opens up a file attachment.
The agent makes changes to the file.
The agent saves the changes and uploads the changes.
The changes made to the file are preserved in the Siebel Contact Center.
Applicable Releases
The base Inline Attachment Editing feature is applicable to the following releases:
Latest release of Desktop Integration Siebel Agent
Siebel Innovation Pack 2014, Patchset 14 or later (version.14.14 or later)
Siebel Innovation Pack 2015, Patchset 8 or later (version.15.8 or later)
Siebel Innovation Pack 2016 and above
The Auto detection of DISA feature is applicable to the following releases:
Latest release of Desktop Integration Siebel Agent
Siebel Innovation Pack 2015, Patchset 13 or later (version.15.13 or later)
Siebel Innovation Pack 2016, Patchset 3 or later (version.16.3 or later)
Siebel Innovation Pack 2017 and above
The Support multiple files read-only access feature is applicable to the following releases:
Latest release of Desktop Integration Siebel Agent
Siebel Innovation Pack 2016, Patchset 10 or later (version.16.10 or later)
Siebel Innovation Pack 2017 and above
Inline Attachment Editing Features
Desktop Integration Siebel Agent (DISA) supports the Inline Attachment Editing feature. The Inline Attachment Editing feature allows editing the attachment online. The following are the features of Inline Attachment Editing:
Auto Detection of DISA
The Inline Attachment Editing feature is functional based on two conditions:
Configuration settings (Prerequisite): The FileDownloadSave user property configuration.
DISA Availability: DISA installed and running. The application auto detects DISA availability.
When users click on a file attachment, based on the configuration settings, the Inline Attachment Editing feature functions in conjunction with DISA as follows:
When the FileDownloadSave user property is configured and DISA is available and running, the application enables the Inline Attachment Editing feature. When users click on a file attachment for download, the Edit button in the pop-up message box is enabled. Users can click the Edit button to open up the file attachment, make the changes to the document and upload the changes back to Siebel application.
When the FileDownloadSave user property is configured and DISA is not available (DISA is either not installed or not running), the application informs the users that DISA cannot be connected. When DISA is unavailable, the Edit button remains disabled. Users can only download a file to their local machine and make the changes offline. They need to re-upload the changed file back to Siebel application.
Support multiple files read-only access
Users can now view multiple files at once. Users can pre-select multiple files and click the View Files button to open up the selected files at the same time. By default, some files will be in read-only mode, such as .doc and .docx, while some other files will be in edit mode. However, users cannot save the changes online; the changes must be saved offline.
Previously, users could only open and view one file at a time. To view another file, they had to close the current file.
Editing an Inline Attachment
To edit an inline attachment, you must set configurations to enable the feature.
Configuring the User Property
You must configure the FileDownloadSave user property to be able to use the Inline Attachment Edit feature.
To configure FileDownloadSave user property
Log in to Siebel Webtools.
Navigate to the Object Explorer and click Application.
In the Applications list, query the application name that you are modifying. For example, Siebel Universal Agent.
In the Object Explorer, expand the Application tree, and then click Application User Prop.
In the Application User Props list, query the FileDownloadSave property that you are modifying.
If the property does not exist, add it.
-
Set the FileDownloadSave property to one of the following values:
All. Enables the Edit button for all the file download requests.
Semicolon separated file extensions. Enables the Edit button only for the files with the file extensions specified in the property. For example, .html; .doc; .gif.
Blank. The Edit button is always disabled.
Install and deploy DISA on Siebel desktops.
Editing an Inline Attachment
After you configure the user property, the application allows you to edit an attachment online when DISA is available.
To edit an inline attachment
Open the Siebel Call Center application and log in.
Drill down to the attached document and click on the document name. A file download dialog box appears.
You can edit the document online or offline based on whether DISA is available or not. The application auto-detects DISA availability.
If DISA is available, the Edit button is enabled. Click Edit to open the document. Make the required changes, save and close the document.
To upload the document after changes, click the Edit button without opening a document. The File Editing dialog box opens. Click Finish.
Tip: Note the timestamp and file size before and after the upload to know if the file is updated.If you do not save the edited file and leave it open and click Finish, the system displays an error message, "System has detected an open attachment. Please save and close it." Save and close the file. Click OK, Finish.
Note: From DISA 2.16.8 release onwards, the option IAEFileAction is available in the DISA configuration file config.properties. When it is configured as open, the attachment will be opened by the default program associated with the file type. If the value is configured as edit, the attachment will be opened by the default program associated to edit the file type. For most file types, they are the same program. This configuration is mainly for images like TIFF, PNG, JPEG formats. When it is open, images will be opened by a photo viewer (like Windows Photo Viewer); when it is edit, images will be opened by Paint.If DISA is not available, the Edit button is disabled. Click Download to save a copy of the document in your local drive. Edit the document and upload the edited version.
Viewing files
To view a file or multiple files at once
Select a file or multiple files in the Attachments applets, such as Contact Attachment applet.
Tip: To select multiple files, when using the mouse to select file record, hold Ctrl or Shift key in the keyboard.Click the View Files button to open one file or multiple files one after another.
Note: From DISA 2.17.4 release onward, by default the files will open in read-only mode. This can be changed by modifying IAEViewFileAsReadonly option in DISA configuration file config.properties. By default, IAEViewFileAsReadonly=true. By changing IAEViewFileAsReadonly to false, files will open in normal mode.
F9/Microsoft Outlook Integration
When using Siebel CRM applications to manage customer interactions through emails, application users may choose using third-party email clients to send outbound emails. With the DISA framework, Siebel CRM application users can start to benefit from the full integration between Siebel Email Response (F9) and Microsoft Outlook Client. The solution is supported with Siebel on Open UI. It includes the following topics:
Working Process of F9/Microsoft Outlook Integration
The following diagram shows the F9/Microsoft Outlook Integration process that includes the following steps:
The agent logs in to the Siebel Contact Center.
The agent works on a Service Request.
The agent launches Microsoft Client Outlook client using F9.
The agent sends out emails using Microsoft Client Outlook client.
Email transactions are captured inside Siebel Activites.
Emails are saved as Siebel Activity attachments.
Applicable Releases
The OpenUI F9/Microsoft Outlook Integration feature is applicable to the following releases:
Latest release of Desktop Integration Siebel Agent
Siebel Innovation Pack 2014, Patchset 16 or later (version.14.16 or later)
Siebel Innovation Pack 2015, Patchset 10 or later (version.15.10 or later)
Siebel Innovation Pack 2016
Siebel Innovation Pack 2017
The following table describes the patch-wise feature support:
| Siebel Release | External Email Client | Microsoft Outlook |
|---|---|---|
IP14, IP14 PatchSet 1 to 15 P15, IP15 PatchSet 1 to 9 |
F9 in Open UI: Supported Supports native email clients with limitations (no attachments from Siebel, no HTML template, limited body length). Native email clients refer to Microsoft Outlook, Mozilla Thunderbird, or Lotus Notes. Required step: Configure Email Response to capture emails sent with external email clients. |
Not applicable |
IP14 PatchSet 16 or later IP15 PatchSet 10 or later IP16 IP17 |
F9 in Open UI: Supported Supports native email clients with limitations (no attachments from Siebel, no HTML template, limited body length). Native email clients refer to Microsoft Outlook, Mozilla Thunderbird, or Lotus Notes. Required steps:
|
F9 in Open UI: Supported Supports full integration between MS Outlook Client and Siebel. Required Steps:
|
Configuring CTI Hoteling Telesets
You can configure the telesets in your call center for hoteling, which allows an agent to log in to the Siebel application from any one of a pool of telesets and computers that have been configured for this purpose and allows the agent to use voice communications features.
For more information, refer to Configuring Telesets for Hoteling.
It includes the following topics:
Configuring the CTI Hoteling telesets
The following diagram shows how to configure the CTI Hoteling telesets feature that includes the following steps:
The administrator configures teleset for hoteling.
The agent logs in to Siebel Contact Center.
The agent is associated to the teleset.
The agent logs in to CTI Toolbar.
The agent answers inbound calls with the teleset.
Applicable Releases
Latest release of Desktop Integration Siebel Agent
Siebel Innovation Pack 2014, Patchset 14 or later (version.14.14 or later)
Siebel Innovation Pack 2015, Patchset 8 or later (version.15.8 or later)
Siebel Innovation Pack 2016
Siebel Innovation Pack 2017
Web Notifications for Siebel CTI
When Siebel CTI or Chat agents are using Siebel Contact Center to manage their customer communications, sometimes they may need to temporarily look up other applications or browsers for other work. In such cases the Siebel browser may get either minimized or hidden behind other application or browser windows. If there is an incoming call or chat, a visual notification is required at desktop so the agents do not miss customer calls or chats.
Siebel’s solution integrates Web Notifications API with Siebel CTI and Chats. When the Siebel application browser is minimized or hidden behind other application windows, an alert window will display to notify agents about incoming calls or chats. On clicking inside the notification window, the Siebel browser comes to the front.
Siebel CTI Web Notifications feature is based on the standard Web Notifications API (http://www.w3.org/TR/notifications/). The World Wide Web Consortium (W3C) recommends the Web Notifications API. It is designed for end-user notifications and can alert user outside the context of a web page of an occurrence.
The Siebel CTI Web Notifications feature supports the following visual notifications to agents for incoming calls or chats.
Displaying pop-up window
Flashing browser title bar
Bringing Siebel browser to the front when one more browser is running
It includes the following topics:
Working Process of the Web Notifications
The following is a typical flow of the Web Notifications feature:
The agent starts the Siebel application.
The first-time user must enable the browser notifications.
Note: Follow browser specific instruction to enable browser notifications.The agent logs in to the Siebel CTI toolbar and gets ready to take incoming calls or chats.
The agent either minimizes the Siebel browser and starts to do other work or directly switches to other applications.
A call or chat comes in. A pop-up window shows up to alert the agent about the incoming call or chat. The Siebel browser title bar starts flashing the title.
The agent clicks inside the notification pop-up window. The Siebel Cell Center window comes to the front when one another browser tab is open.
If there are multiple incoming calls or chats, multiple notification pop-up windows will appear. On clicking inside a notification pop-up window, all of the existing pop-up windows will close. Multiple chats at a time can be initiated from the Siebel application.
Configuring Web Notifications Display
You can configure when and how to display the web notifications from the User Preferences > Bring Siebel to Front selection. The following are the options:
On all Incoming Work Items: Use this to display the web notifications for both incoming calls and chats.
On Matching Events: Use this to display the web notifications pop-up window every time a matched event triggers an event handler.
Off: Use this to disable the display of web notifications.
Applicable Releases
The Web Notifications for Siebel CTI feature is applicable to the following releases:
Latest release of Desktop Integration Siebel Agent
Siebel Innovation Pack 2015, Patchset 13 or later (version.15.13 or later)
Siebel Innovation Pack 2016, Patchset 3 or later (version.16.3 or later)
Siebel Innovation Pack 2017
Viewing Web Notifications
Login in to the Siebel application, bring up the communications panel, and open the CTI session. When Siebel application browser is minimized or hidden behind other application windows, a notification alert window pops up when a new call comes in and the Siebel application comes up to the front.
The web visual notifications display in the following scenarios:
Scenario 1: Working on one browser one chat:
When working on one browser, in this case the Siebel application, a notification appears.
You can either close the notification and continue with the work or click on the notification pop-up window to go to the Siebel application. The chat icon flashes. You can accept the chat and start chatting with the support agent.
Scenario 2: Working on two browsers one chat:
While working on another browser tab and Siebel application browser is minimized, when a notification arrives, it appears on the active browser.
On clicking on the notification, the Siebel application comes to the front. The chat icon flashes and the title bar switches between Incoming Interaction and Service Request Activities.
You can either close the notification and continue with your work or click on the notification pop-up window to go to the Siebel application where you can accept the chat and start chatting with the support agent.
Scenario 3: Working on multiple chat requests in the same browser:
With multiple incoming call, multiple notifications display together.
Agents can do the following:
Close all the notification windows and continue with their work.
Go to the Siebel application by clicking on one notification. On clicking one notification, all the other notifications also close and the Siebel application opens.
If multiple chat requests flash, click for each request and begin the chats simultaneously.
Browser Add-ons
DISA supports the following browser add-ons:
Internet Explorer
DISA supports Web Notifications in Microsoft Internet Explorer (IE) for customers to use the IE Web Notifications feature built on DISA, without a need to install the Internet Explorer Web Notifications third-party add-on. Customers who want to use the Web Notifications feature for IE browser have two options:
Use third-party IE add-on to support Web Notifications. For example, http://ie-web-notifications.github.io/
Use Desktop Integration Siebel Agent (DISA) to support Web Notifications. DISA 2.0.13+ is required to support this feature.
Starting with DISA 2.0.13, two new settings can be added into config.properties to support flexible configuration for IE users:
maxNotificationCount=3 -> the maximum notification count for displaying the pop-up's at the same time
notificationLife = 0 -> the life of notification in seconds. 0 is the default value, meaning the life of notification is indefinite, which requires user interaction to close out a pop-up. When the value is a positive integer, such as 30, means the life of notification is 30 seconds. The notification will close by itself after 30 seconds.
Both settings are applicable to IE browser only.
Google Chrome and Mozilla Firefox
Google Chrome and Mozilla Firefox browsers support Web Notifications API natively. If you are using these browsers, you need only to upgrade to the releases that support the feature. There are no extra steps to implement the feature.
Batch Fulfillment Printing
Batch printing simplifies the task of printing multiple correspondence items. The user first selects one or more correspondence items, and then selects the Print option from the menu button. The documents are then printed on the appropriate printer.
Siebel applications support two types of batch printing. These are:
Client-based: This is the default configuration. The print menu item appearing in the Correspondence and Fulfillment screens performs the client-based batch printing.
Server-based: This printing option can be configured either in addition to, or instead of, client-based batch printing. The administrator can use Siebel Tools to reconfigure these menus to use server-based batch printing.
Applicable Releases
Desktop Integration Siebel Agent 2.0.9 or later
Siebel Innovation Pack 2016
Siebel Innovation Pack 2017