7Configuring Data Quality with Oracle Data Quality Servers
Configuring Data Quality with Oracle Data Quality Servers
This chapter describes the data quality configuration that you can perform for Oracle Data Quality Matching Server and Oracle Data Quality Validation Server. It covers the following topics:
Process of Installing the Oracle Data Quality Matching Server
Universal Connector Parameter and Field Mapping Values for Oracle Data Quality Matching Server
Process of Configuring Data Synchronization Between Siebel and Oracle Data Quality Matching Server
Sample Configuration Files for Oracle Data Quality Matching Server
Process of Installing the Oracle Data Quality Address Validation Server
Configuring Siebel Business Applications for the Oracle Data Quality Address Validation Server
Sample Configuration File for Oracle Data Quality Address Validation Server
Process of Installing the Oracle Data Quality Matching Server
The Oracle Data Quality Matching Server provides real-time and batch data matching functionality using licensed third-party Informatica Identity Resolution 953 (IIR) software. The Oracle Data Quality Matching Server connector uses the Universal Connector in a mode where match candidate acquisition takes place within the Oracle Data Quality Matching Server. Since the match keys are generated and stored within the Oracle Data Quality Matching Server, key generation and key refresh operations are eliminated within Siebel CRM.
To install the Oracle Data Quality Matching Server for data matching, perform the following tasks:
Creating Database Users and Tables for Oracle Data Quality Matching Server
Modifying Configuration Parameters for Oracle Data Quality Matching Server
Deploying Workflows for Oracle Data Quality Matching Server Integration
Initial Loading of Siebel Data into Oracle Data Quality Matching Server Tables
Setting Up the Environment and the Database
This topic describes the prerequisites that are needed before starting to install Oracle Data Quality Matching Server for data matching, and also how to set up an Oracle database for Oracle Data Quality Matching Server. This task is a step in Process of Installing the Oracle Data Quality Matching Server.
Java Runtime Environment
The installation and operation of the Oracle Data Quality Matching Server is controlled by a Java application called the Console Client. The Console Client can be run on any operating system that supports Java 1.4 or later, and Java Help 1.1 is required. In order to run the Workbench, the Java Runtime Environment (JRE) is required.
JRE must be installed on the same computer as the Console Client. Before running the Console Client, ensure that the PATH and CLASSPATH environment variables have been set up for the correct Java and Javahelp installations.
For example, on a Win32 client:
SET CLASSPATH=%JAVAHELP_HOME%\jhall.jar
SET PATH=%PATH%;%JAVA_HOME%\bin
On UNIX:
SSAJDK="/usr/java/jdk1.5.0_14"
CLASSPATH="/export/home/qa1/jh2_0/javahelp/lib/jhall.jar"
On UNIX, you set the PATH and CLASSPATH environment variables in the ssaset script file.
Network Protocol
Clients and Servers require a TCP/IP network connection. This includes DNS, which must be installed, configured and available (and easily contactable). The following paths (or their equivalents) must be correctly set up: /etc/hosts, /etc/resolv.conf and /etc/nsswitch.conf. Reverse name lookups must yield correct and consistent results.
ODBC Driver
The Oracle Data Quality Matching Server uses Open Database Connectivity (ODBC) to access source and target databases. ODBC Drivers for specific databases must be installed and working. Installing and configuring ODBC drivers is operating system and database dependent. Unless a driver is provided by Oracle Data Quality Matching Server (as is the case for an Oracle database), you must follow the instructions provided by your database manufacturer in order to install them. On Windows operating system, navigate to Control Panel, Administrative Tools, and then Data Sources (ODBC) to create a DSN and associate it with a driver and database server.
At run time, the database layer attempts to load an appropriate ODBC driver for the type of database to be accessed. The name of the driver is determined by reading the odbc.ini file and locating a configuration block matching the database service specified in the connection string. For example, the database connection string odb:99:scott/tiger@ora920 refers to a service named ora920. A configuration block for [ora920] looks similar to the following:
[ora920]
ssadriver = ssaoci9
ssaunixdriver = ssaoci9
server = ora920.myexample.com
A configuration block has the following syntax:
[Service_Name]
DataSourceName = ODBC_DSN
ssadriver = ODBC_Driver
ssaunixdriver = ODBC_UNIX_Driver
server = Native_DB_Service_Name
Creating Database Users and Tables for Oracle Data Quality Matching Server shows the databases supported by Oracle Data Quality Matching Server, describes the ODBC drivers required for different operating systems, and shows example odbc.ini configurations.
Installing Oracle Data Quality Matching Server
This task is a step in Process of Installing the Oracle Data Quality Matching Server. The following tasks describe the steps involved in installing Oracle Data Quality Matching Server on Microsoft Windows and on UNIX respectively.
Installing Oracle Data Quality Matching Server on Microsoft Windows
Use the following procedure to install Oracle Data Quality Matching Server on Microsoft Windows.
To install Oracle Data Quality Matching Server on Microsoft Windows
Run setup from the root directory of the installed product media pack (which you downloaded from Oracle Software Delivery Cloud), and follow the on-screen prompts to install the following options:
Install License Server
Install Informatica Product
Note: You must install these options in the order that they are displayed.Select Install License Server, click Next to continue, then do the following:
Browse to the installation directory where you want to install the License Server, then click Next.
Enter the host name and port number for the License Server.
Verify the installation summary details on the next screen that displays, then click Install.
When installation is complete, you are prompted to start the License Server. Click No to close the prompt, then Finish to return to the main installer window.
Copy the OEM license key file downloaded from Oracle Software Delivery Cloud to the following location:
<Drive:>\InformaticaIR\licenses
Set the environment variable SSALI_MZXPQRS to STANISLAUS (system variable).
Start the License Server by selecting, for example, the following:
Programs, Informatica, Identity Resolution V2.8.07 (InformaticaIR), Informatica License Server, and then Start.
Select the Install Informatica Product from the main installer window, click Next to continue, then do the following:
When prompted to specify the path to the OEM license, browse to the
[installation_media_directory]\data\file1003.datfile, and then click Next to continue.Enter the host name and port number for the License Server (or accept the default), then click Next.
Browse to the installation directory where you want to install Informatica Identity Resolution, then click Next.
The next screen displays a list of components, click Select All, and then Next.
The next screen displays an installation summary of products and modules that you want to install. Review the details and click Next to confirm that they match your requirements.
Make sure to add XML Synchronization server at port 1671. This server is not set by default. Click Next when done.
Select default port values for all servers.
On the next screen, enter database information, as follows:
Service Name: Enter the database service name on Informatica Identity Resolution. This is used when configuring SIEBEL instances.
ODBC Data Source Name: Enter the ODBC Connect String name if using ODBC (the ODBC Data Source name is required only when connecting through ODBC).
ODBC Driver: Select the applicable database driver from the drop-down list (the ODBC driver name must be provided even when ODBC is not being used).
Native Service: Enter the name for the database connection as defined in
dB Client\ Serverutilities (for example: for Oracle an databases, this is the TNS entry name).Example settings when using an Oracle database are:
         Service Name: target
ODBC Data Source Name:
          ODBC Driver: Oracle 9 (or later) client software
  Native Service Name: <tns_entry>
Note: All configuration information entered in this step is written to the odbc.ini file. Creating Database Users and Tables for Oracle Data Quality Matching Server shows some example odbc.ini configurations.Click Next to start the installation.
Click Finish to complete.
Post installation, do the following:
Install the hot fix on top of the Base Installer for Informatica Identity Resolution 2.8.07. Make sure that you apply the latest Informatica Identity Resolution fix, which is available on Oracle Software Delivery Cloud.
C:\InformaticaIR\bin>version
SSA-NAME3 v2.8.07 (FixL106)
SSA-NAME3 Extensions v2.8.07 (FixL106)
Data Clustering Engine v2.8.07 (FixL106)
Informatica Identity Resolution v2.8.07 (FixL106 + FixL113 + FixL114 + FixL120
+ FixL123 + FixL124 + FixL125 + FixL126 + FixL127 + FixL134 + FixL136 + FixL140
+ FixL141 + FixL145 + FixL147 + FixL148)
Rename xsserv.xml.org located in
<drive>\InformaticaIR\bin to xsserv.xml. This file has a sample format. Change it to match the following:<server xmlns="_http://www.identitysystems.com/xmlschema/iss-version-1/ xmlserv"> <mode>generic</mode> <rulebase>odb:0:db_username/db_password@ISS_connectstring</rulebase> </server>
Note: If you do not make these changes to xsserv.xml, then errors might occur using legacy SIEBEL-ISS Sync workflows.
Installing Oracle Data Quality Matching Server on UNIX
Use the following procedure to install Oracle Data Quality Matching Server on UNIX.
To install Oracle Data Quality Matching Server on UNIX
The following prerequisites must be met:
Obtain an installable ISO from Informatica or Oracle Software Delivery Cloud.
Make sure to mount the ISO to a suitable location which is accessible to the user who is installing Informatica products.
Ensure that the required ODBC entries (if applicable) are created.
Ensure to add TNS entries pointing to the Informatica Identity Resolution Database (target database) for system configurations.
The Informatica Installer requires a UNIX GUI for installation and product administration. If necessary, contact your system administrator to make sure that the corresponding applications and X-Server have been enabled for easy access.
After ensuring the installer location and GUI access, start the installer from the mounted location using the following command:
./installThe Informatica Installer window opens with three options. You must install the three options in the order that they are displayed.
Select the Install License Server from the installer, click Next to continue, then do the following:
Select the path where you want to install the license server, then click Next.
Enter the port number for the License Server on the next screen that displays. You can accept the default (if available), or choose to change the port. Click Next when done.
Verify the installation summary details on the next screen that displays, then click Install.
When installation is complete, you are prompted to start the License Server. Click No, and then Finish to return to the main installer window. You must start the License Server only when the license file is available.
Copy the OEM license key file downloaded from Oracle Software Delivery Cloud to the following location:
<Drive:>/InformaticaIR/licenses
Export the environment variable SSALI_MZXPQRS to STANISLAUS (system variable) before proceeding to the next step.
Start the License Server:
Start an xterm / ssh session.
Change to bash (Bourne Shell)
Copy the license file to
<installation_folder>/licenses
Set common environment variables by sourcing idsset script located at
<IIR_Installation_Folder>/env. For example:. ./idsset
Set the environment variables required to start the License Server by sourcing script lienvs located at
<IIR_Installation_Folder>/env. For example:. ./lienvs
Start the License Server using the following command:
$SSABIN/liup.
Select Install Informatica Product from the main installer window, click Next to continue, then do the following:
When prompted to specify the path to the OEM license, browse to the
[installation_media_directory]/data/file1003.datfile, and then click Next to continue.Enter the License Server port number or accept the default, then click Next.
The next screen displays a list of components. Licensed components have an editable check-box. Select the check box beside the required components and populations, and then click Next.
The next screen displays a summary of selected options. Verify the details, then click Next.
On the next screen, select or set servers and their ports, then click Next. If a port is already in use, you must change it.
On the next screen, enter database information:
Service Name: Enter the database service name on Informatica Identity Resolution (this is used when configuring SIEBEL instances).
ODBC Data Source Name: Enter the ODBC Connect String name if using ODBC (the ODBC Data Source name is required only when connecting through ODBC).
ODBC Driver: Select the applicable database driver from the drop-down list (the ODBC driver name must be provided even when ODBC is not being used).
Native Service: Enter the name for the database connection as defined in
dB Client/Serverutilities (for example: for Oracle an databases, this is the TNS entry name).Example settings when using an Oracle database are:
         Service Name: target
ODBC Data Source Name:
          ODBC Driver: Oracle 9 (or later) client software
  Native Service Name: <tns_entry>
Click Next to continue.
Note: All configuration information entered in this step is written to the odbc.ini file. Creating Database Users and Tables for Oracle Data Quality Matching Server shows some example odbc.ini configurations.
The next screen displays an installation summary of products and modules that you want to install. Verify the details and confirm that they match your requirements.
Click Install to start the installation.
Click Finish to complete.
Post installation, rename xsserv.xml.ori located in
<IIR_Installation_Folder>/binto xsserv.xml. Change the contents of this sample file as follows:Change <mode> to generic
Add rulebase details.
For example:
<server xmlns="_http://www.identitysystems.com/xmlschema/iss-version-1/xmlserv">
<mode>generic</mode>
<rulebase>odb:0:db_username/db_password@ISS_connectstring</rulebase> </server>
Note: If you do not make these changes to xsserv.xml, then errors might occur using legacy SIEBEL-ISS Sync workflows.
Creating Database Users and Tables for Oracle Data Quality Matching Server
Creating database users and tables involves executing a number of scripts on the Oracle Data Quality Matching Server database. The scripts that you must execute are located in the Oracle Data Quality Applications media pack on Oracle Software Delivery Cloud. Once the media pack is downloaded and installed, the scripts are located in the InformaticaIR/dbscript/ora folder. For example (idsuseru.sql):
C:/InformaticaIR/dbscript/ora/idsuseru.sql
You must open these scripts and modify them as required, depending on the database that you are using. For example, complete the steps in the following procedure to create database users and database tables for Oracle Data Quality Matching Server if using an Oracle database. Note the following:
The procedure is similar if using Microsoft SQL Server, UDB, or DB2 on OS/390. However, you must modify the SQL scripts according to the database that you are using.
The procedure is also similar whether creating database users and database tables for Oracle Data Quality Matching Server on Microsoft Windows or on UNIX.
When setting up the database for Oracle Data Quality Matching Server on UNIX, you must set TNSNAmes.ora with an entry to the target database (Oracle Data Quality Matching Server database), and perform connectivity testing using SQLPLUS if required.
For more information about testing the connectivity on UNIX, see the relevant documentation included in Siebel Business Applications Third-Party Bookshelf in the product media pack on Oracle Software Delivery Cloud. This task is a step in Process of Installing the Oracle Data Quality Matching Server.
To create database users and tables for Oracle Data Quality Matching Server if using an Oracle database
Log in to the database as database administrator, then execute the idsuseru.sql script to create a new database user with appropriate privileges to create and update Oracle Data Quality Matching Server tables.
Note: You must be logged in as database administrator to execute idsuseru.sql.Log in to the database as the new database user (created in Step 1 with appropriate privileges to create and update Oracle Data Quality Matching Server tables), then execute the following SQL scripts to create other Oracle Data Quality Matching Server database tables, such as IDT and IDX tables. You can execute the following SQL scripts in any order:
Note: IDT tables store the copy of source records in the Oracle Data Quality Matching Server database. IDX tables store the index keys for IDT tables. Each IDT table can have one or more IDX tables associated with it.Execute idstbora.sql to create control tables for the Oracle Data Quality Matching Server.
Execute updsyncu.sql to create database objects required by the Oracle Data Quality Matching Server to synchronize data in ID tables with updates to user source tables.
Run this script on all databases containing user source tables that require synchronization, and also before loading any ID tables that require synchronization.
Execute updsynci.sql to create database objects required by the Oracle Data Quality Matching Server to synchronize data in ID tables with updates to user source tables.
Run this script on the database which will contain IDTs, and also before loading any ID tables that require synchronization.
Execute updsyncg.sql to create database objects required by the Oracle Data Quality Matching Server to synchronize data in SSA-ID tables with updates to user source tables.
This script will create public synonyms for the Oracle Data Quality Matching Server objects created on user source table databases. This script must be run by someone (for example, the database administrator) who has the privilege to CREATE PUBLIC SYNONYM. Run this script after running updsyncu.sql. Use the same userid to run updsynci.sql as you did to run updsyncu.sql.
Note: You must be logged in as database administrator to execute updsyncg.sql.
The following table describes some example odbc.ini configurations.
Table Example odbc.ini Configuration Blocks
| Database | Description | Example odbc.ini Configurations |
|---|---|---|
Oracle Database 10g |
The Oracle database driver works out-of-the box and is named When using the ssaoci9 driver with Oracle Database 10g client software, the connectivity test might fail on some UNIX operating systems. This occurs because the driver has been linked with libclntsh.so.9.0, which is not distributed with Oracle Database 10g. Oracle normally provides backward compatibility by adding symbolic links to redirect requests for older versions of the library to the current version. Unfortunately, by default, this practice is restricted to minor versions only (for example, 9.0-9.2). To overcome the problem, locate the appropriate Oracle lib directory (lib, lib32, or lib64) and add a symbolic link. For example: cd $ORACLE_HOME/lib32 ln -s ./libclntsh.so libclntsh.so.9.0 |
[ora10g] ssadriver = ssaoci9 ssaunixdriver = ssaoci9 server = ora10g.mynet8tns.name |
Universal Database (UDB) |
UDB must be installed prior to the installation of Oracle Data Quality Matching Server. IBM provides ODBC drivers for both Windows and UNIX operating systems, named db2cli and db2 respectively. For more information about the db2cli and db2 drivers, see the appropriate UDB manuals for full details. |
[test-udb] DataSourceName = udb8 ssadriver = db2cli ssaunixdriver = db2 server = UDB_database_alias |
Microsoft SQL Server |
Microsoft provides a Windows ODBC driver named sqlsrv32. It is configured by adding a new Data Source Name (DSN) using Control Panel, Administrative Tools, Data Sources (ODBC). For more information about the sqlsrv32 driver, see the appropriate Microsoft manuals for specific details. The ODBC_Driver name is sqlsrv32 and the Native_DB_Service is the server name (-S parameter of the osql and bcp utilities). The SQL Server Native Client (sqlncli.dll) can be used as an alternative driver. |
[production] DataSourceName = msq2003 ssadriver = sqlsrv32 server = mySQLServer |
Sybase |
For more information about the sybdrvodb drivers, see the appropriate Sybase manuals for installation specifics. |
[production] DataSourceName = ase150 ssadriver = sybdrvodb ssaunixdriver = sybdrvodb server = mySybaseServer |
Testing Connectivity
Use the dblist utility to test your ODBC configuration by connecting to a database whose connection string is provided with the -d parameter. An example of the output associated with a successful connection follows:
$SSABIN/dblist -c -dodb:99:ssa09/SSA09@ora920
Maximum connections per module: 1024
Linked databases: odb: sdb:
Driver Manager: 'Identity Systems ODBC Driver Manager 1.2.2.3'
ODBC Driver: 'ssaoci9 SSADB8 2.7.0.00MSVC60 Jun 8 2006 17:26:56'
DBMS Name: 'Oracle DBMS (9.2.0.6.0)'
Native DB type: 'ora'
Configuring Oracle Data Quality Matching Server
The following tasks describe the steps involved in configuring Oracle Data Quality Matching Server for data matching on Microsoft Windows and on UNIX respectively.
This task is a step in Process of Installing the Oracle Data Quality Matching Server.
Configuring Oracle Data Quality Matching Server on Microsoft Windows
Use the following procedure to configure Oracle Data Quality Matching Server on Microsoft Windows.
To configure Oracle Data Quality Matching Server for data matching on Microsoft Windows
If required, modify the odbc.ini file located at
<drive>:\<IIR_Installation_Folder>\InformaticaIR\bin\to contain the ODBC connection string of your target database, for example, as follows:[Target] ssadriver=ssaoci9 server=qa19b_sdchs20n519
Creating Database Users and Tables for Oracle Data Quality Matching Server describes the ODBC drivers required for different operating systems.
Note: For an Oracle database, the server parameter specifies a connect string from the tnsnames.ora file (which is the network configuration file of the Oracle database client). For other databases, the server contains the ODBC datasource name (DSN).The database information that you enter when installing Oracle Data Quality Matching Server is reflected in the odbc.ini file. If all values are correct and you do not want to make any changes to the database information, then you can skip this step.
Copy the SiebelDQ.sdf file to the following (IIR server) folder location:
<Drive>:\<IIR_Installation_Folder>\InformaticaIR\ids
Note: For an example SDF file, see Sample SiebelDQ.sdf File.To use the XML Sync Server instead of the External Business Components for Informatica Identity Resolution, then activate or deactivate the following ports located in
<Drive>:\<IIR_Installation_Folder>\env\isss.bat.::set SSA_XSPORT=1671 ::set SSA_XSHOST=localhost:1671
Removing the double colon from the beginning of the line activates the process listening on the ports:
set SSA_XSHOST=localhost:1671
set SSA_XSPORT=1671
Note: For Informatica Identity Resolution Version 2.7, you turn on the XML Sync Server by modifying the idsenvs.bat file located in<Drive>:\<ISS Installation Folder>\iss2704s\bin.Create a tmp folder for the IIR Synchronizer Workflow Log in
<Drive>:\<IIR_Installation_Folder>\InformaticaIR\. For example:C:\InformaticIR\tmpNote: If you install Oracle Data Quality Matching Server on a different drive (other thanC:\), you must modify the ISSErrorHandler workflow in your Siebel application to specify the correct log folder. Other modifications that must be made if you install Oracle Data Quality Matching Server on a drive other thanC:\include modifying action sets and the location where you deploy the XML files.Start the IIR Server by navigating to, for example, the following:
Programs, Informatica, Identity Resolution V2.8.07 (InformaticaIR), Informatica Identity Resolution, Informatica IR Server - Start(Configure Mode)
Note: You can also start the Informatica Identity Resolution server from the command prompt using the idsup command.Start the IIR Console Client (in Admin Mode) by navigating to, for example, the following:
Programs, Informatica, Identity Resolution V2.8.07 (InformaticaIR), Informatica Identity Resolution, Informatica IR Console Client - Start(Admin Mode)
Create a new system in IIR using SiebelDQ.sdf.
The system that you create in IIR (Console Client, Admin Mode) will hold all the IDT and IDX database tables. For more information about creating a new system in IIR, see the relevant documentation included in Siebel Business Applications Third-Party Bookshelf in the product media pack on Oracle Software Delivery Cloud.
When the system is created (initially, it will be empty), run LoadIDT from the IIR Console Client. For more information, see Initial Loading of Siebel Data into Oracle Data Quality Matching Server Tables.
Configuring Oracle Data Quality Matching Server on UNIX
Use the following procedure to configure Oracle Data Quality Matching Server on UNIX.
To configure Oracle Data Quality Matching Server for data matching on UNIX
Copy the most recent version of the shared library libssaiok.so (libssaiok.sl on HP-UX) to the SSA-NAME3 bin directory.
If the version packaged with IIR is more recent than the one packaged with SSA-NAME3, copy the ssaiok shared library from the IIR server distribution to the SSA-NAME3 bin directory as follows:
cp $SSATOP/common/bin/libssaiok.* $SSAN3V2TOP/bin
No action is required if the version packaged with IIR is older than the one packaged with SSA-NAME3.
Set the shared library path according to your operating system.
The following table shows examples of shared library paths.
Operating System Shared Library Path Linux and Oracle Solaris
LD_LIBRARY_PATH="$SSABIN:$SSANM3BIN:<DBMS shared object
location>" export LD_LIBRARY_PATH
HP-UX
SHLIB_PATH="$SSABIN:$SSANM3BIN:<DBMS shared object location>"
export SHLIB_PATH
AIX
LIBPATH="$SSABIN:$SSANM3BIN:<DBMS shared object location>"
export LIBPATH
If required, modify the odbc.ini file to contain the ODBC connection string of your target database:
Copy the odbc.ini.ori file located in the
$SSATOP/binfolder, and rename it odbc.ini.Edit the odbc.ini to contain the ODBC connection string of your target database, for example, as follows:
[Target]
ssaunixdriver=ssaoci9
server=<TNS_entry_name_from_tnsnames.ora>
For an Oracle database, the server parameter specifies a connect string from the tnsnames.ora file (which is the network configuration file of the Oracle database client). For other databases, the server contains the ODBC datasource name (DSN). Most UNIX installations do not need the ODBC DSN, but if required, parameters change accordingly:
[Target]
DataSourceName=ODBC_DNS_Name_Pointing_to_ISS_DB
ssaunixdriver=<ssaoci9>
Creating Database Users and Tables for Oracle Data Quality Matching Server describes the ODBC drivers required for different operating systems.
The database information that you enter when installing Oracle Data Quality Matching Server is reflected in the odbc.ini file. If all values are correct and you do not want to make any changes to the database information, then you can skip this step.
Copy the System Definition File (SDF) to the UNIX server.
Make sure that the SDF file is compressed before using FTP to copy it to the UNIX server. You must use the -a switch to extract a file on a UNIX server, for example, as follows:
unzip - sysdeffile.zip
For more information about configuring ODBC on UNIX, see the relevant documentation included in Siebel Business Applications Third-Party Bookshelf in the product media pack on Oracle Software Delivery Cloud.
Modifying Configuration Parameters for Oracle Data Quality Matching Server
The ssadq_cfg.xml file contains the global configuration parameters for Oracle Data Quality Matching Server (IIR). To modify ssadq_cfg.xml, complete the steps in the following procedure. This task is a step in Process of Installing the Oracle Data Quality Matching Server. For an example ssadq_cfg.xml file, see Sample Configuration Files for Oracle Data Quality Matching Server.
To modify configuration parameters for the Oracle Data Quality Matching Server
Open up a text editor.
Modify the following parameters in ssadq_cfg.xml, as required:
Set
<iss_host>to point to the server where Oracle Data Quality Matching Server is running.Set
<iss_port>to 1666 (which is the default), unless you are using a different port for installation.Set the
<rulebase_name>parameter. For example, with Oracle Database 10g:username is ssa
password is SIEBEL
ServiceName is Target (as specified in the odbc.ini file for the Oracle Data Quality Matching Server server)
<rulebase_name> Example: odb:0:ssa/SIEBEL@Target
For more information about the format of the rulebase name, see the relevant documentation included in Siebel Business Applications Third-Party Bookshelf in the product media pack on Oracle Software Delivery Cloud.
Set <contact_system>, <account_system>, and <prospect_system> to the name of the system that you create in Oracle Data Quality Matching Server (IIR) using the SiebelDQ.sdf file.
The system that you create in IIR (Console Client, Admin Mode) will hold all the IDT and IDX database tables. For more information about creating a new system in IIR, see the relevant documentation included in Siebel Business Applications Third-Party Bookshelf in the product media pack on Oracle Software Delivery Cloud.
If you want to run Oracle Data Quality Matching Server against only a single entity (for example, Accounts) as opposed to multiple entities (Accounts, Contacts, and Prospects), then you must alter the definitions within the SiebelDQ.sdf file to include only the one entity that you want as otherwise the synchronizer fails to run. In this example, you must remove the definitions for Contacts and Prospects.
Any changes that you make to the SDF file must be appended to the user property for the business service DQ Sync Services. If you do not want to use a particular field (for example, Birth Date) as part of deduplication, then that field must be removed from the SDF file. In addition, you must do the following:
Remove the corresponding mapping from data quality third-party administration settings in your Siebel application.
Change the user property in the DQ Sync Services business process. For example:
For Account, change the Account_DeDupFlds user property.
For Contact, change the Contact_DeDupFlds user property.
Remove the DeDup field from the user property.
Remove the corresponding mapping in the user property for external length.
This is Account_ExtLen for Account, and Contact_ExtLen for Contact.
Since CUT Address is shared across Account and Contact, any change in the CUT Address is reflected in both Account and Contact de-duplication.
Save the ssadq_cfg.xml file and copy to the SDQConnector folder on Siebel Server for changes to take effect:
siebsrvr/SDQConnector
Deploying Workflows for Oracle Data Quality Matching Server Integration
In the Siebel application, make sure that the following workflows are deployed and activated if using workflows to synchronize with the Oracle Data Quality Matching Server. This task is a step in Process of Installing the Oracle Data Quality Matching Server.
ISS Build Load File
ISS Delete Record Sync
ISS ErrorHandler
ISS Launch Build Load File
ISS Launch Delete Record Sync
ISS Launch PreDelete Record Sync
ISS Launch PreWrite Record Sync
ISS Launch Write Record Sync
ISS PreDelete Record Sync
ISS PreWrite Record Sync
ISS WriteRecordNew
ISS WriteRecordUpdated
ISS Write Record Sync
ISS Launch Record Sync
ISS PreLaunch Record Sync
ISS Launch Record ASync
These workflows are used to synchronize data between the Siebel application and Oracle Data Quality Matching Server (IIR) tables. For more information about Siebel Workflow, see Siebel Business Process Designer Administration Guide.
Initial Loading of Siebel Data into Oracle Data Quality Matching Server Tables
To initially load your Siebel application data into Oracle Data Quality Matching Server (IIR) tables, complete the steps in the following procedure. This procedure uses SQL scripts and is for large implementations where, for example, the database is too large to use an XML file import or export to initially load Siebel application data into Oracle Data Quality Matching Server tables.
It is highly recommended that data is directly loaded from source tables into Oracle Data Quality Matching Server tables.
The sample system definition file (SiebelDQ.sdf) includes appropriate sections to load data directly from source tables into Oracle Data Quality Matching Server tables.
Note: For an example SDF file, see Sample SiebelDQ.sdf File.The system definition file includes information about the matching criteria for various entities.
As part of the initial analysis, it is essential that you review the sample system definition file (SiebelDQ.sdf) and make appropriate changes to it, before creating any new systems in IIR.
The sample system definition file (SiebelDQ.sdf) is not a preconfigured configuration file; it serves as a sample for you to start with.
Make sure that the entries in the system definition file are in sync with the data quality configuration settings that you set up in your Siebel application (in Administration - Data Quality screen, Third Party Administration view).
Make sure that the user properties that you set up in Siebel Tools for the business service are in sync with the entries in your system definition file.
set SSA_XML_SIZE to 8000000.
This task is a step in Process of Installing the Oracle Data Quality Matching Server.
To initially load Siebel application data into Oracle Data Quality Matching Server tables
Start the IIR Server by navigating to, for example, the following:
Programs, Informatica, Identity Resolution, v2.8.07 (InformaticaIR), Informatica Identity Resolution, Informatica IR Server - Start(Configure Mode)
Start the IIR Console Client (in Admin Mode) by navigating to:
Programs, Informatica, Identity Resolution, v2.8.07(InformaticaIR), Informatica Identity Resolution, Informatica IR Console Client - Start(Configure Mode)
If not already done so, create a new system in IIR using the appropriate System Definition file that you have reviewed and modified using the sample SiebelDQ.sdf file as a starting point. Or, if a system already exists, select it and refresh it by clicking the System/Refresh button.
The system that you create in IIR (Console Client, Admin Mode) will hold all the IDT and IDX database tables. For more information about creating a new system in IIR, see the relevant documentation included in Siebel Business Applications Third-Party Bookshelf in the product media pack on Oracle Software Delivery Cloud.
Note: If you want to run IIR against only a single entity (for example, Accounts) as opposed to multiple entities (Accounts, Contacts, and Prospects), then you must alter the definitions within the SiebelDQ.sdf file to include only the one entity that you want as otherwise the synchronizer fails to run. In this example, you must remove the definitions for Contacts and Prospects.Run the IDS_IDT_<ENTITY TO BE LOADED>_STG.sql script to take a snapshot of records in the Siebel application. For example, for account initial load, execute the following script from the SQL prompt as user SSA_SRC:
IDS_IDT_ACCOUNT_STG.sql
Depending on project requirements, IIR configuration, and data quality configuration, you must modify sample scripts provided with the software accordingly.
Note: It is not mandatory to always load the data incrementally. If the initial volume of data to load is not high, then you can load the data directly from source tables to IIR tables in one go.Run the IDS_IDT_CURRENT_BATCH_<ENTITY TO BE LOADED>.sql script to create the dynamic view to load the snapshot created in Step 4. For example, for account initial load, execute the following script from the SQL prompt as user SSA_SRC:
IDS_IDT_CURRENT_BATCH_ACCOUNTS.sql
To be in sync with the snapshot created in Step 4 and the SDF file used for system creation in Step 3, you must modify the sample scripts provided with the software according to project requirements, IIR configuration, and data quality configuration. Also, use a batch size that is appropriate to your project needs, initial data load volume, and any other project specific needs.
Run the following SQL script to create the database table to store the current batch number being loaded:
IDS_IDT_CURRENT_BATCH.sql
Load IIR with data from the Siebel application by clicking the System/Load IDT button.
Make sure to select the All_load option from the Loader Definition menu in the dialog that displays. This process loads records with batch number 1 from the snapshot created earlier. Validate the data to make sure that all the records with batch number 1 are correctly loaded.
Open a command window and navigate to the directory where the initial load scripts were copied during product installation.
Execute the initial load process by entering the following command at the command line:
IDS_IDT_LOAD_ANY_ENTITY.CMD <Entity> <System> <Work Directory>
For example, for account initial load, execute the following script:
IDS_IDT_LOAD_ANY_ENTITY.CMD Account c:/initialLoad/logs
This loads data in batches from the snapshot created in Step 4. The log files and error files recording the outcome of each batch load are stored in the
C:/InitialLoad/logsdirectory.Examine the log files and error files to identify any batch that failed to load. Use the information in the log and error files to determine the root cause for any failure and fix the underlying issue.
Incrementally load the failed batches individually using the following script from the command line:
IDS_IDT_LOADBATCH_ANY_ENTITY.CMD
For example, to load batch 33 of account, execute the following script from the command line:
IDS_IDT_LOADBATCH_ANY_ENTITY.CMD Account SiebelDQ c:/initialLoad/logs 33
Examine the log files and error files to ensure that the (failed) batches successfully loaded. In case of errors, use the information in the log and error files to determine the root cause for the failure and fix the underlying issue. Repeat Step 11 until all the batches have successfully loaded.
Repeat this process to load other entities such as contacts and prospects.
Upgrading to Informatica Identity Resolution 9.01
A new Cluster Id system field called CL ID is introduced by Informatica Identity Resolution 9.01. Consisting of 2 bytes, the CL ID field is added automatically to the end of each IDT table. To accommodate this change, you must configure a new CL ID field in DQ Sync Services so that Siebel can format the correct record length to insert into the Oracle Data Quality Matching Server NSA table.
Use the following procedure to upgrade your existing Oracle Data Quality Matching Server setup to Informatica Identity Resolution 9.01. This task is a step in Configuring Oracle Data Quality Matching Server.
To upgrade to Informatica Identity Resolution 9.01
Add new CL ID fields to the DQ Sync Services business service user properties.
Note: Add the new CL ID field to the last field in your IDT table. For example, the last field in the Account IDT table is Account Business Address, so add the new CL ID field to the Account_Business_Address component (not to the parent Account object).Add the following for Account:
User Property Value Account Record Length
1092
Account_Business Address_DataType
W|W|W|W|W|C|C
Account_Business Address_DeDupFlds
City|Country|Postal Code|State|Street Address|Address Id|CL ID
Account_Business Address_ExtLen
200|120|120|40|200|60|2
Add the following for Contact:
User Property Value Contact Record Length
1852
Contact_INS Personal Address_DataType
W|W|W|W|W|C|C
Contact_INS Personal Address_DeDupFld
INS Personal City|INS Personal Country|INS Personal Postal Code|INS Personal State|INS Personal Street Address|INS Personal Address Id|CL ID
Contact_INS Personal Address_ExtLen
120|40|40|40|200|60|2
Add the following for Prospect:
User Property Value Prospect Record Length
1772
Prospect_DataType
W|W|W|W|W|W|W|W|W|W|W|W|W|C|C
Prospect_DeDupFlds
Account|Cellular Phone #|City|Country|Email Address|First Name Last Name|Home Phone #|Middle Name|Postal Code|Social Security Number|State|Street Address|Work Phone #|Id|CL ID
Prospect_ExtLen
200|120|120|60|120|200|120|200|40|120|40|200|200|30|2
Apply the Informatica Address Doctor Version 5 license in the ssaasmv5.xml file as follows:
Open the ssaasmv5.xml file which is located in the
InformaticaIR/ssaas/ad5folder.Configure the Informatica Address Doctor Version 5 license as follows:
Go to the
<ASM_ADv5_Config>tag.Set the unlock_code value as follows:
<ASM_ADv5_Config>
    <MAX_THREAD>1</MAX_THREAD>
    <MAX_ADOBJECTS>1</MAX_ADOBJECTS>
    <AD5_UNLOCK_CODE>
        <UNLOCK_CODE>unlock_code</UNLOCK_CODE>
     </AD5_UNLOCK_CODE>
</ASM_ADv5_Config>
Note: If Informatica Identity Resolution 9.01 is being used on UNIX, the ssaasmv5.xml file has the following blank tag under <ASM_ADv5_CONFIG>, which must either be set with a proper value or completely removed from the ssaasmv5.xml file: <ENRICHMENT_OPTION> </ENRICHMENT_OPTION>
Save the ssaasmv5.xml file.
Configuring Oracle Data Quality Matching Server
The Oracle Data Quality Matching Server provides real-time and batch data matching functionality using licensed third-party Informatica Identity Resolution software. For information about installing Oracle Data Quality Matching Server, see Installing the Universal Connector.
Configuring data quality for Oracle Data Quality Matching Server involves enabling deduplication on all object managers, specifying data quality settings, and setting up preconfigured vendor parameters and field mapping values for Oracle Data Quality Matching Server.
Use the following procedure to set up real-time deduplication for Oracle Data Quality Matching Server. This task is a step in Configuring Oracle Data Quality Matching Server.
To configure data quality for Oracle Data Quality Matching Server
Enable data quality at the object manager level as described in Enabling Data Quality at the Object Manager Level.
Change the DeDuplication Data Type setting to ISS on all object managers as described in Enabling Data Quality at the Enterprise Level.
This parameter can be set at the Enterprise, Siebel Server, or component level. For example, srvrmgr commands similar to the following can be used to set the parameters:
Change param DeDupTypeType =ISS
Change param DeDupTypeEnable =True, DeDupTypeType =ISS for comp DQMgr
Change param DeDupTypeEnable =True, DeDupTypeType =ISS for comp SCCObjMgr_enu
Change param DeDupTypeEnable =True, DeDupTypeType =ISS for comp UCMObjMgr_enu
Note: You must change the DeDuplication Data Type setting to ISS on all object managers for deduplication with Oracle Data Quality Matching Server to be active.Set data quality settings as described in Specifying Data Quality Settings.
Make sure that the following parameters are set to Yes:
Enable DeDuplication
Force User DeDupe - Account
Force User DeDupe - Contact
Force User DeDupe - List Mgmt
Verify that the preconfigured vendor parameter and field mapping values are set up as listed in Universal Connector Parameter and Field Mapping Values for Oracle Data Quality Matching Server.
Modify the ssadq_cfg.xml file as described in Modifying Configuration Parameters for Oracle Data Quality Matching Server
For more information about Siebel Server configuration and management, see Siebel System Administration Guide.
Universal Connector Parameter and Field Mapping Values for Oracle Data Quality Matching Server
This topic includes information about the Universal Connector parameter and field mapping values for the Oracle Data Quality Matching Server:
Preconfigured Vendor Parameters for Oracle Data Quality Matching Server
The following table lists the vendor parameters preconfigured for Oracle Data Quality Matching Server (Informatica Identity Resolution). You must not reconfigure the parameter settings.
Table Preconfigured Oracle Data Quality Matching Server Vendor Parameters
| Name | Value |
|---|---|
Account DeDup Record Type |
Account |
Contact DeDup Record Type |
Contact |
List Mgmt Prospective Contact DeDup Record Type |
Prospect |
Parameter 1 |
"global", "iss-config-file", "ssadq_cfg.xml" |
Candidate Acquisition Process by Third Party |
Yes. If set to Yes, then match candidate acquisition takes place using the Oracle Data Quality Matching Server. The default value for this parameter is No. |
Preconfigured Field Mappings for Oracle Data Quality Matching Server
This topic includes information about the preconfigured Oracle Data Quality Matching Server (Informatica Identity Resolution) field mappings for the following business components:
Preconfigured Field Mappings for Business Component - Account
The following table shows the Oracle Data Quality Matching Server data matching field mappings for the Account business component and DeDuplication operation.
Table Preconfigured Oracle Data Quality Matching Server Field Mappings for Account
| Business Component Field | Mapped Field |
|---|---|
DUNS Number |
DUNSNumber |
Name |
Name |
Primary Account City |
PAccountCity |
Primary Account Country |
PAccountCountry |
Primary Account Postal Code |
PAccountPostalCode |
Primary Account State |
PAccountState |
Primary Account Street Address |
PAccountStrAddress |
Row Id |
RowId |
Preconfigured Field Mappings for Business Component - Contact
The following table shows the Oracle Data Quality Matching Server data matching field mappings for the Contact business component and DeDuplication operation.
Table Preconfigured Oracle Data Quality Matching Server Field Mappings for Contact
| Business Component Field | Mapped Field |
|---|---|
Birth Date |
BirthDate |
Cellular Phone # |
CellularPhone |
Email Address |
EmailAddress |
First Name Last Name |
NAME |
Home Phone # |
HomePhone |
Middle Name |
MiddleName |
Primary Account Name |
Account |
Primary Personal City |
City |
Primary Personal Country |
Country |
Primary Personal Postal Code |
PrimaryPostalCode |
Primary Personal State |
State |
Primary Personal Street Address |
StreetAddress |
Row Id |
RowId |
Social Security Number |
SocialSecurityNumber |
Work Phone # |
Work Phone |
Preconfigured Field Mappings for Business Component - List Mgmt Prospective Contact
The following table shows the Oracle Data Quality Matching Server data matching field mappings for the List Mgmt Prospective Contact business component and DeDuplication operation.
Table Preconfigured Oracle Data Quality Matching Server Field Mappings for List Mgmt Prospective Contact
| Business Component Field | Mapped Field |
|---|---|
Account |
Account |
Cellular Phone # |
CellularPhone |
City |
City |
Country |
Country |
Email Address |
EmailAddress |
First Name Last Name |
NAME |
Home Phone # |
HomePhone |
Id |
RowId |
Middle Name |
MiddleName |
Postal Code |
PostalCode |
Social Security Number |
SocialSecurityNumber |
State |
State |
Street Address |
StreetAddress |
Work Phone |
WorkPhone |
Field Mappings for Business Component - CUT Address
The following table shows the data matching field mappings for the CUT Address business component and DeDuplication operation. In your Siebel application, you must manually add these field mappings if you want to configure deduplication against multiple addresses, which is supported only by Oracle Data Quality Matching Server. For more information, see Configuring Deduplication Against Multiple Addresses.
Table Oracle Data Quality Matching Server Field Mappings for CUT Address
| Business Component Field | Mapped Field |
|---|---|
City |
PAccountCity |
Country |
PAccountCountry |
Postal Code |
PAccountPostalCode |
Row Id |
PAccountAddressID |
State |
PAccountState |
Street Address |
PAccountStrAddress |
Configuring a New Field for Real-Time Data Matching
When using the Oracle Data Quality Matching Server for data matching, there are a number of steps involved in configuring a new field for real-time data matching. Use the following procedure to configure a new field for data matching. This procedure shows you how to add a new field called Position when matching Contacts.
To configure a new field for real-time data matching
In your Siebel application, navigate to the Administration - Data Quality screen, then the Third Party Administration view, and add the vendor field mappings for the new business components. For example:
Select the Vendor shown in the following table:
Vendor Name DLL Name ISS
ssadqsea
Select the business component operation shown in the following table:
Business Component Name Operation Contact
DeDuplication
Add the field mapping shown in the following table:
Business Component Field Mapped Field Position
MyPosition
Configure the integration object.
If using the old synchronizer, modify the Identity Search Server synchronization Integration Object by adding the new fields to it. In this example, you must modify the ISS_Contact to add the new Integration Component Field as shown in the following table:
Name Data Type Length External Name XML Tag Position
DTYPE_TEXT
50
Position
MyPosition
Note: For a Contact, you must modify the ISS_Contact integration object. For an Account, you must modify the ISS_Account integration object. For a Prospect, you must modify the ISS_List_Mgmt_Prospective_Contact integration object.If using the new synchronizer, then do the following:
Add the new field to the Synchronize Integration Object. In this case, 'SyncContact' IO. For the contact address field, add it to the 'Contact_INS Personal Address' Integration Component.
Add the new field to the 'DQ Sync Services' user property. In this case, 'Contact_DeDupFlds'. For the contact address field, add it to the 'Contact_INS Personal Address_DeDupFlds' user property.
Add the new field length to one or both of the following 'DQ Sync Services' user properties:
'Contact_ExtLen'
'Contact_INS Personal Address_ExtLen'
Note: It is mandatory that you maintain the same sequence that is detailed in the sdf file. Also make sure that the address fields are grouped together at the end of the sdf file.Enter the new record length into the 'Contact Record Length' user property. This user property holds a total of all the field lengths in 'Contact_ExtLen' and 'Contact_INS Personal Address_ExtLen'.
Note: ISSDataSrc must be added to the OM - Named Data Source component parameter for the UCM object manager and EAI object manager components.
Modify the SDF file (SiebelDQ.sdf):
Add the new fields to the IDT table in IIR:
In the following example for the old synchronizer, you must add the new Position field to the IDT_Contact. For example:
create_idt
          IDT_CONTACT
SOURCED_FROM      FLAT_FILE
                    BirthDate                    w(60),
                    CellularPhone                w(60),
                    EmailAddress                 w(60),
                    NAME                         w(100),
                    HomePhone                    w(60),
                    MiddleName                   w(100),
                    Account                      w(100),
                    City                         w(60),
                    Country                      w(20),
                    PrimaryPostalCode            w(20),
                    State                        w(20),
                    StreetAddress                w(100),
                    RowId                        w(30)
                    SocialSecurityNumber         w(60)
                    MyPosition                   w(60)
                    WorkPhone                    w(60)
SYNC_REPLACE_DUPLICATE_PK
TXN-SOURCE NSA
;
In the following example for the new synchronizer, you must add the new Position field to the IDT_Contact.
create_idt IDT_CONTACT
sourced_from odb:15:ssa_src/ssa_src@ISS_DSN
INIT_LOAD_ALL_CONTACTS.BIRTHDATE            BirthDate             V(60),
INIT_LOAD_ALL_CONTACTS.CELLULARPHONE        CellularPhone         V(60),
INIT_LOAD_ALL_CONTACTS.EMAILADDRESS         EmailAddress          V(60),
INIT_LOAD_ALL_CONTACTS.NAME                 NAME                  V(100),
INIT_LOAD_ALL_CONTACTS.HOMEPHONE            HomePhone             V(60),
INIT_LOAD_ALL_CONTACTS.MIDDLE_NAME          MiddleName            V(100),
INIT_LOAD_ALL_CONTACTS.ACCOUNT              Account               V(100),
INIT_LOAD_ALL_CONTACTS.CONTACT_ID  (pk1)    RowId                 C(30),
INIT_LOAD_ALL_CONTACTS.SOCIALSECURITYNUMBER SocialSecurityNumber  V(60),
INIT_LOAD_ALL_CONTACTS.MYPOSITION           MyPosition            V(60),
INIT_LOAD_ALL_CONTACTS.WORKPHONE            WorkPhone             V(60),
INIT_LOAD_ALL_CONTACTS.CITY                 City                  V(60),
INIT_LOAD_ALL_CONTACTS.COUNTRY              Country               V(20),
INIT_LOAD_ALL_CONTACTS.POSTAL_CODE          PrimaryPostalCode     V(20),
INIT_LOAD_ALL_CONTACTS.STATE                State                 V(20),
INIT_LOAD_ALL_CONTACTS.STREETADDRESS        StreetAddress         V(100),
INIT_LOAD_ALL_CONTACTS.ADDRESS_ID  (pk2)    ContactAddressID      C(60)
SYNC REPLACE_DUPLICATE_PK
TXN-SOURCE NSA
;
Modify SCORE-LOGIC in the IIR search definition:
A set of field types are provided that are supported by Match Purpose. For Contact Match Purpose, the required and optional field types are shown in the following table:
Field Required Person_Name
Yes
Organization_Name
Yes
Address_Part1
Yes
Address_Part2
No
Posal_Area
No
Telephone_Number
No
ID
No
Date
No
Attribute1
No
Attribute2
No
If you want the new field to contribute to the match score, add it to the SCORE-LOGIC section in IIR search definition. For example:
search-definition
==================
NAME=           "search-person-name"
IDX=            IDX_CONTACT_NAME
COMMENT=        "Use this to search and score on person"
KEY-LOGIC=      SSA,
                System(default),
                Population(usa),
                Controls("FIELD=Person_Name
                          SEARCH_LEVEL=Typical UNICODE_ENCODING=6",
                Field(Name)
SCORE-LOGIC=    SSA,
                System(default),
                Population(usa),
                Controls("Purpose=Person_Name
                          MATCH_LEVEL=Typical UNICODE_ENCODING=6",
                Matching-Fields
("Name:Person_Name,StreetAddress:Address_Part1,City:Address_part2,State:Attr
ibute1,PrimaryPostalCode:Postal_area,MyPosition:Attribute2")
Delete the existing system in IIR, and then create a new system using the new SiebelDQ.sdf file.
For more information about creating a new system in IIR (which will hold all the IDT and IDX database tables), see the relevant documentation included in Siebel Business Applications Third-Party Bookshelf in the product media pack on Oracle Software Delivery Cloud.
Reload the IIR system as described in Initial Loading of Siebel Data into Oracle Data Quality Matching Server Tables.
Loading Data Incrementally
When loading Siebel application data into Informatica Identity Resolution tables, rather than generating keys for the entire data set in one go, the incremental data load feature provides the functionality to divide the total load into smaller batches of configurable size and load them incrementally. Use the following procedure to configure a new field for data matching.
To incrementally load Siebel application data into Informatica Identity Resolution tables
Start the Informatica Identity Resolution server in Configure Mode.
Start the Informatica Identity Resolution Console client in Admin Mode.
Select System (if already created), otherwise create a new system using the required sdf file.
Run the IDS_IDT_<ENTITY TO BE LOADED>_STG.sql script to take a snapshot of records in the Siebel application.
For example, execute the following script from the SQL command line prompt for account initial load using your appropriate login credentials:
IDS_IDT_ACCOUNT_STG.sql
The following sample SQL scripts can be used to capture snapshots of the data:
IDS_IDT_ACCOUNT_STG.SQL
IDS_IDT_CONTACT_STG.SQL
IDS_IDT_PROSPECT_STG.SQL
For more information about these example scripts, see Sample SQL Scripts.
While creating a snapshot using the example scripts listed in the previous step, users are prompted to enter a batch size. Depending on the value entered, the entire snapshot is grouped into batches of the specified batch size.
For example, run the following SQL script to create the database table to store the current batch number being loaded (this value is usually 1 for the first time):
IDS_IDT_CURRENT_BATCH.sql
Run the IDS_IDT_CURRENT_BATCH_<ENTITY TO BE LOADED>.sql script to create the dynamic view to load the snapshot for the staging table created in the previous step.
For example, execute the following script from the command line:
IDS_IDT_CURRENT_BATCH_ACCOUNT.sql
The following sample SQL scripts can be used to create the views to process the records in a given batch:
IDS_IDT_CURRENT_BATCH_ACCOUNT.SQL
IDS_IDT_CURRENT_BATCH_CONTACT.SQL
IDS_IDT_CURRENT_BATCH_PROSPECT.SQL
For more information about these example scripts, see Sample SQL Scripts.
Open the Informatica Identity Resolution client and perform a Load IDT.
Load the remaining batches of data through the ISS batch Utility. Open a command window and navigate to the directory where the initial scripts for loading have been copied. Execute the initial load process by entering the following command at the command line:
IDS_IDT_LOAD_ANY_ENTITY.CMD <Entity> <Work Directory>
For example, execute the following script from the command line for account initial load:
IDS_IDT_LOAD_ANY_ENTITY.CMD Account c:/initialLoad/logs
The following files contain the parameters used by the batch load utility; you must update these files to reflect your installation:
idt_Account_load.txt
idt_Contact_load.txt
idt_Prospect_load.txt
Note: Certain SQL and shell scripts are required to create materialized views and to load data incrementally. Depending on customer requirements, you can fine tune these sample files during implementation.Incrementally load the failed batches individually using the following script from the command line:
IDS_IDT_LOADBATCH_ANY_ENTITY <Entity> <Work Directory> <Batch Number>
For example, execute the following script from the command line to load batch 33 of account:
IDS_IDT_LOADBATCH_ANY_ENTITY.CMD Account c:/initialLoad/logs 33
Examine the log files and error files to ensure that all batches have successfully loaded. In the case of errors, use the information in the log and error files to determine the root cause for the failure and fix the underlying issue; repeat the load process as necessary.
Process of Configuring Data Synchronization Between Siebel and Oracle Data Quality Matching Server
When configuring data synchronization between the Siebel application and Oracle Data Quality Matching Server, perform the following tasks:
Configure the data source, see Configuring the Data Source.
Configure the DQ Sync Services Business Service to Use Informatica Identity Resolution 9.01, see Upgrading to Informatica Identity Resolution 9.01 (Upgrading to Informatica Identity Resolution 9.01).
Configuring the Data Source
Use the following procedure to configure the data source definition (or EBC table) required to synchronize data between the Siebel application and Oracle Data Quality Matching Server. This task is a step in Process of Configuring Data Synchronization Between Siebel and Oracle Data Quality Matching Server.
To configure the data source definition
In your Siebel application, navigate to Administration - Server Configuration, Enterprises, and then Profile Configuration view.
Copy an existing InfraDatasources named subsystem type.
Change the Profile and Alias properties to the Data Source name (ISSDataSrc) configured in Web Tools.
Update the profile parameters to correspond to the external RDBMS:
DSConnectString: This is the data source connect string.
For the Microsoft SQL Server or the IBM DB2 databases, create an ODBC or equivalent connection and input the name of the connection in the parameter. For an Oracle RDBMS, specify the TNS name associated with the database, and not an ODBC or other entry.
DSSSQLStyle: This is the database SQL type.
DSDLLName: This is the DLL Name corresponding to the SQL type.
DSTableOwner: This is the data source table owner.
DSUsername: This is the default user name used for connections (Optional).
DSPassword: This is the default password used for connections (Optional).
Configuring Object Managers for ISS Data Source
Use the following procedure to configure object managers for the ISS Data Source. This task is a step in Process of Configuring Data Synchronization Between Siebel and Oracle Data Quality Matching Server.
To configure object managers for ISS Data Source
Navigate to Administration - Server Configuration, Enterprises, and then Component Definitions view.
Query for the components used with UCM, such as, the following:
EAI
UCM
Data Quality
Workflow
Select a component, and then select Start Reconfiguration from the main menu.
In the lower applet, query for the following parameter: OM - Named Data Source.
Note: The value for this parameter is similar to the following:ServerDataSrc,GatewayDataSrc.Add a comma after the last data source, then add the ISS data source you created in Configuring the Data Source. The default data source name is ISSDataSrc.
Save the record, then select Commit Reconfiguration from the main menu.
Repeat Step 3 through Step 6 for all required Object Managers.
For example, add ISSDataSrc to the following components:
EAI Object Manager: OM - Named Data Source name
UCM Object Manager: OM - Named Data Source name
UCM Batch Manager: OM - Named Data Source name
Data Quality Manager
Workflow Process Batch Manager
Workflow Process Manager
Click Synchronize to save the changes to the Gateway Configuration file.
Start the Gateway Server and the Siebel Server.
Siebel Business Applications DQ Sync Action Sets
DQ Sync action sets use the Siebel application business service to insert records directly into Oracle Data Quality Matching Server database tables. Activate DQ Sync action sets if using Siebel CRM Version 8.2 or later. For information about creating action sets, including creating actions for action sets, and associating events with action sets, see Siebel Personalization Administration Guide.
This topic introduces the following DQ Sync action sets for Siebel applications:
DQ Sync Action Sets for Account
This topic introduces the following Siebel application DQ Sync action sets for Account:
For more information about creating action sets, including creating actions for action sets, and associating events with action sets, see Siebel Personalization Administration Guide.
DQ Sync DeleteRecord Account
The following table describes the actions in the DQ Sync DeleteRecord Account action set.
Table Actions in DQ Sync DeleteRecord Account Action Set
| Action | Name of Field | Value |
|---|---|---|
ISS Set System Name |
Name |
ISS Set System Name |
Sequence |
1 |
|
Action Type |
Attribute Set |
|
Profile Attribute |
IDS_SYSTEM |
|
Set Operator |
Set |
|
Value |
siebeldq |
|
ISS Set IDT Name |
Name |
ISS Set IDT Name |
Sequence |
2 |
|
Action Type |
Attribute Set |
|
Profile Attribute |
IDS_IDT |
|
Set Operator |
Set |
|
Value |
IDS_01_IDT_ACCOUNT |
|
ISS Set BC Name |
Name |
ISS Set BC Name |
Sequence |
3 |
|
Action Type |
Attribute Set |
|
Profile Attribute |
IDS_BC_NAME |
|
Set Operator |
Set |
|
Value |
Account |
|
ISS Run DQSync |
Name |
ISS Run DQSync |
Sequence |
4 |
|
Action Type |
BusService |
|
Business Service Name |
DQ Sync Services |
|
Business Service Method |
SyncISS |
DQ Sync PreDeleteRecord Account
The following table describes the actions in the DQ Sync PreDeleteRecord Account action set.
Table Actions in DQ Sync PreDeleteRecord Account Action Set
| Action | Name of Field | Value |
|---|---|---|
ISS Set System Name |
Name |
ISS Set System Name |
Sequence |
1 |
|
Action Type |
Attribute Set |
|
Profile Attribute |
IDS_SYSTEM |
|
Set Operator |
Set |
|
Value |
siebeldq |
|
ISS Set IDT Name |
Name |
ISS Set IDT Name |
Sequence |
2 |
|
Action Type |
Attribute Set |
|
Profile Attribute |
IDS_IDT |
|
Set Operator |
Set |
|
Value |
IDS_01_IDT_ACCOUNT |
|
ISS Set ID |
Name |
ISS Set ID |
Sequence |
3 |
|
Action Type |
Attribute Set |
|
Profile Attribute |
IDS_IO_ID |
|
Set Operator |
Set |
|
Value |
[Id] |
|
ISS Set BC Name |
Name |
ISS Set BC Name |
Sequence |
4 |
|
Action Type |
Attribute Set |
|
Profile Attribute |
IDS_BC_NAME |
|
Set Operator |
Set |
|
Value |
Account |
|
ISS Run DQSync |
Name |
ISS Run DQSync |
Sequence |
5 |
|
Action Type |
BusService |
|
Business Service Name |
DQ Sync Services |
|
Business Service Method |
SyncISS |
DQ Sync PreWriteRecord Account
The following table describes the actions in the DQ Sync PreWriteRecord Account action set.
Table Actions in DQ Sync PreWriteRecord Account Action Set
| Action | Name of Field | Value |
|---|---|---|
ISS Set System Name |
Name |
ISS Set System Name |
Sequence |
1 |
|
Action Type |
Attribute Set |
|
Profile Attribute |
IDS_SYSTEM |
|
Set Operator |
Set |
|
Value |
siebeldq |
|
ISS Set IDT Name |
Name |
ISS Set IDT Name |
Sequence |
2 |
|
Action Type |
Attribute Set |
|
Profile Attribute |
IDS_IDT |
|
Set Operator |
Set |
|
Value |
IDS_01_IDT_ACCOUNT |
|
ISS Set ID |
Name |
ISS Set ID |
Sequence |
3 |
|
Action Type |
Attribute Set |
|
Profile Attribute |
IDS_IO_ID |
|
Set Operator |
Set |
|
Value |
[Id] |
|
ISS Set BC Name |
Name |
ISS Set BC Name |
Sequence |
4 |
|
Action Type |
Attribute Set |
|
Profile Attribute |
IDS_BC_NAME |
|
Set Operator |
Set |
|
Value |
Account |
|
ISS Run DQSync |
Name |
ISS Run DQSync |
Sequence |
5 |
|
Action Type |
BusService |
|
Business Service Name |
DQ Sync Services |
|
Business Service Method |
SyncISS |
DQ Sync WriteRecord Account
The following table describes the actions in the DQ Sync WriteRecord Account action set.
Table Actions in DQ Sync WriteRecord Account Action Set
| Action | Name of Field | Value |
|---|---|---|
ISS Set System Name |
Name |
ISS Set System Name |
Sequence |
1 |
|
Action Type |
Attribute Set |
|
Profile Attribute |
IDS_SYSTEM |
|
Set Operator |
Set |
|
Value |
siebeldq |
|
ISS Set IDT Name |
Name |
ISS Set IDT Name |
Sequence |
2 |
|
Action Type |
Attribute Set |
|
Profile Attribute |
IDS_IDT |
|
Set Operator |
Set |
|
Value |
IDS_01_IDT_ACCOUNT |
|
ISS Set ID |
Name |
ISS Set ID |
Sequence |
3 |
|
Action Type |
Attribute Set |
|
Profile Attribute |
IDS_IO_ID |
|
Set Operator |
Set |
|
Value |
[Id] |
|
ISS Set BC Name |
Name |
ISS Set BC Name |
Sequence |
4 |
|
Action Type |
Attribute Set |
|
Profile Attribute |
IDS_BC_NAME |
|
Set Operator |
Set |
|
Value |
Account |
|
ISS Run DQSync |
Name |
ISS Run DQSync |
Sequence |
5 |
|
Action Type |
BusService |
|
Business Service Name |
DQ Sync Services |
|
Business Service Method |
SyncISS |
DQ Sync Action Sets for Contact
This topic introduces the following Siebel application DQ Sync action sets for Contact:
DQ Sync DeleteRecord Contact
The following table describes the actions in the DQ Sync DeleteRecord Contact action set.
Table Actions in DQ Sync DeleteRecord Contact Action Set
| Action | Name of Field | Value |
|---|---|---|
ISS Set System Name |
Name |
ISS Set System Name |
Sequence |
1 |
|
Action Type |
Attribute Set |
|
Profile Attribute |
IDS_SYSTEM |
|
Set Operator |
Set |
|
Value |
siebeldq |
|
ISS Set IDT Name |
Name |
ISS Set IDT Name |
Sequence |
2 |
|
Action Type |
Attribute Set |
|
Profile Attribute |
IDS_IDT |
|
Set Operator |
Set |
|
Value |
IDS_01_IDT_CONTACT |
|
ISS Set BC Name |
Name |
ISS Set BC Name |
Sequence |
3 |
|
Action Type |
Attribute Set |
|
Profile Attribute |
IDS_BC_NAME |
|
Set Operator |
Set |
|
Value |
Contact |
|
ISS Run DQSync |
Name |
ISS Run DQSync |
Sequence |
4 |
|
Action Type |
BusService |
|
Business Service Name |
DQ Sync Services |
|
Business Service Method |
SyncISS |
DQ Sync PreDeleteRecord Contact
The following table describes the actions in the DQ Sync PreDeleteRecord Contact action set.
Table Actions in DQ Sync PreDeleteRecord Contact Action Set
| Action | Name of Field | Value |
|---|---|---|
ISS Set System Name |
Name |
ISS Set System Name |
Sequence |
1 |
|
Action Type |
Attribute Set |
|
Profile Attribute |
IDS_SYSTEM |
|
Set Operator |
Set |
|
Value |
siebeldq |
|
ISS Set IDT Name |
Name |
ISS Set IDT Name |
Sequence |
2 |
|
Action Type |
Attribute Set |
|
Profile Attribute |
IDS_IDT |
|
Set Operator |
Set |
|
Value |
IDS_01_IDT_CONTACT |
|
ISS Set ID |
Name |
ISS Set ID |
Sequence |
3 |
|
Action Type |
Attribute Set |
|
Profile Attribute |
IDS_IO_ID |
|
Set Operator |
Set |
|
Value |
[Id] |
|
ISS Set BC Name |
Name |
ISS Set BC Name |
Sequence |
4 |
|
Action Type |
Attribute Set |
|
Profile Attribute |
IDS_BC_NAME |
|
Set Operator |
Set |
|
Value |
Contact |
|
ISS Run DQSync |
Name |
ISS Run DQSync |
Sequence |
5 |
|
Action Type |
BusService |
|
Business Service Name |
DQ Sync Services |
|
Business Service Method |
SyncISS |
DQ Sync PreWriteRecord Contact
The following table describes the actions in the DQ Sync PreWriteRecord Contact action set.
Table Actions in DQ Sync PreWriteRecord Contact Action Set
| Action | Name of Field | Value |
|---|---|---|
ISS Set System Name |
Name |
ISS Set System Name |
Sequence |
1 |
|
Action Type |
Attribute Set |
|
Profile Attribute |
IDS_SYSTEM |
|
Set Operator |
Set |
|
Value |
siebeldq |
|
ISS Set IDT Name |
Name |
ISS Set IDT Name |
Sequence |
2 |
|
Action Type |
Attribute Set |
|
Profile Attribute |
IDS_IDT |
|
Set Operator |
Set |
|
Value |
IDS_01_IDT_CONTACT |
|
ISS Set ID |
Name |
ISS Set ID |
Sequence |
3 |
|
Action Type |
Attribute Set |
|
Profile Attribute |
IDS_IO_ID |
|
Set Operator |
Set |
|
Value |
[Id] |
|
ISS Set BC Name |
Name |
ISS Set BC Name |
Sequence |
4 |
|
Action Type |
Attribute Set |
|
Profile Attribute |
IDS_BC_NAME |
|
Set Operator |
Set |
|
Value |
Contact |
|
ISS Run DQSync |
Name |
ISS Run DQSync |
Sequence |
5 |
|
Action Type |
BusService |
|
Business Service Name |
DQ Sync Services |
|
Business Service Method |
SyncISS |
DQ Sync WriteRecord Contact
The following table describes the actions in the DQ Sync WriteRecord Contact action set.
Table Actions in DQ Sync WriteRecord Contact Action Set
| Action | Name of Field | Value |
|---|---|---|
ISS Set System Name |
Name |
ISS Set System Name |
Sequence |
1 |
|
Action Type |
Attribute Set |
|
Profile Attribute |
IDS_SYSTEM |
|
Set Operator |
Set |
|
Value |
siebeldq |
|
ISS Set IDT Name |
Name |
ISS Set IDT Name |
Sequence |
2 |
|
Action Type |
Attribute Set |
|
Profile Attribute |
IDS_IDT |
|
Set Operator |
Set |
|
Value |
IDS_01_IDT_CONTACT |
|
ISS Set ID |
Name |
ISS Set ID |
Sequence |
3 |
|
Action Type |
Attribute Set |
|
Profile Attribute |
IDS_IO_ID |
|
Set Operator |
Set |
|
Value |
[Id] |
|
ISS Set BC Name |
Name |
ISS Set BC Name |
Sequence |
4 |
|
Action Type |
Attribute Set |
|
Profile Attribute |
IDS_BC_NAME |
|
Set Operator |
Set |
|
Value |
Contact |
|
ISS Run DQSync |
Name |
ISS Run DQSync |
Sequence |
5 |
|
Action Type |
BusService |
|
Business Service Name |
DQ Sync Services |
|
Business Service Method |
SyncISS |
DQ Sync Action Sets for List Mgmt Prospective Contact
This topic introduces the following Siebel application DQ Sync action sets for List Mgmt Prospective Contact:
DQ Sync DeleteRecord Prospect
The following table describes the actions in the DQ Sync DeleteRecord Prospect action set.
Table Actions in DQ Sync DeleteRecord Prospect Action Set
| Action | Name of Field | Value |
|---|---|---|
ISS Set System Name |
Name |
ISS Set System Name |
Sequence |
1 |
|
Action Type |
Attribute Set |
|
Profile Attribute |
IDS_SYSTEM |
|
Set Operator |
Set |
|
Value |
siebeldq |
|
ISS Set IDT Name |
Name |
ISS Set IDT Name |
Sequence |
2 |
|
Action Type |
Attribute Set |
|
Profile Attribute |
IDS_IDT |
|
Set Operator |
Set |
|
Value |
IDS_01_IDT_PROSPECT |
|
ISS Set BC Name |
Name |
ISS Set BC Name |
Sequence |
3 |
|
Action Type |
Attribute Set |
|
Profile Attribute |
IDS_BC_NAME |
|
Set Operator |
Set |
|
Value |
Prospect |
|
ISS Run DQSync |
Name |
ISS Run DQSync |
Sequence |
4 |
|
Action Type |
BusService |
|
Business Service Name |
DQ Sync Services |
|
Business Service Method |
SyncISS |
DQ Sync PreDeleteRecord Prospect
The following table describes the actions in the DQ Sync PreDeleteRecord Prospect action set.
Table Actions in DQ Sync PreDeleteRecord Prospect Action Set
| Action | Name of Field | Value |
|---|---|---|
ISS Set System Name |
Name |
ISS Set System Name |
Sequence |
1 |
|
Action Type |
Attribute Set |
|
Profile Attribute |
IDS_SYSTEM |
|
Set Operator |
Set |
|
Value |
siebeldq |
|
ISS Set IDT Name |
Name |
ISS Set IDT Name |
Sequence |
2 |
|
Action Type |
Attribute Set |
|
Profile Attribute |
IDS_IDT |
|
Set Operator |
Set |
|
Value |
IDS_01_IDT_PROSPECT |
|
ISS Set ID |
Name |
ISS Set ID |
Sequence |
3 |
|
Action Type |
Attribute Set |
|
Profile Attribute |
IDS_IO_ID |
|
Set Operator |
Set |
|
Value |
[Id] |
|
ISS Set BC Name |
Name |
ISS Set BC Name |
Sequence |
4 |
|
Action Type |
Attribute Set |
|
Profile Attribute |
IDS_BC_NAME |
|
Set Operator |
Set |
|
Value |
Prospect |
|
ISS Run DQSync |
Name |
ISS Run DQSync |
Sequence |
5 |
|
Action Type |
BusService |
|
Business Service Name |
DQ Sync Services |
|
Business Service Method |
SyncISS |
DQ Sync PreWriteRecord Prospect
The following table describes the actions in the DQ Sync PreWriteRecord Prospect action set.
Table Actions in DQ Sync PreWriteRecord Prospect Action Set
| Action | Name of Field | Value |
|---|---|---|
ISS Set System Name |
Name |
ISS Set System Name |
Sequence |
1 |
|
Action Type |
Attribute Set |
|
Profile Attribute |
IDS_SYSTEM |
|
Set Operator |
Set |
|
Value |
siebeldq |
|
ISS Set IDT Name |
Name |
ISS Set IDT Name |
Sequence |
2 |
|
Action Type |
Attribute Set |
|
Profile Attribute |
IDS_IDT |
|
Set Operator |
Set |
|
Value |
IDS_01_IDT_PROSPECT |
|
ISS Set ID |
Name |
ISS Set ID |
Sequence |
3 |
|
Action Type |
Attribute Set |
|
Profile Attribute |
IDS_IO_ID |
|
Set Operator |
Set |
|
Value |
[Id] |
|
ISS Set BC Name |
Name |
ISS Set BC Name |
Sequence |
4 |
|
Action Type |
Attribute Set |
|
Profile Attribute |
IDS_BC_NAME |
|
Set Operator |
Set |
|
Value |
Prospect |
|
ISS Run DQSync |
Name |
ISS Run DQSync |
Sequence |
5 |
|
Action Type |
BusService |
|
Business Service Name |
DQ Sync Services |
|
Business Service Method |
SyncISS |
DQ Sync WriteRecord Prospect
The following table describes the actions in the DQ Sync WriteRecord Prospect action set.
Table Actions in DQ Sync WriteRecord Prospect Action Set
| Action | Name of Field | Value |
|---|---|---|
ISS Set System Name |
Name |
ISS Set System Name |
Sequence |
1 |
|
Action Type |
Attribute Set |
|
Profile Attribute |
IDS_SYSTEM |
|
Set Operator |
Set |
|
Value |
siebeldq |
|
ISS Set IDT Name |
Name |
ISS Set IDT Name |
Sequence |
2 |
|
Action Type |
Attribute Set |
|
Profile Attribute |
IDS_IDT |
|
Set Operator |
Set |
|
Value |
IDS_01_IDT_PROSPECT |
|
ISS Set ID |
Name |
ISS Set ID |
Sequence |
3 |
|
Action Type |
Attribute Set |
|
Profile Attribute |
IDS_IO_ID |
|
Set Operator |
Set |
|
Value |
[Id] |
|
ISS Set BC Name |
Name |
ISS Set BC Name |
Sequence |
4 |
|
Action Type |
Attribute Set |
|
Profile Attribute |
IDS_BC_NAME |
|
Set Operator |
Set |
|
Value |
Prospect |
|
ISS Run DQSync |
Name |
ISS Run DQSync |
Sequence |
5 |
|
Action Type |
BusService |
|
Business Service Name |
DQ Sync Services |
|
Business Service Method |
SyncISS |
Generic DQ Sync Action Sets
This topic introduces the following Siebel application generic DQ Sync action sets for all business components:
DQ Sync UpdateAddress
The following table describes the actions in the DQ Sync UpdateAddress action set.
Table Actions in DQ Sync UpdateAddress Action Set
| Action | Name of Field | Value |
|---|---|---|
ISS Run DQSync |
Name |
ISS Run DQSync |
Sequence |
1 |
|
Action Type |
BusService |
|
Business Service Name |
DQ Sync Services |
|
Business Service Method |
SyncISS |
DQ Sync WriteRecordNew
The following table describes the actions in the DQ Sync WriteRecordNew action set.
Table Actions in DQ Sync WriteRecordNew Action Set
| Action | Name of Field | Value |
|---|---|---|
ISS UPDATE FLAG |
Name |
ISS UPDATE FLAG |
Sequence |
1 |
|
Action Type |
Attribute Set |
|
Profile Attribute |
IDS_IS_UPDATE |
|
Set Operator |
Set |
|
Value |
false |
DQ Sync WriteRecordUpdated
The following table describes the actions is in the DQ Sync WriteRecordUpdated action set.
Table Actions in DQ Sync WriteRecordUpdated Action Set
| Action | Name of Field | Value |
|---|---|---|
ISS UPDATE FLAG |
Name |
ISS UPDATE FLAG |
Sequence |
1 |
|
Action Type |
Attribute Set |
|
Profile Attribute |
IDS_IS_UPDATE |
|
Set Operator |
Set |
|
Value |
true |
Configuring Deduplication Against Multiple Addresses
When using the Oracle Data Quality Matching Server for data matching, you can configure deduplication against either the primary address or all address entities. When Oracle Data Quality is configured to carry out deduplication against all address entities, this helps identify duplicates between records that have similar non primary addresses. Previous to this release, deduplication was carried out on the primary address only.
For account, you must use the Account Match Against parameter to specify whether to match using one of the following:
All Address
Primary Address
For contact, you must use the Contact Match Against parameter to specify whether to match using one of the following:
All Address
Primary Address
The following procedure describes how to configure deduplication against multiple addresses. Once configured, deduplication against multiple addresses applies in real-time, Universal Customer Master (UCM) or Enterprise Application Integration (EAI) insertion, and batch match processing modes.
To configure deduplication against multiple addresses
In your Siebel application, navigate to the Administration - Data Quality screen, then the Third Party Administration view, select the ISS Vendor Name (DLL Name: ssadqsea) and:
In the BC Vendor Field Mapping, configure the business component operation shown in the following table:
Business Component Field Operation CUT Address
DeDuplication
In the Vendor Parameter, configure the value shown in the following table:
Name Value CUT Address DeDup Record Type
CUT Address
In the field mapping for CUT Address, enter the values shown in the following table:
Business Component Field Mapped Field PositionCity
PAccountCity
Country
PAccountCountry
Postal Code
PAccountPostalCode
Row Id
PAccountAddressID
State
PAccountState
Street Address
AccountStrAddress
In your Siebel application, navigate to the Administration - Data Quality screen, then the Data Quality Settings view, and:
In the Value field for the parameters shown in the following table, specify the appropriate settings.
Log out of the application and log back in for the changes to take effect (you do not have to restart the Siebel Server).
Parameter Description Account Match Against
Set to one of the following:
All Address to consider all addresses associated with an account for deduplication.
Primary Address (the default value). If set to Primary Address, then only the primary address associated with an account is considered for deduplication.
Contact Match Against
Set to one of the following:
All Address to consider all addresses associated with a contact for deduplication.
Primary Address (default value). If set to Primary Address, then only the primary address associated with a contact is considered for deduplication.
Enable DQ Multiple Addresses
Set the value of this property Yes.
Enable DQ Sync
Set the value of this property to Yes.
Configuring Multiple Language Support for Data Matching
When using Oracle Data Quality Matching Server for data matching, you can configure different match rules for different languages. This is useful when you have multiple geographical implementations, and for each implementation, you want to use country-specific match rules.
The solution involves creating multiple systems in Informatica Identity Resolution, where each system corresponds to a specific country or language. Records with a specific language or country are routed to the corresponding system. Because each system is linked to a population, the respective country-specific population rules are used for matching the records. To use this feature, add the Append BC Record Type Field x vendor parameter for UI entry and the Batch Append BC Record Type Field x vendor parameter for batch mode. This vendor parameters is used to specify a field in the BC, which has the country or language information. The BC name can be Account, Contact, or Prospect where x represents the sequence number. For example: Batch Append Account Record Type Field 1.
You must add similar vendor parameters to the Business Service User Property of the ISS System Services business service to represent the IDT number corresponding to the Language. When you create multiple systems in Informatica Identity Resolution, you must specify a unique database number for each system which is used as part of the unique IDT table name in Informatica Identity Resolution. You must enter this same number into the Business Service User Property of the ISS System Services business service for each system. The name of the user property is the same as the name of the system created in Informatica Identity Resolution, and the value of the user property is the database number (for example, see the following figure).
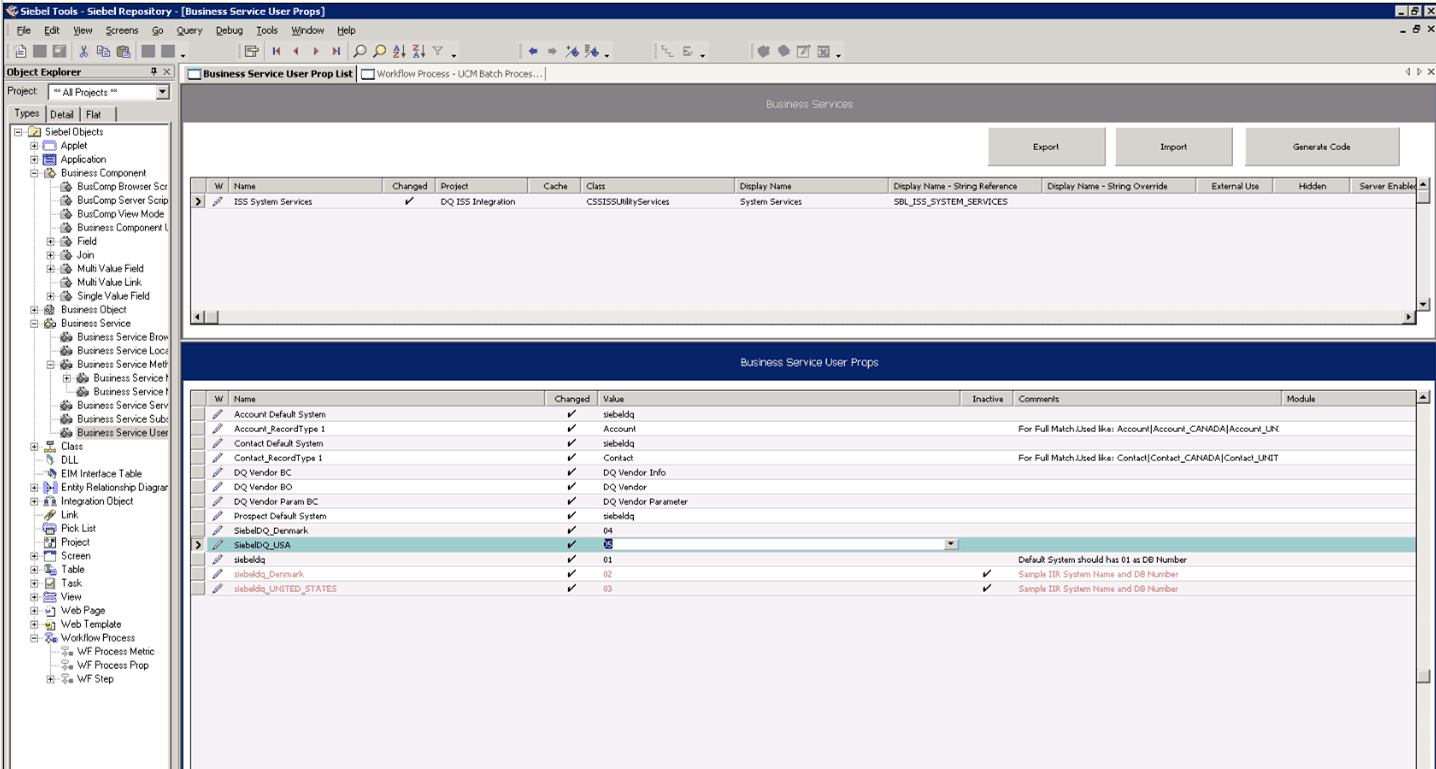
This feature can be extended as follows:
Extended to have different match rules depending on the source of data (for example the Siebel application or other application).
Extended to have different match rules depending on the mode of data entry (for example, real-time or batch processing mode). The procedure below describes how to configure multiple mode support for data matching when using the Oracle Data Quality Matching Server for data matching.
Use the following procedure to configure multiple language support for data matching when using the Oracle Data Quality Matching Server for data matching.
To configure the Siebel Server for Informatica Identity Resolution multiple language support
Create systems on the Informatica Identity Resolution server.
Create separate SDF files for each Country (Population). Informatica provides Standard Populations for most of the countries. Standard Populations are distributed as part of SSA-NAME3 installation and can be copied separately if not selected when installing NAME3 server.
Note: For more information about installing populations from the Windows Fix CD and adding populations to an existing installation, see the relevant documentation included in Siebel Business Applications Third-Party Bookshelf in the product media pack on Oracle Software Delivery Cloud.Once all populations are in place, check and note the filename of each population, as this is the same name that is used in the SDF file.
You can change System Name and System ID within the system definition file as follows:
system-definition
*=================
NAME= siebeldq_XXXX
ID= sYY
Replace XXXX with Country, and YY with any number between and including 02 and 99. System ID 01 is reserved for Default System. For example, for Japanese population:
filename : siebeldq_Japan.sdf
Population files :
japan.ysp
Changes to SDF file:
system-definition
*=================
NAME= siebeldq_Japan
ID= s05
System ID 01 is reserved for Default System
Replace all occurrences of Population(usa) to Population(japan).
Similar changes are required for each sdf file.
Configure the ssadq_cfg.xml configuration file in the
<siebsrvr>/SDQConnectorfolder.For example, add the following parameter to the ssadq_cfg.xml file:
<Parameter>
    <Record_Type>
        <Name>Account_Japan</Name>
        <System>siebeldq_Japan</System>
        <Search>search-org</Search>
        <no_of_sessions>25</no_of_sessions>
    </Record_Type>
</Parameter>
In your Siebel application, navigate to the Administration - Data Quality screen, then the Data Quality Settings view and in the value field for the parameter shown in the following table, specify the following setting:
Parameter Name Value Enable DQ Multiple Languages
Yes
Enable multiple language support for real-time flow:
Navigate to Administration - Data Quality screen, then Third Party Administration view in your Siebel application.
Select ISS as the third party vendor.
Add the vendor parameters shown in the following table:
Name Value Append Account Record Type Field 1
Primary Account Country
Append Contact Record Type Field 1
Primary Personal Country
Enable multiple language support for batch flow:
Navigate to Administration - Data Quality screen, then Third Party Administration view in your Siebel application.
Select ISS as the third-party vendor.
Add the vendor parameters shown in the following table:
Name Value Batch Append Account Record Type Field 1
Country
Batch Append Contact Record Type Field 1
Primary Personal Country
Add the user property to the ISS System Services business service.
The user property that you add must correspond to the system name created in Informatica Identity Resolution for the respective country. For example, if the system created for Japan is siebeldq_Japan and the ID is set to 5, then the user property name must be siebeldq_Japan and the value 05, as shown in the following table.
User Property Name Value siebeldq_Japan
05
Configuring Multiple Mode Support for Data Matching
When using Oracle Data Quality Matching Server for data matching, you can configure different match rules for data matching depending on:
Mode of operation (real-time or batch mode)
Source of data (Siebel CRM or other application, such as, eBiz)
As a prerequisite to configuring multiple mode support for data matching, multiple language support for data matching must be configured as described in Configuring Multiple Language Support for Data Matching.
Follow the steps in the following procedure in order to use different match rules on a custom parameter (Source System). Using this procedure, the match rules that apply to data from source system 1 (EBIZ) will be different to the match rules that apply to data from source system 2 (SIEBEL).
To configure multiple mode support for data matching
Define separate match rules for each source system.
Create systems corresponding to each source system, where each source system points to a separate SDF file. For example:
Siebeldq_ebiz
Siebeldq_siebel
The SDF file contains the IDT Layout Definition, Key Definition Logic, Match Fields considered for scoring records, the population to be used, and the Match purpose.
Note: You must contact Informatica Technical Support in order to fine tune the SDF file.Apply changes to the ssadq_cfg.xml file.
For each system that you create in IIR, add the following parameters. There must be two entries, one for each source system (EBIZ and SIEBEL).
    <Record_Type>
        <Name>BCNAME_SOURCEFIELDVALUE</Name>
        <System>SYSTEM_NAME</System>
        <Search>SEARCH_CRITERIA</Search>
        <no_of_sessions>100</no_of_sessions>
    </Record_Type>
The following example assumes that the source field is within the Account Business Component.
<Parameter>
    <Record_Type>
        <Name>Account_EBIZ</Name>
        <System>SiebelDQ_EBIZ</System>
        <Search>search-org</Search>
        <no_of_sessions>100</no_of_sessions>
    </Record_Type>
</Parameter>

<Parameter>
    <Record_Type>
        <Name>Account_SIEBEL</Name>
        <System>SiebelDQ_SIEBEL</System>
        <Search>search-org</Search>
        <no_of_sessions>100</no_of_sessions>
    </Record_Type>
</Parameter>
Navigate to the Administration - Data Quality screen, then the Third Party Administration view, and add the new vendor parameter for ISS as shown in the following table (this example assumes that Account is the Business Component Name, and Source is the Field):
Parameter Name Value Append Account Record Type Field 1
Source (this the business component field name where the source information is stored).
Sample Configuration Files for Oracle Data Quality Matching Server
This topic provides an example of the ssadq_cfg file which is the configuration file used by Oracle Data Quality Matching Server.
ssadq_cfg.xml
The ssadq_cfg.xml file is used by Oracle Data Quality Matching Server. An example ssadq_cfg.xml file follows.
<?xml version="1.0" encoding="UTF-16"?>
<Data>
   <Parameter>
      <iss_host>hostName</iss_host>
   </Parameter>
   <Parameter>
      <iss_port>1666</iss_port>
   </Parameter>
   <Parameter>
      <rulebase_name>odb:0:userName/passWord@connectString</rulebase_name>
   </Parameter>
   <Parameter>
      <id_tag_name>DQ.RowId</id_tag_name>
   </Parameter>

   <Parameter>
      <Record_Type>
         <Name>Account_Denmark</Name>
         <System>SiebelDQ_Denmark</System>
         <Search>search-org</Search>
                     <no_of_sessions>25</no_of_sessions>

      </Record_Type>
   </Parameter>
   <Parameter>
      <Record_Type>
      <Name>Account_USA</Name>
         <System>SiebelDQ_USA</System>
         <Search>search-org</Search>
                     <no_of_sessions>25</no_of_sessions>

      </Record_Type>
   </Parameter>
   <Parameter>
      <Record_Type>
         <Name>Account_Germany</Name>
         <System>SiebelDQ_Germany</System>
         <Search>search-org</Search>
                     <no_of_sessions>25</no_of_sessions>

      </Record_Type>
   </Parameter>
   <Parameter>
      <Record_Type>
         <Name>Account</Name>
         <System>SiebelDQ</System>
         <Search>search-org</Search>
                     <no_of_sessions>25</no_of_sessions>

      </Record_Type>
   </Parameter>
   <Parameter>
      <Record_Type>
         <Name>Account_China</Name>
         <System>siebelDQ_China</System>
         <Search>search-org</Search>
                     <no_of_sessions>25</no_of_sessions>

      </Record_Type>
   </Parameter>
   <Parameter>
      <Record_Type>
         <Name>Account_Japan</Name>
         <System>siebelDQ_Japan</System>
         <Search>search-org</Search>
                     <no_of_sessions>25</no_of_sessions>

      </Record_Type>
   </Parameter>
   <Parameter>
      <Record_Type>
         <Name>Contact_Denmark</Name>
         <System>SiebelDQ_Denmark</System>
         <Search>search-person-name</Search>
                     <no_of_sessions>25</no_of_sessions>

      </Record_Type>
   </Parameter>
   <Parameter>
      <Record_Type>
         <Name>Contact_USA</Name>
         <System>SiebelDQ_USA</System>
         <Search>search-person-name</Search>
                     <no_of_sessions>25</no_of_sessions>

      </Record_Type>
   </Parameter>
   <Parameter>
      <Record_Type>
         <Name>Contact</Name>
         <System>SiebelDQ</System>
         <Search>search-person-name</Search>

      </Record_Type>
   </Parameter>
   <Parameter>
      <Record_Type>
         <Name>Contact_Germany</Name>
         <System>SiebelDQ_USA</System>
         <Search>search-person-name</Search>
                     <no_of_sessions>25</no_of_sessions>

      </Record_Type>
   </Parameter>
   <Parameter>
      <Record_Type>
         <Name>Contact_China</Name>
         <System>SiebelDQ_China</System>
         <Search>search-person-name</Search>
                     <no_of_sessions>25</no_of_sessions>

      </Record_Type>
   </Parameter>
   <Parameter>
      <Record_Type>
         <Name>Contact_Japan</Name>
         <System>SiebelDQ_Japan</System>
         <Search>search-person-name</Search>
                     <no_of_sessions>25</no_of_sessions>

      </Record_Type>
   </Parameter>
      <Parameter>
      <Record_Type>
         <Name>Prospect</Name>
         <System>SiebelDQ</System>
         <Search>search-prospect-name</Search>
                     <no_of_sessions>25</no_of_sessions>

      </Record_Type>
   </Parameter>
   <Parameter>
      <Record_Type>
         <Name>Prospect_Denmark</Name>
         <System>SiebelDQ_Denmark</System>
         <Search>search-prospect-name</Search>
                     <no_of_sessions>25</no_of_sessions>

      </Record_Type>
   </Parameter>
   <Parameter>
      <Record_Type>
         <Name>Prospect_USA</Name>
         <System>SiebelDQ_USA</System>
         <Search>search-prospect-name</Search>
                     <no_of_sessions>25</no_of_sessions>

      </Record_Type>
   </Parameter>
   <Parameter>
      <Record_Type>
         <Name>Prospect_China</Name>
         <System>SiebelDQ_China</System>
         <Search>search-prospect-name</Search>
                     <no_of_sessions>25</no_of_sessions>

      </Record_Type>
   </Parameter>
   <Parameter>
      <Record_Type>
         <Name>Prospect_Japan</Name>
         <System>SiebelDQ_Japan</System>
         <Search>search-prospect-name</Search>
                     <no_of_sessions>25</no_of_sessions>

      </Record_Type>
   </Parameter>
</Data>
Process of Installing the Oracle Data Quality Address Validation Server
The Oracle Data Quality Address Validation Server provides address validation and standardization functionality using licensed third-party Informatica Identity Resolution software. The process of installing the Oracle Data Quality Address Validation Server for data cleansing is broken down into the following tasks:
Installing Oracle Data Quality Address Validation Server
Use the following procedure to install the Oracle Data Quality Address Validation Server. This task is a step in Process of Installing the Oracle Data Quality Address Validation Server.
To install Oracle Data Quality Address Validation Server
Install Informatica Identity Resolution.
The Oracle Data Quality Address Validation Server is installed as part of Informatica Identity Resolution installation. For more information about Informatica Identity Resolution installation on Microsoft Windows and on UNIX, see the following:
The ssadqasm.dll file uses the Oracle Data Quality Address Validation Server for address cleansing. You need a license to use the Oracle Data Quality Address Validation Server.
Obtain licensing for the postal directories (or postal validation databases), and then:
Note: The postal directories and the license for the postal directories must be obtained directly from Informatica Address Doctor. For more information, see Acquiring the License Key and Postal Directories for Oracle Data Quality Address Validation Server. Informatica bundles geographies in different ways - for example, North America is cheaper than USA + Canada + Mexico.Copy the postal validation databases to the following location:
<InstallDir>:/InformaticaIR/ssaas/ad5/ad/db
Note: This is the postal directory path for Informatica Address Doctor Version 5. For Informatica Address Doctor Version 4, the postal directory path isInformaticaIR/ssaas/ad/ad/db.Copy the following DLLs from
informaticaIR/bintosiebelsrvr/bin:ssasec.dll
ssadqasm.dll
ssadqsea.dll
ssaiok.dll
Note: Copy these DLLs if using Windows. Copy the libXXXX.so DLLs if using UNIX. For UNIX, the target directory issiebsrvr/lib. For Windows, the target directory issiebsrvr\bin.]Make sure that you copy the DLLs to Siebel Server every time you upgrade or apply a new patch for your Siebel application.
Place the Oracle Data Quality Address Validation Server key file in the
/ssaas/ad5/ad/dbfolder. For example:<InstallDir>:/InformaticaIR/ssaas/ad5/ad/db
The
keyfile contains an unlock code for specific databases; Informatica sends thekeyfile along with the postal directories.Note: If using Informatica Identity Resolution 9.01, see Upgrading to Informatica Identity Resolution 9.01 ( Upgrading to Informatica Identity Resolution 9.01).
Install country files in the /
ssaas/ad5/ad/dbfolder. For example:/InformaticaIR/ssaas/ad5/ad/db
Add UNITED STATES to the COUNTRY list of values:
Navigate to Administration - Data screen, then the List of Values Explorer view.
Click Query, and query for the following in the List of Values - Type field: COUNTRY.
In the LOV explorer panel, click the COUNTRY node (by clicking the + sign) and navigate to the values for COUNTRY.
Add a new entry for UNITED STATES.
Repeat this step for each country where you acquired postal directories. For example, add CANADA to the COUNTRY list of values in the same way, add MEXICO to the COUNTRY list of values in the same way, and so on.
Modifying Configuration Parameters for Oracle Data Quality Address Validation Server
The ssadq_cfgasm.xml file contains the global configuration parameters for Oracle Data Quality Address Validation Server. You must modify ssadq_cfgasm.xml in order to map Siebel CRM business components (<bc_field>) to data types supported by IIR (<data_type>). The following table lists the data types that are supported by IIR. For an example ssadq_cfgasm.xml file, see Sample Configuration Files for Oracle Data Quality Matching Server.
Table Data Types Supported by IIR
| Data Type | Meaning |
|---|---|
Nobility |
For example: Lord, Sir, and so on. |
Title |
For example: Mr. Mrs, Dr, and so on. |
FName |
First name |
MName |
Middle name |
LName |
Last name |
Function |
For example: Manager, Director, and so on. |
Building |
Building name |
SubBuilding |
Sub building name |
HouseNumber |
House number |
Street1 |
Street address line 1 |
Street2 |
Street address line 2 |
POBox |
Post office box number |
DeptLocality |
For example: URB, Colonia. |
Locality |
For example: County |
Province |
For example: State |
Zip |
Postal code |
Country |
Country name |
In addition to providing field mappings, the ssadq_cfgasm.xml file defines a standardization operation (<std_operation>) for each field, which controls how the field will be standardized.
The following table lists the standardization operations that are supported by IIR.
Table Standardization Operations Supported by IIR
| Standardization Operation | Description |
|---|---|
Upper |
Convert text to upper case. |
Lower |
Convert text to lower case. |
Camel |
Convert text to camel case (upper case for first letter only) |
Use the following procedure to modify configuration parameters for Oracle Data Quality Address Validation Server. This task is a step in Process of Installing the Oracle Data Quality Address Validation Server.
To modify configuration parameters for Oracle Data Quality Address Validation Server
Open the ssadq_cfgasm.xml file in a text editor.
Use the following syntax to map a Siebel CRM business component field name to a supported IIR data type:
<Parameter>
 <datacleanse_mapping>
    <mapping>
        <bc_field>AccountName</bc_field>
        <data_type>Organization</data_type>
        <std_operation>Camel</std_operation>
    </mapping>
 </datacleanse_mapping>
</Parameter>
This example maps the Siebel CRM business component field name AccountName to the supported IIR Organization data type, and defines camel as the standardization operation.
Repeat this step as required.
Save the ssadq_cfgasm.xml file and copy it to the SDQConnector folder on Siebel Server for the changes to take effect:
siebsrvr/SDQConnector
To integrate with the Informatica Address Doctor Version 5 postal directories, add the following tag to the ssadqasm_cfg.xml file located in
siebelserver/SDQConnector:<Parameter> <asm_version>V5</asm_version> </Parameter>When enabling data cleansing, you must add the country LOV value according to how the country is returned by the postal directory after cleansing. For example, if Country USA looks like “UNITED STATES” post cleansing, then you must add the LOV value UNITED STATES to the Country picklist.
Note: An upgrade from Informatica Identity Resolution 2.7.04 to 2.8.07 should be treated like a new setup. In such cases, install Informatica Identity Resolution 2.8.07 on a new port, create a new system, perform the initial load, start the synchronizer to make it operational, and then delete the current Informatica Identity Resolution 2.7.04 setup.
Acquiring the License Key and Postal Directories for Oracle Data Quality Address Validation Server
The Oracle Data Quality Address Validation Server is installed as part of Informatica Identity Resolution installation. All content and license keys for the postal directories, however, must be purchased directly from Informatica Address Doctor. Subsequent updates and support for the postal directories is provided by Informatica Address Doctor also.
Address Doctor postal directories are currently certified in USA, Canada, and Australia. Address Doctor provides coverage for over 240 countries but not all coverage is the same. Address Doctor assigns a grade (A+, A, B) for each country's coverage. As this grade can change, it is recommended that you check the Address Doctor Web site at the following address for the latest grades:
http://www.addressdoctor.com/en/countries_data/countries5.asp
License keys, once purchased, provide a 12-month subscription to the postal directories and restrict the use of address validation to the purchased countries or territories. The maximum duration of the license key is 12 months.
A postal directory is ultimately owned and managed by the country or territory that provides the postal data, and hence is managed differently across providers. You can keep an eye on postal directory updates by:
Verifying the postal reference data on the Address Doctor Web site.
Reviewing any update emails that Address Doctor sends.
Use the following procedure to acquire the license key and postal directories for Oracle Data Quality Address Validation Server. This task is a step in Process of Installing the Oracle Data Quality Address Validation Server.
To acquire the license key and postal directories for Oracle Data Quality Address Validation Server
Send the following information to Informatica Address Doctor using the email address oracleAV@informatica.com:
Full customer contact information, including: company name, contact name, email address, billing address, telephone, and fax numbers.
The countries, regions, or territories for which you require the license and postal reference data.
The platform on which the Oracle Data Quality Address Validation Server is deployed (for example, Oracle Solaris 10 or Windows 32 bit).
The underlying Informatica product and version (for example, Informatica Identity Resolution version 2.7 or 2.8).
When you have purchased the license key and postal directories for Oracle Data Quality Address Validation Server:
Informatica Address Doctor emails the license key information to the named contact.
Informatica Address Doctor support emails the credentials to download the reference key to the named contact.
You need this information to install and access the postal directories as described in Installing Oracle Data Quality Address Validation Server.
Configuring Siebel Business Applications for the Oracle Data Quality Address Validation Server
Configuring Siebel Business Applications for the Oracle Data Quality Address Validation Server involves enabling cleansing on all object managers, specifying data cleansing settings, and setting up preconfigured vendor parameters and field mapping values for the Oracle Data Quality Address Validation Server.
Use the following procedure to configure Siebel Business Applications for the Oracle Data Quality Address Validation Server. This task is a step in Configuring Oracle Data Quality Matching Server.
To configure Siebel Business Applications for the Oracle Data Quality Address Validation Server
Open the uagent.cfg file in a text editor, and modify the [DataCleansing] section of the file to include the following:
[DataCleansing]
Enable=TRUE
Type=ASM
The uagent.cfg file is located in the
Siebel/bin/w32u/enudirectory.In your Siebel application, enable data cleansing to use the Oracle Data Quality Address Validation Server as described in Enabling and Disabling Data Matching and Data Cleansing.
For example, enable data cleansing at the object manager level, enterprise level, user level, and set the data quality settings (for data cleansing). Note that the Data Cleansing Type parameter must be set to ASM as shown in the following table.
Parameter Name Value Data Cleansing Enable Flag
True
Data Cleansing Type
ASM
Configure the ASM vendor applet (Oracle Data Quality Address Validation Server vendor applet) as shown in the following table by navigating to the Administration - Data Quality screen, then the Third Party Administration view.
Vendor Applet Parameter Name Vendor Applet Parameter Value Name
ASM
DLL Name
ssadqasm
Verify that the preconfigured ASM vendor parameter and field mapping values are set up as listed in Universal Connector Parameter and Field Mapping Values for Oracle Data Quality Address Validation Server.
For better control over the data returned by ASM, add the following vendor parameters for Oracle Data Quality Address Validation Server:
Vendor Parameter Name Description ASM Country Database Return Code
Specifies the ASM return codes under this vendor parameter for which any error messages returned are ignored and processing continues if the country database is not found.
List return codes, separated by a comma. For example, if the customer is using Informatica Address Doctor Version 5 and the country database is not licensed, then specify the vendor parameter as follows:
ASM Country Database Return Code: 25,26
ASM High Deliverability Return Code
Specifies the ASM return codes under this vendor parameter for which addresses returned by the ASM Engine override the input address.
If the ASM return code matches a return code defined within this vendor parameter, then the validated address sent by the ASM Engine is cleansed. In all other cases, the input address is retained.
List return codes, separated by a comma. For example:
ASM High Deliverability Return Code:
0,1,2,3,4,5,6,7,8
This vendor parameter applies only if the DQ Cleanse High Deliverable Address vendor parameter is set to Yes.
Modify the ssadq_cfgasm.xml file as described in Process of Installing the Oracle Data Quality Matching Server.
Universal Connector Parameter and Field Mapping Values for Oracle Data Quality Address Validation Server
This topic includes information about the Universal Connector parameters and field mapping values for the Oracle Data Quality Address Validation Server.
Preconfigured Vendor Parameters for Oracle Data Quality Address Validation Server
The following table lists the vendor parameters preconfigured for Oracle Data Quality Address Validation Server. You must not reconfigure the parameter settings.
Table Preconfigured Vendor Parameters for Oracle Data Quality Address Validation Server
| Name | Value |
|---|---|
Account DataCleanse Record Type |
Account |
Contact DataCleanse Record Type |
Contact |
List Mgmt Prospective Contact DataCleanse Record Type |
Prospect |
Personal Address DataCleanse Record Type |
Business Address |
CUT Address DataCleanse Record Type |
Business Address |
DQ Send Empty Field To Third Party Vendor |
No |
DQ Cleanse High Deliverable Address |
Yes |
Parameter 1 |
"global", "iss-config-file", "ssadq_cfgasm.xml" |
Preconfigured Field Mappings for Oracle Data Quality Address Validation Server
This topic includes information about the preconfigured Oracle Data Quality Address Validation Server field mappings for the following business components:
Preconfigured Field Mappings for Business Component - Account
Preconfigured Field Mappings for Business Component - Contact
Preconfigured Field Mappings for Business Component - List Mgmt Prospective Contact
Preconfigured Field Mappings for Business Component - CUT Address
Preconfigured Field Mappings for Business Component - Personal Address
Preconfigured Field Mappings for Business Component - Account
The following table shows the data cleansing field mappings for the Account business component and data cleansing operation.
Table Preconfigured Field Mappings for Oracle Data Quality Address Validation Server Business Component - Account
| Business Component Field | Mapped Field |
|---|---|
Name |
Account.Name |
Preconfigured Field Mappings for Business Component - Contact
The following table shows the data cleansing field mappings for the Contact business component and data cleansing operation.
Table Preconfigured Field Mappings for Oracle Data Quality Address Validation Server Business Component - Contact
| Business Component Field | Mapped Field |
|---|---|
First Name |
Contact.First Name |
Last Name |
Contact.Last Name |
Middle Name |
Contact.Middle Name |
Preconfigured Field Mappings for Business Component - List Mgmt Prospective Contact
The following table shows the data cleansing field mappings for the List Mgmt Prospective Contact business component and data cleansing operation.
Table Preconfigured Field Mappings for Oracle Data Quality Address Validation Server Business Component - List Mgmt Prospective Contact
| Business Component Field | Mapped Field |
|---|---|
First Name |
List Mgmt Prospective Contact.First Name |
Job Title |
List Mgmt Prospective Contact.Job Title |
Last Name |
List Mgmt Prospective Contact.Last Name |
Middle Name |
List Mgmt Prospective Contact.Middle Name |
Preconfigured Field Mappings for Business Component - CUT Address
The following table shows the data cleansing field mappings for the CUT Address business component and data cleansing operation.
Table Preconfigured Field Mappings for Oracle Data Quality Address Validation Server Business Component - CUT Address
| Business Component Field | Mapped Field |
|---|---|
City |
Business Address.City |
Country |
Business Address.Country |
Postal Code |
Business Address.Postal Code |
State |
Business Address.State |
Street Address |
Business Address.Street Address |
Street Address 2 |
Business Address.Street Address 2 |
Preconfigured Field Mappings for Business Component - Personal Address
The following table shows the data cleansing field mappings for the Personal Address business component and data cleansing operation.
Table Preconfigured Field Mappings for Oracle Data Quality Address Validation Server Business Component - Personal Address
| Business Component Field | Mapped Field |
|---|---|
City |
Business Address.City |
Country |
Business Address.Country |
Postal Code |
Business Address.Postal Code |
State |
Business Address.State |
Street Address |
Business Address.Street Address |
Street Address 2 |
Business Address.Street Address 2 |
Sample Configuration File for Oracle Data Quality Address Validation Server
This topic provides an example of the ssadq_cfgasm file which is the configuration file used by Oracle Data Quality Address Validation Server.
ssadq_cfgasm.xml
The ssadq_cfgasm.xml file is used by Oracle Data Quality Address Validation Server. An example ssadq_cfgasm.xml file follows.
<?xml version="1.0" encoding="UTF-8"?>
<Data>
   <Parameter>
      <iss_host>hostname</iss_host>
   </Parameter>
   <Parameter>
      <iss_port>1666</iss_port>
   </Parameter>
   <Parameter>
      <format_zip>TRUE</format_zip>
   </Parameter>
      <Parameter>
      <datacleanse_mapping>
         <mapping>
            <field>Name</field>
            <ssafield>Organization</ssafield>
            <std_operation>Upper</std_operation>
         </mapping>
         <mapping>
            <field>Street_spcAddress</field>
            <ssafield>Street1</ssafield>
            <std_operation>Upper</std_operation>
         </mapping>
         <mapping>
            <field>City</field>
            <ssafield>Locality</ssafield>
      </mapping>
         <mapping>
            <field>Postal_spcCode</field>
            <ssafield>Zip</ssafield>
         </mapping>
         <mapping>
            <field>State</field>
            <ssafield>Province</ssafield>
         </mapping>
         <mapping>
            <field>Country</field>
            <ssafield>Country</ssafield>
         </mapping>
         <mapping>
            <field>First_spcName</field>
            <ssafield>FName</ssafield>
            <std_operation>Upper</std_operation>
         </mapping>
         <mapping>
            <field>Middle_spcName</field>
            <ssafield>MName</ssafield>
         <std_operation>Upper</std_operation>
         </mapping>
         <mapping>
            <field>Last_spcName</field>
            <ssafield>LName</ssafield>
            <std_operation>Upper</std_operation>
         </mapping>
                  <mapping>
            <field>Personal_spcPostal_spcCode</field>
            <ssafield>Zip</ssafield>
      </mapping>
         <mapping>
            <field>Personal_spcCity</field>
            <ssafield>Locality</ssafield>
         </mapping>
         <mapping>
            <field>Personal_spcState</field>
            <ssafield>Province</ssafield>
         </mapping>
         <mapping>
            <field>Personal_spcStreet_spcAddress</field>
            <ssafield>Street1</ssafield>
            <std_operation>Camel</std_operation>
         </mapping>
         <mapping>
            <field>Personal_spcStreet_spcAddress 2</field>
            <ssafield>Street2</ssafield>
            <std_operation>Camel</std_operation>
         </mapping>
         <mapping>
            <field>Personal_spcCountry</field>
            <ssafield>Country</ssafield>
         </mapping>
      </datacleanse_mapping>
   </Parameter>
</Data>
Siebel Business Applications ISSSYNC Action Sets
ISSSYNC action sets use Siebel application workflows to send messages to the Oracle Data Quality Matching Server XS Server (XML Sync Server). Activate ISSSYNC action sets if using a code base earlier than Siebel CRM Version 8.2. For more information about creating action sets, including creating actions for action sets, and associating events with action sets, see Siebel Personalization Administration Guide.
This topic introduces the following ISSSYNC action sets for Siebel Business Applications:
ISSSYNC Action Sets for Account
This topic introduces the following Siebel application ISSSYNC action sets for Account:
ISSLoad Account
The following table describes the actions in the ISSLoad Account action set.
Table Actions in ISSLoad Account Action Set
| Action | Name of Field | Value |
|---|---|---|
ISS Set System Name |
Name |
ISS Set System Name |
Sequence |
1 |
|
Action Type |
Attribute Set |
|
Profile Attribute |
IDS_SYSTEM |
|
Set Operator |
Set |
|
Value |
SiebelDQ |
|
ISS Set Page Size |
Name |
ISS Set Page Size |
Sequence |
2 |
|
Action Type |
Attribute Set |
|
Profile Attribute |
IDS_PAGE_SIZE |
|
Set Operator |
Set |
|
Value |
80 |
|
ISS Set File Name |
Name |
ISS Set File Name |
Sequence |
3 |
|
Action Type |
Attribute Set |
|
Profile Attribute |
IDS_LOADFILE |
|
Set Operator |
Set |
|
Value |
"C:\ids\iss2704s\ids\data\account.xml"
Note: Modify this value if you install
Oracle Data Quality Matching Server on a drive other than
C:\ drive.
|
|
ISS Set IDT Name |
Name |
ISS Set IDT Name |
Sequence |
4 |
|
Action Type |
Attribute Set |
|
Profile Attribute |
IDS_IDT |
|
Set Operator |
Set |
|
Value |
IDS_01_IDT_ACCOUNT |
|
Set IO Name |
Name |
ISS Set IO Name |
Sequence |
5 |
|
Action Type |
Attribute Set |
|
Profile Attribute |
IDS_IO_NAME |
|
Set Operator |
Set |
|
Value |
ISS_Account |
|
ISS Run WF |
Name |
ISS Run WF |
Sequence |
6 |
|
Action Type |
BusService |
|
Business Service Name |
Workflow Process Manager |
|
Business Service Method |
RunProcess |
|
Business Service Context |
"ProcessName", "ISS Launch Build Load File" |
ISSSYNC DeleteRecord Account
The following table describes the actions in the ISSSYNC DeleteRecord Account action set.
Table Actions in ISSSYNC DeleteRecord Account Action Set
| Action | Name of Field | Value |
|---|---|---|
ISS Set URL |
Name |
ISS Set URL |
Sequence |
1 |
|
Action Type |
Attribute Set |
|
Profile Attribute |
IDS_URL |
|
Set Operator |
Set |
|
Value |
"http://SERVERNAME:1671"
Note: Replace SERVERNAME with the Hostname or IP address of the computer where XML Sync Server (XS) is installed.
|
|
ISS Run WF |
Name |
ISS Run WF |
Sequence |
2 |
|
Action Type |
BusService |
|
Business Service Name |
Workflow Process Manager |
|
Business Service Method |
RunProcess |
|
Business Service Context |
"ProcessName", "ISS Launch Delete Record Sync" |
ISSSYNC PreDeleteRecord Account
The following table describes the actions in the ISSSYNC PreDeleteRecord Account action set.
Table Actions in ISSSYNC PreDeleteRecord Account Action Set
| Action | Name of Field | Value |
|---|---|---|
ISS Set System Name |
Name |
ISS Set System Name |
Sequence |
1 |
|
Action Type |
Attribute Set |
|
Profile Attribute |
IDS_SYSTEM |
|
Set Operator |
Set |
|
Value |
SiebelDQ |
|
ISS Set IDT Name |
Name |
ISS Set IDT Name |
Sequence |
2 |
|
Action Type |
Attribute Set |
|
Profile Attribute |
IDS_IDT |
|
Set Operator |
Set |
|
Value |
IDS_01_IDT_ACCOUNT |
|
ISS Set IO Name |
Name |
ISS Set IO Name |
Sequence |
3 |
|
Action Type |
Attribute Set |
|
Profile Attribute |
IDS_IO_NAME |
|
Set Operator |
Set |
|
Value |
ISS_Account |
|
ISS Set ID |
Name |
ISS Set ID |
Sequence |
4 |
|
Action Type |
Attribute Set |
|
Profile Attribute |
IDS_IO_ID |
|
Set Operator |
Set |
|
Value |
[Id] |
|
ISS Run WF |
Name |
ISS Run WF |
Sequence |
5 |
|
Action Type |
BusService |
|
Business Service Name |
Workflow Process Manager |
|
Business Service Method |
RunProcess |
|
Business Service Context |
"ProcessName", "ISS Launch PreDelete Record Sync" |
ISSSYNC PreWriteRecord Account
The following table describes the actions in the ISSSYNC PreWriteRecord Account action set.
Table Actions in ISSSYNC PreWriteRecord Account Action Set
| Action | Name of Field | Value |
|---|---|---|
ISS Set System Name |
Name |
ISS Set System Name |
Sequence |
1 |
|
Action Type |
Attribute Set |
|
Profile Attribute |
IDS_SYSTEM |
|
Set Operator |
Set |
|
Value |
SiebelDQ |
|
ISS Set IDT Name |
Name |
ISS Set IDT Name |
Sequence |
2 |
|
Action Type |
Attribute Set |
|
Profile Attribute |
IDS_IDT |
|
Set Operator |
Set |
|
Value |
IDS_01_IDT_ACCOUNT |
|
ISS Set IO Name |
Name |
ISS Set IO Name |
Sequence |
3 |
|
Action Type |
Attribute Set |
|
Profile Attribute |
IDS_IO_NAME |
|
Set Operator |
Set |
|
Value |
ISS_Account |
|
ISS Set ID |
Name |
ISS Set ID |
Sequence |
4 |
|
Action Type |
Attribute Set |
|
Profile Attribute |
IDS_IO_ID |
|
Set Operator |
Set |
|
Value |
[Id] |
|
ISS Run WF |
Name |
ISS Run WF |
Sequence |
5 |
|
Action Type |
BusService |
|
Business Service Name |
Workflow Process Manager |
|
Business Service Method |
RunProcess |
|
Business Service Context |
"ProcessName", "ISS Launch PreWrite Record Sync" |
ISSSYNC WriteRecord Account
The following table describes the actions in the ISSYNC WriteRecord Account action set.
Table Actions in ISSSYNC WriteRecord Account Action Set
| Action | Name of Field | Value |
|---|---|---|
ISS Set System Name |
Name |
ISS Set System Name |
Sequence |
1 |
|
Action Type |
Attribute Set |
|
Profile Attribute |
IDS_SYSTEM |
|
Set Operator |
Set |
|
Value |
SiebelDQ |
|
ISS Set IDT Name |
Name |
ISS Set IDT Name |
Sequence |
2 |
|
Action Type |
Attribute Set |
|
Profile Attribute |
IDS_IDT |
|
Set Operator |
Set |
|
Value |
IDS_01_IDT_ACCOUNT |
|
ISS Set IO Name |
Name |
ISS Set IO Name |
Sequence |
3 |
|
Action Type |
Attribute Set |
|
Profile Attribute |
IDS_IO_NAME |
|
Set Operator |
Set |
|
Value |
ISS_Account |
|
ISS Set ID |
Name |
ISS Set ID |
Sequence |
4 |
|
Action Type |
Attribute Set |
|
Profile Attribute |
IDS_IO_ID |
|
Set Operator |
Set |
|
Value |
[Id] |
|
ISS Set URL |
Name |
ISS Set URL |
Sequence |
5 |
|
Action Type |
Attribute Set |
|
Profile Attribute |
IDS_URL |
|
Set Operator |
Set |
|
Value |
"http://SERVERNAME:1671"
Note: Replace SERVERNAME with the Hostname or IP address of the computer where XML Sync Server (XS) is installed.
|
|
ISS Run WF |
Name |
ISS Run WF |
Sequence |
6 |
|
Action Type |
BusService |
|
Business Service Name |
Workflow Process Manager |
|
Business Service Method |
RunProcess |
|
Business Service Context |
"ProcessName", "ISS Launch Write Record Sync" |
ISSSYNC Action Sets for Contact
This topic introduces the following Siebel application ISSSYNC action sets for Contact:
ISSLoad Contact
The following table describes the actions in the ISSLoad Contact action set.
Table Actions in ISSLoad Contact Action Set
| Action | Name of Field | Value |
|---|---|---|
ISS Set System Name |
Name |
ISS Set System Name |
Sequence |
1 |
|
Action Type |
Attribute Set |
|
Profile Attribute |
IDS_SYSTEM |
|
Set Operator |
Set |
|
Value |
SiebelDQ |
|
ISS Set Page Size |
Name |
ISS Set Page Size |
Sequence |
2 |
|
Action Type |
Attribute Set |
|
Profile Attribute |
IDS_PAGE_SIZE |
|
Set Operator |
Set |
|
Value |
80 |
|
ISS Set File Name |
Name |
ISS Set File Name |
Sequence |
3 |
|
Action Type |
Attribute Set |
|
Profile Attribute |
IDS_LOADFILE |
|
Set Operator |
Set |
|
Value |
"C:\ids\iss2704s\ids\data\contact.xml"
Note: Modify this value if you install
Oracle Data Quality Matching Server on a drive other than
C:\ drive.
|
|
ISS Set IDT Name |
Name |
ISS Set IDT Name |
Sequence |
4 |
|
Action Type |
Attribute Set |
|
Profile Attribute |
IDS_IDT |
|
Set Operator |
Set |
|
Value |
IDS_01_IDT_CONTACT |
|
ISS Set IO Name |
Name |
ISS Set IO Name |
Sequence |
5 |
|
Action Type |
Attribute Set |
|
Profile Attribute |
IDS_IO_NAME |
|
Set Operator |
Set |
|
Value |
ISS_Contact |
|
ISS Run WF |
Name |
ISS Run WF |
Sequence |
6 |
|
Action Type |
BusService |
|
Business Service Name |
Workflow Process Manager |
|
Business Service Method |
RunProcess |
|
Business Service Context |
"ProcessName", "ISS Launch Build Load File" |
ISSSYNC DeleteRecord Contact
The following table describes the actions in the ISSSYNC DeleteRecord Contact action set.
Table Actions in ISSSYNC DeleteRecord Contact Action Set
| Action | Name of Field | Value |
|---|---|---|
ISS Set URL |
Name |
ISS Set URL |
Sequence |
1 |
|
Action Type |
Attribute Set |
|
Profile Attribute |
IDS_URL |
|
Set Operator |
Set |
|
Value |
"http://SERVERNAME:1671"
Note: Replace SERVERNAME with the Hostname or IP address of the computer where XML Sync Server (XS) is installed.
|
|
ISS Run WF |
Name |
ISS Run WF |
Sequence |
2 |
|
Action Type |
BusService |
|
Business Service Name |
Workflow Process Manager |
|
Business Service Method |
RunProcess |
|
Business Service Context |
"ProcessName", "ISS Launch Delete Record Sync" |
ISSSYNC PreDeleteRecord Contact
The following table describes the actions in the ISSYNC PreDeleteRecord Contact action set.
Table Actions in ISSSYNC PreDeleteRecord Contact Action Set
| Action | Name of Field | Value |
|---|---|---|
ISS Set System Name |
Name |
ISS Set System Name |
Sequence |
1 |
|
Action Type |
Attribute Set |
|
Profile Attribute |
IDS_SYSTEM |
|
Set Operator |
Set |
|
Value |
SiebelDQ |
|
ISS Set IDT Name |
Name |
ISS Set IDT Name |
Sequence |
2 |
|
Action Type |
Attribute Set |
|
Profile Attribute |
IDS_IDT |
|
Set Operator |
Set |
|
Value |
IDS_01_IDT_CONTACT |
|
ISS Set IO Name |
Name |
ISS Set IO Name |
Sequence |
3 |
|
Action Type |
Attribute Set |
|
Profile Attribute |
IDS_IO_NAME |
|
Set Operator |
Set |
|
Value |
ISS_Contact |
|
ISS Set ID |
Name |
ISS Set ID |
Sequence |
4 |
|
Action Type |
Attribute Set |
|
Profile Attribute |
IDS_IO_ID |
|
Set Operator |
Set |
|
Value |
[Id] |
|
ISS Run WF |
Name |
ISS Run WF |
Sequence |
5 |
|
Action Type |
BusService |
|
Business Service Name |
Workflow Process Manager |
|
Business Service Method |
RunProcess |
|
Business Service Context |
"ProcessName", "ISS Launch PreDelete Record Sync" |
ISSSYNC PreWriteRecord Contact
The following table describes the actions in the ISSSYNC PreWriteRecord Contact action set.
Table Actions in ISSSYNC PreWriteRecord Contact Action Set
| Action | Name of Field | Value |
|---|---|---|
ISS Set System Name |
Name |
ISS Set System Name |
Sequence |
1 |
|
Action Type |
Attribute Set |
|
Profile Attribute |
IDS_SYSTEM |
|
Set Operator |
Set |
|
Value |
SiebelDQ |
|
ISS Set IDT Name |
Name |
ISS Set IDT Name |
Sequence |
2 |
|
Action Type |
Attribute Set |
|
Profile Attribute |
IDS_IDT |
|
Set Operator |
Set |
|
Value |
IDS_01_IDT_CONTACT |
|
ISS Set IO Name |
Name |
ISS Set IO Name |
Sequence |
3 |
|
Action Type |
Attribute Set |
|
Profile Attribute |
IDS_IO_NAME |
|
Set Operator |
Set |
|
Value |
ISS_Contact |
|
ISS Set ID |
Name |
ISS Set ID |
Sequence |
4 |
|
Action Type |
Attribute Set |
|
Profile Attribute |
IDS_IO_ID |
|
Set Operator |
Set |
|
Value |
[Id] |
|
ISS Run WF |
Name |
ISS Run WF |
Sequence |
5 |
|
Action Type |
BusService |
|
Business Service Name |
Workflow Process Manager |
|
Business Service Method |
RunProcess |
|
Business Service Context |
"ProcessName", "ISS Launch PreWrite Record Sync" |
ISSSYNC WriteRecord Contact
The following table describes the actions in the ISSSYNC WriteRecord Contact action set.
Table Actions in ISSSYNC WriteRecord Contact Action Set
| Action | Name of Field | Value |
|---|---|---|
ISS Set System Name |
Name |
ISS Set System Name |
Sequence |
1 |
|
Action Type |
Attribute Set |
|
Profile Attribute |
IDS_SYSTEM |
|
Set Operator |
Set |
|
Value |
SiebelDQ |
|
ISS Set IDT Name |
Name |
ISS Set IDT Name |
Sequence |
2 |
|
Action Type |
Attribute Set |
|
Profile Attribute |
IDS_IDT |
|
Set Operator |
Set |
|
Value |
IDS_01_IDT_CONTACT |
|
ISS Set IO Name |
Name |
ISS Set IO Name |
Sequence |
3 |
|
Action Type |
Attribute Set |
|
Profile Attribute |
IDS_IO_NAME |
|
Set Operator |
Set |
|
Value |
ISS_Contact |
|
ISS Set ID |
Name |
ISS Set ID |
Sequence |
4 |
|
Action Type |
Attribute Set |
|
Profile Attribute |
IDS_IO_ID |
|
Set Operator |
Set |
|
Value |
[Id] |
|
ISS Set URL |
Name |
ISS Set URL |
Sequence |
5 |
|
Action Type |
Attribute Set |
|
Profile Attribute |
IDS_URL |
|
Set Operator |
Set |
|
Value |
"http://SERVERNAME:1671"
Note: Replace SERVERNAME with the Hostname or IP address of the computer where XML Sync Server (XS) is installed.
|
|
ISS Run WF |
Name |
ISS Run WF |
Sequence |
6 |
|
Action Type |
BusService |
|
Business Service Name |
Workflow Process Manager |
|
Business Service Method |
RunProcess |
|
Business Service Context |
"ProcessName", "ISS Launch Write Record Sync" |
ISSSYNC Action Sets for List Mgmt Prospective Contact
This topic introduces the following Siebel application ISSSYNC action sets for List Mgmt Prospective Contact:
ISSLoad Prospect
The following table describes the actions in the ISSLoad Prospect action set.
Table Actions in ISSLoad Prospect Action Set
| Action | Name of Field | Value |
|---|---|---|
ISS Set System Name |
Name |
ISS Set System Name |
Sequence |
1 |
|
Action Type |
Attribute Set |
|
Profile Attribute |
IDS_SYSTEM |
|
Set Operator |
Set |
|
Value |
SiebelDQ |
|
ISS Set Page Size |
Name |
ISS Set Page Size |
Sequence |
2 |
|
Action Type |
Attribute Set |
|
Profile Attribute |
IDS_PAGE_SIZE |
|
Set Operator |
Set |
|
Value |
80 |
|
ISS Set File Name |
Name |
ISS Set File Name |
Sequence |
3 |
|
Action Type |
Attribute Set |
|
Profile Attribute |
IDS_LOADFILE |
|
Set Operator |
Set |
|
Value |
"C:\ids\iss2704s\ids\data\prospect.xml"
Note: Modify this value if you install
Oracle Data Quality Matching Server on a drive other than
C:\ drive.
|
|
ISS Set IDT Name |
Name |
ISS Set IDT Name |
Sequence |
4 |
|
Action Type |
Attribute Set |
|
Profile Attribute |
IDS_IDT |
|
Set Operator |
Set |
|
Value |
IDS_01_IDT_PROSPECT |
|
ISS Set IO Name |
Name |
ISS Set IO Name |
Sequence |
5 |
|
Action Type |
Attribute Set |
|
Profile Attribute |
IDS_IO_NAME |
|
Set Operator |
Set |
|
Value |
ISS_List_Mgmt_Prospective_Contact |
|
ISS Run WF |
Name |
ISS Run WF |
Sequence |
6 |
|
Action Type |
BusService |
|
Business Service Name |
Workflow Process Manager |
|
Business Service Method |
RunProcess |
|
Business Service Context |
"ProcessName", "ISS Launch Build Load File" |
ISSSYNC DeleteRecord Prospect
The following table describes the actions in the ISSSYNC DeleteRecord Prospect action set.
Table Actions in ISSSYNC DeleteRecord Prospect Action Set
| Action | Name of Field | Value |
|---|---|---|
ISS Set URL |
Name |
ISS Set URL |
Sequence |
1 |
|
Action Type |
Attribute Set |
|
Profile Attribute |
IDS_URL |
|
Set Operator |
Set |
|
Value |
"http://SERVERNAME:1671"
Note: Replace SERVERNAME with the Hostname or IP address of the computer where XML Sync Server (XS) is installed.
|
|
ISS Run WF |
Name |
ISS Run WF |
Sequence |
2 |
|
Action Type |
BusService |
|
Business Service Name |
Workflow Process Manager |
|
Business Service Method |
RunProcess |
|
Business Service Context |
"ProcessName", "ISS Launch Delete Record Sync" |
ISSSYNC PreDeleteRecord Prospect
The following table describes the actions in the ISSSYNC PreDeleteRecord Prospect action set.
Table Actions in ISSSYNC PreDeleteRecord Prospect Action Set
| Action | Name of Field | Value |
|---|---|---|
ISS Set System Name |
Name |
ISS Set System Name |
Sequence |
1 |
|
Action Type |
Attribute Set |
|
Profile Attribute |
IDS_SYSTEM |
|
Set Operator |
Set |
|
Value |
SiebelDQ |
|
ISS Set IDT Name |
Name |
ISS Set IDT Name |
Sequence |
2 |
|
Action Type |
Attribute Set |
|
Profile Attribute |
IDS_IDT |
|
Set Operator |
Set |
|
Value |
IDS_01_IDT_PROSPECT |
|
ISS Set IO Name |
Name |
ISS Set IO Name |
Sequence |
3 |
|
Action Type |
Attribute Set |
|
Profile Attribute |
IDS_IO_NAME |
|
Set Operator |
Set |
|
Value |
ISS_List_Mgmt_Prospective_Contact |
|
ISS Set ID |
Name |
ISS Set ID |
Sequence |
4 |
|
Action Type |
Attribute Set |
|
Profile Attribute |
IDS_IO_ID |
|
Set Operator |
Set |
|
Value |
[Id] |
|
ISS Run WF |
Name |
ISS Run WF |
Sequence |
5 |
|
Action Type |
BusService |
|
Business Service Name |
Workflow Process Manager |
|
Business Service Method |
RunProcess |
|
Business Service Context |
"ProcessName", "ISS Launch PreDelete Record Sync" |
ISSSYNC PreWriteRecord Prospect
The following table describes the actions in the ISSSYNC PreWriteRecord Prospect action set.
Table Actions in ISSSYNC PreWriteRecord Prospect Action Set
| Action | Name of Field | Value |
|---|---|---|
ISS Set System Name |
Name |
ISS Set System Name |
Sequence |
1 |
|
Action Type |
Attribute Set |
|
Profile Attribute |
IDS_SYSTEM |
|
Set Operator |
Set |
|
Value |
SiebelDQ |
|
ISS Set IDT Name |
Name |
ISS Set IDT Name |
Sequence |
2 |
|
Action Type |
Attribute Set |
|
Profile Attribute |
IDS_IDT |
|
Set Operator |
Set |
|
Value |
IDS_01_IDT_PROSPECT |
|
ISS Set IO Name |
Name |
ISS Set IO Name |
Sequence |
3 |
|
Action Type |
Attribute Set |
|
Profile Attribute |
IDS_IO_NAME |
|
Set Operator |
Set |
|
Value |
ISS_List_Mgmt_Prospective_Contact |
|
ISS Set ID |
Name |
ISS Set ID |
Sequence |
4 |
|
Action Type |
Attribute Set |
|
Profile Attribute |
IDS_IO_ID |
|
Set Operator |
Set |
|
Value |
[Id] |
|
ISS Run WF |
Name |
ISS Run WF |
Sequence |
5 |
|
Action Type |
BusService |
|
Business Service Name |
Workflow Process Manager |
|
Business Service Method |
RunProcess |
|
Business Service Context |
"ProcessName", "ISS Launch PreWrite Record Sync" |
ISSSYNC WriteRecord Prospect
The following table describes the actions in the ISSSYNC WriteRecord Prospect action set.
Table Actions in ISSSYNC WriteRecord Prospect Action Set
| Action | Name of Field | Value |
|---|---|---|
ISS Set System Name |
Name |
ISS Set System Name |
Sequence |
1 |
|
Action Type |
Attribute Set |
|
Profile Attribute |
IDS_SYSTEM |
|
Set Operator |
Set |
|
Value |
SiebelDQ |
|
ISS Set IDT Name |
Name |
ISS Set IDT Name |
Sequence |
2 |
|
Action Type |
Attribute Set |
|
Profile Attribute |
IDS_IDT |
|
Set Operator |
Set |
|
Value |
IDS_01_IDT_PROSPECT |
|
ISS Set IO Name |
Name |
ISS Set IO Name |
Sequence |
3 |
|
Action Type |
Attribute Set |
|
Profile Attribute |
IDS_IO_NAME |
|
Set Operator |
Set |
|
Value |
ISS_List_Mgmt_Prospective_Contact |
|
ISS Set ID |
Name |
ISS Set ID |
Sequence |
4 |
|
Action Type |
Attribute Set |
|
Profile Attribute |
IDS_IO_ID |
|
Set Operator |
Set |
|
Value |
[Id] |
|
ISS Set URL |
Name |
ISS Set URL |
Sequence |
5 |
|
Action Type |
Attribute Set |
|
Profile Attribute |
IDS_URL |
|
Set Operator |
Set |
|
Value |
"http://SERVERNAME:1671"
Note: Replace SERVERNAME with the Hostname or IP address of the computer where XML Sync Server (XS) is installed.
|
|
ISS Run WF |
Name |
ISS Run WF |
Sequence |
6 |
|
Action Type |
BusService |
|
Business Service Name |
Workflow Process Manager |
|
Business Service Method |
RunProcess |
|
ISS Run WF (continued) |
Business Service Context |
"ProcessName", "ISS Launch Write Record Sync" |
Generic ISSSYNC Action Sets
This topic introduces the Siebel application generic ISSSYNC action sets for all business components:
ISSSYNC WriteRecordNew
The following table describes the actions in the ISSSYNC WriteRecordNew action set.
Table Actions in ISSSYNC WriteRecordNew Action Set
| Action | Name of Field | Value |
|---|---|---|
ISS Run WF |
Name |
ISS Run WF |
Sequence |
1 |
|
Action Type |
BusService |
|
Business Service Name |
Workflow Process Manager |
|
Business Service Method |
RunProcess |
|
Business Service Context |
"ProcessName", "ISS WriteRecordNew" |
ISSSYNC WriteRecordUpdated
The following table describes the actions is in the ISSSYNC WriteRecordUpdated action set.
Table Actions in ISSSYNC WriteRecordUpdated Action Set
| Action | Name of Field | Value |
|---|---|---|
ISS Run WF |
Name |
ISS Run WF |
Sequence |
1 |
|
Action Type |
BusService |
|
Business Service Name |
Workflow Process Manager |
|
Business Service Method |
RunProcess |
|
Business Service Context |
"ProcessName", "ISS WriteRecordUpdated" |
Activating Action Sets in Your Siebel Business Application
Use the following procedure to activate action sets in your Siebel application.
To activate action sets in your Siebel application
Verify that the action sets for Account, Contact, and List Mgmt Prospective Contact are set up in your Siebel application by navigating to Administration - Runtime Events, then the Action Sets view.
For information about the action sets that are set up by default in your Siebel application, see the following:
For more information about creating action sets, including creating actions for action sets, see Siebel Personalization Administration Guide.
Note: When verifying ISSSYNC action set setup, make sure that the IDS_URL profile attribute reflects the URL location of Oracle Data Quality Matching Server.Verify that appropriate run-time events (seed data) are set up in your Siebel application by navigating to Administration - Runtime Events, then the Events view.
For more information about run-time events, including how to call a workflow process from a run-time event, see Siebel Business Process Framework: Workflow Guide.
For more information about associating events with action sets, see Siebel Personalization Administration Guide.
Activate the action sets for Account, Contact, and List Mgmt Prospective Contact, as follows:
Navigate to Administration - Runtime Events, then the Action Sets view.
Select the Active checkbox for each Action Set that you want to activate.
Reload the run-time events by clicking Menu, and selecting Reload Runtime Events.
Sample SQL Scripts
This topic provides examples of the SQL scripts that are used for incremental data load.
IDS_IDT_ACCOUNT_STG.SQL
The following sample SQL script can be used for incremental data load.
/*
'============================================================================'
' Need to change TBLO before executing the scripts on target database.       '
'============================================================================'
*/
SET TERMOUT ON
SET FEEDBACK OFF
SET VERIFY OFF
SET TIME OFF
SET TIMING OFF
SET ECHO OFF
SET PAUSE OFF
DROP MATERIALIZED VIEW ACCOUNTS_SNAPSHOT_VIEW;
CREATE MATERIALIZED VIEW ACCOUNTS_SNAPSHOT_VIEW AS
SELECT
   T2.ROW_ID   ACCOUNT_ID,
   T2.NAME   ACCOUNT_NAME,
   T3.ROW_ID   ACCOUNT_ADDR_ID,
   T3.ADDR   ADDRESS_LINE1,
   T3.ADDR_LINE_2   ADDRESS_LINE2,
   T3.COUNTRY   COUNTRY,
   T3.STATE   STATE,
   T3.CITY   CITY,
   T3.ZIPCODE   POSTAL_CODE,
   DECODE(T2.PR_BL_ADDR_ID,T3.ROW_ID,'Y','N')   PRIMARY_FLAG,
   FLOOR((ROWNUM-1)/&BATCH_SIZE)+1   BATCH_NUM
   FROM
      dbo.S_CON_ADDR T1,
      dbo.S_ORG_EXT T2,
      dbo.S_ADDR_PER T3
   WHERE
      T1.ACCNT_ID = T2.ROW_ID
   AND
      T1.ADDR_PER_ID = T3.ROW_ID
-- Comment the following line for Multiple address match option
--   AND T2.PR_BL_ADDR_ID=T3.ROW_ID
/
SELECT '============================================================================'
|| CHR(10) ||
       '                  REPORT ON ACCOUNTS SNAPSHOT' || CHR(10) ||
       '============================================================================'
|| CHR(10)  "  "
       FROM DUAL
/
SELECT BATCH_NUM BATCH, COUNT(*)  "NUMBER OF RECORDS"
FROM ACCOUNTS_SNAPSHOT_VIEW
GROUP BY BATCH_NUM
ORDER BY BATCH_NUM
/
IDS_IDT_CONTACT_STG.SQL
The following sample SQL script can be used for incremental data load.
/*
============================================================================
 Need to change TBLO before executing the scripts on target database.
============================================================================
*/
SET TERMOUT ON
SET FEEDBACK OFF
SET VERIFY OFF
SET TIME OFF
SET TIMING OFF
SET ECHO OFF
SET PAUSE OFF
SET PAGESIZE 50
DROP MATERIALIZED VIEW CONTACTS_SNAPSHOT_VIEW;
CREATE MATERIALIZED VIEW CONTACTS_SNAPSHOT_VIEW AS
SELECT
   T1.CONTACT_ID CONTACT_ID,
   T2.FST_NAME || ' ' || LAST_NAME NAME,
   T2.MID_NAME MIDDLE_NAME,
   T3.ROW_ID   ADDRESS_ID,
   T3.CITY     CITY,
   T3.COUNTRY COUNTRY,
   T3.ZIPCODE  POSTAL_CODE,
   T3.STATE   STATE,
   T3.ADDR    STREETADDRESS,
   T3.ADDR_LINE_2 ADDRESS_LINE2,
   DECODE(T2.PR_PER_ADDR_ID,T3.ROW_ID,'Y','N') PRIMARY_FLAG,
   T4.NAME    ACCOUNT,
   T2.BIRTH_DT BirthDate,
   T2.CELL_PH_NUM  CellularPhone,
   T2.EMAIL_ADDR  EmailAddress,
   T2.HOME_PH_NUM  HomePhone,
   T2.SOC_SECURITY_NUM  SocialSecurityNumber,
   T2.WORK_PH_NUM  WorkPhone,
   FLOOR((ROWNUM-1)/&BATCHSIZE)+1 BATCH_NUM
FROM
   dbo.S_CON_ADDR T1,
   dbo.S_CONTACT T2,
   dbo.S_ADDR_PER T3,
   dbo.S_ORG_EXT T4
WHERE
   T1.CONTACT_ID = T2.ROW_ID AND
   T1.ADDR_PER_ID      = T3.ROW_ID AND
--    OR (T1.ADDR_PER_ID IS NULL))  Do we need contacts with no address?
--Comment the following line for Multiple address match option
--    T2.PR_PER_ADDR_ID   = T3.ROW_ID (+) AND
    T2.PR_DEPT_OU_ID    = T4.PAR_ROW_ID (+)
/
SELECT '============================================================================'
|| CHR(10) ||
       '                  REPORT ON CONTACTS SNAPSHOT' || CHR(10) ||
       '============================================================================'
|| CHR(10)  "  "
       FROM DUAL
/
SELECT BATCH_NUM BATCH, COUNT(*)  "NUMBER OF RECORDS"
FROM CONTACTS_SNAPSHOT_VIEW
GROUP BY BATCH_NUM
ORDER BY BATCH_NUM
/
IDS_IDT_PROSPECT_STG.SQL
The following sample SQL script can be used for incremental data load.
/*
'============================================================================'
' Need to change TBLO before executing the scripts on target database.       '
'============================================================================'
*/
SET TERMOUT ON
SET FEEDBACK OFF
SET VERIFY OFF
SET TIME OFF
SET TIMING OFF
SET ECHO OFF
SET PAUSE OFF
SET PAGESIZE 50
DROP MATERIALIZED VIEW PROSPECTS_SNAPSHOT_VIEW;
CREATE MATERIALIZED VIEW PROSPECTS_SNAPSHOT_VIEW AS
SELECT
   CON_PR_ACCT_NAME  ACCOUNT_NAME,
   CELL_PH_NUM CELLULAR_PHONE,
   CITY   CITY,
   COUNTRY COUNTRY,
   EMAIL_ADDR EMAIL_ADDRESS,
   FST_NAME || ' ' || LAST_NAME  NAME,
   HOME_PH_NUM HOME_PHONE,
   MID_NAME MIDDLE_NAME,
   ZIPCODE POSTAL_CODE,
   SOC_SECURITY_NUM SOCIAL_SECURITY_NUMBER,
   STATE STATE,
   ADDR  STREETADDRESS,
   ADDR_LINE_2  ADDRESS_LINE2,
   WORK_PH_NUM WORK_PHONE,
   ROW_ID PROSPECT_ID,
   FLOOR((ROWNUM-1)/&BATCH_SIZE)+1 BATCH_NUM
FROM
   dbo.S_PRSP_CONTACT T2
/
SELECT '============================================================================'
|| CHR(10) ||
       ' REPORT ON PROSPECTS SNAPSHOT' || CHR(10) ||
       '============================================================================'
|| CHR(10)  "  "
       FROM DUAL
/
SELECT BATCH_NUM BATCH, COUNT(*)  "NUMBER OF RECORDS"
FROM PROSPECTS_SNAPSHOT_VIEW
GROUP BY BATCH_NUM
ORDER BY BATCH_NUM
/
IDS_IDT_CURRENT_BATCH.SQL
The following sample SQL script can be used for incremental data load.
SET FEEDBACK ON
DROP TABLE IDS_IDT_CURRENT_BATCH
/
CREATE TABLE IDS_IDT_CURRENT_BATCH
   (  BATCH_NUM INTEGER)
/
INSERT INTO IDS_IDT_CURRENT_BATCH VALUES (1)
/
IDS_IDT_CURRENT_BATCH_ACCOUNT.SQL
The following sample SQL script can be used for incremental data load.
CREATE OR REPLACE VIEW INIT_LOAD_ALL_ACCOUNTS AS
SELECT
   ACCOUNT_ID,
   ACCOUNT_NAME,
   ACCOUNT_ADDR_ID,
   ADDRESS_LINE1,
   ADDRESS_LINE2,
   COUNTRY,
   STATE,
   CITY,
   POSTAL_CODE,
   PRIMARY_FLAG
FROM
   ACCOUNTS_SNAPSHOT_VIEW
WHERE
   BATCH_NUM=
(SELECT BATCH_NUM FROM IDS_IDT_CURRENT_BATCH)
/
IDS_IDT_CURRENT_BATCH_CONTACT.SQL
The following sample SQL script can be used for incremental data load.
CREATE OR REPLACE VIEW INIT_LOAD_ALL_CONTACTS AS
SELECT
   CONTACT_ID,
                                         NAME,
   MIDDLE_NAME,
                                         ADDRESS_ID,
                                         CITY,
                                         COUNTRY,
                                         POSTAL_CODE,
                                         STATE,
                                         STREETADDRESS,
                                         ADDRESS_LINE2,
                                      PRIMARY_FLAG,
   BirthDate,
   CellularPhone,
   EmailAddress,
   HomePhone,
   SocialSecurityNumber,
   WorkPhone,
   ACCOUNT
FROM
   CONTACTS_SNAPSHOT_VIEW
WHERE
   BATCH_NUM=
(SELECT BATCH_NUM FROM IDS_IDT_CURRENT_BATCH)
/
IDS_IDT_CURRENT_BATCH_PROSPECT.SQL
The following sample SQL script can be used for incremental data load.
CREATE OR REPLACE VIEW  INIT_LOAD_ALL_PROSPECTS AS
SELECT
   ACCOUNT_NAME,
CELLULAR_PHONE,
   CITY,
   COUNTRY,
   EMAIL_ADDRESS,
   NAME,
   HOME_PHONE,
   MIDDLE_NAME,
   POSTAL_CODE,
   SOCIAL_SECURITY_NUMBER,
   STATE,
   STREETADDRESS,
   WORK_PHONE,
   PROSPECT_ID
FROM
   PROSPECTS_SNAPSHOT_VIEW
WHERE
   BATCH_NUM=
(SELECT BATCH_NUM FROM IDS_IDT_CURRENT_BATCH)
/
IDS_IDT_LOAD_ANY_ENTITY.CMD
The following sample SQL script can be used for incremental data load.
@echo off
REM ************************************************************************
REM *                                             *
REM *  1. Change informaticaHome to point to your IIR installation folder  *
REM *  2. Change initLoadScripts to point to your Initial Load scripts    *
REM *                                             *
REM ************************************************************************
   if  %1.==. goto Error
   if  %2.==. goto Error
   if  %3.==. goto Error
   NOT %4.==. goto GIvenBatchOnly
REM ************************************************************************
REM *                                             *
REM *  Setting parameters                        *
REM *                                             *
REM ************************************************************************
set current=%1
set workdir=%2
set dbcredentials=%3
set machineName=%computername%
set informaticaHome=C:\InformaticaIR
set initLoadScripts=C:\InformaticaIR\InitLoadScripts
REM ************************************************************************
REM *                                             *
REM *  Find the number of batches in the current Entity records snapshot   *
REM *                                             *
REM ************************************************************************
FOR /F "usebackq delims=!" %%i IN (`sqlplus -s %dbcredentials% @GetBatchCount%1`) DO set
xresult=%%i
set /a NumBatches=%xresult%
echo %NumBatches%
del /s/f/q %workdir%\*
setlocal enabledelayedexpansion
set /a counter=1
REM ************************************************************************
REM *                                             *
REM *  Loop through all the batches         *
REM *                                             *
REM ************************************************************************
for /l %%a in (2, 1, !NumBatches!) do (
   set /a counter += 1
   (echo counter=!counter!)
   sqlplus %dbcredentials% @%initLoadScripts%\SetBatchNumber.sql !counter!
   cd /d %informaticaHome%\bin
   idsbatch -h%machineName%:1669 -i%initLoadScripts%\idt_%current%_load.txt -
1%workdir%\idt_%current%_load!counter!.log -2%workdir%\idt_%current%_load!counter!.err
-3%workdir%\idt_%current%_load!counter!.dbg
)
goto DONE
:GivenBatchOnly
   echo Processing Batch %4....
   sqlplus %dbcredentials% @%initLoadScripts%\SetBatchNumber.sql %4
   cd /d %informaticaHome%\bin
   idsbatch -h%machineName%:1669 -i%initLoadScripts%\idt_%current%_load.txt -
1%workdir%\idt_%current%_load%4.log -2%workdir%\idt_%current%_load%4.err -
3%workdir%\idt_%current%_load%4.dbg
   goto DONE
:Error
   ECHO Insufficient parameters
   echo usage "IDS_IDT_LOAD_ANY_ENTITY.CMD <Object_Name> <Work_Dir> <DBUser/
DBPassword@TNS_Entry_Name> [Optional Batch Number]"
   ECHO
   echo e.g. IDS_IDT_LOAD_ANY_ENTITY.CMD ACCOUNT C:\InformaticaIR\InitLoadScripts
ora1234/ora1234@ora_db
   GOTO END
:DONE
   Echo Process completed. Please examine error and log files in %workdir%
   OFF
   set /a errorcount = 0
   %%R in (*.err) do if %%~zR neq 0   set /a errorcount += 1
   error Count =%errorcount%
   if %errorcount% neq 0 goto batcherror
   GOTO END
:batcherror
   echo %errorcount% batch/es have failed. Please check the following batches:
   for %%R in (*.err) do if %%~zR neq 0   echo %%R
   goto DONE
:END
IDS_IDT_LOAD_ANY_ENTITY.sh
The following sample SQL script can be used for incremental data load.
#!/bin/bash
#################################################################################
# Prerequisite check block                              #
#################################################################################
# Checking IIR system variables are set. If not then throw error and exit.
if [ -z "$SSABIN" ] && [ -z "$SSATOP" ]
then
   echo "Err #LOAD-01: Informatica IIR system variables not set. Please use 'idsset'
script"
   exit
else
   # checking if required idsbatch utility exists at $SSABIN location
   if [ -f $SSABIN/idsbatch ]
   then
      echo "idsbatch utility found."
   fi
fi
#################################################################################
# Param block                                             #
#################################################################################
# INPUT PARAMETERS
   current=$1
   workdir=$2
   dbcredentials=$3
# ENVIRONMENT RELATED PARAMETERS
#  scriptdir=/export/home/qa1/InformaticaIR/initloadscripts
#  informaticadir=/export/home/qa1/InformaticaIR
   scriptdir=$SSATOP/initloadscripts
   =$SSATOP
# DEBUG OPTION - 1 for ON and 0 for OFF
   debug=1

# Passing DB credentials as argument
# ISS DATABASE CREDENTIALS and CONNECT INFO
#  dbcredentials=ora32155/ora32155@sdchs20n532_qa532a
   dbcredentials=$3
# MACHINE NAME
   machineName=`hostname`
#################################################################################
# Execution block                                         #
#################################################################################
if [ $debug -eq 1 ]; then
   echo using Script dir: $scriptdir
   using Informatica Home: $informaticadir
fi
if [ $# -lt 3 ]
then
   echo "Err #LOAD-03: Error in $0 - Invalid Argument Count"
   echo Usage LoadAnyEntity "<Entity Account,Contact or Prospect> <WorkDir> <dbuser/
dbpass@tnsname> [Optional Batch Number]"
   echo Insufficient parameters
   echo e.g "Syntax: $0 Entity_name  Account  Log_directory  /temp"
   exit
fi
if [ -f $scriptdir/idt_$current\_load.txt ]
   then
   if [ $debug -eq 1 ]; then
      echo Using Load file $scriptdir/idt_$current\_load.txt
   fi
   else
   Load file cannot be loaded. Please check and rerun process
fi
if [ $# -eq 4 ]
   then
   Specific bath to be loaded: $4
fi
if [  -d $workdir ]; then
   cd $workdir
   rm -r -f *.err
fi
if [ $# -eq 3 ]
   then
   read_sql_stmt() {
   typeset stmt=$1
   typeset login=$2

   echo "
      set feedback off verify off heading off pagesize 0
      $stmt;
      exit
      " |  sqlplus -s  $login
   }

   read_sql_stmt "select max(batch_num) from "$current"s_SNAPSHOT_VIEW"
"$dbcredentials" | while read u
   do

   batches=$u

   counter=2
   if [ $debug -eq 1 ]; then
      echo current=$current
      echo workdir=$workdir
      echo counter=$counter
      echo number of batches to be processed is: $batches
   fi

#  for counter in $(seq 2 $batches);
   for ((counter=2; counter <= $batches; counter++));

currentbatch=$(
sqlplus -S $dbcredentials <<!
set head off feedback off echo off pages 0
UPDATE IDS_IDT_CURRENT_BATCH set batch_num=$counter
/
select batch_num from IDS_IDT_CURRENT_BATCH
/
!
   echo
   echo
   echo "#########################################"
   echo "# Curently Processing Batch: $currentbatch     #"
   echo "#########################################"
   cd $informaticadir/bin
   if [ $debug -eq 1 ]; then
   echo InformaticaDrive: ${PWD}
      echo Processing following command:
      echo idsbatch -h$machineName:1669 -i$scriptdir/idt_$current\_load.txt -1$workdir/
idt_$current\_load$counter.log -2$workdir/idt_$current\_load$counter.err -
3$workdir\idt_$current\_load$counter.dbg
      echo "#########################################"
   fi
   idsbatch -h$machineName:1669 -i$scriptdir/idt_$current\_load.txt -1$workdir/
idt_$current\_load$counter.log -2$workdir/idt_$current\_load$counter.err -
3$workdir\idt_$current\_load$counter.dbg
   done
   done
else
   counter=$4
   echo "#########################################"
   echo Processing Batch $4....
   currentbatch=$(
         sqlplus -S $dbcredentials <<!
         set head off feedback off echo off pages 0
         UPDATE IDS_IDT_CURRENT_BATCH set batch_num=$counter
         /
         select batch_num from IDS_IDT_CURRENT_BATCH
         /
         !
         )
   echo "#########################################"
   cd $informaticadrive/bin
   idsbatch -h$machineName:1669 -i$scriptdir/idt_$current\_load.txt -1$workdir/
idt_$current\_load$counter.log -2$workdir/idt_$current\_load$counter.err -
3$workdir\idt_$current\_load$counter.dbg
fi
   echo "Process completed. Please examine error and log files in "$workdir
   # errorcnt=0
if [  -d $workdir ]; then
   cd $workdir
fi
   errorcnt=$(find ./ -depth 1 -name "*.err" ! -size 0 | wc -l)
echo Errors encountered is: $errorcnt
if [ $errorcnt -eq 0 ]; then
   echo Successfully processed all the batches
   else
   echo #########################################
   echo # Failed batch report  #
   echo #########################################
   echo $errorcnt batch/es have failed. Please check the following batches:
   find ./ -depth 1 -name "*.err"
fi
Sample SiebelDQ.sdf File
The following is an example of a SiebelDQ.sdf file.
Section: System
*-----------------------------------------------------------------------
*
*************
* Create a System for each Country. Use separate SDF files for each Country. Use Smallar
case for System Name.
*************
system-definition
*=================
NAME= siebeldq
ID= s1
DEFAULT-PATH= "+"
*
idt-definition
*=============
NAME= IDT_ACCOUNT
*
idt-definition
*=============
NAME= IDT_CONTACT
*
idt-definition
*=============
NAME= IDT_PROSPECT
*
idx-definition
*=============
NAME= IDX_ACCOUNT
ID= 1s
IDT-NAME= IDT_ACCOUNT
KEY-LOGIC= SSA,
           System(default),
           Population(usa),
           Controls("FIELD=Organization_Name
           KEY_LEVEL=Standard"),
          Field(Name), Null-Key("K$$$$$$$")
OPTIONS= No-Null-Key,
         Compress-Key-Data(150)
*
idx-definition
*=============
NAME= IDX_CONTACT_NAME
ID= 2s
IDT-NAME= IDT_CONTACT
KEY-LOGIC= SSA,
           System(default),
           Population(usa),
           Controls("FIELD=Person_Name KEY_LEVEL=Standard"),
           Field(Name),
           Null-Key("K$$$$$$$")
OPTIONS= No-Null-Key,
         Compress-Key-Data(150)
*
idx-definition
*=============
NAME= IDX_CONTACT_ADDR
ID= 3s
IDT-NAME= IDT_CONTACT
KEY-LOGIC= SSA,
           System(default),
           Population(usa),
           Controls("FIELD=Address_part1 KEY_LEVEL=Standard"),
           Field(StreetAddress),
           Null-Key("K$$$$$$$")
OPTIONS= No-Null-Key,
         Compress-Key-Data(150)
*
idx-definition
*=============
NAME= IDX_CONTACT_ORG
ID= 4s
IDT-NAME= IDT_CONTACT
KEY-LOGIC= SSA,
           System(default),
           Population(usa),
           Controls("FIELD=Organization_Name KEY_LEVEL=Standard"),
           Field(Account),
           Null-Key("K$$$$$$$")
OPTIONS= No-Null-Key,
         Compress-Key-Data(150)
*
idx-definition
*=============
NAME= IDX_PROSPECT
ID= 5s
IDT-NAME= IDT_PROSPECT
KEY-LOGIC= SSA,
           System(default),
           Population(usa),
           Controls("FIELD=Person_Name KEY_LEVEL=Standard"),
           Field(Name),
           Null-Key("K$$$$$$$")
OPTIONS= No-Null-Key,
         Compress-Key-Data(150)
*
*
*********************************************************************
* Loader and Job Definitions for Initial Load. You can remove the parameter
OPTIONS=APPEND, if you are not doing an incremental load
*********************************************************************
*
loader-definition
*====================
NAME= All_Load
JOB-LIST= job-account,
   job-contact,
   job-prospect
*
loader-definition
*====================
NAME= siebel_prospect
JOB-LIST= job-prospect
OPTIONS= APPEND
*
loader-definition
*====================
NAME= siebel_contact
JOB-LIST= job-contact
OPTIONS= APPEND
*
loader-definition
*====================
NAME= siebel_account
JOB-LIST= job-account
OPTIONS= APPEND
*
job-definition
*=============
NAME= job-account
FILE= lf-input-account
IDX= IDX_ACCOUNT
*
job-definition
*=============
NAME= job-contact
FILE= lf-input-contact
IDX= IDX_CONTACT_NAME
OPTIONS= Load-All-Indexes
*
job-definition
*=============
NAME= job-prospect
FILE= lf-input-prospect
IDX= IDX_PROSPECT
*
*
logical-file-definition
*======================
NAME= lf-input-account
PHYSICAL-FILE= IDT_ACCOUNT
*PHYSICAL-FILE= "+/data/account.xml"
*************
* If Loading directly from Table, set PHYSICAL-FILE as Table Name,If loading from xml
file set PHYSICAL-FILE as XML file name
*************
INPUT-FORMAT= SQL
*FORMAT= XML
**********
*If Loading directly from Table, set INPUT-FORMAT as SQL, If loading from xml file use
INPUT-FORMAT as XML
*********
*
logical-file-definition
*======================
NAME= lf-input-contact
PHYSICAL-FILE= IDT_CONTACT
INPUT-FORMAT= SQL
*
logical-file-definition
*======================
NAME= lf-input-prospect
PHYSICAL-FILE= IDT_PROSPECT
INPUT-FORMAT= SQL
*
user-job-definition
*==================
COMMENT= "Load Accounts"
NAME= AccountLoad
*
user-step-definition
*===================
COMMENT= "Step 0 for acct load"
JOB= AccountLoad
NUMBER= 0
NAME= runAccountLoad
TYPE= "Load ID Table"
PARAMETERS= ("Loader Definition",siebel_account)
*
user-job-definition
*==================
COMMENT= "Load contacts"
NAME= ContactLoad
*
user-step-definition
*===================
COMMENT= "Load Contacts"
JOB= ContactLoad
NUMBER= 0
NAME= runContactLoad
TYPE= "Load ID Table"
PARAMETERS= ("Loader Definition",siebel_contact)
*
user-job-definition
*==================
COMMENT= "Load Prospects"
NAME= ProspectLoad
*
user-step-definition
*===================
COMMENT= "Step 0 for prospect load"
JOB= ProspectLoad
NUMBER= 0
NAME= runProspectLoad
TYPE= "Load ID Table"
PARAMETERS= ("Loader Definition",siebel_prospect)
*
search-definition
*================
NAME= "search-person-name"
IDX= IDX_CONTACT_NAME
COMMENT= "Use this to search and score on person"
KEY-LOGIC= SSA,
           System(default),
           Population(usa),
           Controls("FIELD=Person_Name SEARCH_LEVEL=Typical"),
           Field(Name)
SCORE-LOGIC= SSA,
             System(default),
             Population(usa),
             Controls("Purpose=Person_Name MATCH_LEVEL=Typical"),
             Matching-
Fields("Name:Person_Name,StreetAddress:Address_Part1,City:Address_part2,State:Attribut
e1,PrimaryPostalCode:Postal_area")
*
**********
* Depending on the Business requirement, you can add or remove the fields to be used for
matching from the "Matching-Fields" section
*********
search-definition
*================
NAME= "search-address"
IDX= IDX_CONTACT_ADDR
COMMENT= "Use this to search and score on person"
KEY-LOGIC= SSA,
           System(default),
           Population(usa),
           Controls("FIELD=Address_part1 SEARCH_LEVEL=Typical"),
           Field(StreetAddress)
SCORE-LOGIC= SSA,
             System(default),
             Population(usa),
             Controls("Purpose=Address MATCH_LEVEL=Typical"),
             Matching-Fields
("Name:Person_Name,StreetAddress:Address_Part1,City:Address_part2,State:Attribute1,Pri
maryPostalCode:Postal_area")
*
search-definition
*================
NAME= "search-company"
IDX= IDX_CONTACT_ORG
COMMENT= "Use this to search for a person within a company"
KEY-LOGIC= SSA,
           System(default),
           Population(usa),
           Controls("FIELD=Organization_Name SEARCH_LEVEL=Typical"),
           Field(Account)
SCORE-LOGIC= SSA,
             System(default),
             Population(usa),
             Controls("Purpose=Contact MATCH_LEVEL=Typical"),
             Matching-Fields
("Account:Organization_Name,Name:Person_Name,StreetAddress:Address_Part1")
*
search-definition
*================
NAME= "search-prospect-name"
IDX= IDX_PROSPECT
COMMENT= "Use this to search and score on prospect person"
KEY-LOGIC= SSA,
           System(default),
           Population(usa),
           Controls("FIELD=Person_Name SEARCH_LEVEL=Typical"),
           Field(Name)
SCORE-LOGIC= SSA,
             System(default),
             Population(usa),
             Controls("Purpose=Person_Name MATCH_LEVEL=Typical"),
             Matching-
Fields("Name:Person_Name,StreetAddress:Address_Part1,City:Address_Part2,State:Attribut
e1,PostalCode:Postal_Area")
*
search-definition
*================
NAME= "search-org"
IDX= IDX_ACCOUNT
COMMENT= "Use this to search and score on company"
KEY-LOGIC= SSA,
           System(default),
           Population(usa),
           Controls("FIELD=Organization_Name SEARCH_LEVEL=Typical"),
           Field(Name)
SCORE-LOGIC= SSA,
             System(default),
             Population(usa),
             Controls("Purpose=Organization MATCH_LEVEL=Typical"),
             Matching-Fields
("Name:Organization_Name,PAccountStrAddress:Address_Part1,PAccountCity:Address_Part2")
*
multi-search-definition
*======================
NAME= "multi-search-direct-contact"
SEARCH-LIST= "search-person-name,search-company,search-address"
IDT-NAME= IDT_CONTACT
*
multi-search-definition
*======================
NAME= "multi-search-contact"
SEARCH-LIST= "search-person-name,search-company"
IDT-NAME= IDT_CONTACT
*
multi-search-definition
*======================
NAME= "multi-search-person"
SEARCH-LIST= "search-person-name,search-address"
IDT-NAME= IDT_CONTACT
*
multi-search-definition
*======================
NAME= "multi-search-division"
SEARCH-LIST= "search-company,search-address"
IDT-NAME= IDT_CONTACT
*
Section: User-Source-Tables
*
*********************************************************************
*                        Initial Load Database Source Views
**********************************************************************
**************************************
* Staging Table for Account Data
* Please refer the DQ Admin guide before changing the sequence of the fields
**************************************
create_idt IDT_ACCOUNT
sourced_from odb:15:ssa_src/ssa_src@ISS_DSN
INIT_LOAD_ALL_ACCOUNTS.ACCOUNT_NAME     Name     V(100),
INIT_LOAD_ALL_ACCOUNTS.ACCOUNT_ADDR_ID     DUNSNumber    V(60),
INIT_LOAD_ALL_ACCOUNTS.ACCOUNT_ID      (pk1)  RowId     C(30)  ,
INIT_LOAD_ALL_ACCOUNTS.CITY       PAccountCity    V(100),
INIT_LOAD_ALL_ACCOUNTS.COUNTRY      PAccountCountry    V(60),
INIT_LOAD_ALL_ACCOUNTS.POSTAL_CODE     PAccountPostalCode   V(60),
INIT_LOAD_ALL_ACCOUNTS.STATE      PAccountState    V(20),
INIT_LOAD_ALL_ACCOUNTS.ADDRESS_LINE1     PAccountStrAddress   V(100),
INIT_LOAD_ALL_ACCOUNTS.ACCOUNT_ADDR_ID  (pk2) PAccountAddressID C(60)
SYNC REPLACE_DUPLICATE_PK
TXN-SOURCE NSA
;
**********************************************************************
*      Sample entries if Loading the data from Flat File
**********************************************************************
*create_idt
*   IDT_ACCOUNT
* sourced_from FLAT_FILE
*      Name W(100),
*      DUNSNumber W(60),
*      PAccountCity W(100),
*      PAccountCountry W(60),
*      PAccountPostalCode W(60),
*      PAccountState W(20),
*      PAccountStrAddress W(100),
*            (pk) RowId C(30)
*
*SYNC REPLACE_DUPLICATE_PK
*TXN-SOURCE NSA
*;
**************************************
* Staging Table for Contact Data
**************************************
create_idt IDT_CONTACT
sourced_from odb:15:ssa_src/ssa_src@ISS_DSN
INIT_LOAD_ALL_CONTACTS.BIRTHDATE     BirthDate    V(60),
INIT_LOAD_ALL_CONTACTS.CELLULARPHONE     CellularPhone    V(60),
INIT_LOAD_ALL_CONTACTS.EMAILADDRESS     EmailAddress    V(60),
INIT_LOAD_ALL_CONTACTS.NAME      NAME     V(100),
INIT_LOAD_ALL_CONTACTS.HOMEPHONE     HomePhone    V(60),
INIT_LOAD_ALL_CONTACTS.MIDDLE_NAME     MiddleName    V(100),
INIT_LOAD_ALL_CONTACTS.ACCOUNT      Account     V(100),
INIT_LOAD_ALL_CONTACTS.CONTACT_ID    (pk1)  RowId     C(30),
INIT_LOAD_ALL_CONTACTS.SOCIALSECURITYNUMBER    SocialSecurityNumber   V(60),
INIT_LOAD_ALL_CONTACTS.WORKPHONE     WorkPhone    V(60) ,
INIT_LOAD_ALL_CONTACTS.CITY      City     V(60),
INIT_LOAD_ALL_CONTACTS.COUNTRY      Country     V(20),
INIT_LOAD_ALL_CONTACTS.POSTAL_CODE     PrimaryPostalCode   V(20),
INIT_LOAD_ALL_CONTACTS.STATE      State     V(20),
INIT_LOAD_ALL_CONTACTS.STREETADDRESS     StreetAddress    V(100),
INIT_LOAD_ALL_CONTACTS.ADDRESS_ID  (pk2) ContactAddressID C(60)
SYNC REPLACE_DUPLICATE_PK
TXN-SOURCE NSA
;
**************************************
* Staging Table for Prospect Data
**************************************
create_idt IDT_PROSPECT
sourced_from odb:15:ssa_src/ssa_src@ISS_DSN
INIT_LOAD_ALL_PROSPECTS.ACCOUNT_NAME    Account     V(100),
INIT_LOAD_ALL_PROSPECTS.CELLULAR_PHONE    CellularPhone    V(60),
INIT_LOAD_ALL_PROSPECTS.CITY     City     V(60),
INIT_LOAD_ALL_PROSPECTS.COUNTRY     Country     V(30),
INIT_LOAD_ALL_PROSPECTS.EMAIL_ADDRESS    EmailAddress    V(60),
INIT_LOAD_ALL_PROSPECTS.NAME     NAME     V(100),
INIT_LOAD_ALL_PROSPECTS.HOME_PHONE    HomePhone    V(60),
INIT_LOAD_ALL_PROSPECTS.MIDDLE_NAME    MiddleName    V(100),
INIT_LOAD_ALL_PROSPECTS.POSTAL_CODE    PostalCode    V(20),
INIT_LOAD_ALL_PROSPECTS.SOCIAL_SECURITY_NUMBER  SocialSecurityNumber   V(60),
INIT_LOAD_ALL_PROSPECTS.STATE     State     V(20),
INIT_LOAD_ALL_PROSPECTS.STREETADDRESS    StreetAddress    V(100),
INIT_LOAD_ALL_PROSPECTS.WORK_PHONE    WorkPhone    V(100),
INIT_LOAD_ALL_PROSPECTS.PROSPECT_ID  (pk)  RowId     C(30)
SYNC REPLACE_DUPLICATE_PK
TXN-SOURCE NSA
;
Section: Files
Section: Views