283/661
Creating Combo Meal Pages
- Select the Enterprise, property, revenue center, or zone, click Configuration, and then click Page Design.
- Open the page (typically the Transaction page) on which to place the combo meal keys and functions.
- Click Button, and then create combo meal menu item keys on the Transaction page.
- Click Other..., and then add a Condiment/Combo Orderer.
Add the Condiment/Combo Orderer to the same Transaction page as the combo menu items and function keys to view the combo meals and substitute side items easier.
- Select the Condiment/Combo Orderer, click the Data tab, and then select Display Title Bar.
The Display Title Bar on the POS client indicates when required combo meal sides or condiments are not ordered.
- Select Combo Meal Side to have the application generate and show combo meal side items.
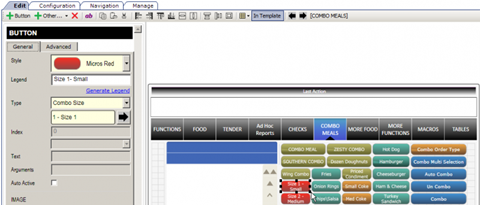
- (Optional) Create combo meal size keys (if needed). These keys enable switching between sizes of combo meal items. You can name the combo size keys for an actual size such as small, medium, or large, or Combo Size 1, Combo Size 2, and so on.
Figure 31-3 Combo Meal Size Key

- Add the appropriate function keys to the Combo Meal Transaction page (for example Combo, Un-Combo, Auto Combo and Combo Multi-Selection).
Combo Meal Function Keys contains more information about each combo meal function key.
- Configure keys for all individual menu items available (in particular combo groups).
- Click Save.