| Oracle® Retail Home Oracle Retail Home Administration Guide Release 21.0 F45466-03 |
|

 Previous |
 Next |
| Oracle® Retail Home Oracle Retail Home Administration Guide Release 21.0 F45466-03 |
|
Previous |
Next |
RGBU Applications provide a feature-rich notifications framework, which sends a variety of different types of notifications to specific groups of users. Retail Home provides administrators with the ability to define types of notifications, set up groups of user roles that should receive each type, and configure how notifications of each type should be handled.
An administrator can access the Manage Notifications page through the Settings menu. To access the page, click Manage Notifications in the settings menu.
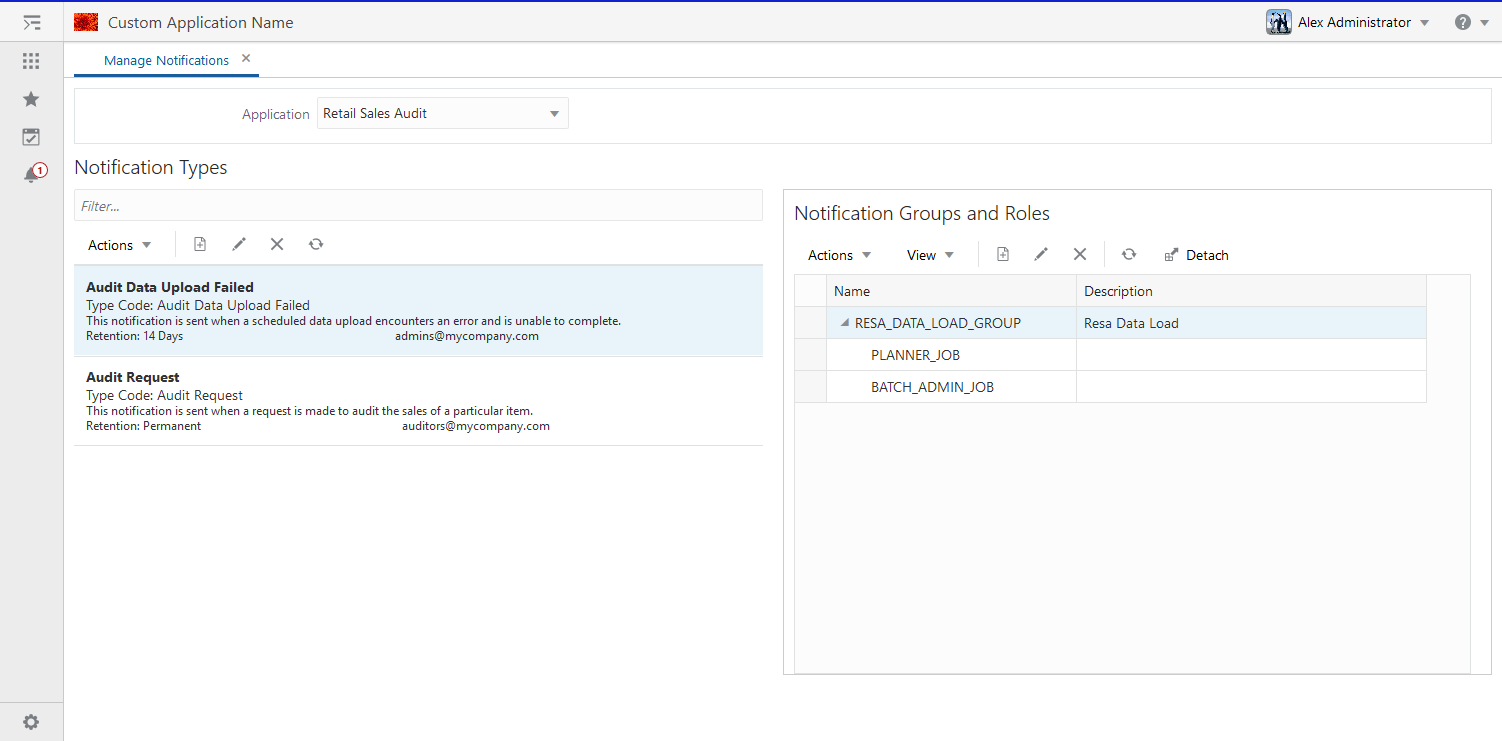
On this page, the user will see a section at the top to select the application which will be configured, and below that, a section titled Notification Types, and a section titled Notification Groups and Roles. Depending on the size of the user's browser window, the Notification Groups and Roles section may either appear to the side or below the Notification Types section.
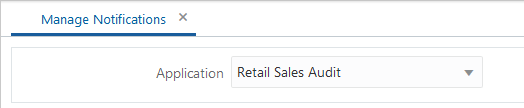
When arriving at the Manage Notifications page, the administrator should first check the Application dropdown, to ensure that the desired application is selected. Only the selected application will be configured.
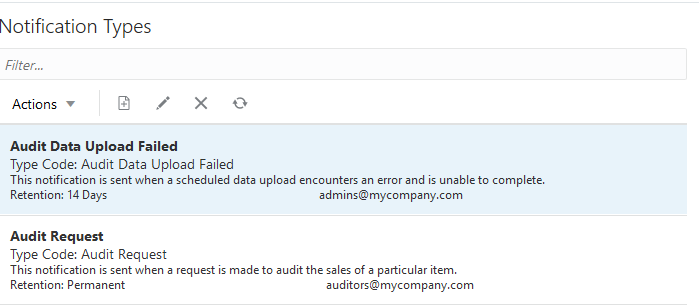
The user can see the notification types on this page, under the heading Notification Types. In this area, the user will see a Filter bar, a toolbar with actions, and a list of notification types.
The user can type in the filter bar to filter the list of notification types. The filter will display only the types that contain the filter text anywhere in the type name, type code, or description.
The Notification Type Toolbar contains an Actions menu as well as four icon buttons: Create, Edit, Remove, and Refresh. These actions are described in further detail below.
Each notification type in the list contains several pieces of information. First, in bold, is the name of the notification type.
Below that is the type code used by the system to identify the type, and a description of the type.
At the bottom, a Retention field indicates how long notifications of this type will be kept before they are deleted from the system. If the retention specifies permanent, then notifications of this type will never be deleted.
The last piece of information for a notification type is an email address, which will be sent an email notification whenever a notification of this type is generated. This field was designed to contain a mailing list email, but strictly speaking any email address may be provided.
The user can select one notification type from the list. Selecting a notification type will enable the edit and remove actions in the toolbar, as well as update the data in the Notification Groups and Roles section, discussed further below.
To create a new notification type, the user must select the Create button on the toolbar or the Create item from the Actions menu. Similarly, to edit a notification type, the user must first select the type to be edited, and then select the Edit button on the toolbar or the Edit item from the Actions menu.
When the user selects the Create or Edit action, a popup will appear prompting for the notification type details. If the user selected Edit, the fields of the popup will be prepopulated with the values of the selected notification type.
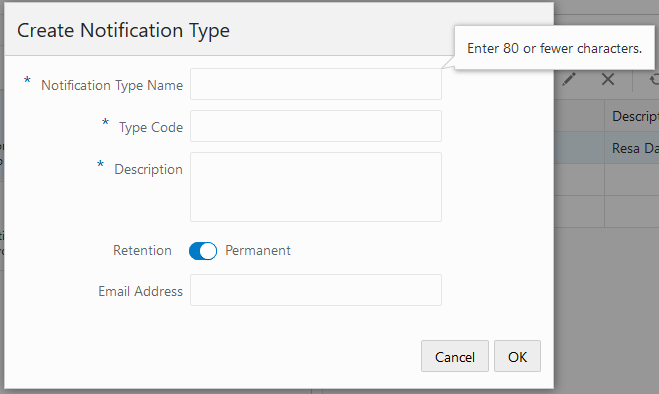
After entering the values for the fields, the user must click OK to finish creating or editing the type. At any time, the user may click Cancel to close the popup without creating or editing the notification type.
To remove a notification type, the user must first select the notification type to be removed. The user must then select the Remove button from the toolbar or the Remove item from the Actions menu. The user will then be presented with a confirmation popup. If the user clicks OK, the notification type will be removed. In addition, all existing notifications of this type will also be removed.
Next to the Notification Types, the user can see the notification groups and roles that are associated with the selected notification type.
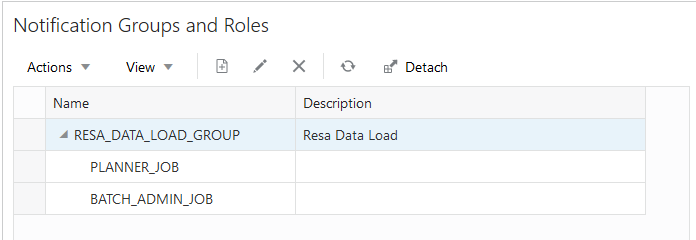
In this area, the user will see a toolbar and a tree table listing the notification groups currently assigned to the selected notification type. The user can expand each notification group to view the roles that are part of the group. If no notification type is selected, this region will instruct the user to select a notification type.
The Notification Type Toolbar contains an Actions menu, and buttons for Create, Edit, Remove, Refresh, and Detach. These actions are described in further detail below.
To create a new notification group, the user must select the Create button on the toolbar or the Create item from the Actions menu. Similarly, to edit a notification group, the user must first select the group to be edited, and then select the Edit button on the toolbar or the Edit item from the Actions menu.
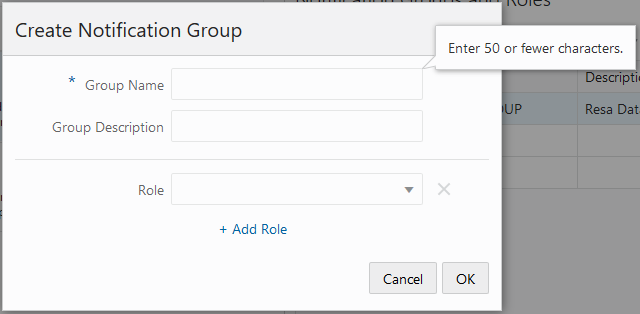
When the user selects the Create or Edit action, a popup will appear prompting for the notification group details. If the user selected Edit, the fields of the popup will be prepopulated with the values of the selected notification group.
On this popup, the user may add, edit, or remove roles from the notification group. To add the first role, simply type the name of the role into the Role field. To add more than one role, select the Add Role link below the Role field for each new role to be added. To edit a role, simply edit the text of the corresponding role field. To remove a role, click the Remove button for the corresponding role. Note that each role must correspond to a valid security role in the Identity Store. If a security role is not valid, the group will not be added or edited.
If the administrator edits a notification group, such as by adding or removing a role from the group, the changes will affect every notification type the group is assigned to, as well as all existing notifications of those types.
After entering the values for the fields, the user must click OK to finish adding or editing the group. At any time, the user may click Cancel to close the popup without creating or editing the notification group.
To remove a notification group from a notification type, the user must first select the notification group to be removed. The user must then select the Remove button from the toolbar or the Remove item from the Actions menu.
The user will then be presented with a confirmation popup. If the user clicks OK, the notification group will be removed from the notification type.
Removing a notification group from a notification type will affect all existing notifications of the selected type. These notifications will no longer be visible to users from the removed group, unless they are part of a different group which still has access to the notification type.
The notification group may still be assigned to other notification types – only the currently selected type will be affected.
At any time, the user may select Refresh from the toolbar or Actions menu. This will cause the page to refresh the list of Notification Groups and Roles.
The user may detach the Notification Groups and Roles region from the page, causing it to appear as a popup. To do this, the user must select the Detach button from the toolbar or the Detach item from the View menu. To reattach the region to the page, the user must select the Detach button again, or select the Attach item from the View menu.