| Oracle® Retail Home Oracle Retail Home Administration Guide Release 21.0 F45466-03 |
|

 Previous |
 Next |
| Oracle® Retail Home Oracle Retail Home Administration Guide Release 21.0 F45466-03 |
|
Previous |
Next |
All Oracle Retail applications come packaged with resource bundles, files that contain text resources. These text resources appear throughout the Oracle Retail application as instructions, messages, labels, errors, virtually any text that appears in the application comes from a resource bundle.
Many Oracle Retail applications support the ability for retailers to customize the text that appears in the Oracle Retail application to better match that retailer's business language. The capability to change the text for a resource is provided through the Resource Bundles area of Retail Home. Retailers can customize text resources for any Oracle Retail supported language.
All text resources in the Oracle Retail application have the following values:
Base Application Code - This value identifies the Oracle Retail application that owns this text resource.
Language - This value identifies the language of the text resource.
Bundle - This value identifies the bundle file where this text resource resides.
Resource - This value is the unique name that can be used to get the text for this resource.
Base Text - This value is the text provided by the Oracle Retail application. This is the text that will appear in the application by default.
Every text resource in Oracle Retail applications is uniquely identified by the combination of Application Code, Language, Bundle, and Resource.
A resource customization is a change that a retailer made to the text of a resource. In addition to the values above, customizations also have the following values.
Custom Text - This is the custom text provided by the retailer for the resource.
Current Text (or Text) - This is the text that will actually appear in the Oracle Retail application. If a retailer has provided custom text for the resource, then this value will display the retailer's custom text. Otherwise, it will display the base text provided by the Oracle Retail application.
The Resource Bundles area of Retail Home consists of the following tasks.
Resource Text Strings
Imports Management
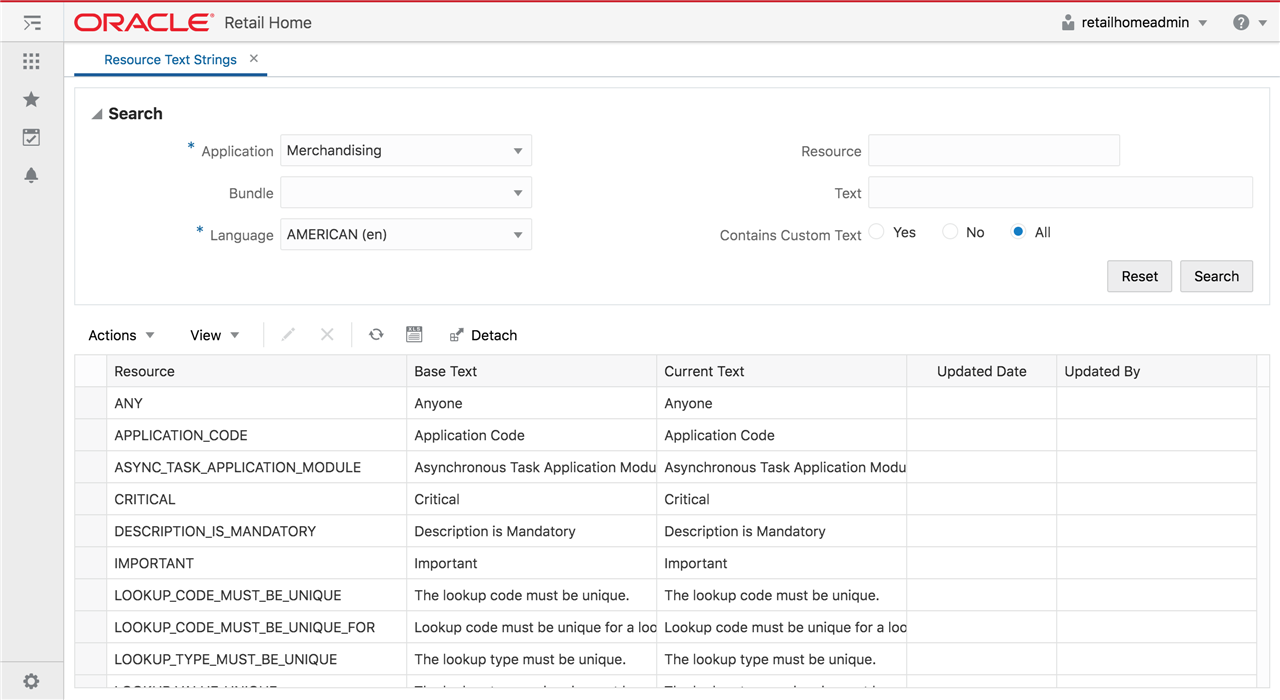
From the Retail Home Settings menu, a Retail Home admin user can access the Resource Text Strings link under the Resource Bundles submenu. The Resource Text Strings screen provides the capability to customize the resources present in the resource bundles of an application. The user can search the resources in an application using the Application, Bundle, Language, Resource, Text and Contains Custom Text fields.
The results table in the Resource Text Strings screen will display the Resource, Base Text, Current Text, Updated Date, and Updated By columns for the resources matching the entered search criteria. If there is a custom value present for a resource, it will be displayed in the Current Text column along with the date and the user who customized that entry. If there is no custom value present for a resource, the Current Text column will display the base text and the Updated Date and Updated By columns will be displayed empty. The user can edit or remove custom text for a resource using this screen.
The user can also export the results table to an Excel CSV file, which can be modified and later imported through the Imports Management screen. The export and import actions allow the user to provide custom text for many resources at one time, and upload all the custom values in a single action in Retail Home.
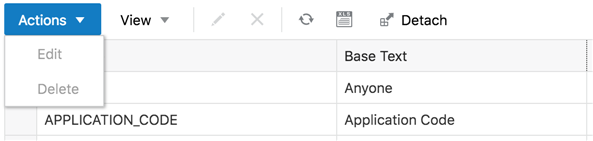
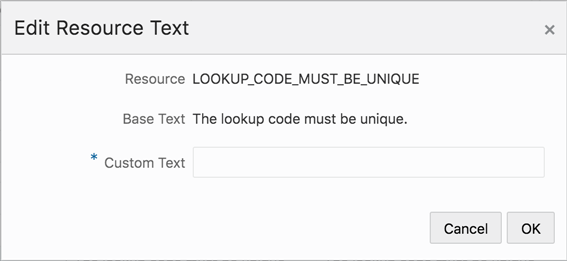
The user can add or edit the custom text for a resource using the Edit menu item or the pencil icon. If no custom text is present for a resource, a new custom text will be added. If a custom text is already present for a resource, it will be modified. The Updated Date and Updated By columns will be changed to reflect the addition or modification. The Edit option opens up a popup showing the resource, its base text and editable custom text. Only one record can be edited at a time in a popup.
The user can remove the custom text for one selected resource using the Delete menu item or the cross icon. The user can select a single record and remove the custom value for the record. The base text is not impacted by the Delete operation. Upon completion of the delete operation a snack bar notification is shown to the user. The user can either undo the delete action or dismiss the notification.
The user can export the details of the resources from the results table to an Excel CSV file. When the user selects the Export to CSV action, the browser will perform its download behavior. Depending on the user's browser preferences, the browser may prompt the user asking whether the exported file should be opened or saved, what program should be used to open the file, or where on the user's computer the file should be saved.
The user can change the values in the Text column of an exported CSV, and then import the CSV file through the Imports Management screen. See the section below titled Imports Management for more details about the Imports Management screen. When the user does this, the values of the Text column are imported into the custom text of each newly customized resource. The user can customize multiple rows with a single action by importing a file that contains multiple customized rows. Importing a file that has not been modified will do nothing, since the text for each resource is already exactly the same in the Oracle Retail application.
The imported file must meet the following requirements for the import to succeed:
The imported file must be a well-formed CSV file. The user can use any compatible program to edit the exported CSV file, as long as the program is able to read the CSV file and save it again in CSV format.
The user should only edit values in the Text column. If the user edits any of the values in the Base Application Code, Language, Bundle, or Resource columns, the import may fail, or invalid customizations may be created.
The user can only add or edit customizations in the import. The user cannot remove customizations using import. Deleting the contents of the Text field or copying the Source Text into the Text field will cause the row to be ignored.
The size of the imported file is limited to 2000 KB. Users will not be allowed to upload a file larger than this.
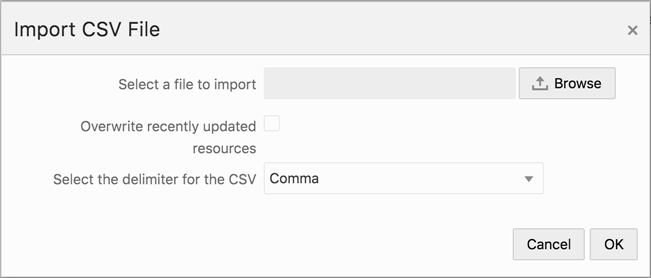
When the user selects the Import CSV file action, a popup opens prompting the user to select a file to import.
It is possible that, after a user exports resources to a CSV file, but before the user imports the file through Retail Home, another user may customize one or more of the exported resources. In this case, the values of resources in Retail Home would be newer than the values in the exported file. In order to ensure that an import does not inadvertently overwrite these values, the import action will skip resources that have been recently updated in Retail Home, and notify the user. The user can tell the import to instead use the values from the imported file by selecting the "Overwrite recently updated resources" checkbox on the import popup.
From the Retail Home Settings menu, a Retail Home admin user can access the Imports Management link under the Resource Bundles submenu. The Imports Management screen provides the ability to create, view and manage import actions, and to take action to resolve any issues encountered during an import.
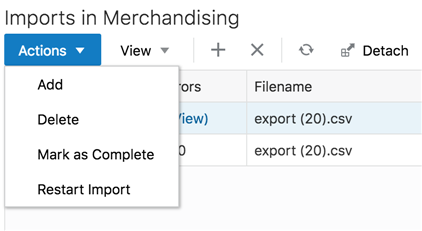
The Imports table will display information about each import that has been created for the currently selected application. The table will display the Status, Errors, File Name, Created By, Created Date, Last Updated By, and Last Updated Date. The user can create a new import, delete an import, mark an import as complete, restart an import, or view the errors for an import from this screen.
The user can import a CSV file from the Imports Management screen. See the section above titled Importing Customizations from a CSV File for more details.
The user can delete one or more imports. When the user deletes an import, that row is removed from the table completely, as well as any unresolved errors in the import. Any customizations that were already created by the import will still exist. The user cannot delete an import that is in "Pending" status. This is to make sure that an import is not deleted while it is being processed.
Note that there is no purge process for imports. All imports will remain in the database until manually deleted by the user.
The user can select an import that is in "Complete with Errors" status and change the status to "Complete" This indicates that the user has finished addressing errors with the import, and all outstanding errors should be dismissed.
After the user addresses any errors that were encountered when importing customizations, the user can restart the import to create customizations for the fixed resources.
When an import on the Imports Management screen is marked with status "Complete with Errors," this means that the import encountered errors with one or more of the customizations in the imported file. In the table, the Errors column indicates the number of customizations that had errors. This number becomes a link that the user can click to view details for the customizations with errors. This takes the user to a modal page within Imports Management. See the section below titled View Errors for more details.
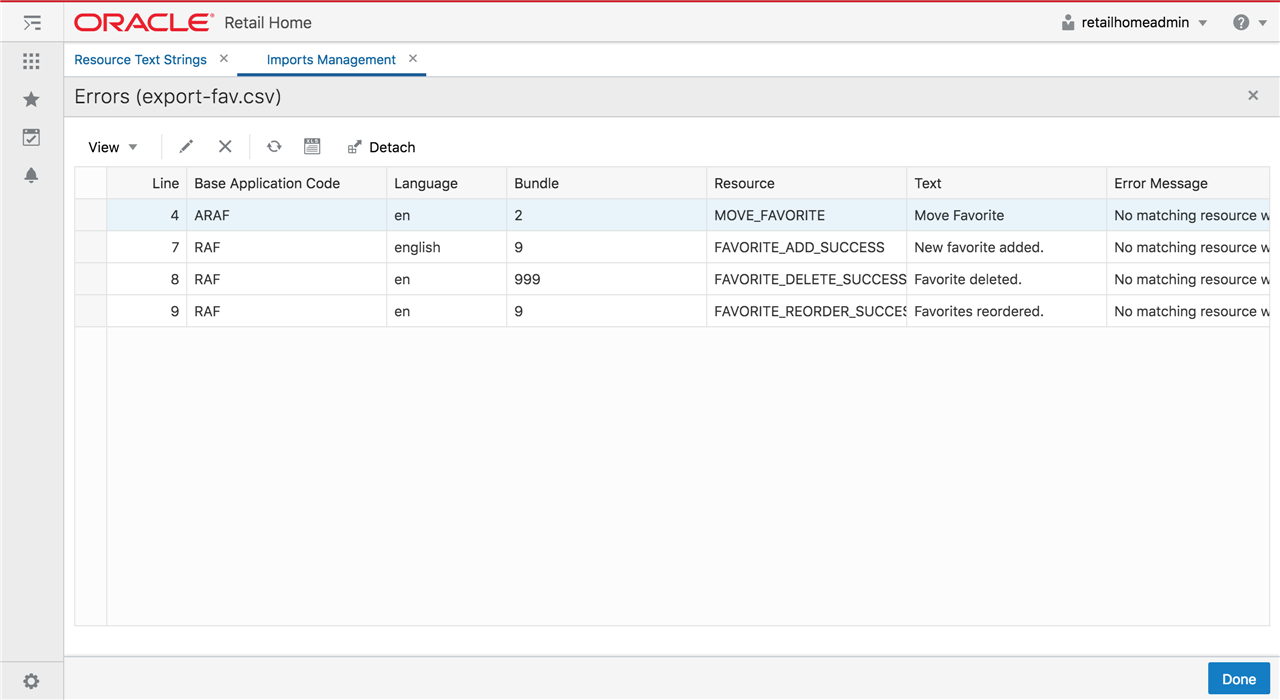
The Import Errors screen allows the user to view the details of any errors encountered while importing customizations from a CSV file. The user can reach this screen via the Imports Management screen. See the View subsection within the Imports Management section above for more details.
The Import Errors screen allows the user to view all imported customizations that encountered errors, as well the error message indicating why that customization could not be created. The Errors table displays Line Number, Base Application Code, Language, Bundle, Resource, Text, and Error Message. The user can edit or delete an imported customization, or Export to CSV.
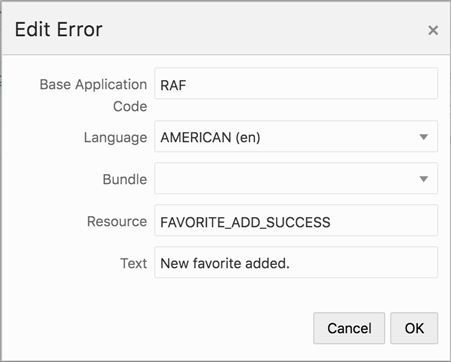
The user can edit the selected imported customization in the Edit Error dialog. The Edit Error dialog supports edits to the Base Application Code, Language, Bundle, Resource, and Text columns. This allows the user to resolve cases where a customization does not identify an existing resource, or cases where two or more customizations identify the same resource.
The user can delete an imported customization. The imported record is removed from the errors table, and no customization is created.
The user can export the contents of the Errors table back to a CSV file, fix any errors in the CSV, and re-import the file. In this case, the user would generally want to return to the Imports Management screen and mark the first import as complete, since the errors were fixed by creating a new import.
When customizing resources:
When customizing a resource text, consider the length of the custom text compared to the base text. Some of the labels and messages may not look good on the page if the custom text is too long compared to the base text.
After customizing the resource text, the changes may not be immediately visible in the application if the application uses a resource bundle cache. If the application is using a resource bundle cache, the customized resources are visible in the application only after the resource bundle cache expires. Please refer to the application documentation for the cache expiry time.