Deploy Oracle Identity Role Intelligence on Kubernetes
Introduction
Oracle Identity Role Intelligence (OIRI) provides a service which allows users to generate a set of candidate roles from a data source (flat files or Oracle Identity Governance), according to a set of role mining rules configured within the service. This tutorial will demonstrate how to deploy OIRI in a Kubernetes environment.
Objectives
On completion of this lab, you should have an installation of OIRI in a Kubernetes environment.
- Install the OIRI images
- Create and seed the OIRI schema
Prerequisites
Prerequisites for deploying OIRI on Kubernetes are:
- Oracle Database version starting from 12c Release 2 (12.2.0.1), on-premises or container-based, is installed and running. Oracle Database versions 18.3 and 19.3 are also supported.
Note: if you have upgraded the OIRI database from 12.1.x to 12.2.x, 18c, or 19c, you should update the database parameter
compatibleto a value of ‘12.2’ or higher. If this is not done, you will seeORA-00972: identifier is too longerrors when creating some OIRI database objects.
- Docker version 19.03.11+ and Kubernetes Cluster (v1.17+) with
kubectlis installed. See Kubernetes documentation for information about installing Kubernetes cluster. - Oracle Identity Governance 12c (with Bundle Patch 12.2.1.4.210428) with Identity Audit enabled. See Enabling Identity Audit in Performing Self Service Tasks with Oracle Identity Governance for details of how to enable Identity Audit.
- NFS mount location exists that can be used for creating a persistent volume which will be used across the Kubernetes cluster nodes. For the purposes of this tutorial this is assumed to be
/nfs.
Configure Authentication for Oracle Identity Governance (OIG)
OIG is the authentication provider for Production instances of OIRI. OIRI requires the following OIG users and roles to be configured to allow for user access to the OIRI application, and to enable it to authenticate with and publish roles to OIG.
- OIRI Service Account User : this user enables service to service authentication between OIRI and OIG, and is used to publish roles to OIG.
- OIRI Application User : this user is used to login to the OIRI application.
- OrclOIRIRoleEngineer Role : this role must be assigned to the OIRI application user in order to allow access to the OIRI application. Only a user with role
OrclOIRIRoleEngineercan login to the OIRI application.
-
Create OIRI Application User.
Create the user, for example
admin, to login to OIRI. See Creating a User in Performing Self Service Tasks with Oracle Identity Governance for details on how to create a user in OIG. -
Create OIRI Role Engineer Role.
Create a Role Engineer role within OIG and assign it to the user,
admin, you created in the previous step. To do this create the roleOrclOIRIRoleEngineer. See Creating Roles in Performing Self Service Tasks with Oracle Identity Governance. Only a user with theOrclOIRIRoleEngineerrole can login to the OIRI application -
Create OIRI Service Account User.
Create a service account in OIG for service to service authentication between OIRI and OIG and publishing roles to OIG.
Create an admin role with the following capabilities.
- User - View / Search
- Role - Create
- Access Policy - Create
Create this role with
Scope of ControlandOrganizationasTop.Create the
OIRIServiceAccountUseruser and assign the admin role.See Creating an Admin Role in Performing Self Service Tasks with Oracle Identity Governance for information about creating an admin role in OIG.
Install the OIRI Image
The OIRI service comprises four images as follows:
oiri: oiri serviceoiri-cli: command line interfaceoiri-ding: data ingestionoiri-ui: user interface
These images can be downloaded from one of two sources:
- Oracle Software Delivery Cloud
- Oracle Container Registry
Install OIRI Image from My Oracle Support
-
Login to My Oracle Support
-
Locate the Support note Container Images for Oracle Identity and Access Management, and Oracle IDM Microservices (Doc ID 2723908.1) and identify the latest patch for OIRI. Download the patch file and extract the contents.
Archive: <patch>.zip inflating: oiri-12.2.1.4.<TAG>/oiri-12.2.1.4.<TAG>.tar inflating: oiri-12.2.1.4.<TAG>/oiri-cli-12.2.1.4.<TAG>.tar inflating: oiri-12.2.1.4.<TAG>/oiri-ding-12.2.1.4.<TAG>.tar inflating: oiri-12.2.1.4.<TAG>/oiri-ui-12.2.1.4.<TAG>.tar -
Navigate to the file created from the zip file.
cd oiri-12.2.1.4.<TAG> -
Load each tar file into the local repository.
docker load --input oiri-12.2.1.4.<TAG>.tar docker load --input oiri-ui-12.2.1.4.<TAG>.tar docker load --input oiri-ding-12.2.1.4.<TAG>.tar docker load --input oiri-cli-12.2.1.4.<TAG>.tar -
Verify the images have loaded using the following command.
docker images | grep 12.2.1.4.<TAG>Output should be similar to:
oiri-ui   12.2.1.4.<TAG>   c88384a36914   20 hours ago   568MB
oiri-ding 12.2.1.4.<TAG>   8a733b055959   20 hours ago   1.23GB
oiri-cli  12.2.1.4.<TAG>   58d75bf93160   20 hours ago   618MB
oiri      12.2.1.4.<TAG>   874276068356   20 hours ago   577MB
Install OIRI Image from Oracle Container Registry
When installing the image from the Oracle Container Registry you will initially download the oiri-cli image only. Other images will be invoked as required by the deployment scripts.
Note: Only the base release of OIRI is currently available on Oracle Container Registry. For the latest release please download from My Oracle Support.
-
Download the
oiri-cliimage.In a browser, navigate to Oracle Container Registry.
Click Sign In and login with your username and password.
In the Terms and Conditions box, select Language as English. Click Continue and ACCEPT “Terms and Restrictions“.
On your Docker environment login to the Oracle Container Registry and enter your Oracle SSO username and password when prompted:
docker login container-registry.oracle.comPull the
oiri-cliimage.docker pull container-registry.oracle.com/middleware/oiri-cli-12.2.1.4.<TAG> -
Verify the installation.
Run the
docker imagescommand to show the image is installed into the repository:docker images | grep oiriThe OIRI Docker image is now installed successfully and ready for configuration.
Create Directories
A number of directories are required for OIRI deployment in a Kubernetes cluster. NFS mount points are required for data ingestion and oiri, while a local directory should be setup to generate values.yaml used by the OIRI Helm chart. Create directories similar to those shown below:
-
Create directories.
mkdir /nfs/dingmkdir /nfs/oirimkdir -p /local/k8s/ -
Set permissions.
Ensure that write permissions are given for each of these directories.
chmod 775 /nfs/ding /nfs/oiri /local/k8s/
Run the oiri-cli container
-
Run the
oiri-clicontainer using the following command.docker run -d --name oiri-cli \ -v /nfs/ding/:/app/ \ -v /nfs/oiri/:/app/oiri \ -v /local/k8s/:/app/k8s \ --group-add <group id> \ oiri-cli-12.2.1.4.<TAG> \ tail -f /dev/nullNote:
<group id>is the id of the group on your host having access to the volumes.Output will be similar to the following.
docker run -d --name oiri-cli \ -v /nfs/ding/:/app/ \ -v /nfs/oiri/:/app/oiri \ -v /local/k8s/:/app/k8s \ --group-add <group id> \ oiri-cli-12.2.1.4.<TAG> \ tail -f /dev/null 430d5f4af68d87be3123fbdd77d53fb13b2b961e41243d69a3c1f367df514a84Verify that the container is running with the following command:
docker ps -a | grep oiriOutput will be similar to the following.
430d5f4af68d oiri-cli-12.2.1.4.<TAG> "tail -f /dev/null" About a minute ago Up About a minute oiri-cli
Configure Container Access to Kubernetes Configuration
-
Create namespaces for OIRI and DING.
kubectl create namespace oirins namespace/oirins created kubectl create namespace dingns namespace/dingns created -
Create
oiri-service-account.yamlwith the following content. Replacewith the OIRI namespace, and with the DING namespace. apiVersion: v1kind: ServiceAccountmetadata: name: oiri-service-account namespace: <OIRINS>---apiVersion: rbac.authorization.k8s.io/v1kind: Rolemetadata: name: oiri-ns-role namespace: <OIRINS>rules:- apiGroups: ["*"] resources: ["*"] verbs: ["*"]---apiVersion: rbac.authorization.k8s.io/v1kind: Rolemetadata: name: ding-ns-role namespace: <DINGNS>rules:- apiGroups: ["*"] resources: ["*"] verbs: ["*"]---kind: ClusterRoleapiVersion: rbac.authorization.k8s.io/v1metadata: name: oiri-ingress-nginx-clusterrolerules:- apiGroups: [""] resources: ["configmaps", "endpoints", "nodes", "pods", "secrets"] verbs: ["watch", "list"]- apiGroups: [""] resourceNames: ["<OIRINS>"] resources: ["namespaces"] verbs: ["get"]- apiGroups: [""] resources: ["nodes"] verbs: ["get"]- apiGroups: [""] resources: ["services"] verbs: ["get", "list", "watch"]- apiGroups: [""] resources: ["events"] verbs: ["create", "patch"]- apiGroups: ["extensions"] resources: ["ingresses"] verbs: ["get", "list", "watch"]- apiGroups: ["extensions"] resources: ["ingresses/status"] verbs: ["update"]- apiGroups: ["networking.k8s.io"] resources: ["ingresses/status"] verbs: ["update"]- apiGroups: ["networking.k8s.io"] resources: ["ingresses", "ingressclasses"] verbs: ["get", "list", "watch"]---apiVersion: rbac.authorization.k8s.io/v1kind: ClusterRoleBindingmetadata: name: oiri-ingress-nginx-clusterrolebinding-<OIRINS>roleRef: apiGroup: rbac.authorization.k8s.io kind: ClusterRole name: oiri-ingress-nginx-clusterrolesubjects:- namespace: <OIRINS> kind: ServiceAccount name: oiri-service-account---apiVersion: rbac.authorization.k8s.io/v1kind: ClusterRoleBindingmetadata: name: oiri-clusterrolebinding-<OIRINS>roleRef: apiGroup: rbac.authorization.k8s.io kind: ClusterRole name: system:persistent-volume-provisionersubjects:- namespace: <OIRINS> kind: ServiceAccount name: oiri-service-account---apiVersion: rbac.authorization.k8s.io/v1kind: RoleBindingmetadata: name: oiri-rolebinding namespace: <OIRINS>roleRef: apiGroup: rbac.authorization.k8s.io kind: Role name: oiri-ns-rolesubjects:- namespace: <OIRINS> kind: ServiceAccount name: oiri-service-account---apiVersion: rbac.authorization.k8s.io/v1kind: RoleBindingmetadata: name: ding-rolebinding namespace: <DINGNS>roleRef: apiGroup: rbac.authorization.k8s.io kind: Role name: ding-ns-rolesubjects:- namespace: <OIRINS> kind: ServiceAccount name: oiri-service-account -
Run the following
kubectlcommands as the Kubernetes Cluster Admin. Replacewith the OIRI namespace where appropriate. kubectl apply -f oiri-service-account.yaml TOKENNAME=`kubectl -n <OIRINS> get serviceaccount/oiri-service-account -o jsonpath='{.secrets[0].name}'` TOKEN=`kubectl -n <OIRINS> get secret $TOKENNAME -o jsonpath='{.data.token}'| base64 --decode` kubectl -n <OIRINS> get secret $TOKENNAME -o jsonpath='{.data.ca\.crt}'| base64 --decode > ca.crt -
Share the
ca.crtandTOKENto the OIRI Installation Admin by copying theca.crtto the Kubernetes local directory, and listing theTOKENcreated in step 5.c.cp ca.crt /local/k8s echo $TOKEN eyJhbGciOiJSUzI1NiIsImtpZCI6ImpBSjd3d0puUDBPUlpxbWY2anBRclY4WElweFNka0dGSU4zQmF4ZmxhMTgifQ.eyJpc3MiOiJrdWJlcm5ldGVzL3NlcnZpY2VhY2NvdW50Iiwia3ViZXJuZXRlcy5pby9zZXJ2aWNlYWNjb3VudC9uYW1lc3BhY2UiOiJvaXJpbnMiLCJrdWJlcm5ldGVzLmlvL3NlcnZpY2VhY2NvdW50L3NlY3JldC5uYW1lIjoib2lyaS1zZXJ2aWNlLWFjY291bnQtdG9rZW4tYjU3bTQiLCJrdWJlcm5ldGVzLmlvL3NlcnZpY2VhY2NvdW50L3NlcnZpY2UtYWNjb3VudC5uYW1lIjoib2lyaS1zZXJ2aWNlLWFjY291bnQiLCJrdWJlcm5ldGVzLmlvL3NlcnZpY2VhY2NvdW50L3NlcnZpY2UtYWNjb3VudC51aWQiOiIxMjU3Y2MwMy0zZGQ3LTQzZTMtODdkYi04ZGExZjM3NTllNjAiLCJzdWIiOiJzeXN0ZW06c2VydmljZWFjY291bnQ6b2lyaW5zOm9pcmktc2VydmljZS1hY2NvdW50In0.Y8n5DPIyqrFOzRo5dtzaNdinQtwQov0RAdNbWb_DBpo1UATrHl72Re2-C7afcP-Jc19JlxS1I3CuyOAGO4-gqSa1fwK-ahNqbhHBoRKPj3o-j8fsbDEkhp_zJOxWBMBE7JgxufzJ_24LtlO6RGafcuiBdZ0vxyxVcEsPHAbNGSiMf_zO36530f6VmURy2MdzoF3fASN5hdiRnT3-7VSxF-Am7BQJnzYXhftMe7lOUW3st1WGeRi3R6dOAj3ibKvXgoA90MUearn1ibXWVkgqjuaoiMvnQQc0bopBLOsAY-s1ZGnwyYP92ulFaXdvYdyDxWXPPg4Tvjxh7gEhw-iTjg -
Connect to the
oiri-clicontainer and run the following commands.Connect:
docker exec -it oiri-cli bashRun:
touch /app/k8s/config
export KUBECONFIG=/app/k8s/config
kubectl config set-cluster oiri-cluster --server=https://<IPAddressofK8SPrimaryNode>:6443 --certificate-authority=/app/k8s/ca.crt --embed-certs=true
export TOKEN=<Token-Shared-by-Kuberetes-Admin>
kubectl config set-credentials oiri-service-account --token=$TOKEN
kubectl config set-context oiri --user=oiri-service-account --cluster=oiri-cluster
kubectl config use-context oiri
exit
Initialize Configuration Files
Setup an initial configuration for OIRI using the following commands:
Note: Full details of all parameters can be viewed in the Administering Oracle Identity Role Intelligence manual.
-
Connect to the
oiri-clicontainer.docker exec -it oiri-cli bash -
View the help for the configuration script,
setupConfFiles.sh. You can view available options for this script by running the following command../setupConfFiles.sh -h -
Run the configuration file setup by invoking the
setupConfFile.shscript../setupConfFiles.sh -m prod \ --oigdbhost {OIG_DB_HOST} \ --oigdbport {OIG_DB_PORT} \ --oigdbsname {OIG_DB_SERVICE_NAME} \ --oiridbhost {OIRI_DB_HOST} \ --oiridbport {OIRI_DB_PORT} \ --oiridbsname {OIRI_DB_SERVICE} \ --useflatfileforetl true \ --sparkmode {SPARK_MODE} \ --dingnamespace {DING_NAMESPACE} \ --dingimage {DING_IMAGE} \ --imagepullsecret {IMAGE_PULL_SECRET} \ --k8scertificatefilename {KUBERNETES_CERTIFICATE_FILE_NAME} \ --sparkk8smasterurl {KUBERENETES_MASTER_URL} \ --oigserverurl {OIG_SERVER_URL} \For example:
./setupConfFiles.sh -m prod \
--oigdbhost oighost.example.com \
--oigdbport 1521 \
--oigdbsname oigdb.example.com \
--oiridbhost oirihost.example.com \
--oiridbport 1521 \
--oiridbsname oiridb.example.com \
--useflatfileforetl true \
--sparkmode k8s \
--dingnamespace ding \
--dingimage oiri-ding-12.2.1.4.<TAG> \
--imagepullsecret regcred \
--k8scertificatefilename ca.crt \
--sparkk8smasterurl k8s://https://12.34.56.78:6443 \
--oigserverurl http://oighost.example.com:14000 \
Output will be similar to the following.
Output: INFO: OIG DB as source for ETL is true INFO: Setting up /app/data/conf/config.yaml INFO: Setting up /app/data/conf/data-ingestion-config.yaml INFO: Setting up /app/data/conf/custom-attributes.yaml INFO: Setting up /app/oiri/data/conf/application.yaml INFO: Setting up /app/oiri/data/conf/authenticationConf.yaml INFO: Setting up /app/data/conf/dbconfig.yamlNote:
--sparkk8smasterurlis a URL used internally and should use the IP address rather than the hostname, else you will see errors when running data ingestion. -
Verify that the files have been created.
Check the
/app/data/confdirectory.ls /app/data/conf/Output should be the same as the following.
config.yaml custom-attributes.yaml data-ingestion-config.yaml dbconfig.yamlCheck the
/app/oiri/data/confdirectory.ls /app/oiri/data/confOutput should be the same as the following.
application.yaml authenticationConf.yaml
Setup Helm Chart Parameters
Setup the configuration for the Helm chart using the following commands.
Note: Full details of all parameters can be viewed in the Administering Oracle Identity Role Intelligence manual.
-
Connect to the
oiri-clicontainer.docker exec -it oiri-cli bash -
Run the
values.yamlsetup../setupValuesYaml.sh \ --oiriapiimage {OIRI_API_IMAGE} \ --oirinfsserver {OIRI_NFS_SERVER} \ --oirinfsstoragepath {OIRI_NFS_PATH} \ --oirinfsstoragecapacity {OIRI_NFS_STORAGE_CAPACITY} \ --oiriuiimage {OIRI_UI_IMAGE} \ --dingimage {DING_IMAGE} \ --dingnfsserver {OIRI_NFS_SERVER} \ --dingnfsstoragepath {DING_NFS_STORAGE_PATH} \ --dingnfsstoragecapacity {DING_NFS_STORAGE_CAPACITY} \ --ingresshostname {INGRESS_HOSTNAME} \ --sslsecretname "{SSL_SECRET_NAME}"For example:
./setupValuesYaml.sh \ --oiriapiimage oiri-12.2.1.4.<TAG> \ --oirinfsserver oirihost.example.com \ --oirinfsstoragepath /nfs/oiri \ --oirinfsstoragecapacity 10Gi \ --oiriuiimage oiri-ui-12.2.1.4.<TAG> \ --dingimage oiri-ding-12.2.1.4.<TAG> \ --dingnfsserver oirihost.example.com \ --dingnfsstoragepath /nfs/ding \ --dingnfsstoragecapacity 10Gi \ --ingresshostname oirihost.example.com \ --sslsecretname "oiri-tls-cert" -
Verify that the
values.yamlfile has been created.ls /app/k8s/Output should be the same as the following.
values.yaml -
Exit the container
Generate a Keystore
-
Connect to the
oiri-clicontainer.docker exec -it oiri-cli bash -
Create the keystore using
keytool.keytool -genkeypair \ -alias <OIRI_JWT_KEY_ALIAS> \ -keypass <OIRI_KEYSTORE_PASSWORD> \ -keyalg RSA \ -keystore /app/oiri/data/keystore/keystore.jks \ -storetype pkcs12 \ -storepass <password>For example:
keytool -genkeypair -alias oii -keypass <password> -keyalg RSA -keystore /app/oiri/data/keystore/keystore.jks -storepass <password> -storetype pkcs12 What is your first and last name? [Unknown]: oiri.example.com What is the name of your organizational unit? [Unknown]: oiri What is the name of your organization? [Unknown]: example.com What is the name of your City or Locality? [Unknown]: Cambridge What is the name of your State or Province? [Unknown]: Massachusetts What is the two-letter country code for this unit? [Unknown]: US Is CN= oiri.example.com, OU=oiri, O=example.com, L=Cambridge, ST=Massachusetts, C=US correct? [no]: yes -
Exit the container.
-
Export the Oracle Identity Governance Server certificate for signature verification.
Export the Oracle Identity Governance Server Server Certificate from the default OIG keystore and then copy to
/nfs/oiri/data/keystoreNote: the default OIG keystore is located at
OIG_ORACLE_HOME/user_projects/domains/base_domain/config/fmwconfig.cd OIG_ORACLE_HOME/user_projects/domains/base_domain/config/fmwconfigkeytool -export -rfc -alias xell -file xell.pem -keystore default-keystore.jksCopy the file to the OIRI keystore directory.
cp xell.pem /nfs/oiri/data/keystore -
Connect to the
oiri-clicontainer.docker exec -it oiri-cli bash -
Import the certificate into the keystore.
keytool -import \
-alias xell \
-file /app/oiri/data/keystore/xell.pem \
-keystore /app/oiri/data/keystore/keystore.jks
Create a Wallet
-
Connect to the OIRI container.
docker exec -it oiri-cli bash -
Create the Wallet using
oiri-cli.oiri-cli --config=/app/data/conf/config.yaml wallet createProvide the following parameters when prompted:
- OIRI Database UserName and Password
- OIG Database UserName and Password
- OIG Service Account UserName and Password (
OIRIServiceAccountUsercreated earlier in this tutorial) - OIRI KeyStore Password
- OIRI JWT Key Alias and Password
Output will be similar to the following.
####### #### ######## #### ###### ## #### ## ## ## ## ## ## ## ## ## ## ## ## ## ## ## ## ## ## ## ## ## ## ######## ## ####### ## ## ## ## ## ## ## ## ## ## ## ## ## ## ## ## ## ## ## ## ## ## ####### #### ## ## #### ###### ######## #### Setting up wallet in [/app/data/wallet] DING Wallet created. Setting up wallet in [/app/oiri/data/wallet] OIRI Wallet created. -
Verify that the OIRI and DING wallets have been created.
ls /app/data/walletOutput should be the same as the following.
Output:
cwallet.sso cwallet.sso.lck
ls /app/oiri/data/walletOutput should be the same as the following.
Output:
cwallet.sso cwallet.sso.lck
Create and Seed the OIRI Database User
-
Connect to the
oiri-clicontainer.docker exec -it oiri-cli bash -
Create the DB User using
oiri-cli.oiri-cli --config=/app/data/conf/config.yaml schema create /app/data/conf/dbconfig.yamlProvide the following parameter when prompted.
- SYS password
Output will be similar to the following.
####### #### ######## #### ###### ## #### ## ## ## ## ## ## ## ## ## ## ## ## ## ## ## ## ## ## ## ## ## ## ######## ## ####### ## ## ## ## ## ## ## ## ## ## ## ## ## ## ## ## ## ## ## ## ## ## ####### #### ## ## #### ###### ######## #### Creating the schema ci_oiri CREATING OIRI SCHEMA ............ =================================================== DB USER ci_oiri has been successfully created -
Seed the schema using
oiri-cli.oiri-cli --config=/app/data/conf/config.yaml schema migrate /app/data/conf/dbconfig.yamlOutput will be similar to the following.
#######  #### ########  ####          ######   ##       ####
##     ##  ##  ##     ##  ##          ##    ##  ##        ##
##     ##  ##  ##     ##  ##          ##        ##        ##
##     ##  ##  ########   ##  ####### ##        ##        ##
##     ##  ##  ##   ##    ##          ##        ##        ##
##     ##  ##  ##    ##   ##          ##    ##  ##        ##
 #######  #### ##     ## ####          ######   ######## ####
Migrating the OIRI schema
Migrating OIRI SCHEMA ............
===================================================
.....
OIRI Schema has been successfully migrated
Verify the Wallet and DB Connectivity
-
Connect to the OIRI container.
docker exec -it oiri-cli bash -
Verify the Wallet using
verifyWallet.sh../verifyWallet.shOutput will be similar to the following.
 #######  #### ########  ####          ######   ##       ####
##     ##  ##  ##     ##  ##          ##    ##  ##        ##
##     ##  ##  ##     ##  ##          ##        ##        ##
##     ##  ##  ########   ##  ####### ##        ##        ##
##     ##  ##  ##   ##    ##          ##        ##        ##
##     ##  ##  ##    ##   ##          ##    ##  ##        ##
 #######  #### ##     ## ####          ######   ######## ####
Verifying Wallets. Wallet locations and entries will be validated
DING Wallet is Valid.
OIRI Wallet is Valid.
OIRI DB Connection is Valid.
OIG DB Connection is Valid.
KeyStore location and entries are Valid.
OIG Server Connection is Valid.
SUCCESS: Wallet locations and entries are valid.
Install OIRI Helm Chart
-
Create Image Pull Secrets for the oiri and ding namespaces.
kubectl create secret docker-registry regcred --docker-server=<registry_server_url> --docker-username=<registry_user> --docker-password=<registry_password> -n <oirins> kubectl create secret docker-registry regcred --docker-server=<registry_server_url> --docker-username=<registry_user> --docker-password=<registry_password> -n <dingns> -
Optionally, if you have selected
-ssl/--sslenabledastruewhen executingsetupValuesYaml.shthen setup an SSL certificate and create a Kubernetes secret for the certificate.Create the certificate using the
opensslutility.openssl req -x509 -nodes -days 365 -newkey rsa:2048 -keyout tls.key -out tls.crt -subj "/CN=<HOSTNAME>"For example:
openssl req -x509 -nodes -days 365 -newkey rsa:2048 -keyout tls.key -out tls.crt -subj "/CN=oiri.example.com" Generating a 2048 bit RSA private key ..+++ ............................+++ writing new private key to 'tls.key' -----Note: the certificate created in the previous step is self-signed and should not be used in a production environment. In production, supply a valid certificate and key to the
create secretcommand detailed in the following step.Connect to the
oiri-clicontainer and create a Kubernetes secret containing the certificate created in the previous step.docker exec -it oiri-cli bashkubectl create secret tls oiri-tls-cert --key="tls.key" --cert="tls.crt"Output should be the same as the following.
secret/oiri-tls-cert created -
Install the OIRI Helm Chart
helm install oiri /helm/oiri -f /app/k8s/values.yaml -n <oirinamespace>Output will be similar to the following.
NAME: oiri
LAST DEPLOYED: Wed Apr 28 05:05:05 2021
NAMESPACE: default
STATUS: deployed
REVISION: 1
TEST SUITE: None
NOTES:
Please be patient while the chart installs. Pod may not be in running status.

To check the status of the pod, run following command.
Pods READY state must be 1/1 and status RUNNING

    kubectl get pods --namespace oiri
    kubectl get pods --namespace ding

Access OIRI UI by using following URL in your browser.

    https://100.94.12.189:30305/oiri/ui/v1/console

Admins can access DING History Server by port forwarding the ding-history pod through kubectl.

    kubectl port-forward <pod_name> <desired_port>:18080 -n ding

Inside the DING-CLI, use following commands to start data ingestion

    ding-cli --config=/app/data/conf/config.yaml data-ingestion start /app/data/conf/data-ingestion-config.yaml`
Verify the installation
Verify the installation by checking the OIRI pods have started successfully. Once the pods are running, log into the OIRI UI.
-
Verify that the OIRI pods have started successfully.
kubectl get pods --namespace oiriOutput should be similar to the following.
NAME                       READY   STATUS    RESTARTS   AGE
oiri-549d5458fb-v6vjk      1/1     Running   0          2d22h
oiri-ui-7894b5b4b7-28klj   1/1     Running   0          2d22h
kubectl get pods --namespace dingOutput should be similar to the following.
NAME READY STATUS RESTARTS AGE spark-history-server-85689d9545-svtvd 1/1 Running 0 2d22h -
Access OIRI UI by using following URL in your browser.
https://oirihost.example.com/oiri/ui/v1/console
Initially you will see the OIRI UI login screen.
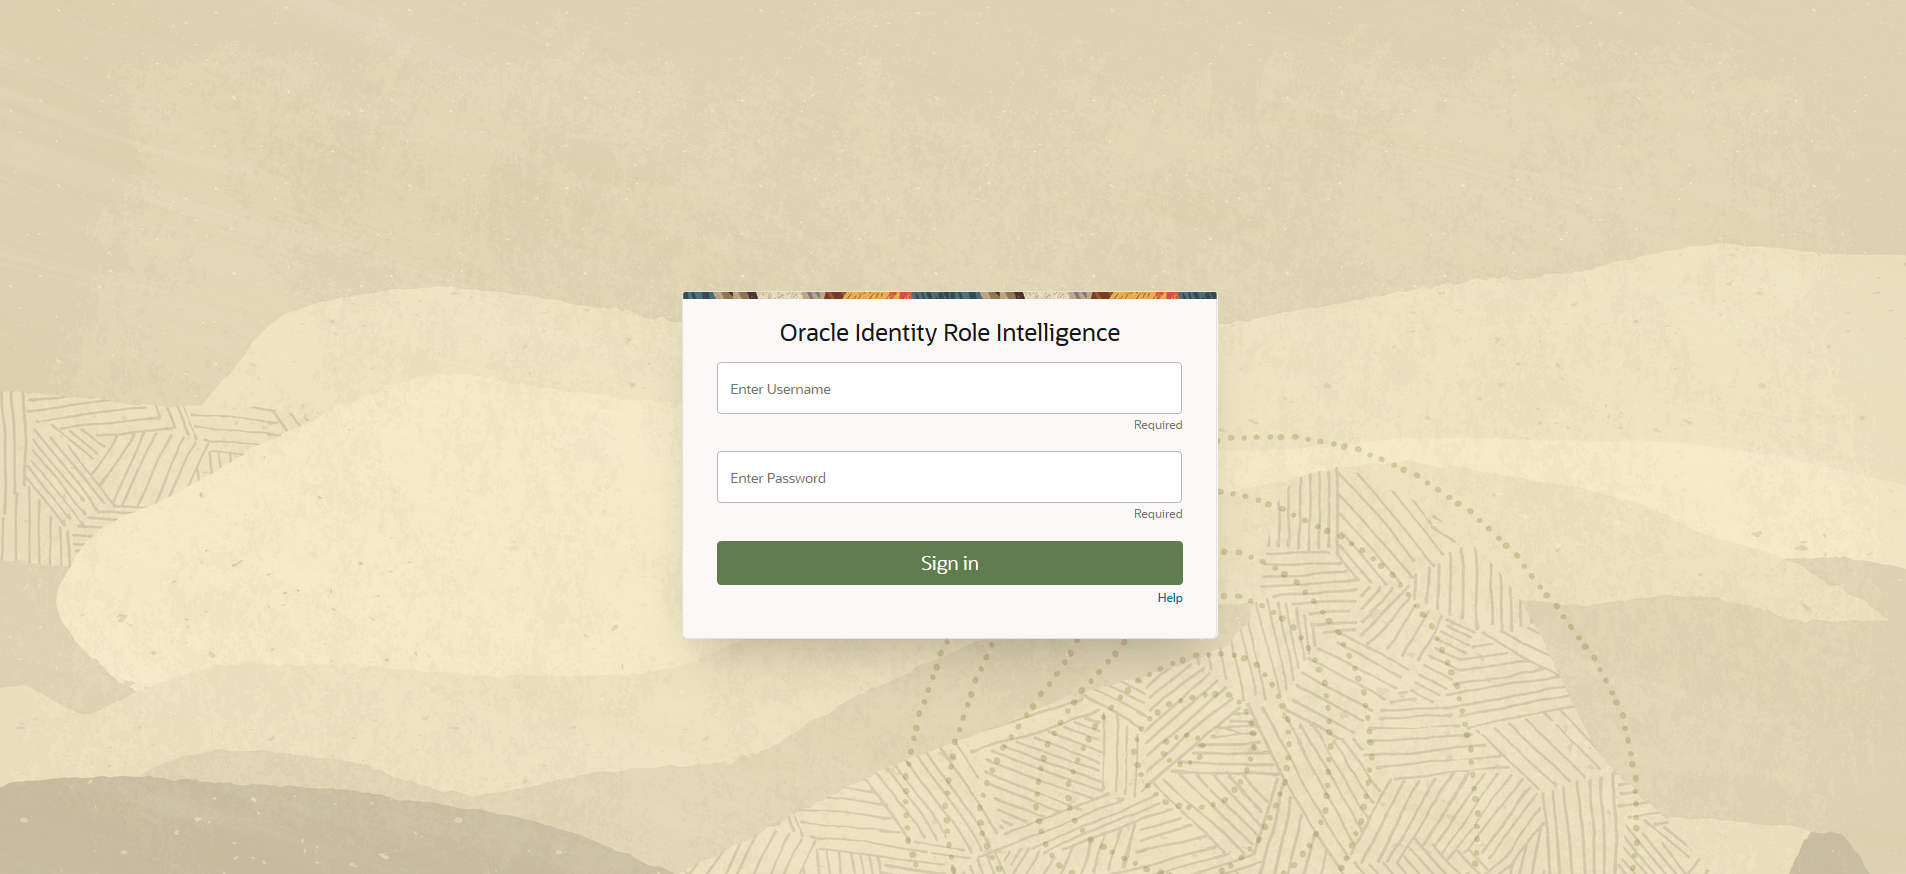
Login with an authorized OIG user.

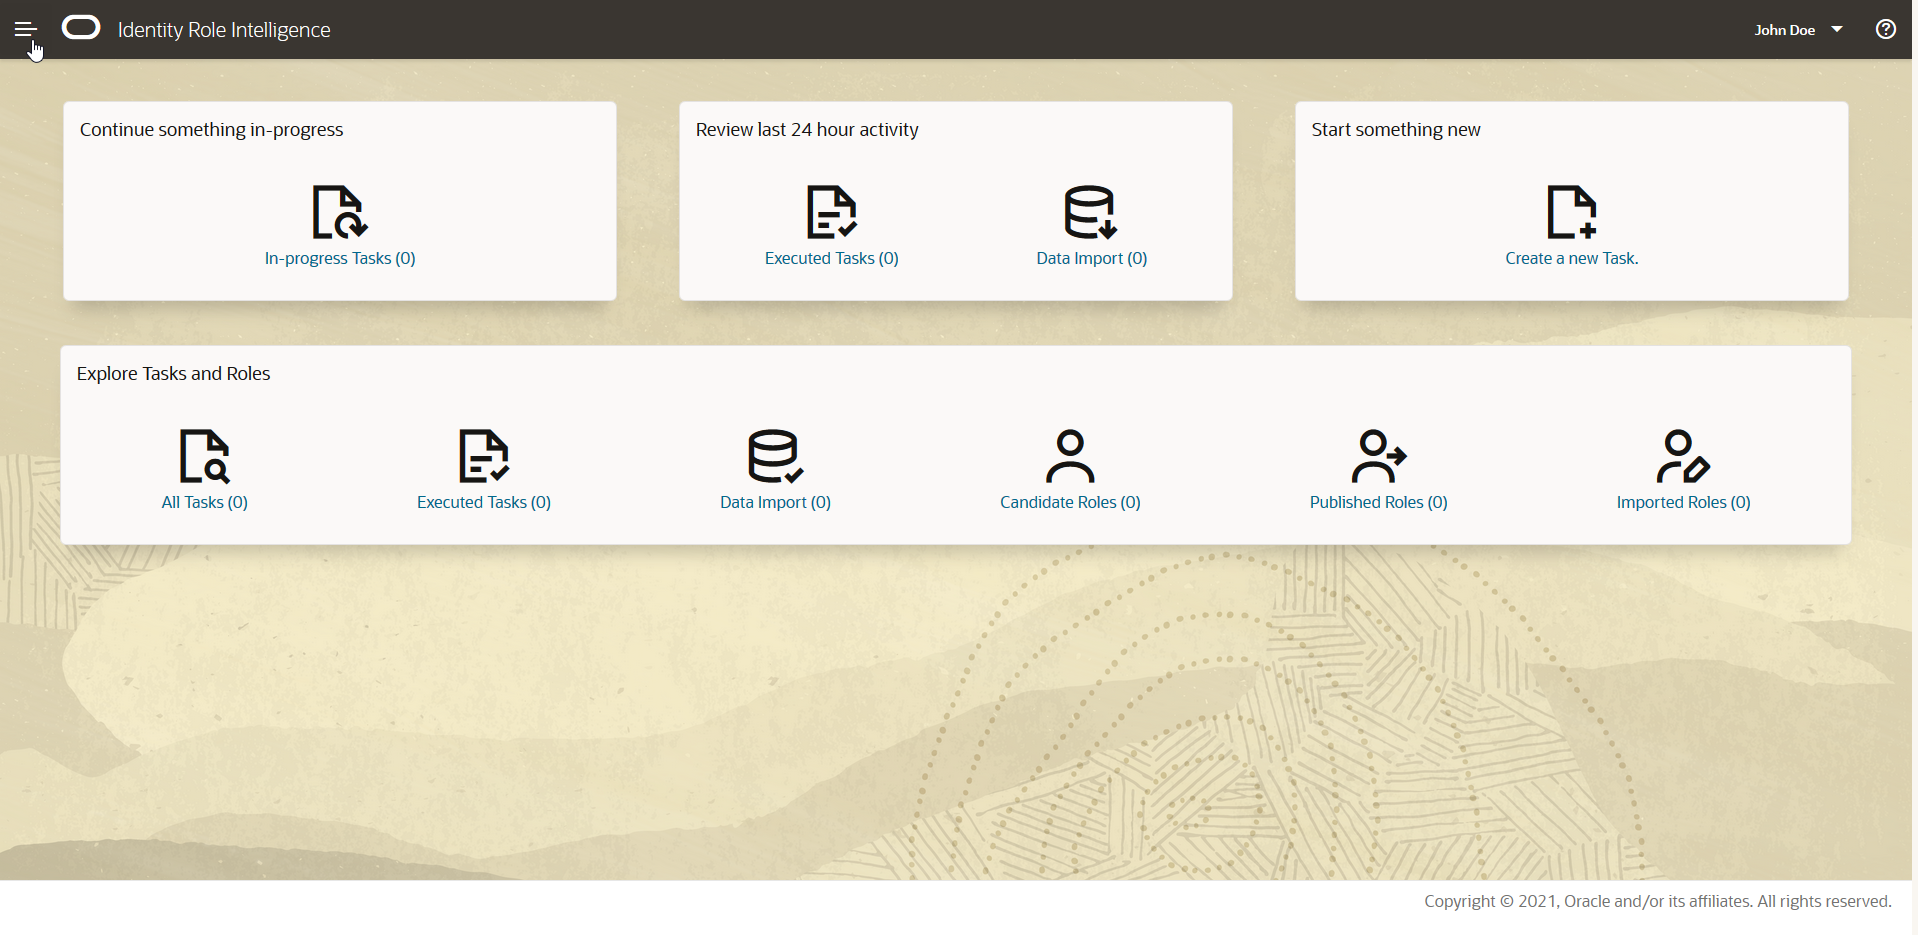
The OIRI main screen should be displayed as below:
Upgrade the OIRI Image
As new builds of the OIRI image are released, you may be required to upgrade your container. In order to do this you should complete the following steps.
-
Remove the existing
oiri-clicontainer.From the host:
docker rm -f oiri-cli -
Create the
oiri-clicontainer using the new image.From the host:
docker run -d --name oiri-cli \
-v /nfs/ding/:/app/ \
-v /nfs/oiri/:/app/oiri \
-v /local/k8s/:/app/k8s \
{OIRI_CLI_NEW_IMAGE} \
tail -f /dev/null
Output will be similar to the following.
docker run -d --name oiri-cli \ -v /nfs/ding/:/app/ \ -v /nfs/oiri/:/app/oiri \ -v /local/k8s/:/app/k8s \ oiri-cli-12.2.1.4.<TAG> \ tail -f /dev/null c78e8964d8d5445028b0b0aa4740f9fd980cbdaa5e31cd11085ac05da0d6a4a0 -
Remove the existing
ding-clicontainer.From the host:
docker rm -f ding-cli -
Create the
ding-clicontainer using the new image.From the host:
docker run -d --name ding-cli \
-v /nfs/ding/:/app/ \
-v /nfs/oiri/:/app/oiri \
-v /local/k8s/:/app/k8s \
{DING_CLI_NEW_IMAGE} \
tail -f /dev/null
Output will be similar to the following.
docker run -d --name ding-cli \ -v /nfs/ding/:/app/ \ -v /nfs/oiri/:/app/oiri \ -v /local/k8s/:/app/k8s \ oiri-ding-12.2.1.4.<TAG> tail -f /dev/null d47b534711ff4d27556ef57c0bd7a9ef3f9d0b12fb9f276bd053e85810374e7b -
Connect to the
oiri-clicontainer.docker exec -it oiri-cli bash -
Update the OIRI configuration with the latest images.
In the
oiri-clicontainer issue the following commands../updateValuesYaml.sh \ --oiriapiimage {OIRI_NEW_IMAGE} \ --oiriuiimage {OIRI_UI_NEW_IMAGE} \ --dingimage {DING_NEW_IMAGE} ./updateConfig.sh \ --dingimage {DING_NEW_IMAGE}Output will be similar to the following.
./updateValuesYaml.sh \ --oiriapiimage oiri-12.2.1.4.<TAG> \ --oiriuiimage oiri-ui-12.2.1.4.<TAG>:<tag> \ --dingimage oiri-ding-12.2.1.4.<TAG> INFO: Setting up /app/k8s/values.yaml ./updateConfig.sh \ --dingimage oiri/oiri-ding:<tag> INFO: Setting up /app/data/conf/config.yaml INFO: Setting up /app/data/conf/data-ingestion-config.yaml INFO: Setting up /app/data/conf/custom-attributes.yaml INFO: Setting up /app/oiri/data/conf/application.yaml INFO: Setting up /app/oiri/data/conf/authenticationConf.yaml INFO: Setting up /app/data/conf/dbconfig.yaml -
Upgrade the schema with the new image.
oiri-cli --config=/app/data/conf/config.yaml schema migrate /app/data/conf/dbconfig.yamlOutput should be similar to the following.
####### #### ######## #### ###### ## #### ## ## ## ## ## ## ## ## ## ## ## ## ## ## ## ## ## ## ## ## ## ## ######## ## ####### ## ## ## ## ## ## ## ## ## ## ## ## ## ## ## ## ## ## ## ## ## ## ####### #### ## ## #### ###### ######## #### Migrating the OIRI schema Migrating OIRI SCHEMA ............ =================================================== ========== Before Migrate ============= Script:V1__RoleMining.sql Installed On:2021-04-14 15:25:56.075212 State:SUCCESS Version:1 Description:RoleMining ========== After Migrate ============= Script:V1__RoleMining.sql Installed On:2021-04-14 15:25:56.075212 State:SUCCESS Version:1 Description:RoleMining OIRI Schema has been successfully migrated -
Upgrade the Helm chart to reflect the new image.
helm upgrade oiri /helm/oiri -f /app/k8s/values.yamlOutput will be similar to the following.
helm upgrade oiri /helm/oiri -f /app/k8s/values.yaml Release "oiri" has been upgraded. Happy Helming! NAME: oiri LAST DEPLOYED: Mon Apr 26 16:51:58 2021 NAMESPACE: default STATUS: deployed REVISION: 4 TEST SUITE: None NOTES: Please be patient while the chart installs. Pod may not be in running status. To check the status of the pod, run following command. Pods READY state must be 1/1 and status RUNNING kubectl get pods --namespace oiri kubectl get pods --namespace ding Access OIRI UI by using following URL in your browser. https://den01evo.us.oracle.com:30305/oiri/ui/v1/console Admins can access DING History Server by port forwarding the ding-history pod through kubectl. kubectl port-forward <pod_name> <desired_port>:18080 -n ding Inside the DING-CLI, use following commands to start data ingestion ding-cli --config=/app/data/conf/config.yaml data-ingestion start /app/data/conf/data-ingestion-config.yaml -
Verify that pods are running and using the correct image.
Confirm that the OIRI pods are running.
kubectl get pods --namespace oiriOutput should be similar to the following.
NAME                     READY   STATUS    RESTARTS   AGE
oiri-677c96f67f-p6q8j    1/1     Running   0          41m
oiri-ui-f5c4df54-hrwsm   1/1     Running   0          41m
For each pod, check the
Image:value, for example:kubectl describe pod oiri-677c96f67f-p6q8j -n oiri | grep Image:Output should be similar to the following.
Image: oiri-12.2.1.4.<TAG>kubectl describe pod oiri-ui-f5c4df54-hrwsm -n oiri | grep Image:Output should be similar to the following.
Image: oiri-ui-12.2.1.4.<TAG>Note: the
<tag>listed in the output should match the<tag>of the latest image that you upgraded to.Perform the same tasks for the DING pod, for example:
kubectl get pods --namespace ding
NAME                                    READY   STATUS      RESTARTS   AGE
oiri-ding-8337ee78f9845138-driver       0/1     Completed   0          4d5h
oiri-ding-baa5ce78fa1f4b2f-driver       0/1     Completed   0          4d2h
oiri-ding-c9a54178fecedd1a-driver       0/1     Completed   0          3d4h
spark-history-server-684dc84b66-jbmkg   1/1     Running     0          60m

kubectl describe pod  spark-history-server-684dc84b66-jbmkg -n ding | grep Image:
 Image:         oiri-ding-12.2.1.4.<TAG>
Remove OIRI
To remove OIRI you should perform the following tasks as appropriate.
-
Delete the Helm chart.
Connect to the
oiri-clicontainer.docker exec -it oiri-cli bashDelete the OIRI Helm chart.
helm delete oiri -
Delete Kubernetes namespaces.
Connected to the
oiri-clicontainer, issue the following commands.kubectl delete namespace oiri kubectl delete namespace ding -
Remove OIRI and DING containers.
Exit the container and on the host issue the following.
docker rm -f oiri-cli docker rm -f ding-cli -
Remove any other components
Remove any other components that may have been created to support your OIRI installation, for example:
- OIRI schema or Database
- Local directory
- NFS directories
Related Links
Provide links to additional resources. This section is optional; delete if not needed.
- https://docs-uat.us.oracle.com/en/middleware/idm/identity-role-intelligence/amiri/index.html
- Enabling Identity Audit
Acknowledgements
- Authors - Mike Howlett
- Contributors - Anup Gautam, Gaurav Kumar, Rishi Agarwal, Tanmay Garg
For product documentation, visit Oracle Help Center.
More Learning Resources
Explore other labs on docs.oracle.com/learn or access more free learning content on the Oracle Learning YouTube channel. Additionally, visit education.oracle.com/learning-explorer to become an Oracle Learning Explorer.
For product documentation, visit Oracle Help Center.
Deploy Oracle Identity Role Intelligence on Kubernetes
F40442-04
November 2021
Copyright © 2021, Oracle and/or its affiliates.