| Oracle® Retail Science Cloud Services User Guide Release 18.0.002 F17712-02 |
|

 Previous |
 Next |
Oracle Digital Assistance (ODA) is a NLP and Machine Learning-based cloud service that enables application-specific interactions. It is a virtual user that assists end users with complex engagements using transactional data to review key business insights and exceptions. It also provides out-of-the-box knowledge sharing by responding to typical Q&A-style questions for customer service and support. ODA features are supported using voice along with conversational interface to distill end user intents, invoke actions, and provide reasonable responses. This enhances consulting services with minimal training and support.
Digital assistance is not a replacement for a web application but a channel that allows the user to complete context-driven tasks using a combination of text messages, voice and, simple UI.
Digital assistance supports Transactional bots and Q&A bots.
This chapter describes how to use digital assistance. Digital Assistance in the Retail Science Platform is displayed in the Contextual area of each module.
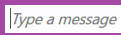
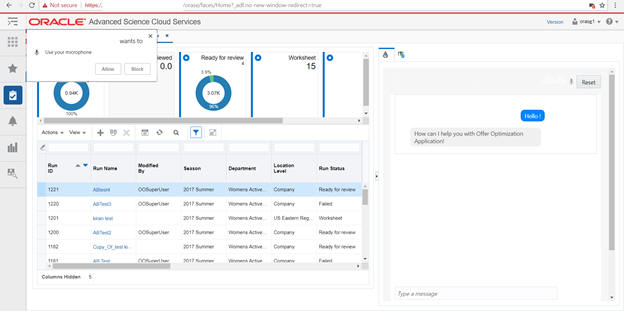
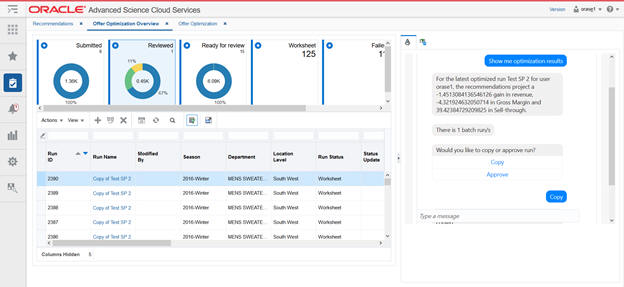
Transactional digital assistance helps with business engagements by using transactional data to review business insights, rules, and exceptions. This assistant complete tasks and helps the end user navigate to specific tasks in application. The data source for these bots is the Retail Science Platform Database. They rely on NLP or Machine Learning to determine user intent.
Figure 14-1 Transactional Digital Assistance
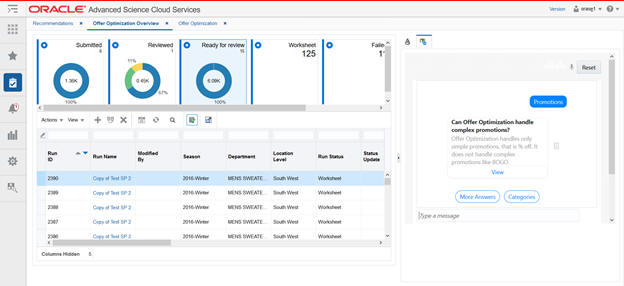
Q&A digital assistance helps answer general interest questions by returning one or more question and answer pairs. It helps the user find FAQs or other knowledge-based documents. The data source of these bots is pre-loaded CSV. They rely on Elastic Search to determine user intent.
Digital Assistance appears in the Contextual Area and has the components described in Table 14-1.
Figure 14-3 Digital Assistance Contextual Area
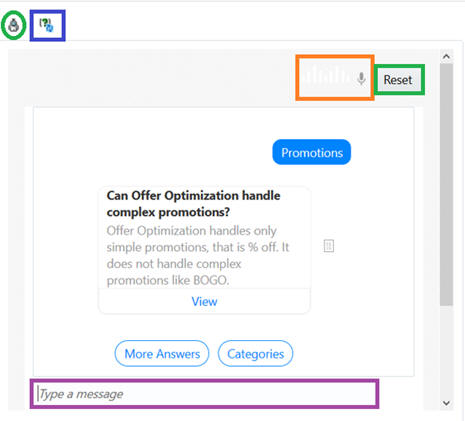
Table 14-1 Interface Components
| Icon | Description |
|---|---|
|
|
Access transaction bots by clicking the bot icon in the contextual area. |
|
|
Access Q&A bots by clicking the question icon in the contextual area. |
|
|
Reset the context of the bots by clicking the reset icon. |
|
|
Access voice component by clicking the microphone icon. If voice is enabled, the bar color next to the microphone icon will be become orange and will animate. When user speaks, the content is typed in the message window. |
|
|
User can type message and click Enter. |
Both of these bots can have voice enabled by clicking on microphone icon. To enable voice, complete the steps described in "Voice Component."
Voice support for ODA is only available in Chrome.
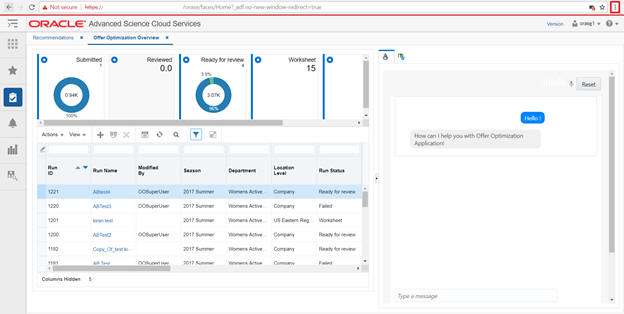
Enabling the microphone in Chrome
Chrome requires permission to enable the Microphone for all URLs (for example, https://<hostname>:<port>).
The process for adding or enabling Microphone differs in different versions of Chrome. Here are the recommended steps. The https mode is recommended.
https://<hostname>:<port>/orase/faces/Home
Click dot in the top right corner to check the settings. This opens a new tab in the browser.
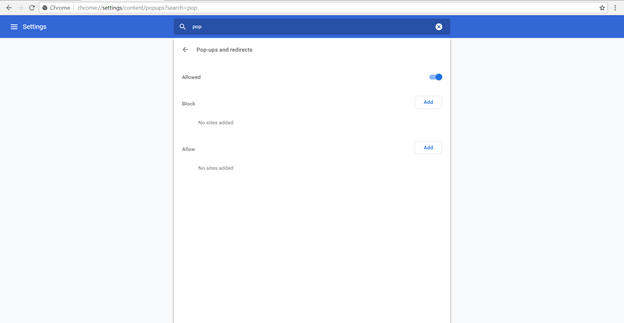
Type microphone in the search text box.
If the application URL is not added to allow section, then follow steps 4 through 7. No setup is required for voice enablement. Make sure that pop-ups are not blocked for the URL.
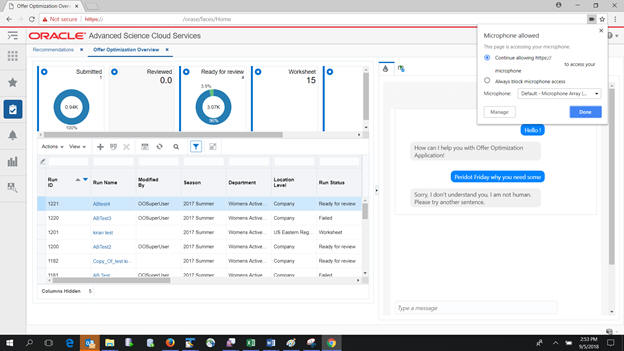
Click Microphone. If the URL is allowed, you will see voice animation next to the yellow button when you speak. You are prompted to click Allow to enable voice. Click Allow or complete the following steps.
The browser enables the button in the top right corner for permission. When asked if the URL should access the microphone, click Allow.
If above steps do not work, try using incognito mode by pressing Ctrl + Shift + N. When asked if <URL> want to access your microphone, reload the page.
Make sure the pop-up is not blocked and click Allow. Voice will be enabled.