3 Manage Promotions
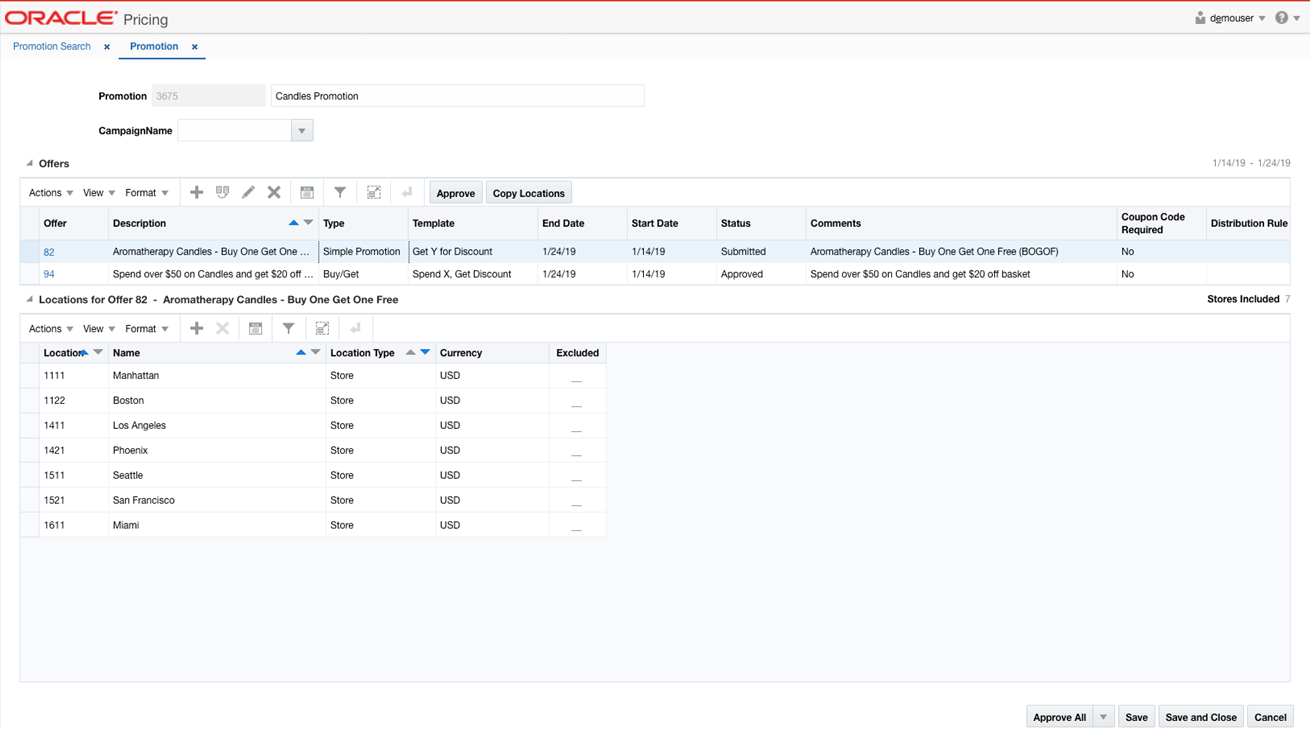
The Promotion screen allows you to maintain the promotion description, offers within the promotion, and the locations associated with the offers. In addition, the promotion can optionally be assigned to a campaign. Offers are maintained using the offer wizard where you can navigate through multiple screens which specify the offer details, conditions to qualify for the offer, and the reward available for the offer. Locations are added to offers after they are created using the offer wizard.
The Promotion screen has three modes: Add, Edit, and View. If the user enters this screen in View mode, all maintenance options are disabled, and the Save, Save and Close, and Cancel buttons are replaced with Done.
The Manage Promotions tasks provide options for existing promotions, including:
Search for a Promotion
Perform the following procedure to search for an existing promotion.
-
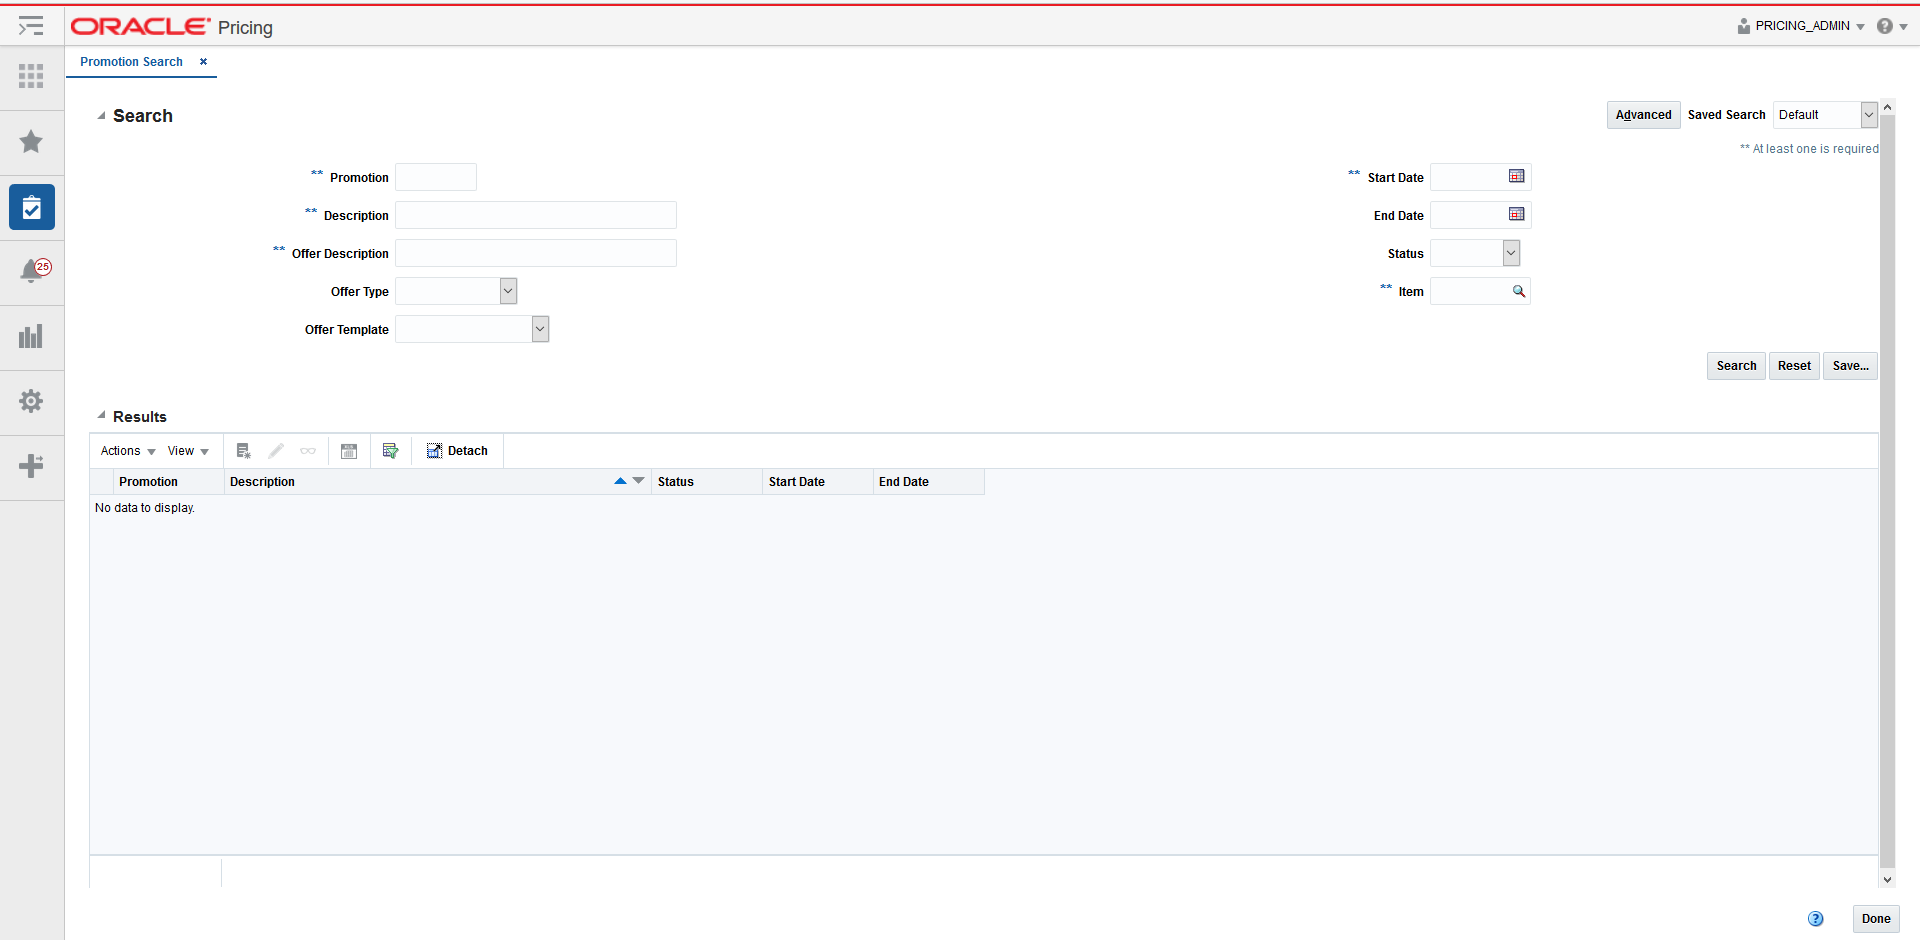
From the Tasks menu, select Manage Promotions. The Promotion Search tab appears.
-
Enter your promotion search criteria using the following fields:
Note:
In order to conduct a promotion search, users must enter at least one of the following; Promotion, Description, Offer Description, Start Date, or Item.Table 3-1 Promotion Search Fields
Field Description Promotion
The Promotion field allows the user to enter a promotion ID to be used in search criteria.
Description
The Description field allows the user to enter a promotion description to be used in search criteria.
Offer Description
The Offer Description allows the user to enter an offer description to be used in search criteria.
Offer Type
The Offer Type field allows the user to select an offer type to be used in search criteria. Promotions containing at least one offer with the entered type should be returned. Values for the drop down include:
-
Simple Discount
-
Buy/Get
-
Gift with Purchase
Offer Template
The Offer Template field allows the user to select an offer template to be used in search criteria.
Start Date
The Start Date field allows the user to enter or select a Start Date to be used in search criteria.
End Date
The End Date field allows the user to enter or select an End Date to be used in search criteria.
Status
The Status field allows the user to select a Status to be used in search criteria. Values for the drop down include:
-
Worksheet
-
Submitted
-
Approved
-
Rejected
-
Active
-
Completed
-
Cancelled
Item
The Item field allows the user to enter or select an Item(s) to be used in search criteria. Users have the option to go directly to the search icon to look up items.
-
-
Once your search criteria are entered, click Search. The search results are displayed in the Results pane.
Edit Offers
Editing a single offer is performed using the Offer Wizard. There are three potential pages within the wizard:
-
Offer Page
-
Conditions Page
-
Rewards Page
Perform the following procedure to edit a single offer:
-
Perform a search for the promotion that you want to edit. See Search for a Promotion.
-
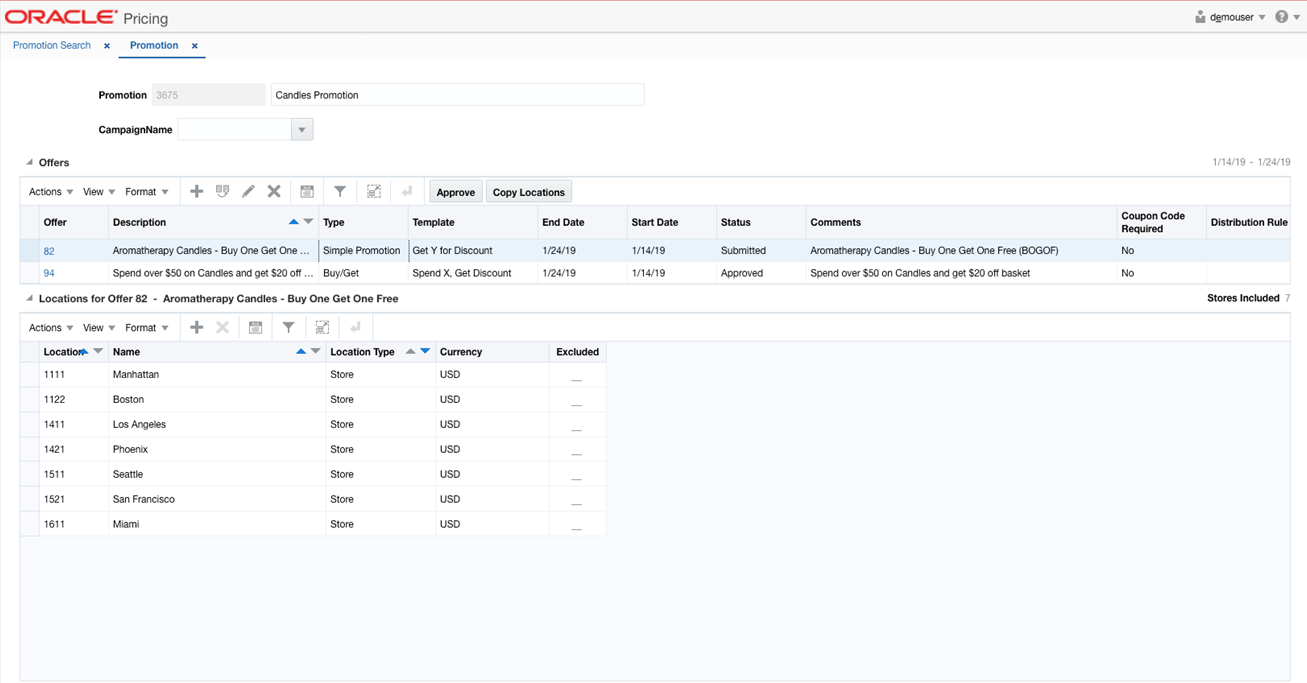
From the search results pane of the Promotion Search tab, highlight the promotion you want to edit and select Edit from the Actions menu. The Promotion tab appears.
-
From the Promotion tab, highlight the offer you want to edit and select Edit from the Action menu.
Note:
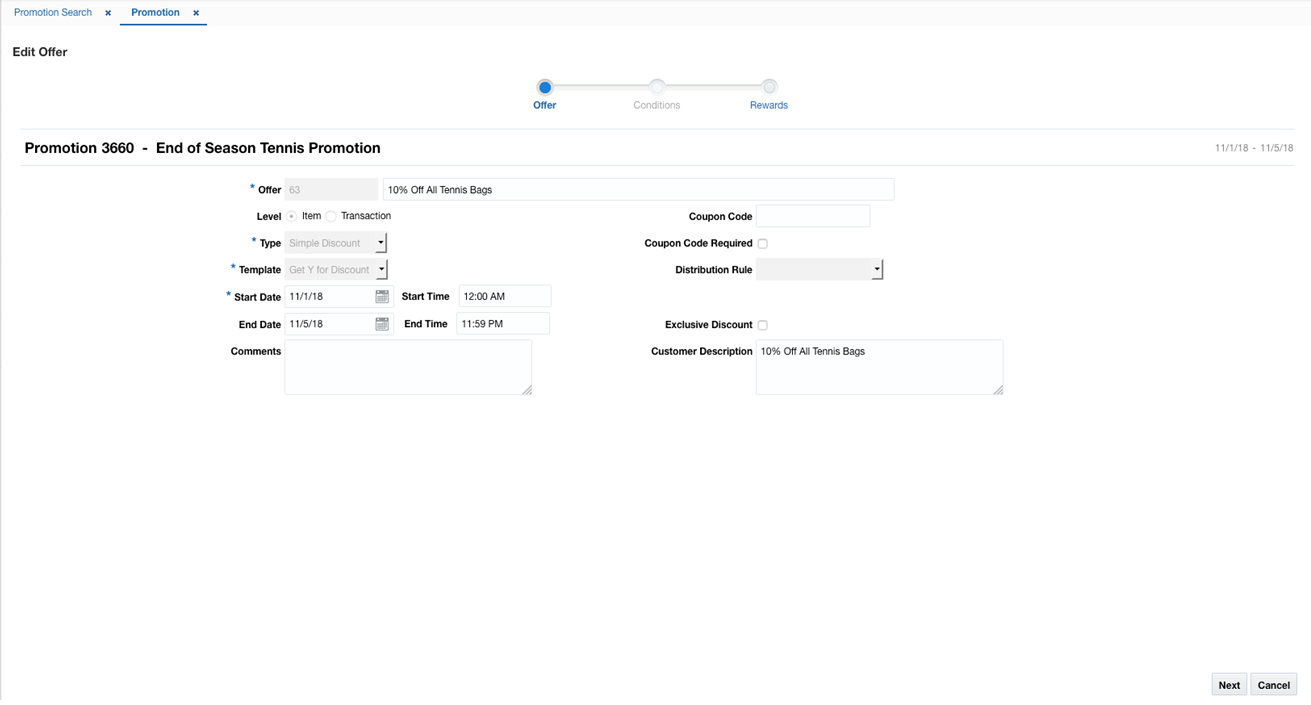
You may need to move your offer back to Worksheet status in order to make edits.If a single offer was selected, the Offer Wizard is launched. The initial page in the Offer Wizard allows you to edit the basic criteria of the offer. See the Add Offer Details section for information on each of the fields on this page.
Once you have edited the main offer criteria as needed, click Next to edit the Conditions and Rewards portions of the offer.
Note:
Depending on the offer template, you may not have both Conditions and Rewards.
Edit Offer Conditions
The Conditions page is used to edit the conditions that a customer needs to meet in order to qualify for the rewards on the offer. The Conditions stop of the wizard allows you to edit the conditions associated with the offer. The offer template will determine which fields are available for editing. See the Create Promotions and Offers section for your offer template for details on the fields on this page.
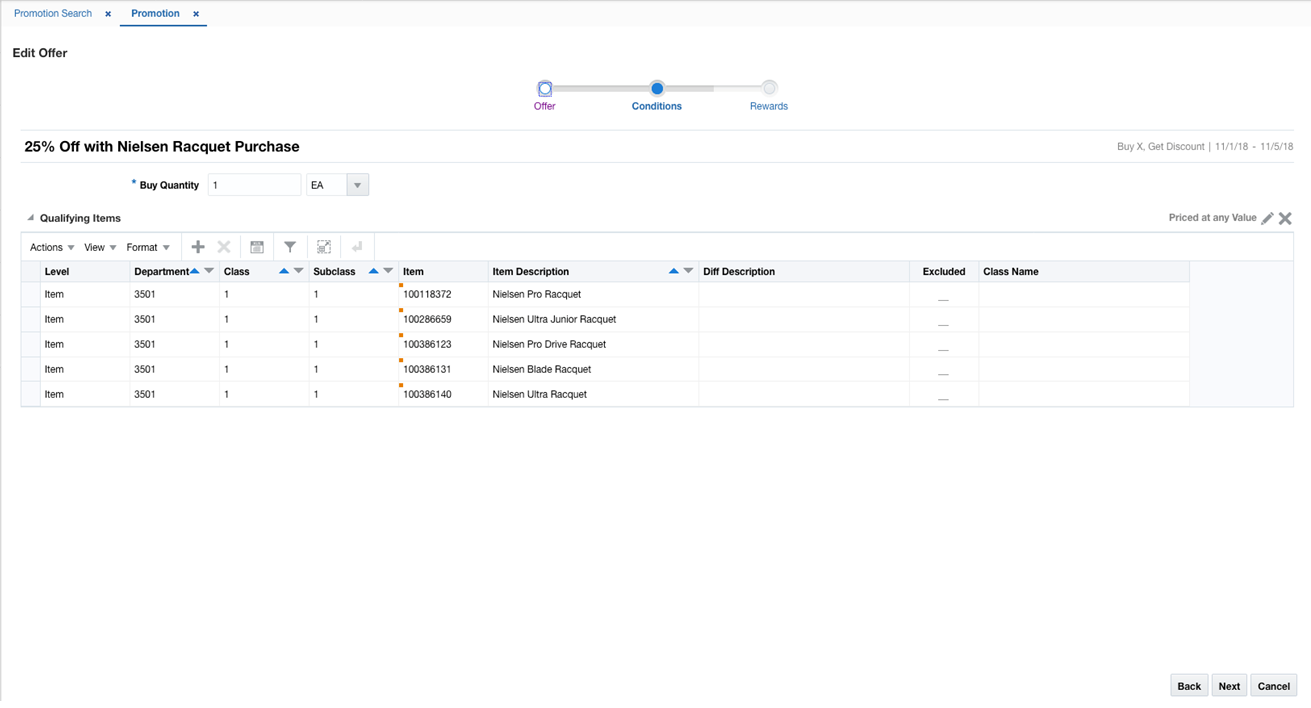
Once your offer conditions criteria are entered, click Next. The Rewards Page opens. If you need to go back to edit the main offer criteria, the click on the Back button or click on the hyperlink for the appropriate train stop at the top of the page.
Edit Offer Rewards
The Rewards page allows you to edit the rewards associated with the offer. As with the conditions page, the details of what is available for editing on this page will differ for each offer template. See the Create Promotions and Offers section for your offer template type for details on the fields on this screen for your template type.
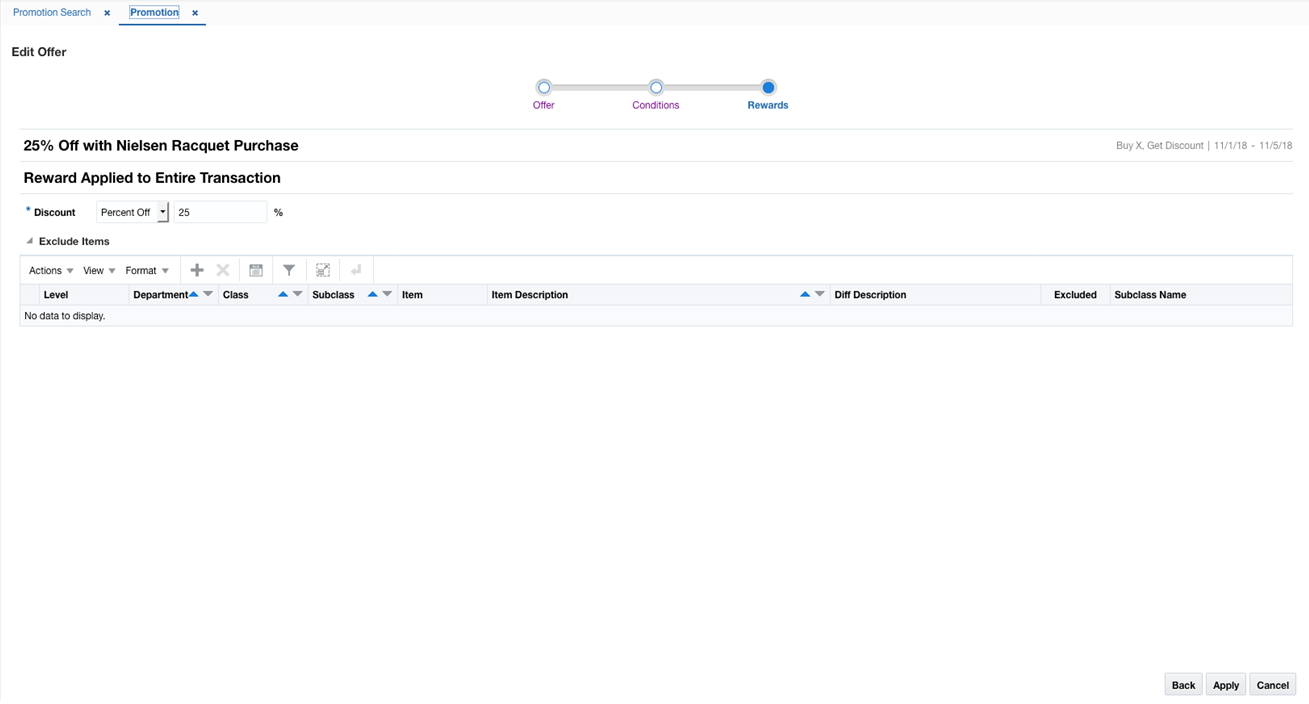
If you have applied all your updates, click Apply to save the changes and return to the Promotions page. If you need to make changes to the Offer or Conditions for the offer, click the Back button or click on the hyperlinks for the appropriate train stop at the top of the page.
Edit Multiple Offers
Several fields on an offer are eligible to be maintained via a mass maintenance screen. The fields which allow mass maintenance all reside on the Offers page in the Offer Wizard. The Mass maintenance functionality is called when multiple offers are selected from the Promotions screen and you select the Edit option from the menu or using the iconic button.
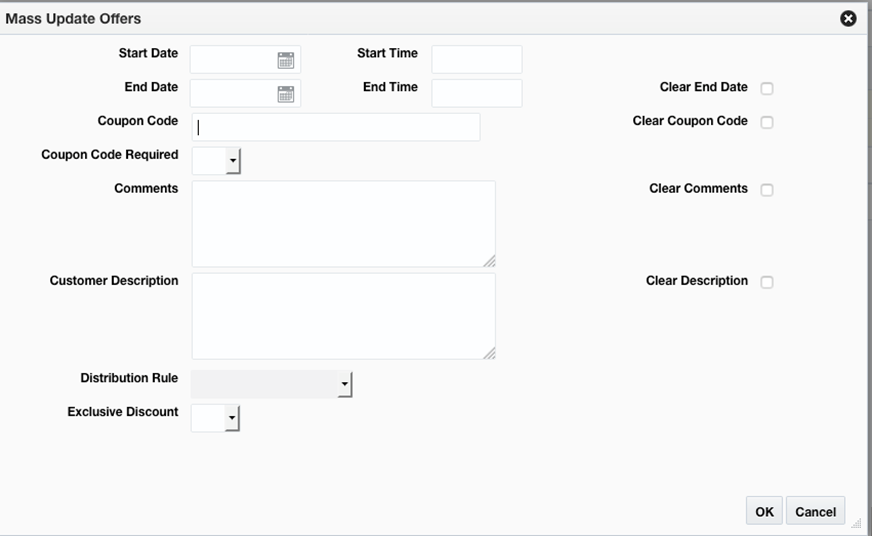
From the Mass Update Offers pop-up, edit your item offer criteria using the following options:
Table 3-2 Mass Update Offers Fields
| Field | Description |
|---|---|
|
Start Date |
The Start Date field allows the user update the start date for the all the selected offers. |
|
Start Time |
The Start Time field allows the user to update the start time for all the selected offers. |
|
End Date |
The End Date field allows the user to update the end date for all the selected offers. |
|
End Time |
The End Time field allows the user to update the end time for all the selected offers. |
|
Coupon Code |
The Coupon Code field allows the user to update the coupon code for all the selected offers. |
|
Comments |
The Comments field allows the user to update the comments for all the selected offers. |
|
Customer Description |
The Customer Description field allows the user to update the customer description for all the selected offers. |
|
Clear End Date |
Selecting Clear End Date will clear the End Date for all selected offers. |
|
Clear Coupon Code |
Selecting Clear Coupon Code will clear the Coupon Code for all selected offers. |
|
Clear Comments |
Selecting Clear Comments will clear the Comments for all selected offers. |
|
Customer Description |
Selecting Clear Customer Description will clear the Customer Description for all selected offers. |
When you have entered all the changes for the Mass Update, click OK to accept the criteria and close the pop-up.
Cancel Offers
Users have the option to cancel an offer from a Promotion. Cancelling an offer can only be done when the offer is in active status.
-
Perform a search for the promotion that has an offer in Active status. See Search for a Promotion.
-
From the search results pane, select the Promotion from which you want to cancel an offer and select Edit from the Actions menu. The Promotion tab appears.
-
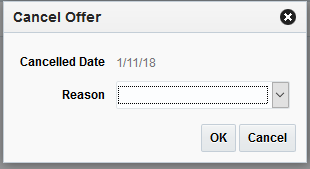
From the Promotion tab, select the offer you wish to cancel and select Cancel from the Actions menu. The Cancel Offer pop-up appears.
-
Select a Reason for the cancellation.
-
Click OK to Cancel the Offer and close the pop-up.
Cancel Items from an Offer
Users have the option to cancel an item or items from an offer. Cancelling an item from an offer can only be done when the offer is in Active status.
-
Perform a search for the promotion that has an offer with items you want to cancel. See Search for a Promotion.
-
From the search results pane, select the Promotion from which you want to cancel items from an offer and select Edit from the Actions menu. The Promotion tab appears.
-
From the Promotion tab, select the offer that contains the item or items to cancel and select Edit from the Actions menu. The Offer Wizard is launched.
-
Navigate to the Conditions page in the wizard.
-
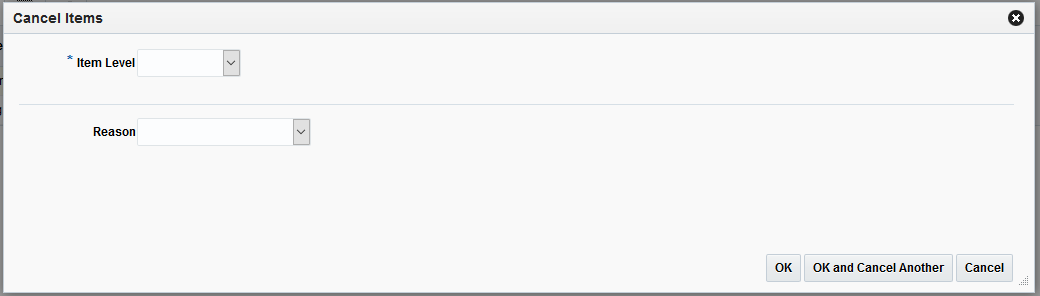
From the Qualifying Items table, select the item or items you want to cancel and select Cancel from the Actions menu. The Cancel Items pop-up appears.
-
From the Cancel Items pop-up, set the criteria for the items to be cancelled, using the following fields:
Table 3-3 Cancel Items Dialog Fields
Field Description Item Level
The Item Level field allows you to select a category by which you can narrow the list of things to cancel in the offer. Options are:
-
Department
-
Class
-
Subclass
-
Item
-
Parent/Diff
-
Item List
-
Upload List
Department
The Department field is active if you select Department, Class, or Subclass in the Item Level field. Click the dropdown to select a department for the items you want to cancel.
Class
The Class field is active if you select Class or Subclass in the Item Level field. Click the dropdown to select a class of items to cancel.
Subclass
The Subclass field is active if you select Subclass in the Item Level field. Click the dropdown to select a subclass of items to cancel.
Item
The Item field is active if you select Item in the Item Level field. Click the magnifying glass to search for an item to cancel.
Parent/Diff Search
The Parent/Diff field is active if you select Parent/Diff in the Item Level field. This field appears as a magnifying glass next to the Item Level field and allows you to search for a parent/diff to cancel.
Diff Type
The Diff Type field is active if you select Parent/Diff in the Item Level field.
Diff
The Diff field is active if you select Parent/Diff in the Item Level field.
Item List
The Item List field is active if you select Item List in the Item Level field. Click the dropdown to select a defined list of items to cancel.
Source File
Source File is active if you select Upload List in the Item Level field. Click Browse to select the file to upload.
Reason
The Reason field allows you to enter a reason for the item(s) cancellation.
-
-
When you have entered the criteria for the item(s) being cancelled, click OK. Clicking OK and Cancel Another allows you to select another item to cancel. You are returned to the Edit Offer Conditions page.
-
From the Edit Offer Conditions page, click Next. The Edit Offer Rewards page appears.
-
From the Edit Offer Rewards page, click Apply. You are returned to the Promotions tab.
Note:
You also have the opportunity to cancel items from the Items table on the Rewards page by following similar steps as outlined for cancelling from the Qualifying Items table on the Conditions page.
Cancel Locations from an Offer
Users also have the option to cancel locations from an offer. Cancelling locations from an offer can only be done when the offer is in Active status.
-
Perform a search for the promotion that has an offer in Active status. See Search for a Promotion.
-
From the search results pane, select the Promotion from which you want to cancel a location from an offer and select Edit from the Actions menu. The Promotion tab appears.
-
From the Promotion tab, highlight the offer which has the location you want to cancel.
-
From the Promotion tab, on the Locations table, select the location(s) to be canceled and select Cancel from the Actions menu (on the locations table). The Cancel Locations dialog appears.
-
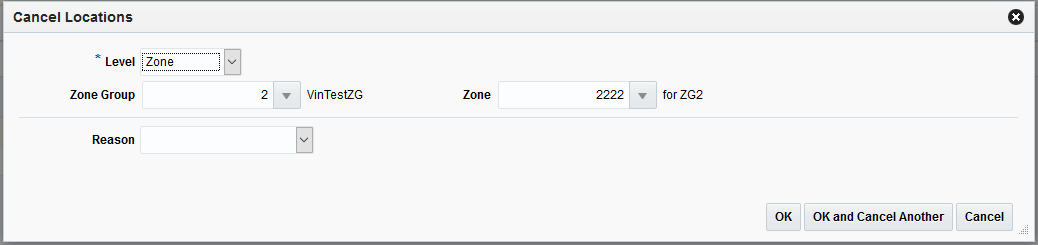
From the Cancel Locations dialog, set the criteria for the location or locations being cancelled using the following fields:
Table 3-4 Cancel Locations Dialog Fields
Field Description Level
The Level field allows you to select a category by which you can narrow the list of locations to cancel in the offer. Options are:
-
Zone
-
Location List
-
Store
Zone Group
The Zone Group field is active if you select Zone in the Level field. Click the dropdown to select a zone group for the location(s) you want to cancel.
Zone
The Zone field is active if you select Zone in the Level field. Click the dropdown to select a specific zone from the selected zone group from which to cancel the location(s).
Location List
The Location List field is active if you select Location List in the Level field. Click the dropdown to select from a defined list of locations from which to cancel the location(s).
Store
The Store field is active if you select Store in the Level field. Click the dropdown to select a store from which to cancel the location(s).
Reason
The Reason field allows you to enter a reason for the location(s) cancellation.
-
-
Click OK to Cancel the location(s) and close the pop-up. Click OK and Cancel Another to remain on the dialog and cancel additional locations.
Delete Offers
Users will have options to perform Delete maintenance at Offer level for one or many items or at the Offer/Location level for one or more Locations tied to an offer.
-
Offer Level: Users highlight one or more rows on the Offer table and click Delete on the Offer table
-
Location Level: Users will highlight a single row on the Offer table and then highlight one or many rows on the Locations table and click Delete on the Locations table
-
Perform a search for the promotion that you want to delete. See Search for a Promotion.
-
From the search results pane, select the Promotion from which you want to delete an offer and select Edit from the Actions menu. The Promotion tab appears.
-
From the Promotion tab, you can select either offers or locations to delete. Highlight the item or location you want to delete and select Delete from that tables' respective Action menu. The Delete Confirmation dialog appears.
-
From the Delete Confirmation dialog, click OK to confirm the deletion. You are returned to the Promotion tab.

Manage Campaigns
A promotion campaign is an attribute that can be added to a promotion as a way of linking together related promotions. Usually campaigns are driven by a retailer's marketing department and are often initiated in a separate solution. Because of this, campaigns are maintained through the upload/download process for use in Pricing. Although a Pricing function, campaigns are actually loaded via Merchandising by accessing Foundation Data > Download Foundation Data and Foundation Data > Upload Foundation Data.
To add, update, or remove a promotion campaign, select the template type of Price and Cost from the Download Data screen and then the template Promotion Campaigns. Click the Download button and when prompted, choose to either open the .ods file that is generated or save the file and open it separately in the spreadsheet application of your choice.
To add a new campaign, select the action type of Create on an empty row of the Promotion Campaigns tab. Next enter a unique ID up to 10 characters in length for the campaign along with the description in the appropriate columns. The description should be entered in the primary language (as defined in the Merchandising system options) of up to 1000 characters.
If you would like to update the description for a promotion campaign, a similar process will be followed as that described above for creating new. First, download the spreadsheet, and then navigate to the row where you would like to make your updates. Select the action type of Update, and then correct the description in the spreadsheet.
If you wish to remove a campaign, select the Delete action on the row of the campaign you which to delete. Note that the removing a campaign is not allowed if it is still in use for a promotion.
For all actions defined above, once all the updates have been made to the data in the spreadsheet, save the file and close it. Then, return to the Merchandising screens and select Foundation Data > Upload Foundation Data from the main task list. In this screen, you'll again select the template type Price and Cost and the template Promotion Campaign. This will generate a process description automatically, but this can be updated if desired. Lastly, select the Browse button and navigate to the directory where you saved the updated spreadsheet.
To review the status of the upload and check whether any errors occurred, select the Foundation Data > Review Status task from the main task list.
See also Download/Upload Data from Spreadsheets and View Data Loading Status.