4 Manage Tolerances
Tolerance settings in ReIM are entities with an ID and a description. These entities are mapped to supplier sites, suppliers, supplier groups, or departments. One of the tolerance entities is also defined as the system default. The match engine looks at the documents in the match and determines the appropriate level to search for a tolerance to be applied.
Search for a Tolerance
The Tolerance Search window provides a way in which to search for already defined tolerances.
Navigate: From the Tasks menu, select Foundation > Tolerance Maintenance. The Tolerance Search window opens.
-
From the Tolerance Search window, use the following criteria to search for existing tolerances:
Table 4-1 Tolerance Search Fields
Field Description Tolerance ID
This field allows the user to enter a tolerance ID to be used in search criteria.
Description
This field allows the user to enter the description to be used in search criteria.
System Default
The system requires one (and only one) tolerance to be flagged as the system default tolerance. This field allows searching based on this indicator.
Available values include:
-
Yes – If selected, only the default tolerance is returned
-
No – If selected, all tolerances except the default tolerance meet the criteria
-
Null – all tolerances meet the criteria.
Currency Code
This field allows the user to enter a currency to be used in search criteria.
-
-
After you have entered the desired search criteria, click Search.
Note:
If you would like to save your search criteria to use at a later date, click Save.Your search results are displayed in the Search Results pane of the Tolerance Search window.
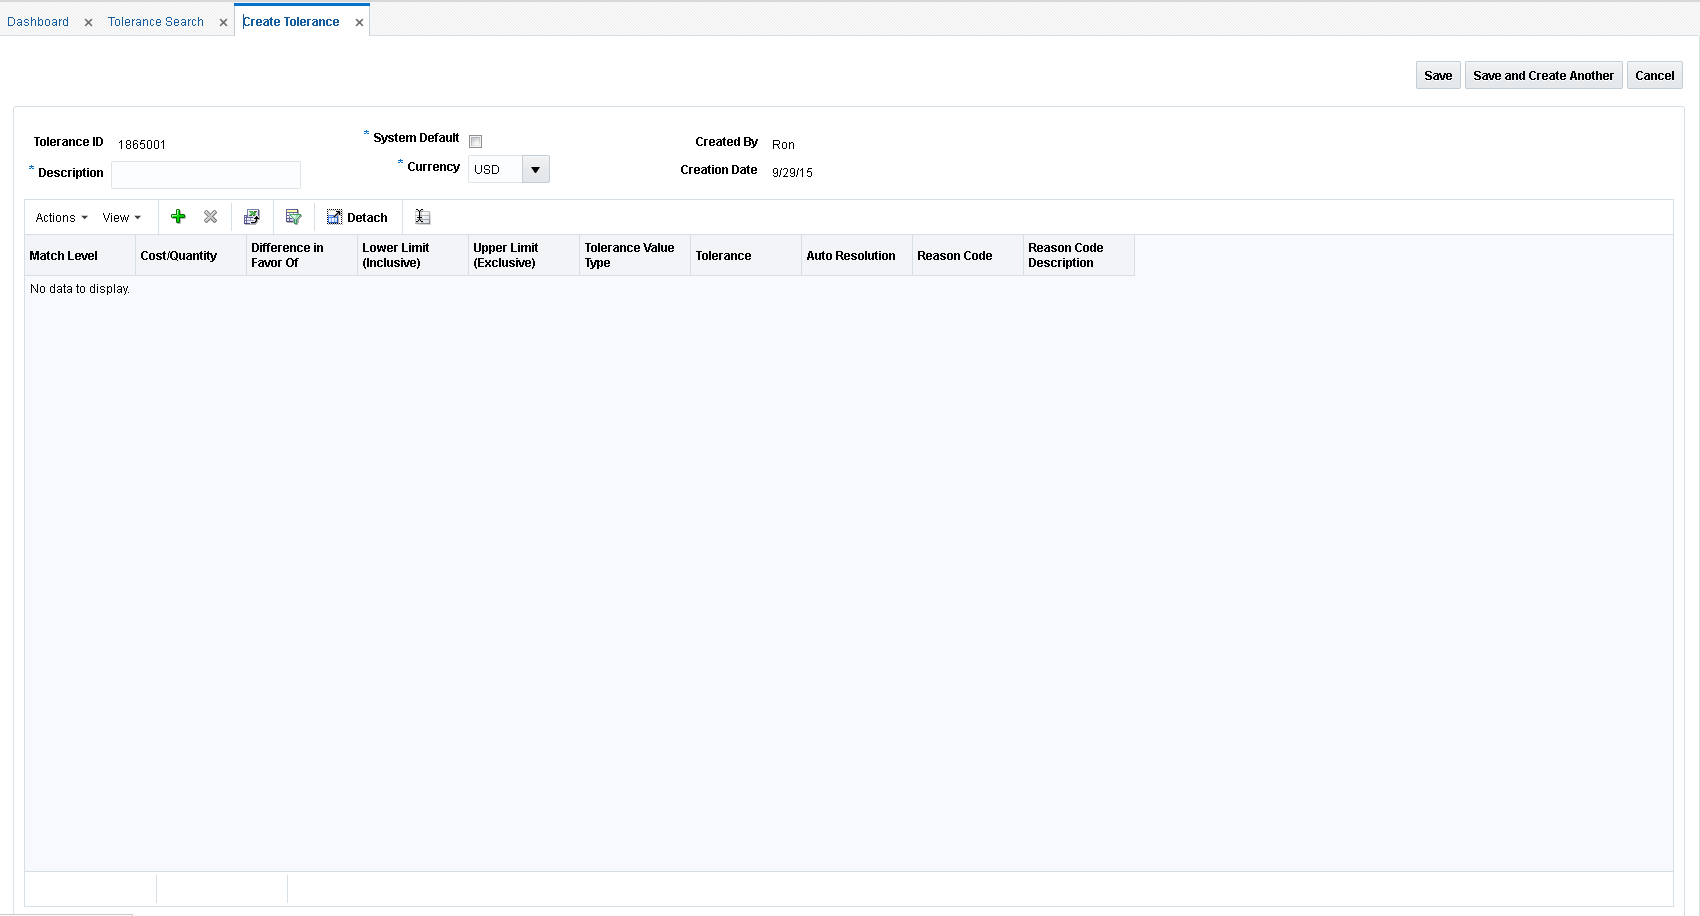
Create a Tolerance
The Create tolerance action is available in the Search Results pane at all times regardless of whether a tolerance search has been performed.
Navigate: From the Tasks menu, select Foundation > Tolerance Maintenance. The Tolerance Search window opens.
-
From the Search Results pane of the Tolerance Search window, select Create from the Action menu. The Create Tolerance window is displayed.
-
Enter a Description and select the Currency for the new tolerance. If the tolerance will be used as the default tolerance, select the Default Tolerance check box.
-
From the Create Tolerance window, select Add from the Action menu. An empty tolerance is added to the tolerance table.
Note:
When in create mode, the Tolerance ID is automatically assigned and cannot be changed. -
Enter the following information for your new tolerance:
-
Match Level – Select the match level for which the tolerance settings apply.
Summary is used for matching at the summary level. Summary level matches the accumulated total of the invoice detail lines, if they are present, to the accumulated total of the detail lines on the receipt. For Header-Only invoices, it matches the merchandise amount from the invoice header with the accumulated total of the receipt lines.
Line Item – used for matching at the item level.
Parent – used for matching at the parent level.
-
Cost/Quantity – Select whether the tolerance settings specified are for cost or quantity matching.
-
Difference in Favor Of – Select whether the tolerance settings specified are for when the discrepancy is in favor of the Supplier or the Retailer. A difference in Favor of the Supplier indicates that the invoice (or item) is an overbill (the invoice is more than the receipt). A difference in Favor of the Retailer indicates the invoice (or item) is an underbill (the invoice is less than the receipt).
-
Lower Limit (Inclusive) – Specify the lower limit for which this tolerance applies.
This field is used in conjunction with the Upper Limit field to allow the user to specify different tolerance levels for different values of invoices. For example, a retailer might want to specify that low value documents (those less than $100.00) might be considered within tolerance if they have a variance of 10% or less, however, high value documents (those with document values greater than $100) might need to be within only 5% variance for them to match within tolerance.
Note:
The value must be greater than or equal to zero and must be less than the Upper Limit on the same row. -
Upper Limit (Exclusive) – Specify the upper limit for which this tolerance applies.
This field is used in conjunction with the Lower Limit field to allow the user to specify different tolerance levels for different values of invoices.
Note:
The value must be greater than zero and must be greater than the Lower Limit on the same row. -
Tolerance Value Type – Specify whether the Tolerance setting and the chargeback tolerance setting are percent or amount values.
-
Tolerance – The Tolerance value is the amount by which the invoice (or invoice item) amount can vary from the receipt (or receipt item) amount yet still be considered valid for matching. Matches which are not perfect but have a variance within the tolerance setting are considered Matched within Tolerance.
-
Auto Resolution – The Auto Resolution value is used to determine the variance level at which the system automatically generates a resolution action to resolve the discrepancy. It is only used at the line level. If the variance between the invoice item and receipt item is greater than the Tolerance setting, but is less than or equal to the Auto Resolution setting, then the system automatically generates a resolution action with the use of a reason code.
-
Reason Code – The Reason Code is used to automatically resolve discrepancies which fall within the Auto Resolution tolerance level.
Only Reason Codes with the following types or Resolution Actions are allowed:
-
Debit Memo Cost (if this row has Cost selected for the Cost/Quantity setting).
-
Debit Memo Quantity (if this row has Quantity selected for the Cost/Quantity setting).
-
Credit Memo Cost (if this row as Cost selected for the Cost/Quantity setting)
-
Credit Memo Quantity (if this row has Quantity selected for the Cost/Quantity setting)
-
Discrepancy Write Off (DWO)
-
Receiver Cost Adjustment (if this row has Cost selected for the Cost/Quantity setting)
-
Receiver Unit Adjustment (if this row has Quantity selected for the Cost/Quantity setting)
-
-
-
Click Save to save the new tolerance.
If you want to create an additional tolerance, click Save and Create Another.

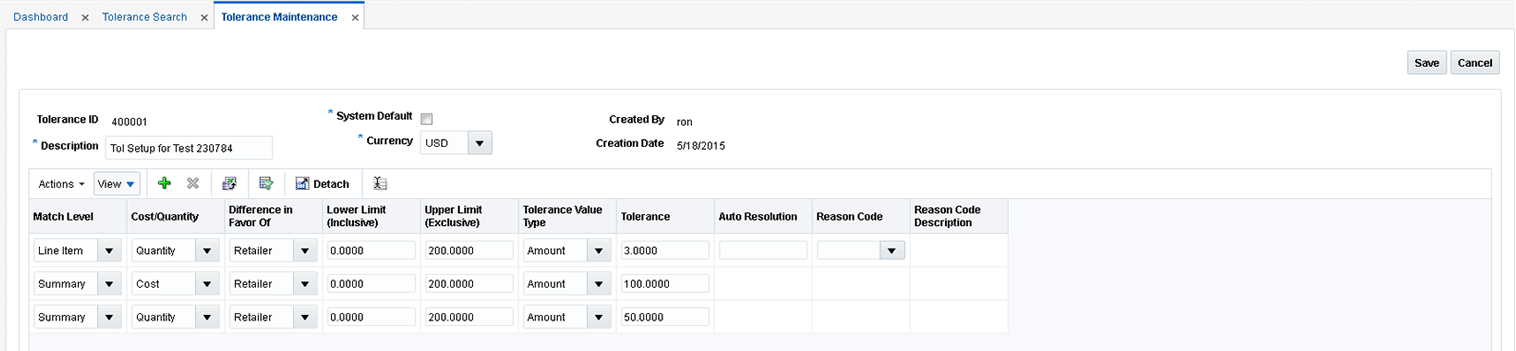
Maintain Tolerances
The Tolerance Maintenance window is called from the Tolerance Search window. The Tolerance Maintenance window allows the user to edit, view, or delete an existing tolerance setting. One tolerance setting must be flagged as the system default. The other settings are mapped to tolerance levels such as Department, Supplier Group, Supplier, or Supplier Site.
Navigate: From the Tasks menu, select Foundation > Tolerance Maintenance. The Tolerance Search window opens.
-
From the Tolerance Search window, perform a search for existing tolerances. See Search for a Tolerance for additional information.
-
From the Search Results pane, select the tolerance you want to edit.
-
With the tolerance selected, select Edit from the Action menu. The Tolerance Maintenance window is displayed.
-
From the Tolerance Maintenance window, you can perform the following:
-
Edit All – Allows you to edit all lines in the tolerance.
-
Click to Edit – Allows you to edit a single line of the tolerance.
-
Add – Allows you to add a new line to the tolerance.
-
Delete – Allows you to delete a selected line from the tolerance
Note:
In Edit mode, the Tolerance ID field is display only and cannot be changed. -
-
Perform your updates to the tolerance.
-
Click Save to save the updated tolerance.