2 Manage Allocations
This chapter describes how to view, edit, and perform various other operations on an existing allocation. This chapter contains the following topics:
View Allocations
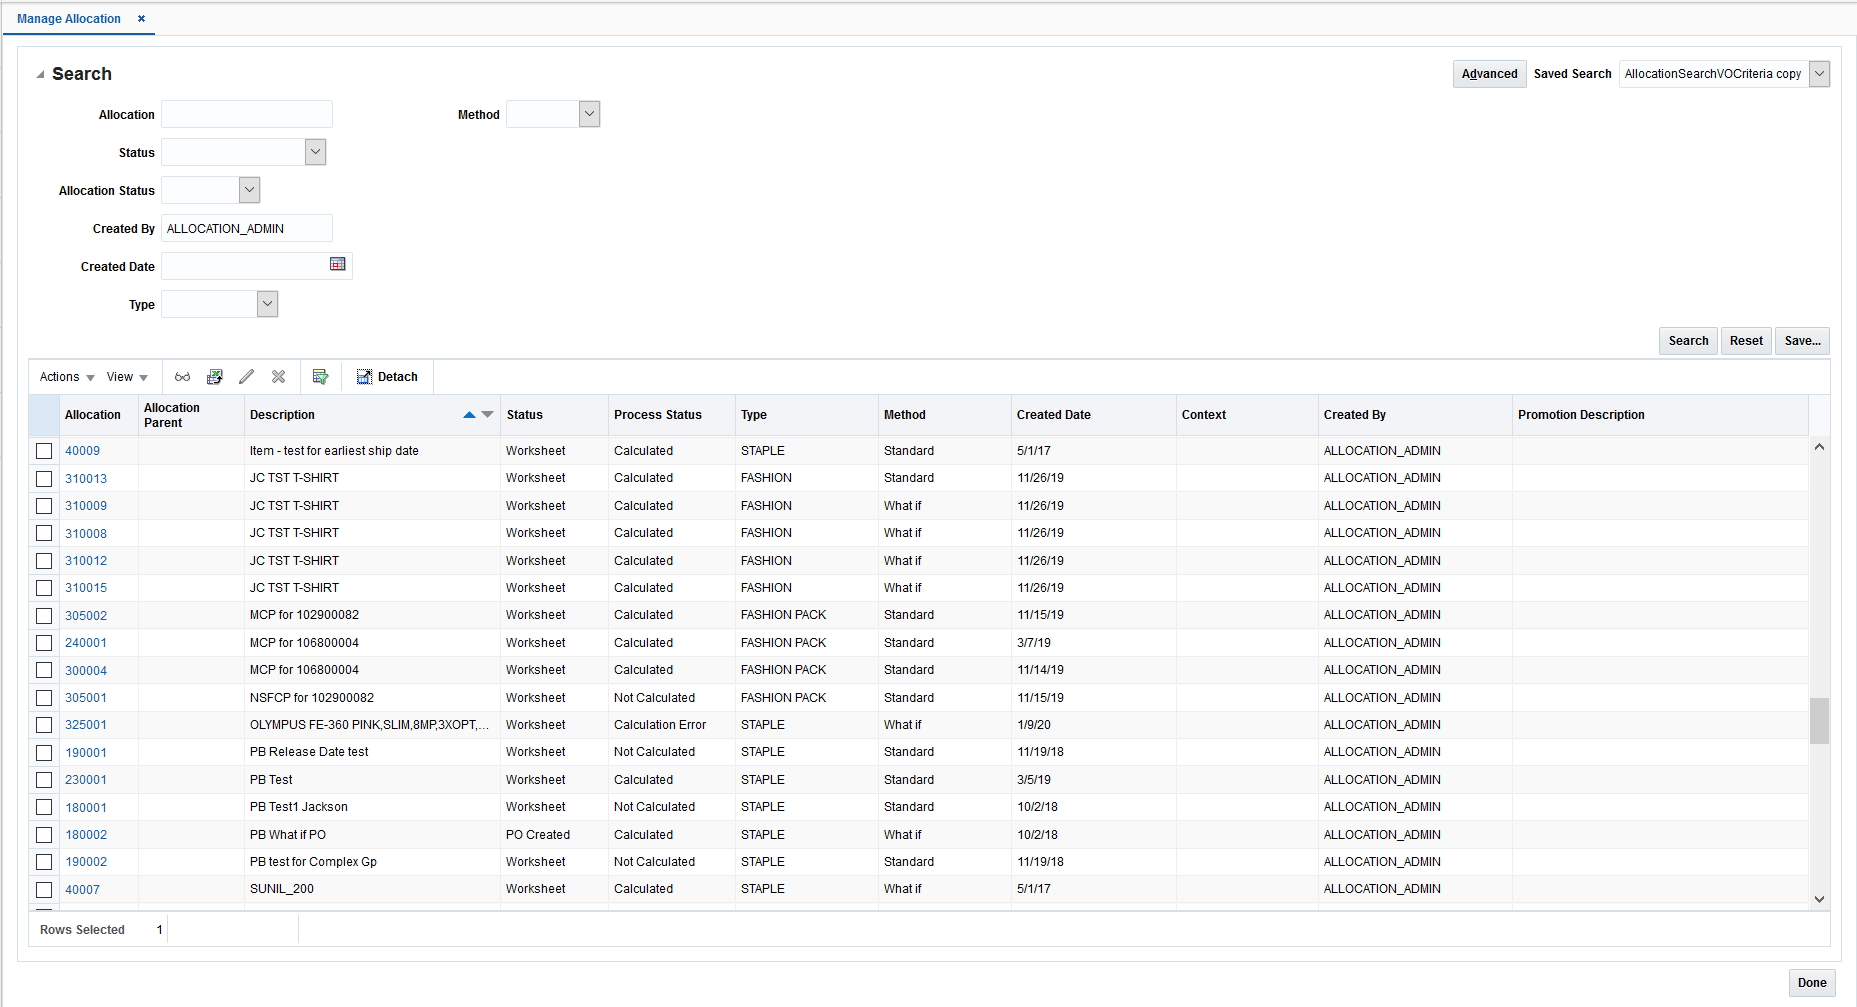
You can search and select to view allocations from the Manage Allocations window.
To view allocations:
-
From the Tasks menu, select Manage Allocations. The Manage Allocations window appears.
-
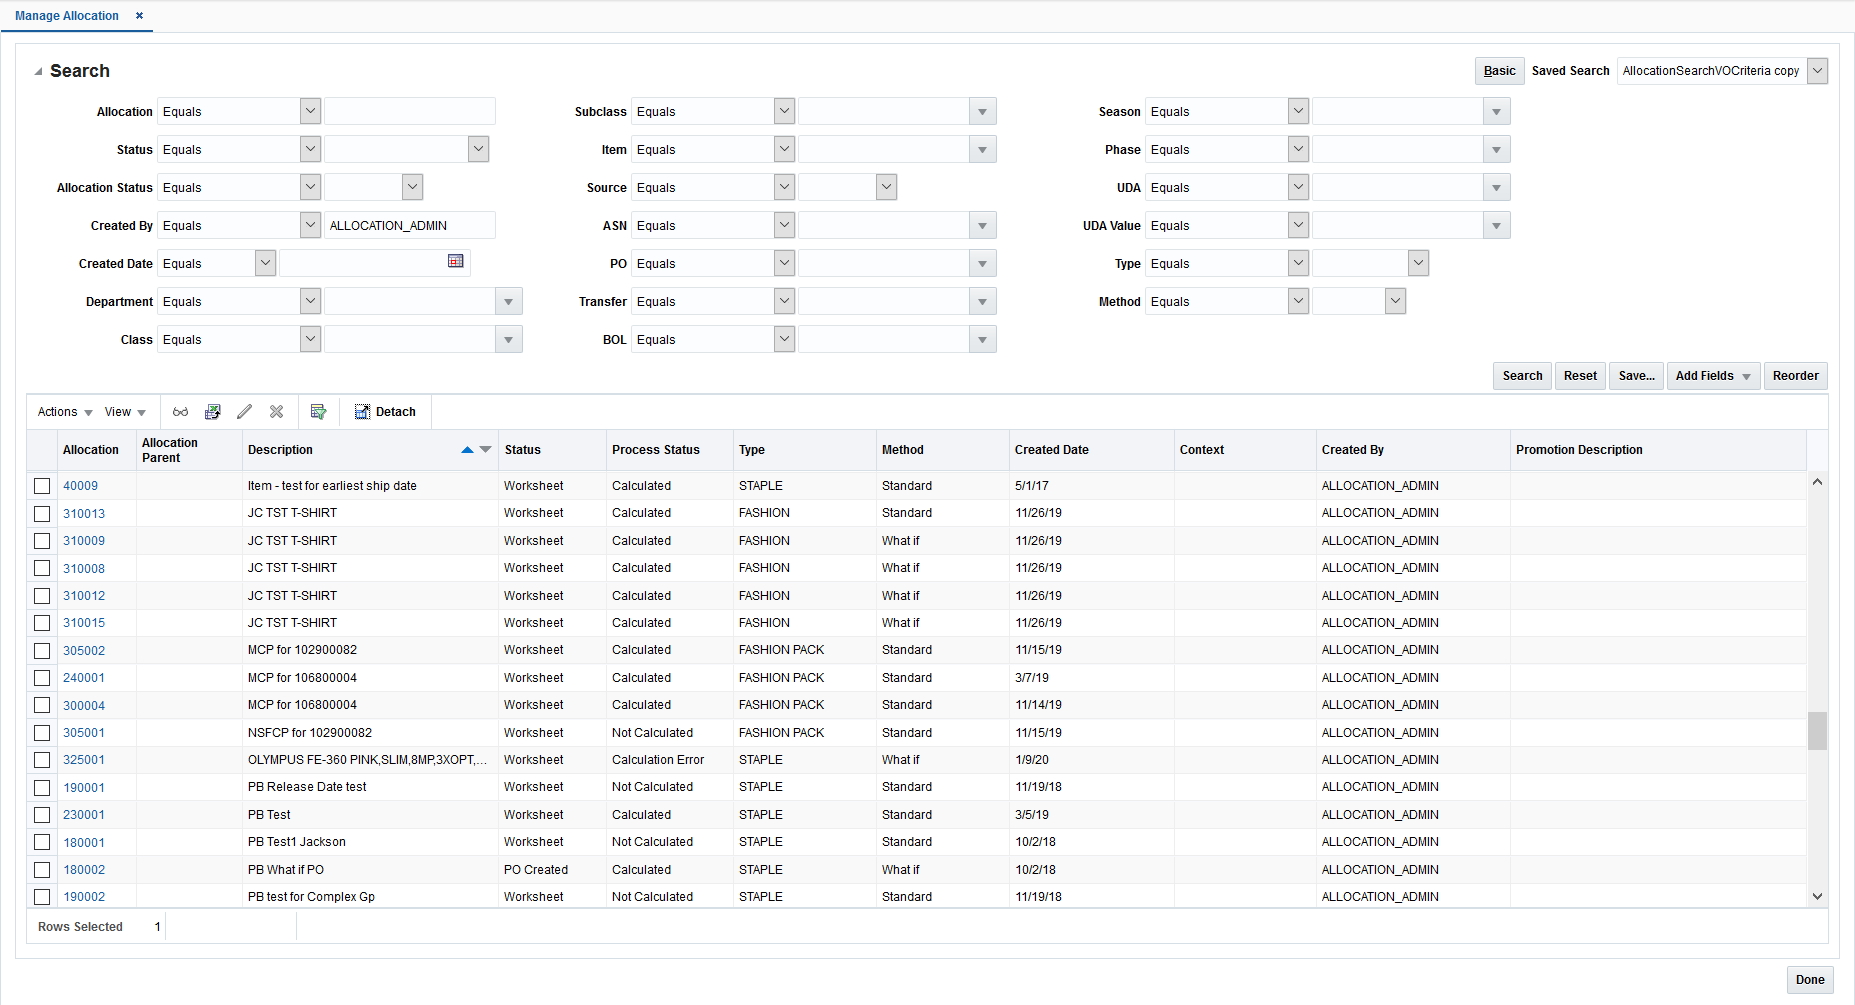
Optionally, click Advanced to see the advanced search options. The Add Field button is added to the window with the extra search fields. Click Add Fields, to include more fields for the search.
-
Enter the search criteria in the available fields.
-
Click Search. The allocations matching the search criteria are listed.
-
Select the allocation that you want to view.
-
Click View Allocation. Alternatively, you can also select View Allocation from the Actions menu. The Allocation window appears in view mode. You can view the following on the Allocation window:
-
To view the allocation details, select the Item tab in the Review section.
-
To view the policies applied, click View Policy in the Summary section.
-
To view the item/ source relationship, click the Item/Source tab.
-
Edit Allocations
You can edit items, locations, and policies, copy or split an allocation, spread the demand/need, or delete an allocation. The following procedures describe how to edit existing allocations.
Edit Items
To edit items:
-
Search for the allocation on the Manage Allocations window.
-
Click the Allocation ID link for the allocation that you want to edit. The Allocation window appears in edit mode.
Add Items to an Allocation
-
On the Allocation window, select the Item/Source tab.
-
To add more items to the list of items, select Quick Item Add from the Actions menu. A window appears with the item search options.
-
Search and retrieve the items you want to add to the allocation. Click Add to Worksheet. The items are added to the list on the Item/Source tab.
-
If you want to delete any items from the list, select the items and click the delete icon.
-
Select the items to add and click Add To Allocation. The items are added to the Item tab on the Allocation Maintenance window.
Edit Locations
To edit locations:
-
Search for the allocation on the Manage Allocations window.
-
Click the Allocation ID link for the allocation that you want to edit. The Allocation window appears in edit mode.
-
On the Allocation Maintenance tab, click Edit in the Location section. The Add Locations window appears.
-
Select the locations you want to add and click Apply.
Edit Policies
To edit policies:
-
Search for the allocation on the Manage Allocations window.
-
Click the Allocation ID link for the allocation that you want to edit. The Allocation window appears in edit mode.
-
On the Allocation Maintenance tab, click Edit in the Rules section. The Policies window appears.
-
Update as necessary and click Apply.
Copy an Allocation
To copy an allocation:
-
Search for the allocation on the Manage Allocations window.
-
Click the Allocation ID link for the allocation that you want to edit. The Allocation window appears in edit mode.
-
Click Copy Allocation. A copy of the existing allocation is created and opened.
Note:
The copied allocation is created in an uncalculated state/worksheet status. -
Edit the copy of the allocation as necessary.
-
Click Calculate to begin the calculation process or click Save to commit changes.
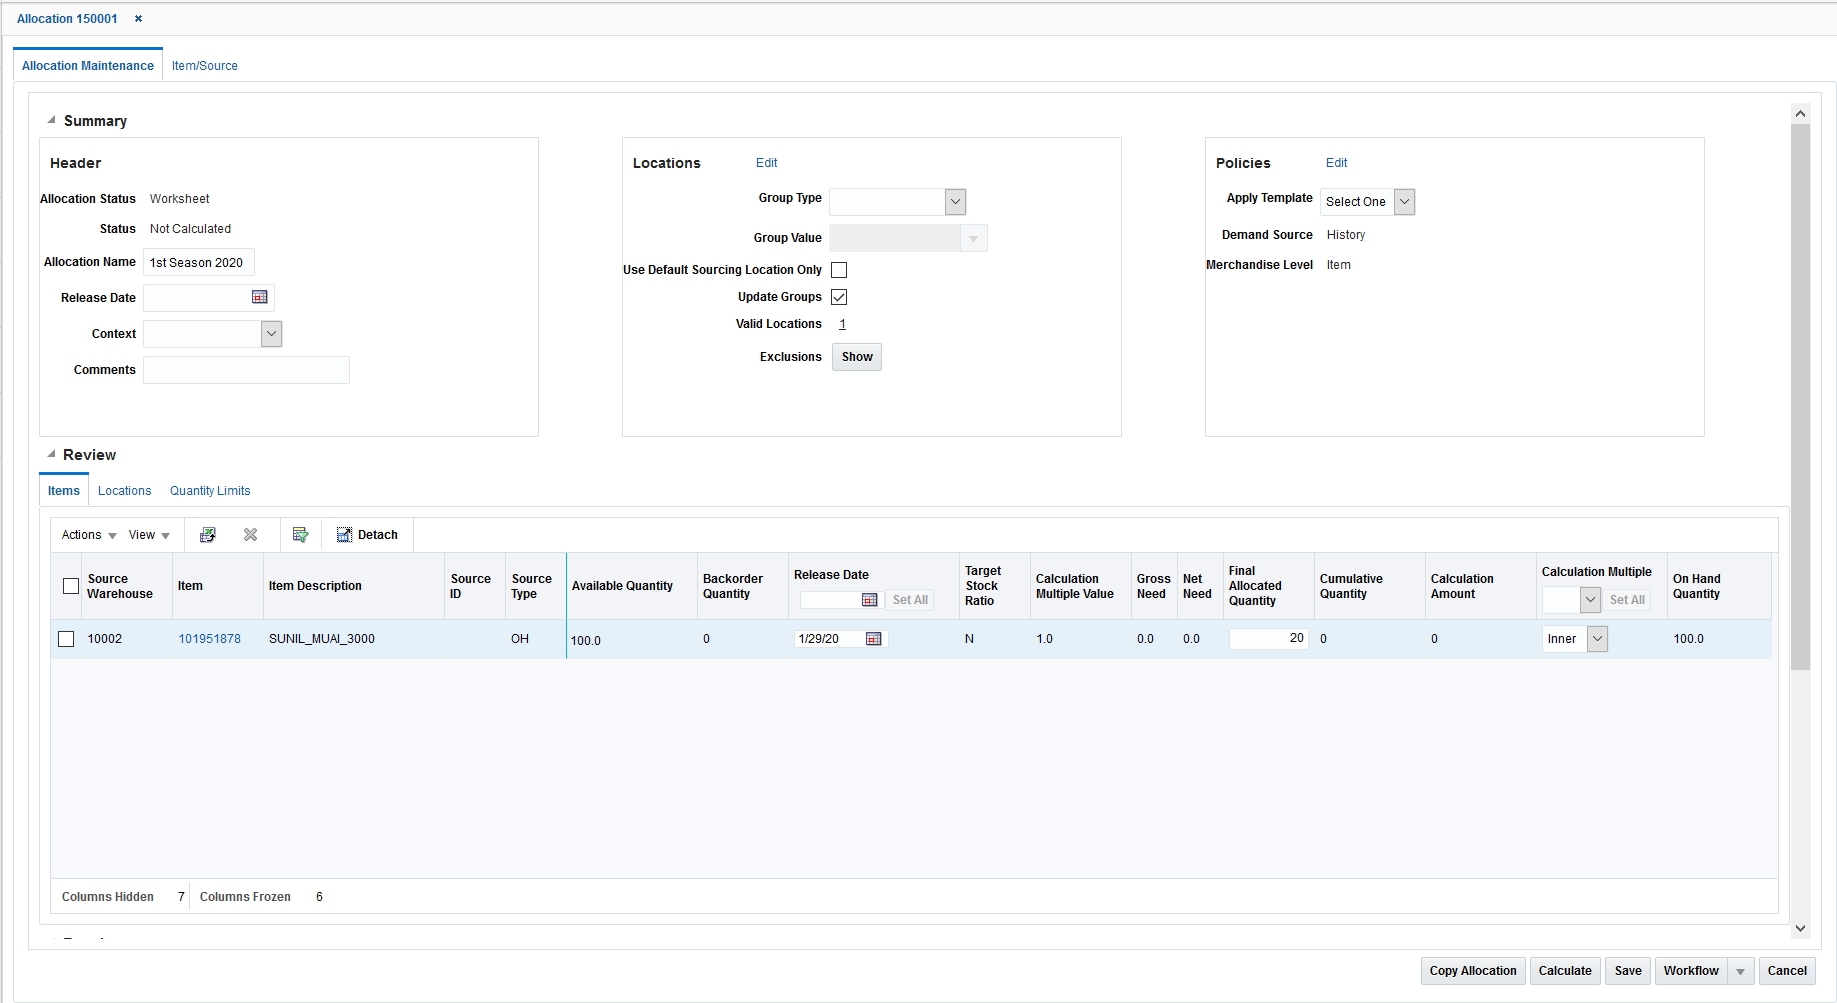
Understanding the Allocation Maintenance Window
The Allocation Maintenance window includes three distinct sections.
-
Summary: The summary section includes three sub sections.
-
Header section contains general information of the allocation.
-
Locations section enables the selection of location groups.
-
Rules section enables the selection of a policy.
-
-
Review: This section contains three tabs Item, Locations, and Quantity Limits, which contain the following tables: an Item Summary Table, a Locations table, and a Quantity Limits table respectively.
-
The Item Summary table shows the items included in the allocation, and allows the entry of optional and required parameters, as well as the management of the available inventory which can be spread across the allocation. For fashion allocations, a parent/diff may be selected from the worksheet and shown on the Item Summary table in place of an item.
-
The Quantity Limits tab allows you to specify quantity limits by location.
-
-
Results: This section shows the detailed information of the allocation at the item/location level. It shows the quantity allocated for each location and then allows various methods to manually adjust the allocation. This table appears only after the allocation is calculated.
Split an Allocation
To split an allocation:
-
Search for the allocation on the Manage Allocations window.
-
Click the Allocation ID link for the allocation that you want to edit. The Allocation window appears in edit mode.
-
Select the items you would like to shift to a separate allocation.
-
Click Split Allocation. A new allocation is created with the selected items.
Note:
Split Allocation is disabled when the allocation contains only one item.
Update the Final Allocated Quantity
To update the final allocated quantity:
-
Search for the allocation with Calculated status on the Manage Allocations window.
-
Click the Allocation ID link for the allocation that you want to update. The Allocation Maintenance window appears in edit mode.
-
In the review section, enter the quantity in Final Allocated Quantity field.
-
From the Actions menu, select Spread To All Locations.
-
Click Recalculate to recalculate the allocation. The quantity entered is spread to all the locations in the allocation.
Freeze Final Allocated Quantity
To freeze final allocated quantity before you spread to all locations:
-
In the Results section of the Allocation Maintenance window, select the Freeze check box next to the quantity you want to freeze.
-
Perform the Spread to All Locations operation.
Note:
Currently, the Freeze indicator is not respected by the Recalculate option.
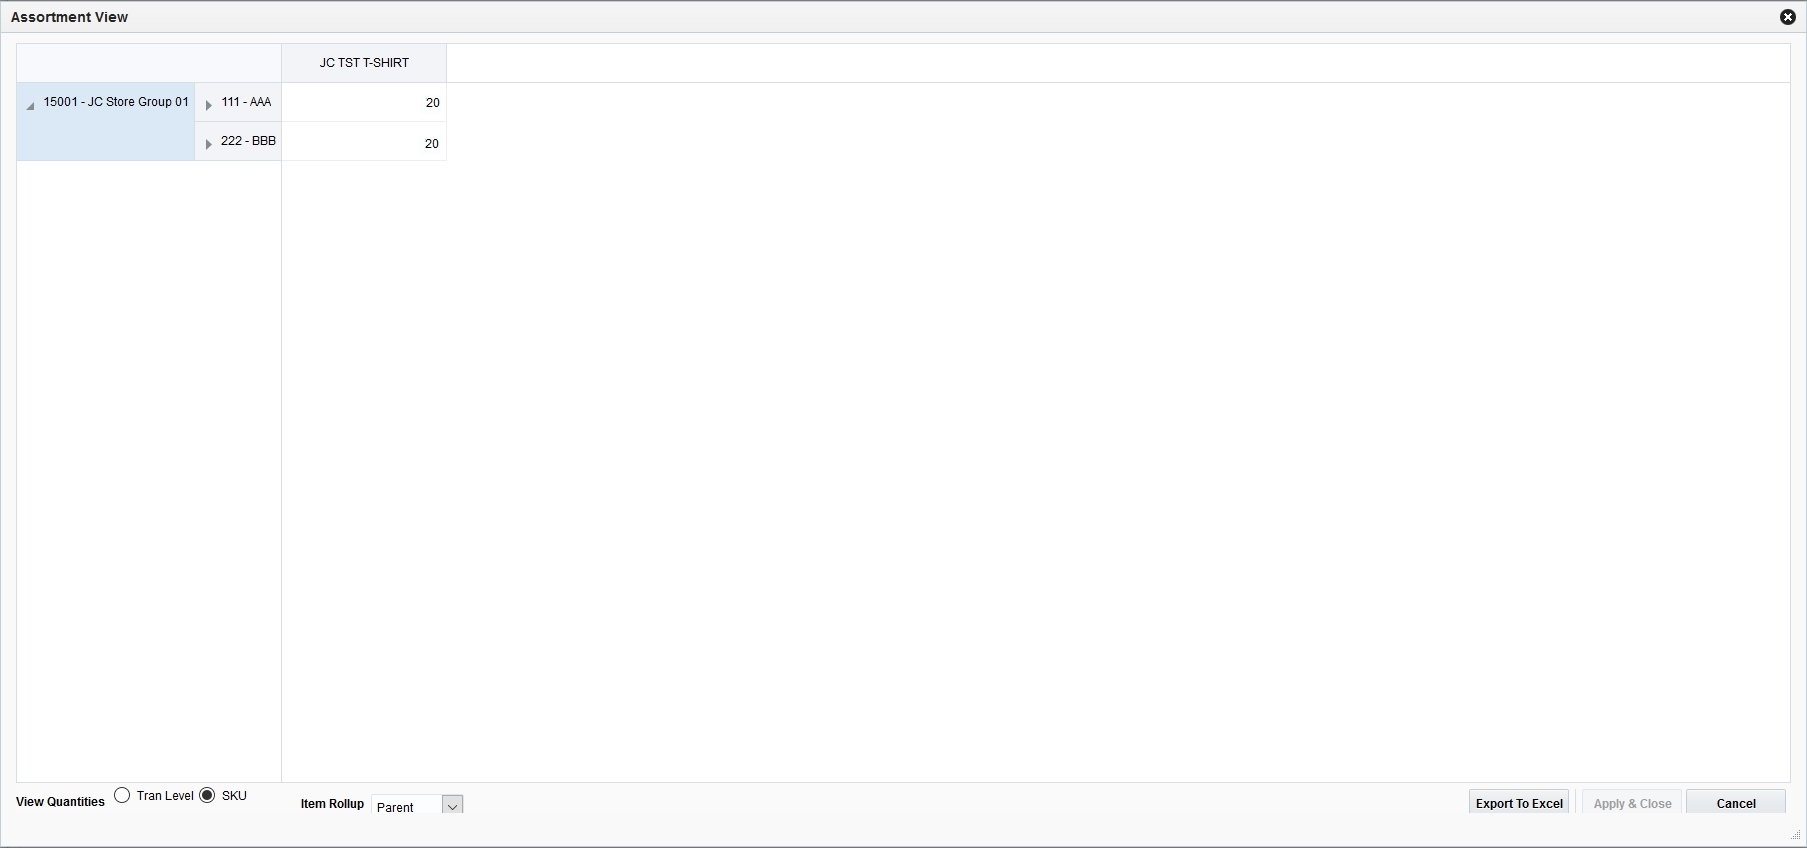
Update the Final Allocated Quantity - View Assortment Window
To updated allocated quantity using Assortment View window:
-
Search for the allocation on the Manage Allocations window.
-
Click the Allocation ID link for the allocation that you want to update. The Allocation window appears in edit mode.
-
In the Results section, select Assortment View - SKU Level or Assortment View - Transaction Level from the Actions menu. The Assortment View window appears.
The SKU view breaks down the allocation all the way to SKU level (so packs are broken down into SKU counts). The SKU view is view only. The Transaction Level view shows the specific loose items and packs which will be sent to each store. The Transaction Level view is editable.
-
Click the cell for the store that you want to update and enter the updated quantity.
-
Click Apply & Close.