2 Create a Worksheet
The Worksheet window allows you to view items that are selected for allocation, the quantity available, the item type, and source information. You can add or delete items from the worksheet. You can review the items selected for the allocation on the Worksheet window.
To create a worksheet:
-
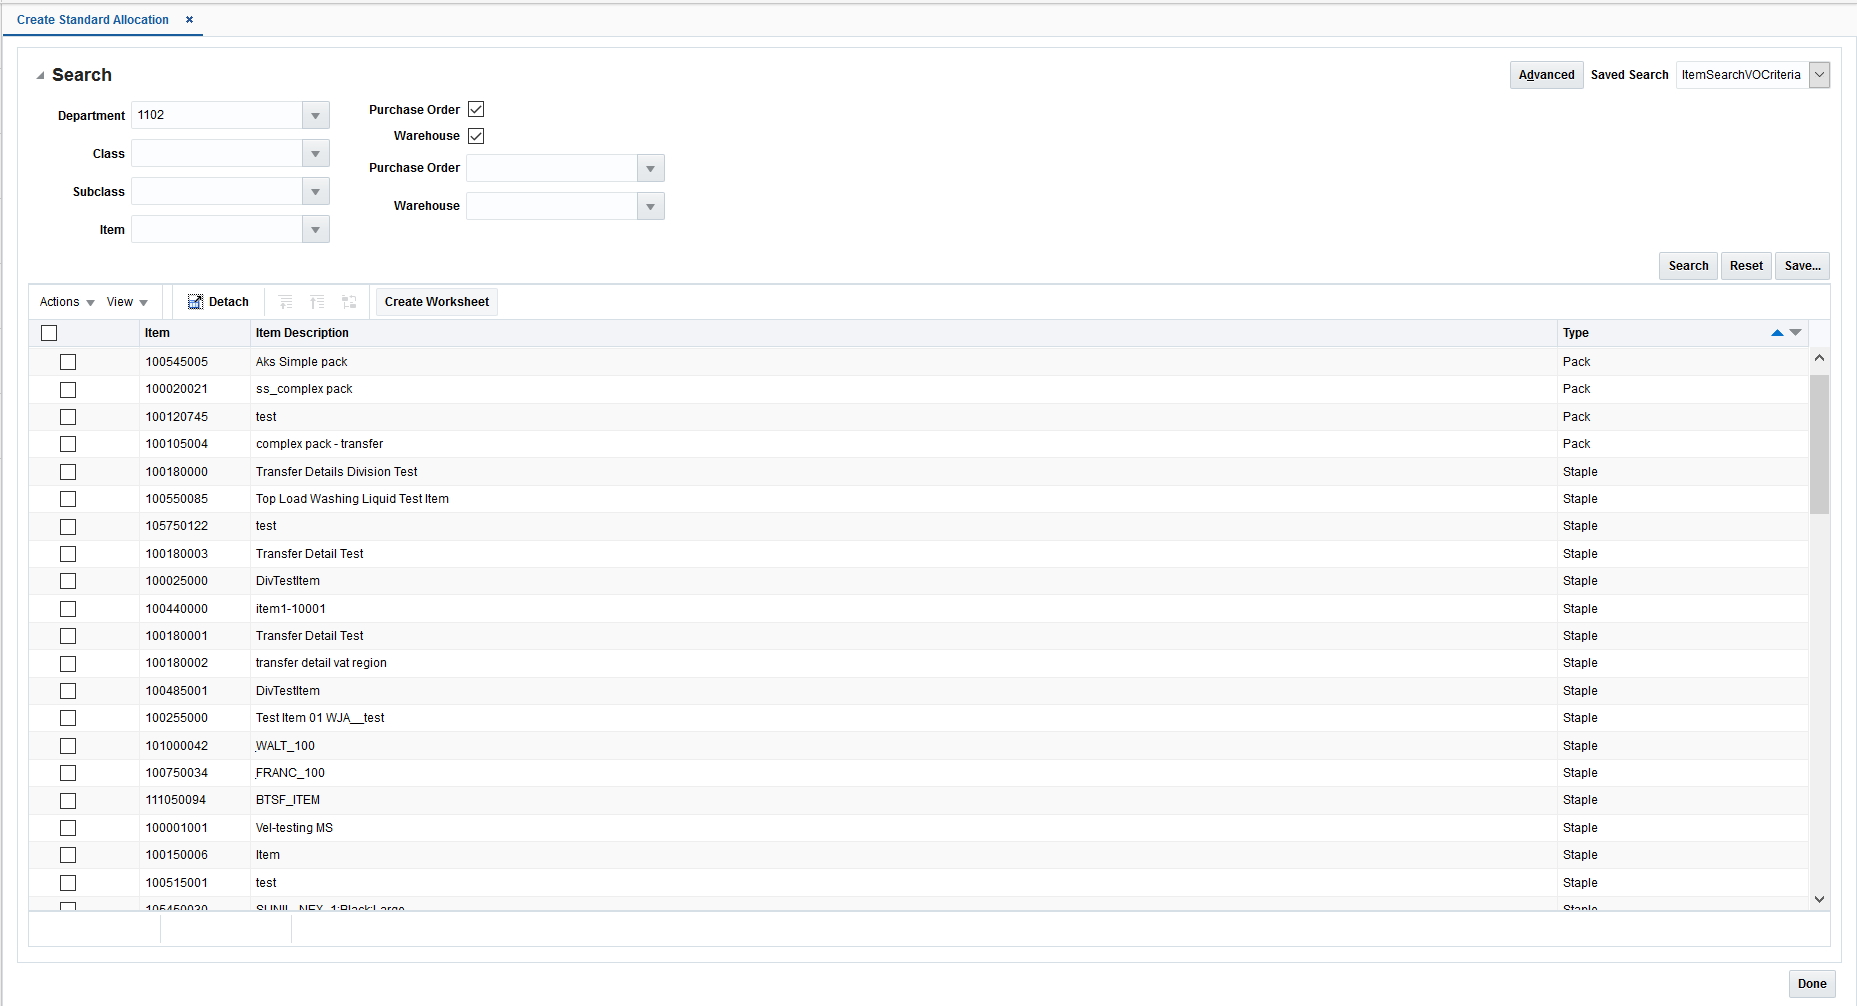
From the Tasks menu, select Create Standard Allocation. The Create Standard Allocation window appears.
-
Search for the items that you want to add to the worksheet.
-
Select the required items from the search results. The Create Worksheet button is enabled.
-
Click Create Worksheet. The Worksheet window appears with the selected items listed.
Add Items to the Worksheet
To add items to the worksheet:
-
On the Worksheet window, select Quick Item Add icon. The item search fields are displayed in a pop-up window.
-
Search and retrieve the items that you want to add.
-
Select the items and click Add to Worksheet.
-
Click OK to close the pop-up and return to the current worksheet. The items are added to the current worksheet.
Delete Items from the Worksheet
To delete items from the worksheet:
-
On the Worksheet window, select the items you want to delete.
-
Click the delete icon. The items are removed from the worksheet.
Select Items
You can search for items to allocate using the Create Standard Allocation window. The Create Standard Allocation window allows you to:
-
Select a source – You can select one or more sources to indicate the available quantity to allocate. Following are the available physical sources:
-
Allocation: An existing approved Warehouse-to-Warehouse allocation can be selected as the source.
-
Transfer: Items being transferred from one warehouse to another.
-
Advanced Shipping Notification: Items from a purchase order that are in transit from a supplier.
-
Bill of Lading: Items from a stock order that are in transit from a location.
-
Search for items – After the sources are selected, you can search for items to allocate using Basic or Advanced search options or by applying a Saved Search.
-
View search results – After searching for items, you can view the search results in this section and select the items the you want to allocate.
-
Create Worksheet – You can create a Worksheet with the selected items for further processing of allocations.
-
Create Allocation – You can create an Allocation if the set of items selected for the creation process are transactional in nature (that is, staple items and packs). Clicking Create Allocation takes the user directly to Allocation Maintenance without having to create an intermediate worksheet.
Search for Items
To search for items to allocate:
-
From the Tasks menu, select Create Standard Allocation. The Create Standard Allocation window appears.
-
To use a saved search, select the search template in the Saved Search field.
-
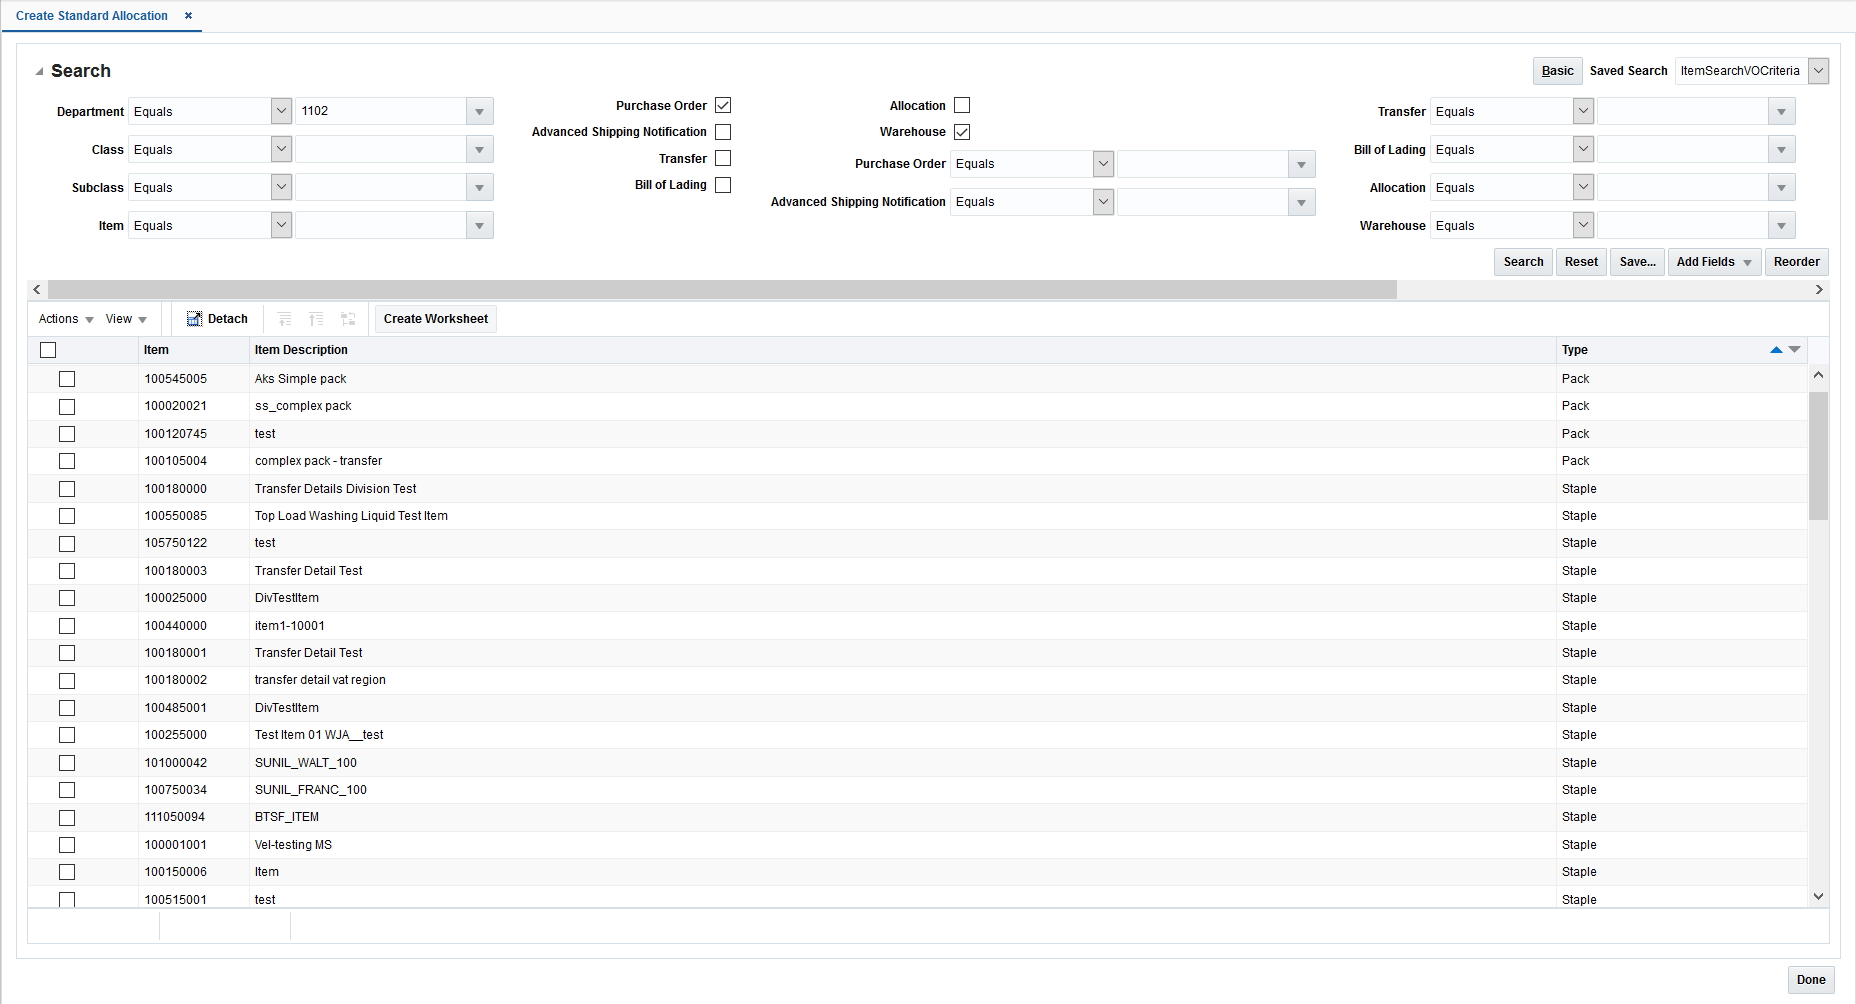
Optionally, click Advanced to see the advanced search options.
-
Select the sources of the allocation. The options available are:
-
Basic Search
-
Purchase Order
-
Warehouse
-
-
Advanced Search
-
Purchase Order
-
Advanced Shipping Notification
-
Transfer
-
Bill of Lading
-
Allocation
-
Warehouse
-
Note:
You must select at least one item source and one item criteria. -
-
Further refine your search by entering information in the available fields. The fields available for search are:
-
Basic Search
-
Department
-
Class
-
Subclass
-
Item
-
-
Advanced Search (Includes all Basic search fields)
-
Purchase Order
Note:
In a Warehouse-to-Warehouse allocation where the source Purchase Order (PO) is short received, the proration method is used to ensure that the distribution of goods takes place correctly between the virtual warehouses present as destination locations. In this method, the allocated quantity of the protected warehouses is fulfilled first. If the received quantity cannot fulfill the demand of all the protected virtual warehouses, it will be distributed across the protected virtual warehouses based on their individual needs. Once the protected virtual warehouses have had their demand fulfilled, the remaining received quantity is distributed across the non-protected virtual warehouses on the PO, prorated based on their individual demand. -
Advanced Shipping notification
-
Transfer
-
Bill of Lading
-
Allocation
-
Warehouse
-
Note:
In the Advanced search mode, you can use the Add Fields button to add more fields to refine the search. -
-
Click Search to view items that match the criteria. Only items with available quantity will be returned in the search

Save an Item Search
To save an item search:
-
From the Tasks menu, select Create Standard Allocation. The Create Standard Allocation window appears.
-
Optionally, click Advanced to set the advanced search options.
-
Enter the search criteria in the available fields.
-
Click Save to save the search criteria. The Create Saved Search window appears.
-
Enter a unique name in the Name field.
-
Select Set as Default if you want to set this search as the default search.
-
Select Run Automatically to run this search automatically every time the Create Standard Allocation window is opened.
-
Select Save Results Layout to save the column layout of the search result. This column layout is applied every time the saved search is run.
-
Click OK to save the item search.
Create an Allocation without a Worksheet
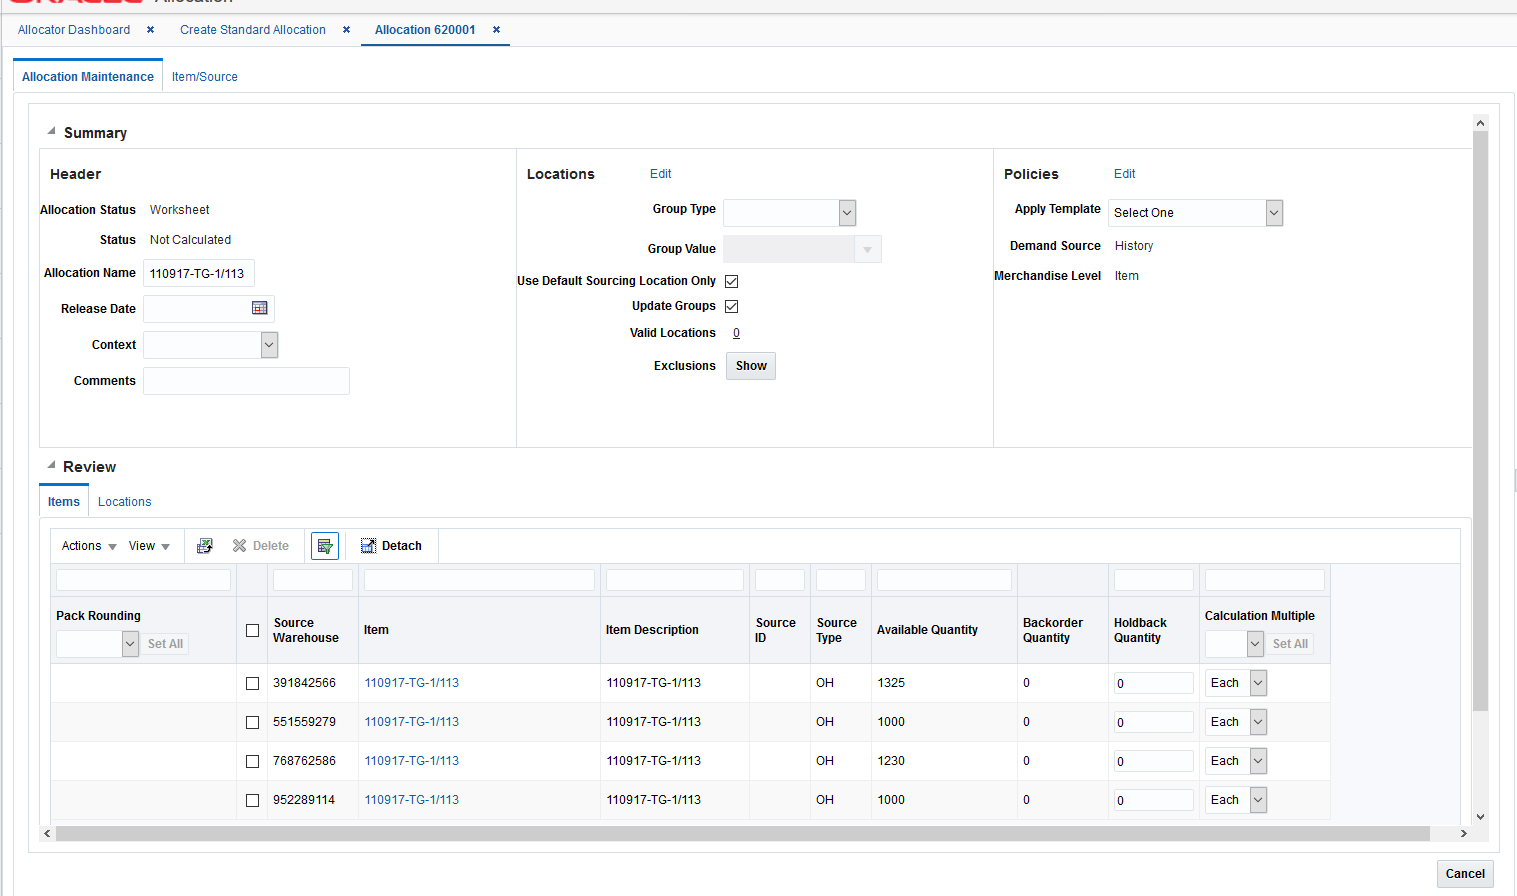
If you are creating an allocation that contains only transaction level items, you have the option to navigate directly to the Allocation Maintenance screen without first creating a worksheet.
To create an allocation without a worksheet:
-
Perform an item search. See "Search for Items".
-
From the search results pane, select the transaction level item for which you want to create an allocation and click Create Allocation. The Allocation Maintenance screen opens.
-
Select locations and policies for the allocation.