3 Reset an Item on Clearance
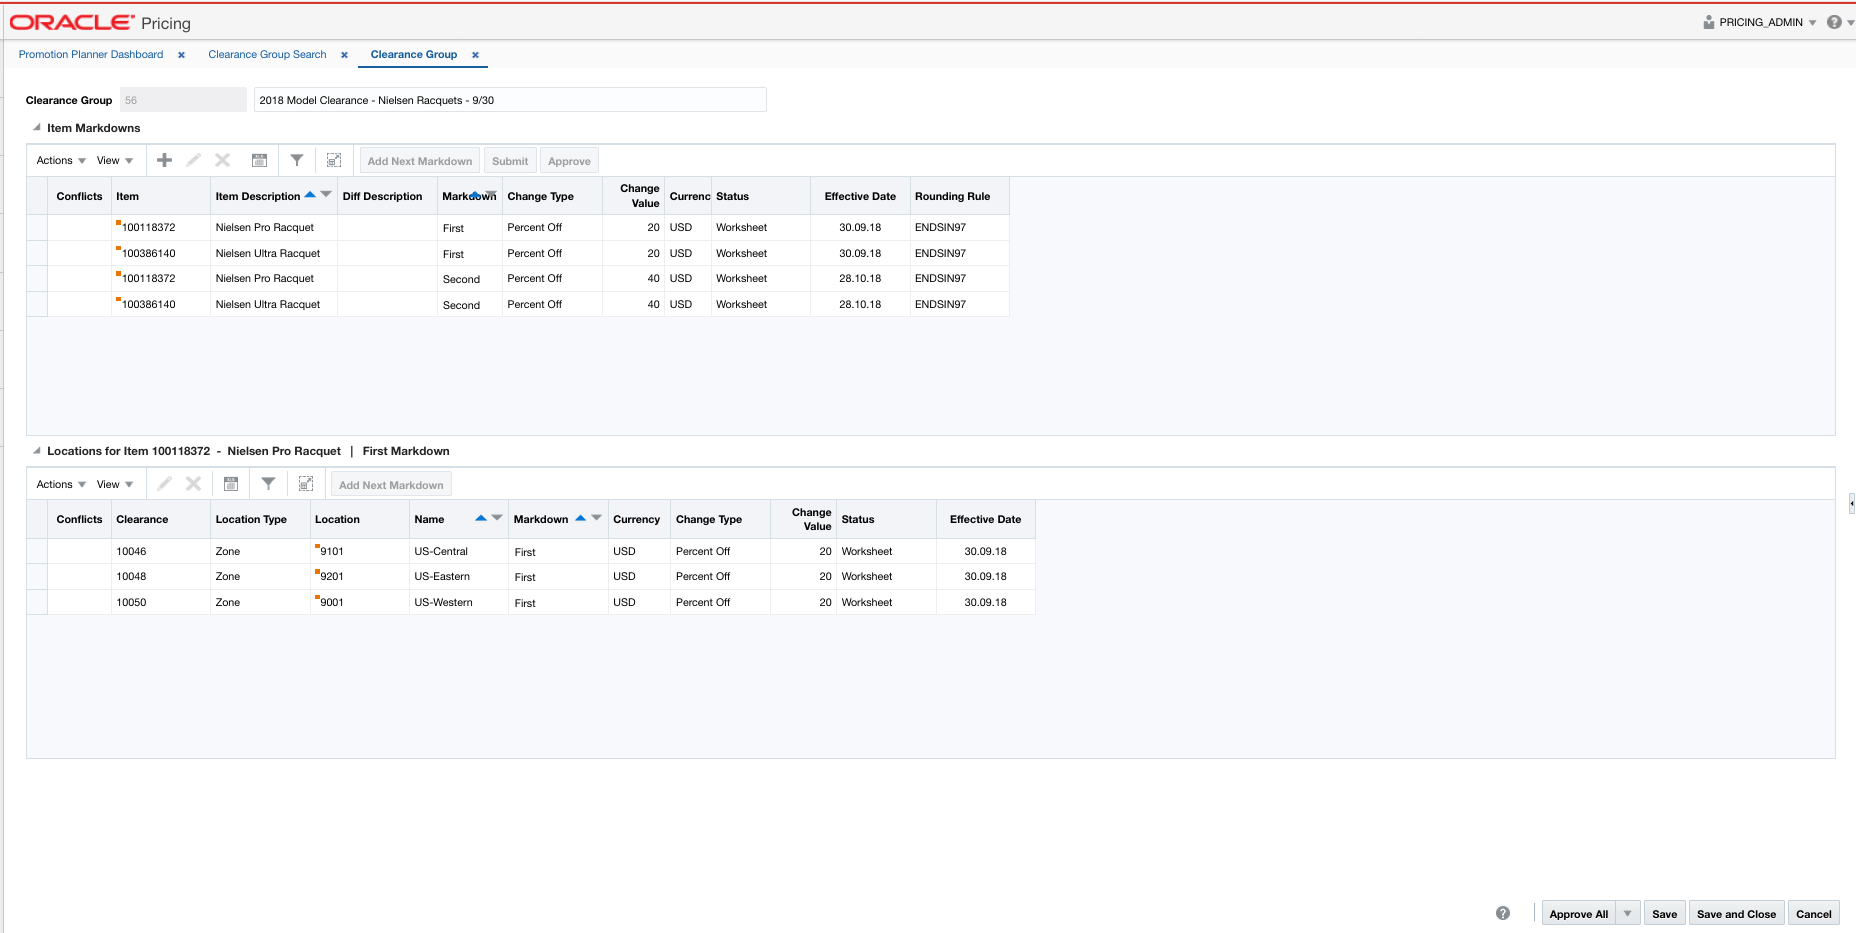
A clearance reset ends the clearance for a set of items at a set of locations which are presently on clearance. A clearance with a change type of Reset (also known as a clearance reset or a reset) ends the clearance on the user-defined effective date. The clearance reset is displayed in the Item Markdowns and Locations tables like any other clearance records.
Add a Clearance Reset using the Reset Wizard
Clearance resets can be added to a new clearance group or an existing clearance group. Creating a new clearance group can be done by selecting the Create Clearance Group task from the Task List, or selecting the Create action from the Clearance Group Search screen. Either of these steps create a new Clearance Group into which resets can be added by following the steps below (starting with step 3).
Adding a reset is performed using the Reset Wizard. There are four potential stops within the wizard:
-
To add resets to an existing Clearance group, perform a search for the clearance group that you want to edit. See Search for a Clearance Group.
-
From the search results pane of the Clearance Group Search page, highlight the clearance group to which you want to add a clearance reset and select Edit from the Actions menu. The Clearance Group page appears.
-
From the Item Markdowns table, select Add Reset from the Actions menu. The Add Resets Wizard launches. Continue with the Items.
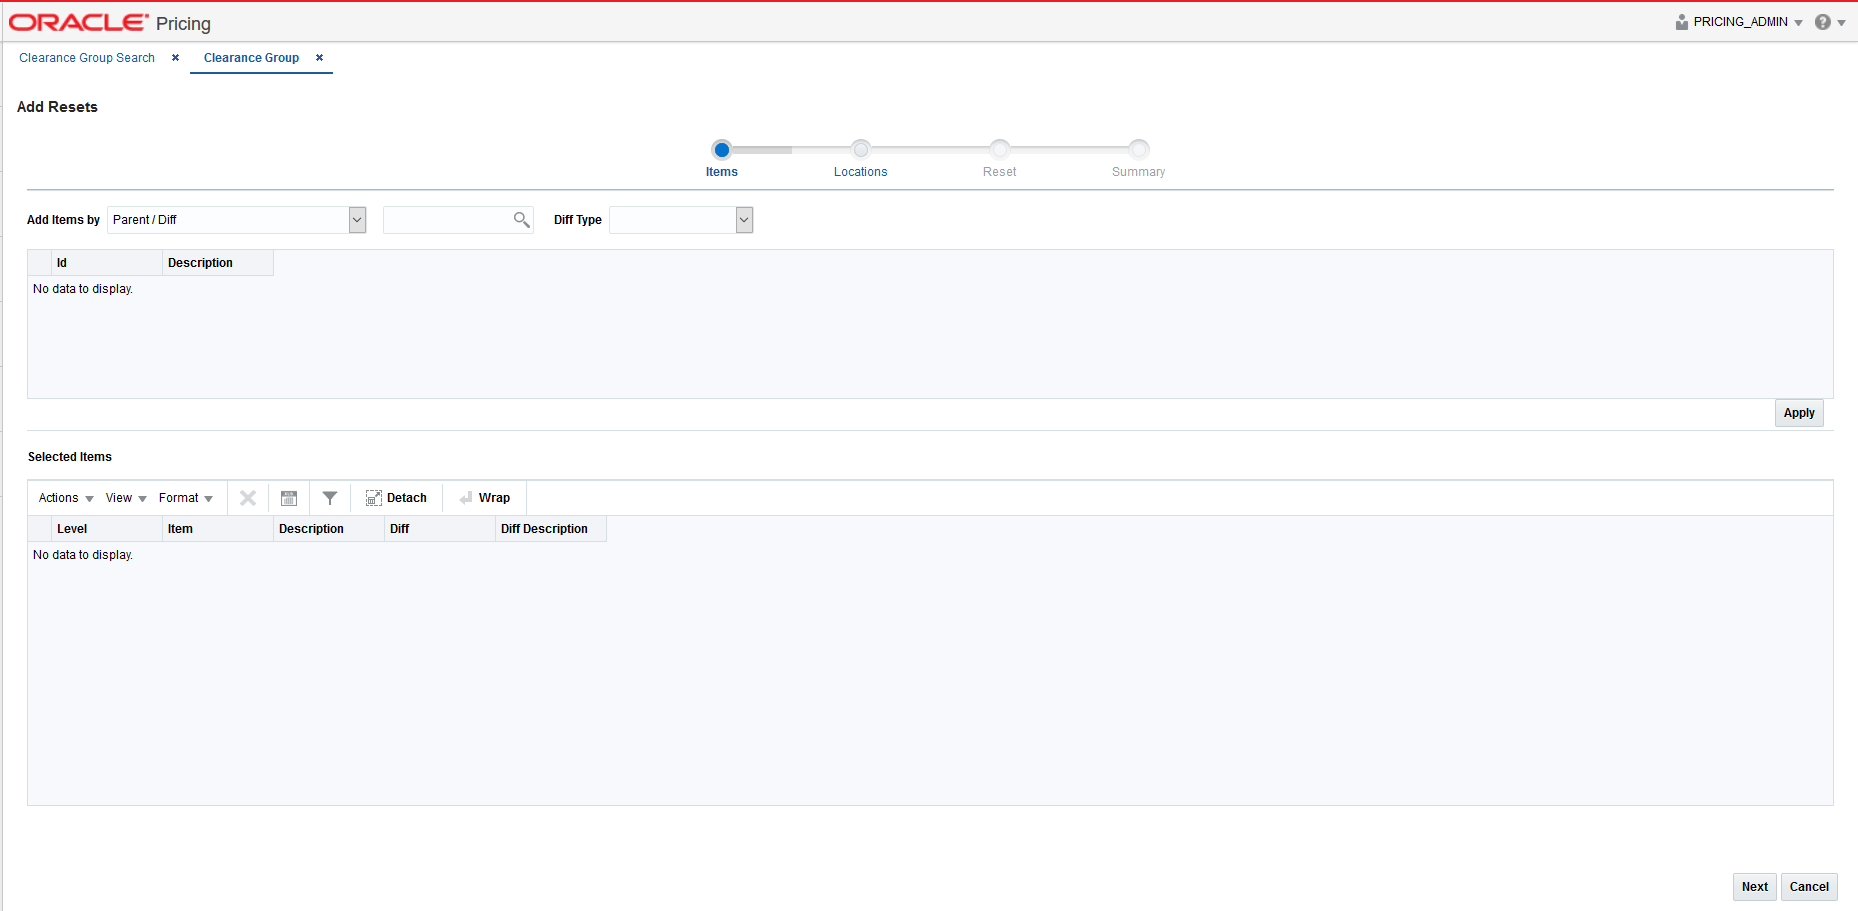
The initial page in the Reset Wizard allows you to select the items that you want to add to the reset.
-
From the Add Resets Items page, enter the items to add to the new reset using the following criteria:
Field Description Add Items by
The Add Items by field allows you to select a category by which you can narrow the list of things to add to the reset. Options are:
-
Item
-
Parent/Diff
-
Upload List
-
Item List
Item
The Item field is active if you select Item in the Add Items by field. Click the magnifying glass to search for an item to add to the reset.
Parent/Diff
When Parent/Diff is selected for 'Add Items by' the display of the screen changes, showing an item field and diff type field as the top row, with a Diffs table directly below. Entering an Item and Diff type will populate the diff table where diffs can then be selected. Combinations of the entered parent item and the selected diffs are added to the Selected Items table when the apply button is selected.
Diff Type
The Diff Type field is active if you select Parent/Diff in the Add Items by field.
Item List
The Item List field is active if you select Item List in the Add Items by field. Click the dropdown to select a defined list of items to add to the reset.
Source File
Source File is active if you select Upload List in the Add Items by field. Click Browse to select the file to upload.
-
-
Once you have entered your criteria, click Apply to move entered or selected data for the item selection option to the Selected Items table. In the case of an Item List or Upload List, the items in the list are populated into the Selected Items table. Once all your items are added to the reset, click Next. The Add Reset Locations page appears. Continue with Locations.
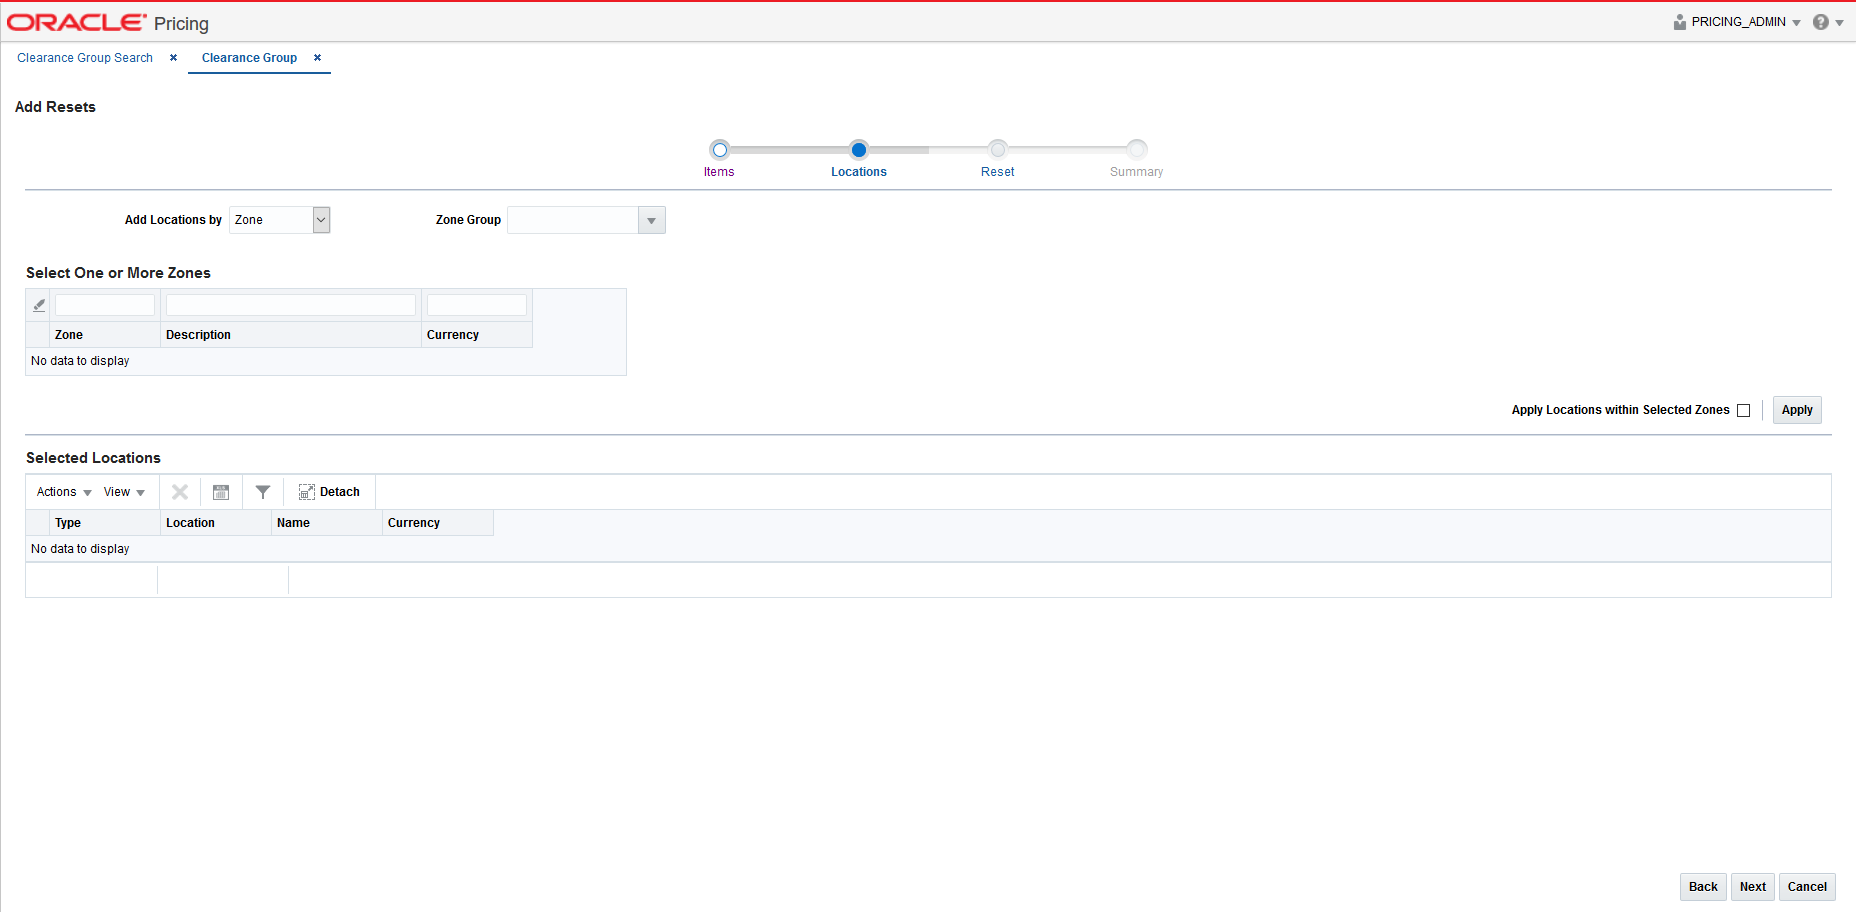
The Locations page of the Reset Wizard allows you to define the locations associated with the reset.
-
From the Add Resets Location page, select the location type you want to use for adding locations using the following criteria:
Table 3-2 Locations Page Fields
Field Description Add Locations by
The Add Locations by field allows you to select a category by which you can narrow the list of locations to add to the reset. Options are:
-
Zone
-
Location List
-
Store
-
Warehouse
Note: The Warehouse option is only displayed if the Recognize Warehouses as Locations option is set to Yes.
Zone Group
The Zone Group field is active if you select Zone in the Add Locations by field.
Zone Table
The Zone Table is active if you select Zone in the Add Locations by field. When a zone group is entered, the Zone Table will be populated with the zones in the zone group.
Apply Locations within Selected Zones
The Apply Locations within Selected Zones check box is active if you select Zone in the Add Locations by field. This checkbox allows exploding the zone into stores and warehouses for populating the Selected Locations table. If you have access to one location in a zone, you can create events for the entire zone and reset can be created for all locations under the zone after exploding the zone.
Location List
The Location List dropdown list is active if you select Location List in the Add Locations by field. Click the dropdown to select from a defined list of locations to add to the reset.
Store
The Store dropdown list is active if you select Store in the Add Locations by field. Click the dropdown to select from a defined list of stores to add to the reset.
Warehouse
The Warehouse dropdown list is active if you select Warehouse in the Add Locations by field. Click the dropdown to select from a defined list of warehouses to add to the reset.
-
-
From the search results pane, select the location(s) to add to the reset and click Apply.
-
Once all your locations are added to the reset, click Next. The Add Reset page appears. Continue with Reset.
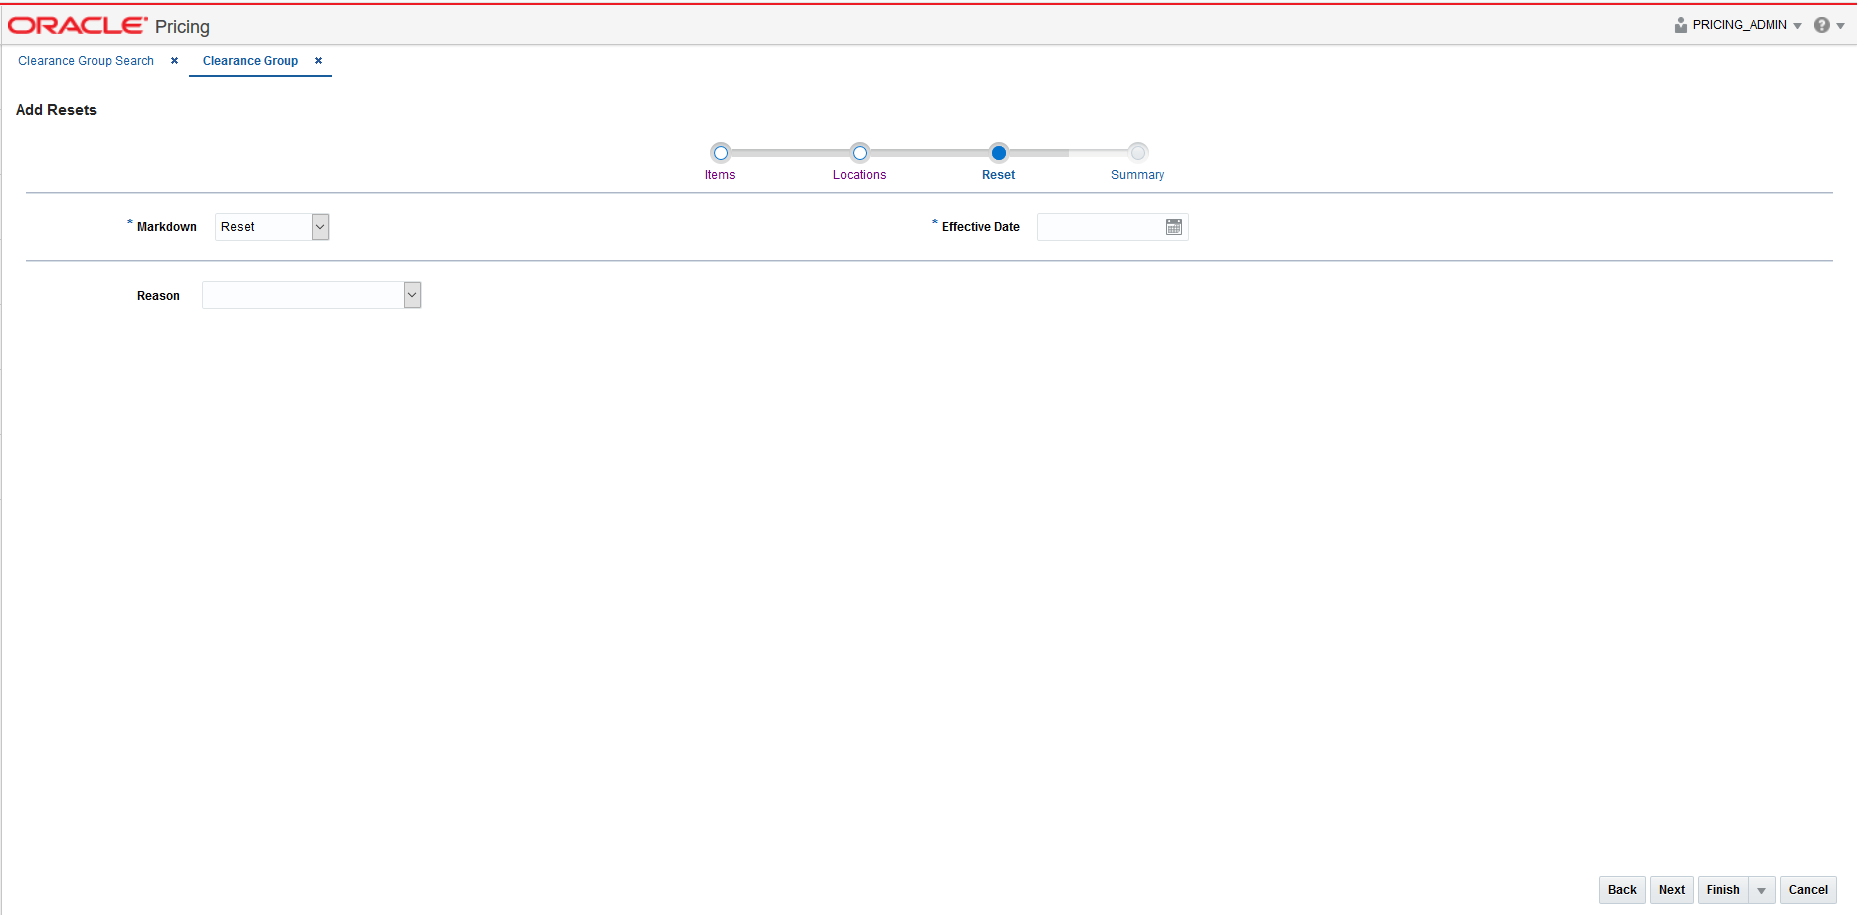
The Reset page of the Reset Wizard allows you to define the reset itself.
-
From the Resets page, define the information for the reset(s) being added using the following criteria:
Field Description Markdown
If the Markdown Value for Resets system option is defined, this field is populated and the field is disabled. If the system option is not configured, then this field is enabled.
This field can be left blank.
Effective Date
The date on which the reset is set to take effect. You have the option to key in a date or select one using the calendar widget.
Reason
The Reason value defines the reason the reset is being created.
You have the option to update this field or remove the value in this field.
-
Once all your markdown information is entered, click Next. The Add Resets Summary page appears. Continue with Summary.
If you want to skip the Summary Page, you can double click on Finish or select Submit, or Approve options from the Finish drop down menu.
The Summary page displays the details of the reset before it is added to the Clearance Group.
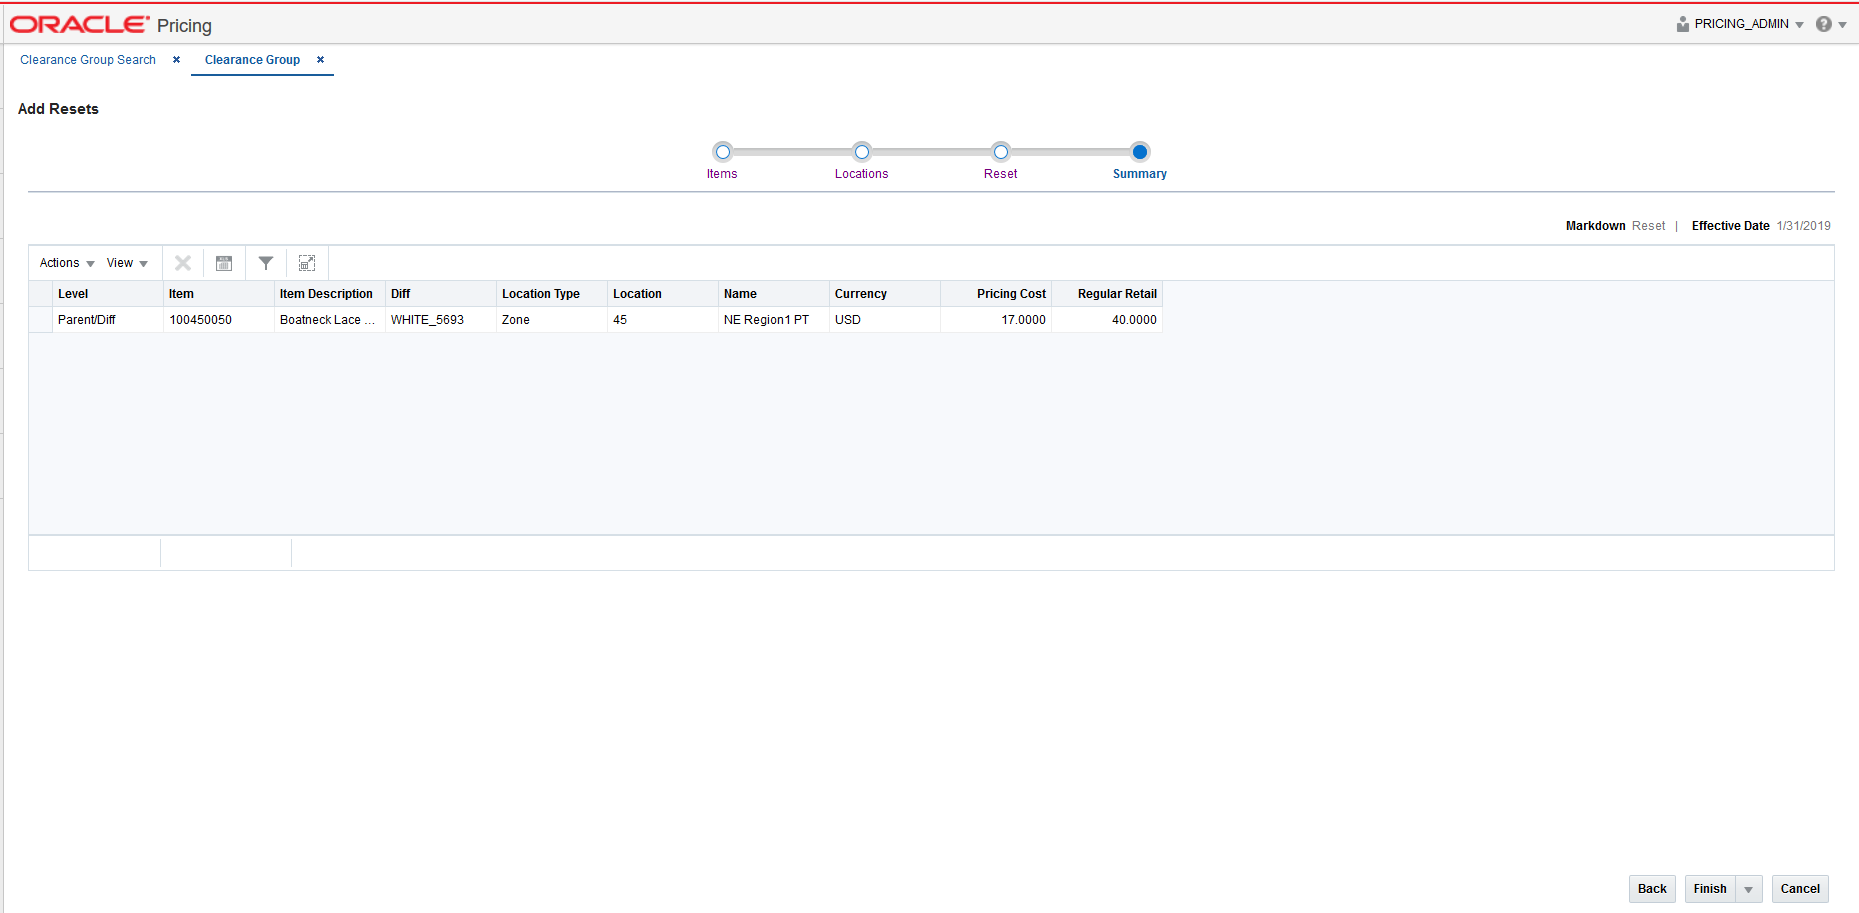
-
Confirm the reset details and click on Finish or select Submit or Approve from the Finish drop down menu. You are returned to the Clearance Group screen. Your new reset is listed in the Item Markdowns table.
Note:
The Summary Page allows individual resets to be removed before they are added to the Clearance Group.
Reset an Item in an Existing Clearance Group
Another way to add a reset is to highlight an existing markdown for the item/zone that you wish to add a reset for and select the Reset Item option.
Perform the following procedure to reset an item in an existing clearance group:
-
Perform a search for the clearance group that you want to update. See Search for a Clearance Group.
-
From the search results pane, select the clearance group for which you want to add a clearance reset. and select Edit from the Actions menu. The Clearance Group page appears.
-
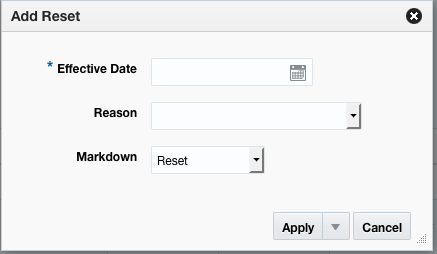
From the Clearance Group page, highlight the item markdown or location to which you want to add a clearance reset and select Reset Item from the Action menu. The Add Reset pop-up appears.
Field Description Effective Date
The date on which the clearance reset is set to take effect. You have the option to key in a date or select one using the calendar widget.
Reason
The Reason value defines the reason the clearance reset is being created. This field is optional.
Markdown
The Markdown field defaults the reset markdown value as defined in system options for the reset, but you can update, if desired.
-
Once updates are complete on the Add Reset pop-up, click OK. The Add Reset pop-up closes and you are returned to the Clearance Group tab.