4 Manage Transactions
The Transaction Maintenance module allows you to investigate and correct errors in the external system transactions. You can review the transactions that were flagged by the automated audit process.
Transactions may have many types of errors, which need to be reviewed and corrected manually. In addition, it is also possible to review and edit the data from missing transactions or transactions that have passed the automated audit. Corrected transactions are exported to external systems by a batch program.
You can use the Transaction Maintenance window to view, create, and edit transactions.

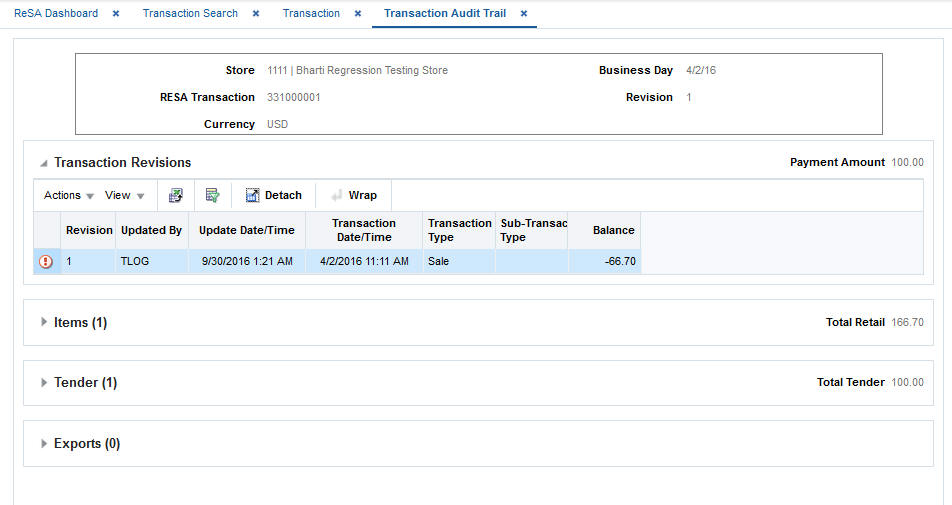
View Transaction Audit Trails
To view the revisions of a transaction:
-
On the Transaction Maintenance window, from the More Actions menu, select Transaction Audit Trail. The Transaction Audit Trail window displays an audit trail of all revisions to the transaction.
-
Click OK to close the window.
View a Transaction
To view a transaction:
-
From the Tasks menu, select Operations > Manage Transactions. The Manage Transactions window appears.
-
Enter search criteria to find the transaction that you want to view and click Search.
-
Select the transaction from the Results table.
-
Select Actions > View. The Transaction Maintenance window appears in view mode.
-
You can view all the information related to the transaction on this window.
-
Click Done to close the window.
View Errors
To view errors:
-
On the Transaction Maintenance window, from the More Actions menu, select Errors. The Sales Audit Errors window appears. You can view all the errors associated with the transaction in this window.
-
Click OK to close the window.
Refresh the Errors
To refresh the errors:
-
On the Transaction Maintenance window, from the More Actions menu, select Refresh Errors.
The errors are refreshed taking into account any updates that were made to the transaction.
Note:
When refreshing errors, Total and Store Day Level rules are not included during the refresh.
Create a Transaction
-
From the Tasks menu, select Operations > Manage Transactions. The Transaction Search window appears.
-
Select Actions > Create. The Transaction Maintenance window appears.
Note:
You can also navigate to the Transaction Maintenance window by selecting Operations > Create Transaction. -
In the Chain field, enter a chain number.
-
In the Store field, enter the store ID.
-
In the Business Day field, enter a date, or click the calendar button and select a date.
Entering a store results in opening a Search and Select pop-up which allows you to select a Business Date. The selection of store and business automatically populates the Chain, Banner and Business Date fields if they were not entered.
-
In the Transaction Date/Time field, enter the date and time the transaction occurred.
Note:
The External Transaction field displays the transaction number that was used by the external system. -
In the Transaction Type field, enter the type of transaction you are creating.
Note:
Depending on the type of transaction you select, additional fields are enabled. Enter the appropriate information in the enabled fields. -
Add any of the following details to the transaction as needed:
-
Items to a transaction.
-
Discount to the item on a transaction.
-
Tender records to a transaction.
-
Customer order information to a transaction.
-
Paid out details to a transaction.
-
Employee details to a transaction.
-
Tax details to a transaction.
-
Tax to the items on a transaction
-
Voucher details to either item or tender on a transaction
-
Customer attributes
-
-
Click OK to save your changes and close the window.
Edit a Transaction
Add Item Information
You can use the following procedures to add item information to a transaction.
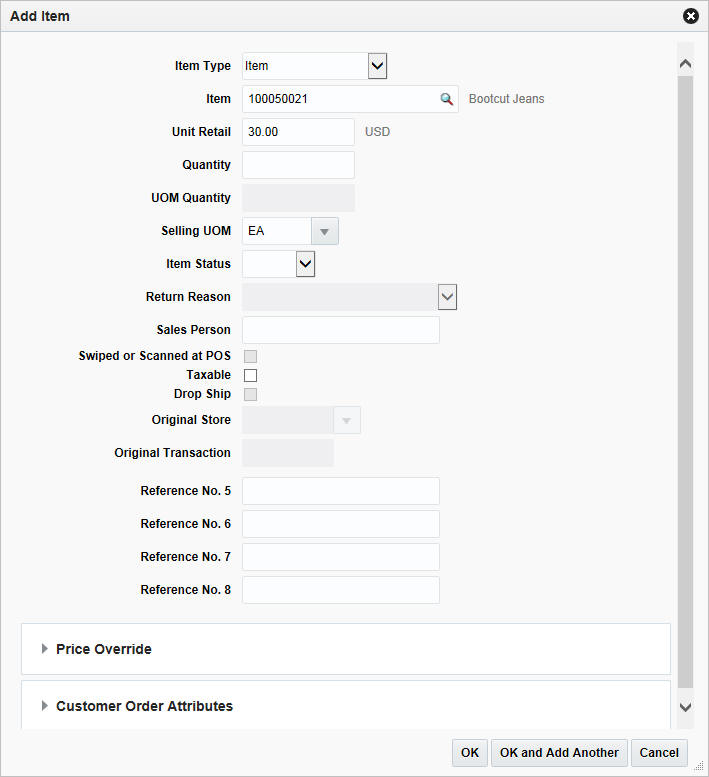
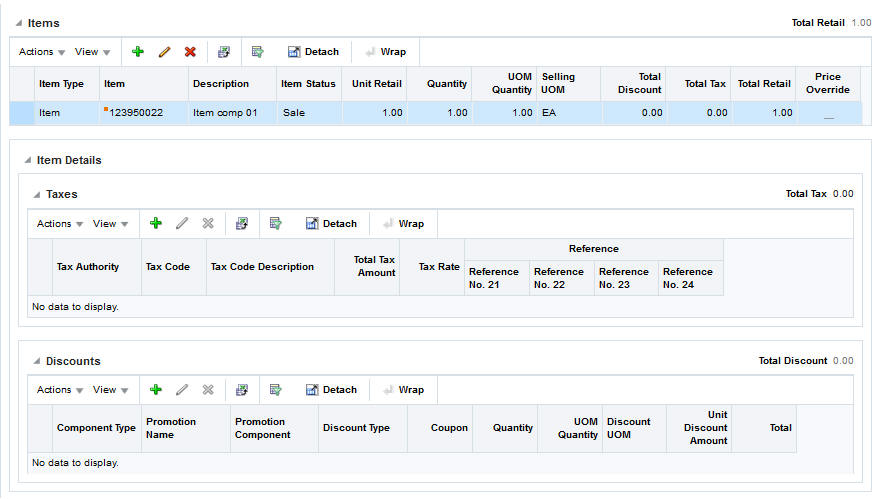
To Add an Item to a Transaction
-
On the Transaction window, in the Items section, select Actions > Add. The Add Item window appears.
-
Select the item type.
-
Enter the item ID. Details such as Unit Retail, Selling UOM are defaulted and can be overridden.
-
Enter details such as Quantity and Item Status.
-
Click OK to save your changes and close the window.
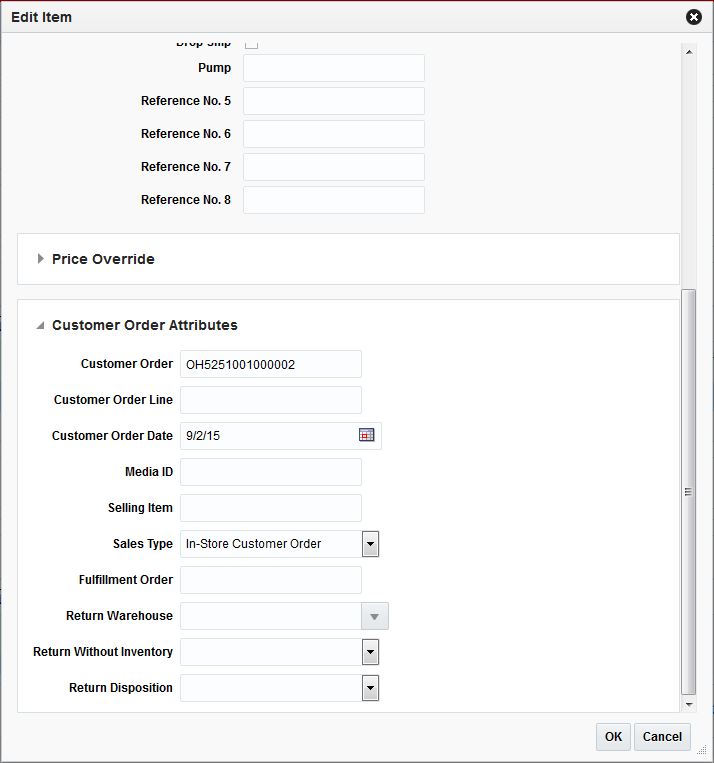
To Add Return Reason Code
-
On the Transaction Maintenance window, in the Items section, select Actions > Edit. The Edit Item window appears.
-
In the Item Status field, select Return. The Return Reason field is activated.
-
In the Return Reason field, select the return reason code.
-
Click OK to save your changes and close the window.
Override Price Information
-
On the Transaction Maintenance window, in the Items section, select Actions > Edit. The Edit Item window appears.
-
In the Price Override section, enter the override reason in the Override Reason field.
-
In the New Unit Retail Price field, enter the new price.
-
Click OK to save your changes and close the window.
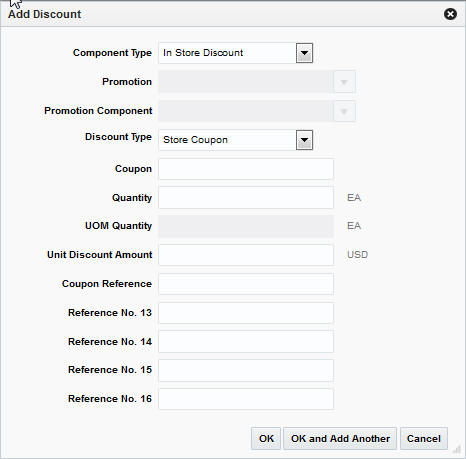
Add Item Discounts
-
In the Items section, click the arrow next to Discounts to expand the discounts section. Click Actions > Add. The Add Discount window appears.
-
In the Component Type field, select the type of promotion or discount you are creating.
-
If you are creating a promotion, in the Promotion field, enter the promotion.
-
If you are creating a discount, from the Discount Type field, select the type of discount that you want to apply to the item.
-
-
In the Promotion Component field, edit the component of the promotion as necessary.
-
In the Coupon No. field, enter the ID of the promotion or discount.
-
In the Quantity field, enter the quantity for the discount.
-
In the Unit Discount Amount field, enter the amount of the discount.
-
Add the appropriate reference information.
-
Click OK to save your changes and close the window.
Add Reference Information
-
On the Transaction Maintenance window, click the arrow next to the Reference section. The Reference section is expanded.
-
In the Reference fields, enter the reference information as needed.
-
Click OK to save your changes and close the window.

Add Comments
To add comments:
-
On the Transaction Maintenance window, from the More Actions menu, select Comments. The Comments window appears.
-
Select Actions > Add. The next line in the table is enabled for commenting.
-
Enter your comments.
-
Click OK to save your changes and close the window.
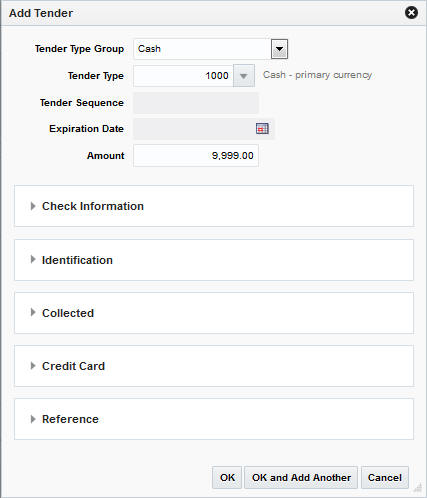
Add Tenders
To add tender information to a transaction:
-
On the Transaction Maintenance window, in the Tender section, select Actions > Add. The Add Tender window appears.
-
In the Tender Type Group field, select the tender type group.
-
In the Tender Type field, select the tender type.
-
In the Amount field, enter the tender amount.
You can enter details in the respective sections based on the tender type you select.
-
If you select a type of card payment in the Tender Type Group field the Credit Card section is enabled:
-
In the Authorization No. field, enter the authorization for user ID.
-
In the Token field, enter the credit card token.
-
In the remaining fields, select the information needed.
-
Click OK to save your changes and close the window.
Note:
The Token field is only available when the selected Tender Type Group is either Credit Card, Debit Card, PayPal, Fonacot or Others. The section label is updated dynamically, based on the selected Tender Type Group. For example, if you select the Tender Type Group Debit Card, the section is labeled Debit Card.
-
-
You can add user-defined reference information to a type of tender in the Reference section.
-
Click OK to save your changes and close the window.

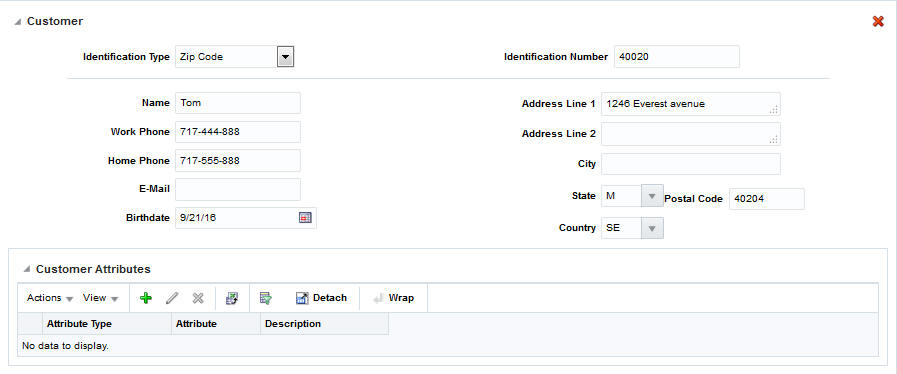
Add Customer Information
To add customer information to a transaction:
-
On the Transaction Maintenance window, expand the Customer section.
-
In the Identification Type field, select the source of the customer information.
-
In the Identification No. field, enter the ID from the source document selected in the Identification Type field.
-
In the remaining fields, enter the name and the address information for the customer.
-
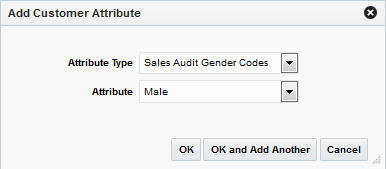
In the Customer Attributes section, select Actions > Add. The Add Customer Attribute window appears.
-
In the Attribute Type field, select the attribute type.
-
In the Attribute field, enter an attribute.
-
Click OK to save your changes and close the window.
Add Paid Out Details
To add paid out details to a transaction:
-
On the Transaction Maintenance window, expand the Paid Out Details section.
-
In the Vendor field, enter a vendor number.
-
In the Vendor Invoice No. field, enter a vendor invoice number.
-
In the Proof of Delivery No. field, enter a proof of delivery number.
-
In the Payment Reference No. field, enter a payment reference number.
-
Click OK to save your changes and close the window.