4 Set User Preferences
The Preferences pages are where you specify the default regional, language, and accessibility settings that you want to use throughout the system.
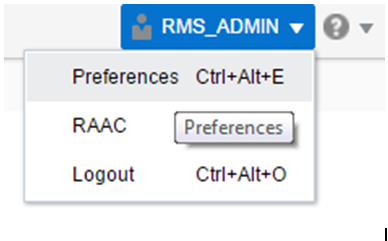
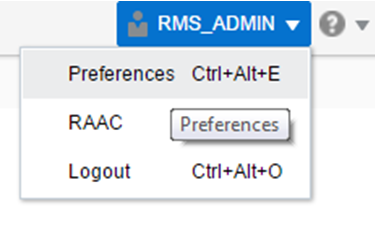
To set your preferred preferences, click user name > Preferences at the top of the application home page. The Preferences page appears. The standard preference options available are as follows:
-
Regional
-
Language
-
Accessibility
To return to the application home page, click Back to Home at the top of the page. The Preferences pages are where you specify the default regional, language, and accessibility settings that you want to use throughout the system.
Regional Options
Use the following options to specify the default formats for territory, date, time, number, and time zone you want to use throughout the system.
| Value | Description |
|---|---|
|
Territory |
Specify the country details. |
|
Date Format |
Select the date format that you want to use. |
|
Time Format |
Select the time format that you want to use. |
|
Number Format |
Select the number format that you want to use. |
|
Time Zone |
Select the time zone you want to use. |
Language Options
Use the following options to specify the default language you want to use throughout the system.
Accessibility Options
Use the following options to specify the default accessibility preferences you want to use throughout the system.
Accessibility
Accessibility involves making your application usable for differently abled persons such as low vision or blindness, deafness, or other physical limitations. This means creating applications that can be used without a mouse (keyboard only), used with a screen reader for blind or low-vision users, and used without reliance on sound, color, or animation and timing.
The Merchandising solutions provides the ability for users to switch between accessibility support levels in the application, so that users can choose their desired type of accessibility support, if required. They do so by exposing a user preferences screen in which the user can specify the accessibility preferences/mode which will allow the user to operate in that mode.
-
Default Mode: By default, the Merchandising solutions a have rich user interface interaction, and are also accessible through the keyboard. Note that in the default mode, screen readers cannot access all components. If a visually impaired user is using a screen reader, it is recommended to use the Screen Reader mode.
-
Screen Reader: Merchandising solutions are optimized for use with screen readers. The Screen Reader mode facilitates the display for visually impaired users, but will degrade the display for sighted users (without visual impairment.
Additional fine grained accessibility levels as described below are also supported:
-
High-contrast: Merchandising solutions can display high-contrast-friendly visual content. High-contrast mode is intended to make the solutions compatible with operating systems or browsers that have high-contrast features enabled. For example, they changes its use of background images and background colors in high-contrast mode to prevent the loss of visual information. Note that the Merchandising solutions high-contrast mode is more beneficial if used in conjunction with your browser's or operating system's high-contrast mode. Also, some users might find it beneficial to use large-font mode along with high-contrast mode.
-
Large-fonts: Merchandising solutions also support browser-zoom-friendly content. In default mode, most text and many containers have a fixed font size to provide a consistent and defined look. In large-font mode, text and containers have a scalable font size. This allows the solutions both to be compatible with browsers that are set to larger font sizes and to work with browser-zoom capabilities. Note that if you are not using large-font mode or browser-zoom capabilities, you should disable large-font mode. Some users might also find it beneficial to use high-contrast mode along with the large-font mode.
Merchandising/Sales Audit provides the ability to switch between the above accessibility support levels in the application, so that users can choose their desired type of accessibility support, if required. It exposes a user preferences screen in which the user can specify the accessibility preferences/mode which will allow the user to operate in that mode.
Configure Application for Screen Reader Mode
Users can configure their session to the accessibility mode by setting user references on the home page of the application as shown below. Perform the following procedure to configure a user preference for screen reader mode.
-
Log into one of the Merchandising solutions. In this example, we use Merchandising.
-
From the application home page, select Preferences from the logged in user menu.
-
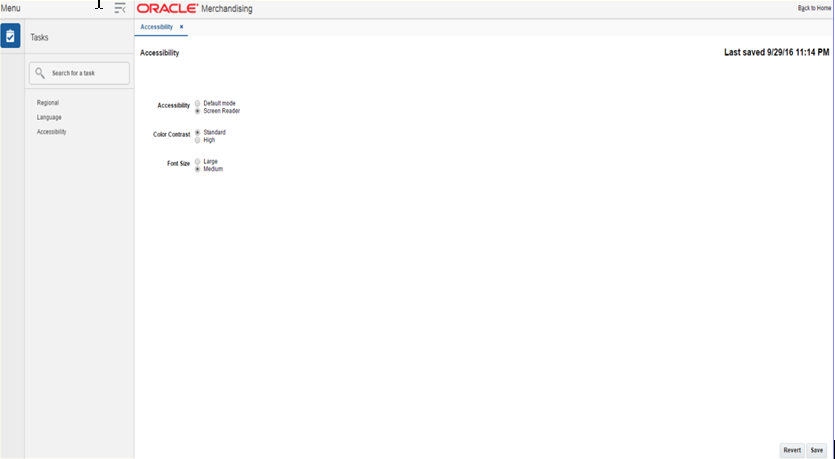
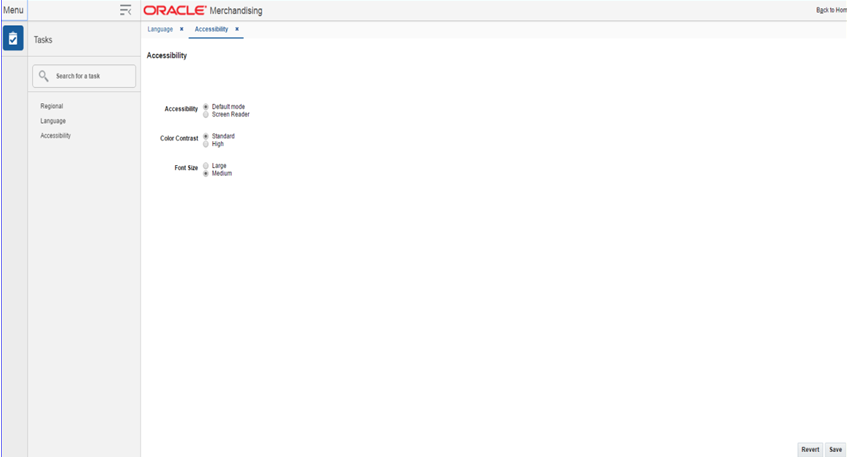
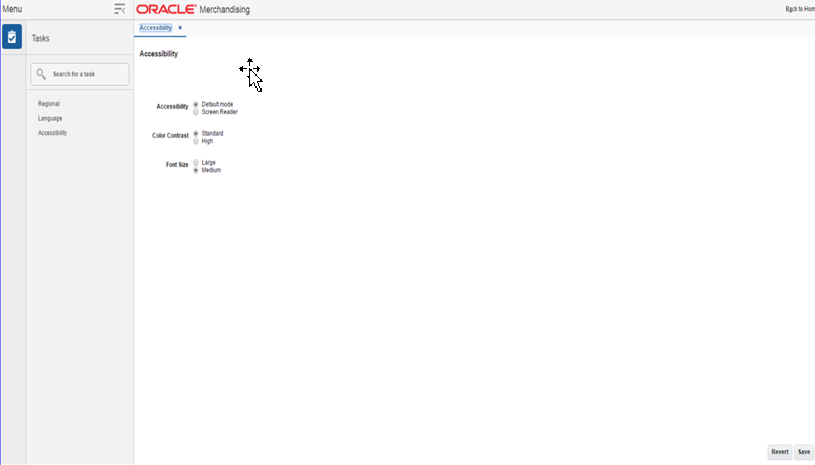
From the Tasks pane, click Accessibility to open the Accessibility tab.
-
Select Screen Reader to enable accessibility mode, and click Save.
-
Click on Back to Home to return to the home page. Now the application is enabled in the screen reader mode to assist a visibly challenged user. Some of the graphical content of Operational Insights is also displayed in a tabular mode.
Set Accessibility to Default
Perform the following procedure to set Accessibility mode to Default mode.
-
From the application home page, select Preferences from the logged in user menu.
-
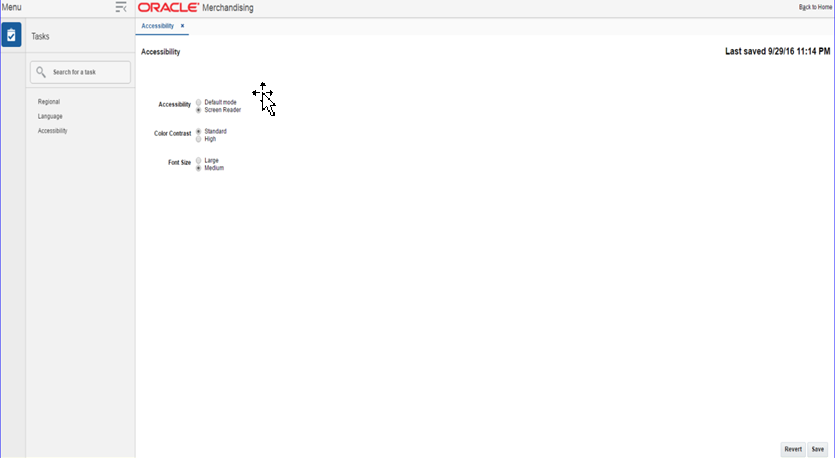
From the Tasks pane, click Accessibility to open the Accessibility tab.
-
Select Default mode.
-
Click Save to save the settings.
-
Click Back to Home to return to the home page. Application is returned to default mode and you can view graphical reports.