Producing Pages
This section provides an overview of page production and discusses how to:
Change general page information.
Change page use information.
Save pages.
Rename and delete pages.
Print page definitions.
Alter page setup.
Read a page definition report.
If you change pages or delete controls in the page definition, use the tools in the Edit and File menus. To avoid making changes that might adversely affect your application database, review your plans with your database administrator. Together, you can evaluate the effect that your actions might have on the system database as a whole.
Several additional steps in the page design process help make future editing of page definitions easier.
After you design a page, you must set the attributes for how the page should function and make sure that you have the proper documentation to assist you when performing upgrades. Access the Page Properties dialog box by selecting in page definition mode.
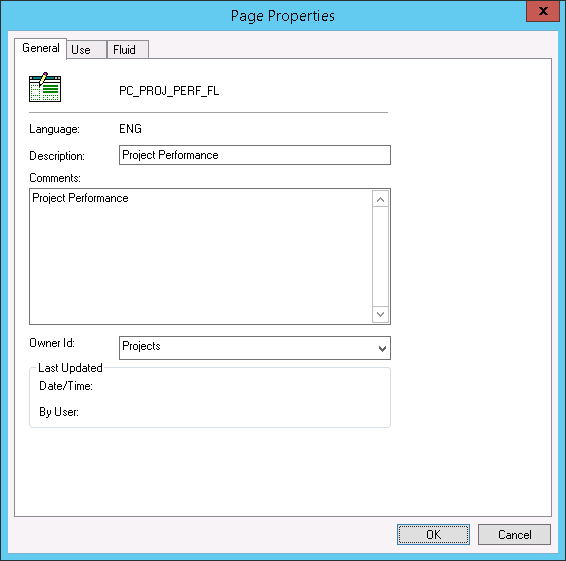
Use the General tab in the Page Properties dialog box to document the page. Enter both short and long descriptions of the page here. You can also document what changes have been made, or must be made, to a page.
Access the Page Properties dialog box and select the General tab. Enter a description and any comments about the page and assign an Owner ID.
Image: Page Properties dialog box: General tab
This example illustrates the fields and controls on the Page Properties dialog box: General tab.
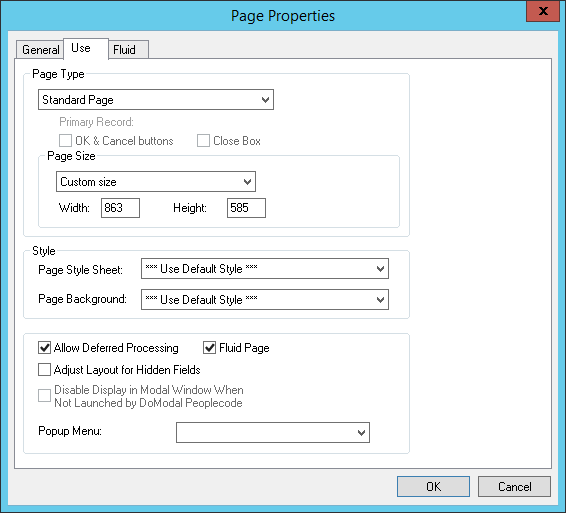
Access the Page Properties dialog box and select the Use tab.
Image: Page Properties dialog box: Use tab
This example illustrates the fields and controls on the Page Properties dialog box: Use tab. You can find definitions for the fields and controls later on this page.
|
Field or Control |
Definition |
|---|---|
| Page Type |
Select Standard page, Subpage, Secondary page, or Popup page from the drop-down list box. See Understanding Secondary Pages. See Using Pop-up Pages. |
Page Size
To accommodate different types of workstation monitors, you can adjust the page size.
|
Field or Control |
Definition |
|---|---|
| 800×600 page inside portal |
This value is the standard option for viewing pages in the portal, providing room for the universal navigation header and the menu. It provides a default page size of 570×330 in PeopleSoft Application Designer. |
| 800×600 page without portal |
You should develop most pages using this option. It is the standard option for viewing pages, providing room for the navigation header and the menu. This option provides a default page size of 760×330 in PeopleSoft Application Designer. |
| 1024×768 page inside portal |
Selecting this option provides an optimal display for users with a 1024×768 resolution, showing the full transaction page and the menu. Users with an 800×600 display will see the full transaction page without the menu when the menu is enabled. This option provides a default page size of 760×498 in PeopleSoft Application Designer. |
| 1024×768 page without portal |
For the power user, this is a high-resolution option. It provides a default page size of 984×498 in PeopleSoft Application Designer. |
| 240×Var portal home page comp. (240×variable portal home page component) |
Use this setting only for creating pagelets for the portal. This size is most usable because it can be viewed in both the narrow area and the wide area of the portal. The system sets the width to 240, but you set the height. |
| 490×Var portal home page comp. (490×variable portal home page component) |
Use this setting only for creating pagelets for the portal. Pagelets that use this setting can appear only in the wide area of the portal. The system sets the width to 490, but you set the height. |
| 640×480 Windows screen |
This option is a deprecated feature used only for Windows client users. This option is designed for VGA resolution. The pages are actually less than 640×480 pixels in size in PeopleSoft Application Designer because they provide space for various windows items, such as the window title, menu bar, and toolbar. |
| 800×600 Windows screen |
This option is a deprecated feature used only for Windows client users. This option is designed for Super VGA resolution. These pages provide space for the window title, menu bar, toolbar, folder tabs, and status line, as well as space at the bottom for the taskbar. |
| Custom size |
Select to set a specific page size other than those listed previously. Set the width and height manually. |
Style
|
Field or Control |
Definition |
|---|---|
| Page Style Sheet |
Select a different style sheet for a specific page to override the style sheet that is selected for the application. If you do not select a different page style sheet (keeping ***Use Default Style***), the system uses the style sheet that is specified on the PeopleTools Options page. |
| Page Background |
Select a different page background style class to override the background style of the page style sheet specified above. If you keep the ***Use Default Style*** setting, the system uses the default background of the page style sheet. |
Note: The style options that you select in the design time environment might look different at the runtime rendering of the page. For example, font and page control sizing metrics are different in the design time Windows environment and the runtime browser environment. As such, when developing pages, do not rely entirely on the rendering of the page in PeopleSoft Application Designer to gauge layout considerations, such as font size and the placement of controls. You should view all pages in the runtime browser environment and adjust them accordingly.
Additional Settings
|
Field or Control |
Definition |
|---|---|
| Allow Deferred Processing |
Deselect if you want the page and all of its fields to follow standard processing. Deferred processing is the default. |
| Fluid Page |
Select this option only if creating a page for a fluid application. This setting is required for fluid pages only. For more information on creating fluid pages, see Creating Fluid Pages. |
| Adjust Layout for Hidden Fields |
Select to set the page to resize automatically when hidden fields are present. |
| Disable Display in Modal Window When Not Launched by DoModal PeopleCode |
Applies only to secondary pages. Select to enable the modal window only when launched by DoModal PeopleCode. |
| Pop-Up Menu | |
| Free Form StyleSheet |
Select a free form style sheet containing styles used by this page. |
The Fluid tab applies only to pages created for fluid applications. For more information on creating fluid applications, refer to the product documentation for Fluid User Interface Developer’s Guide.
For general information on the fluid user interface, see Fluid User Interface Overview.
For information on fluid page properties, see Setting Properties for Fluid Pages.
To save your work, select or
When you save your page, the system performs various edits and issues warning messages as appropriate. The warning explains any errors that are associated with each control. You can disregard these messages and save your work anyway, but you cannot view the page in the browser until all errors are corrected.
Access the explanation of an error message by clicking the Explain button in the warning message box. You can fix the problem immediately or save the page and return later to correct it.
If you rename a page, the change is reflected throughout the system, including in PeopleCode, so you do not have to change the page name anywhere else.
To delete a page, particularly a subpage or a secondary page, first use the Find Definition References option to determine which page, component, and menu definitions refer to or use the page you want to delete.
To keep track of your application definitions and refinements, print your page definitions and keep a log or binder with your new and revised pages as you reconfigure your applications. You may want a reference for each page that includes both the onscreen image and the page control information (the record definitions and special uses or edits that you applied), as well as the information for any subpages that are included in the page definition.
Printing page definitions also helps you debug during testing. Each report includes a unique identifier that the system automatically increments each time you change the page.
To print a page definition:
Open the appropriate page.
Select
Access the Print Setup dialog box by selecting
All print options are selected by default.
|
Field or Control |
Definition |
|---|---|
| Definition |
Select to print the list of fields on the page and all of the parameters that you set for each one. |
| PeopleCode |
Select if you used PeopleCode to design your page |
| Graphics |
Select to provide a snapshot of your page design. Graphics generally take longer to print than page descriptions or PeopleCode reports. |
Borders
|
Field or Control |
Definition |
|---|---|
| Header |
Select to print a header at the top of the report indicating the date and time that you printed the report and the database name, page name, version number, and page number. This option is selected by default. |
| Footer |
Select to print a footer at the bottom of the report indicating the date and time that you printed the report and the database name, page name, version number, and page number. This option is deselected by default. |
| Border |
Select to print a border or box around a page report. This option is deselected by default. |
| Border Space (mm) (border space (in millimeters)) |
Select to insert a set amount of space between a graphical border around the page report and the margins of the report. Deselect this option to print in character mode (faster) rather than in graphics mode (slower). The default space is 3 mm, but you can change it. |
Margins
Set the distance, in millimeters, from the edge of the page to the left, right, top, and bottom edges of the page image or report. The defaults are:
Top: 20.
Bottom: 5.
Left: 10.
Right: 0.
Note: The HP LaserJet printer is the default.
This table lists the columns on the page definition report and describes their content:
|
Column |
Content |
|---|---|
|
Num (Number) |
Sequential number that shows the relative position of the field in the field order list for the page. |
|
Field Type |
Field type, such as edit box. |
|
Label Text |
The label associated with the field, regardless of whether the label appears on the page. |
|
Label Type |
|
|
Record Name |
Record name where the field is located. |
|
Field Name |
Field name on the record definition with which the page field is associated. |
|
Siz (size) |
Field size (custom, minimum, or maximum). |
|
Alg (alignment) |
Alignment (left or right). |
|
On |
Value of the radio button or the on value of the check box (typically Y). |
|
Off |
The value of the radio button or the off value of the check box (typically N). |
|
DSP (display) |
Yes indicates a display-only field. |
|
INV (invisible) |
Yes indicates an invisible field. |
|
CTL (control) |
Yes indicates a display control field. |
|
REL (related) |
Yes indicates a related display field. |
|
RelNum (related number) |
Number (Num column) of the display control field for this related display field. |
|
CUR (currency) |
Yes indicates a multicurrency field that does not appear unless the user is operating in multicurrency mode. |
|
DER (derived) |
Yes indicates a field from a derived or work record. |
|
OccLvl (occurs level) |
Occurs level of scroll bar that governs this field. |
You may see additional reference lines following each field or at the end of the report:
|
Reference |
Description |
|---|---|
|
Page Help Context: nnn |
Indicates that the page was assigned a page help context number that links it to a help file that describes how the field is used wherever it appears in the database. |
|
Field Help Context: nnn |
Indicates that this field, as used on this page, was assigned a record field help context number that links it to a help file that describes how the field is used only as it appears in this record definition. |