Using Radio Buttons
This section provides an overview of radio buttons and discusses how to:
Set radio button record properties.
Set radio button label properties.
Set radio button use properties.
When you insert a radio button on a page, it appears with the default label, Dummy Name, until you specify a record definition name, field, and value for the radio button. Like edit box labels, radio button labels display a dashed box to indicate the translation buffer.
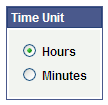
For radio buttons to function as a single group, they must be associated with the same record field and they must be adjacent fields on the Order tab of the page definition. To save time, add all radio buttons in a set, one after the other. After you add the first radio button, the system remembers the record definition name and field name for all subsequent radio buttons; you must enter only the database value for each. Then, place a group box around all of your radio buttons to keep them together and labeled, as in this example:
Image: Example of radio buttons
This example illustrates the fields and controls on the Example of radio buttons. You can find definitions for the fields and controls later on this page.

To link a record with radio buttons:
Open the Radio Button Properties dialog box.
On the Record tab, select the record and field name.
The system retrieves the default label text if you enter the record or field.
Enter the database translate value for this radio button.
In the preceding radio button example, N is for Normal. If you select the drop-down list box for the value, you see the translate value and the long name that was assigned to the field. When the user selects this radio button, it indicates a Normal value.
To set the label of a radio button:
Open the Radio Button Properties dialog box.
On the Label tab, select the type of label if it is other than the default of XLAT Long.
Select the radio button label location: to the left or right.
You might want to change the way that a radio button is used on a page. For example, you might want the selected value of a radio button to control what appears in another control.