Using Single Button Presence
The single presence icon represents a collective presence of all screen names. When a user moves the mouse pointer over a single presence icon, it will open a menu with all user screen names and their presence
The IM Servlet is implemented and hosted in the web server for the purpose of communicating with IM servers to get presence information. Therefore, browsers can send http Get request to IM Servlet and get presence information. The IM Servlet directly communicates with non-XMPP IM servers to fetch presence information and uses Smack API to communicate with XMPP servers. To improve the performance and response time the IM Servlet supports bulk requests for getting presence of multiple screen names using one request. In order to get the presence of a buddy from an XMPP server, the user needs to login into the XMPP server and maintain an active session. For non-XMPP servers the user does not need to login into IM server to fetch the presence information. This active session is maintained in the IM Servlet.
Image: Instant messaging architecture
This diagram shows the Instant messaging architecture.
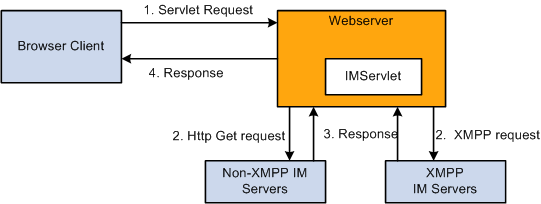
Browser requests to get the presence from IM Servlet
For non-XMPP servers, IM Servlet will send http get request to corresponding Instant Messaging server to find out presence information. For XMPP servers, IM Servlet will contact XMPP server via smack API to get presence information.
Presence information is returned to IM Servlet.
Presence is sent to the client browser.
Image: Configuration page
This example illustrates the fields and controls on the Configuration page.
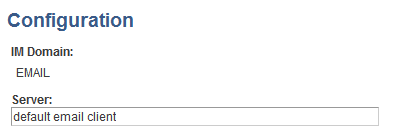
The configuration page is the same page used to configure instant messaging servers. When you select the page under the Presence menu, you can also configure Email, MSN and Skype.
Select .
Image: Screen names configuration page
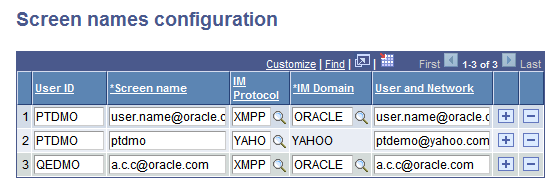
This example illustrates the fields and controls on the Screen names configuration page. You can find definitions for the fields and controls later on this page.
|
Field or Control |
Definition |
|---|---|
| User ID |
Enter PeopleSoft user ID. |
| Screen name |
ID used to obtain presence for this user. |
| IM Protocol |
Select the protocol. |
| IM Domain |
Select the instant messaging domain. |
| User and Network |
The value entered here is used for display purposes in Single Button Presence. |
The value of the ScreenName column will vary, depending on your Instant Messaging domain.
|
IM Domain |
User ID Description |
Email ID |
Corresponding ScreenName |
|---|---|---|---|
|
YAHOO |
User name without domain |
abc.xyz@yahoo.co.in |
abc.xyz |
|
MSN |
MSN badge ID |
p_abc@hotmail.com |
f2a66c8e51870b5 |
|
XMPP |
User name with domain |
abc.xyz@oracle.com |
abc.xyz@oracle.com |
To create MSN user IDs:
Use your browser to point to the following URL: http://settings.messenger.live.com/applications/WebSettings.aspx
Sign on with MSN Credentials
Select the option Allow anyone on the web to see my presence and send me messages. Note: Any website can show your status and people you have blocked may see your presence on the web.
Click Save
Verify the MSN badge: <iframe src="http://settings.messenger.live.com/Conversation/IMMe.aspx?invitee=8e109e9602507581@apps.messenger.live.com&mkt=en-in" width="300" height="300" style="border: solid 1px black; width: 300px; height: 300px;" frameborder="0" scrolling="no"></iframe>
Select the Create HTML tab, and view the HTML appearing at the bottom of the page. The badge value appears after “invitee=” and ” @apps”. The system uses the badge to determine the user’s presence information which is also used as the MSN user ID.
Select .
Image: Single button presence page
This example illustrates the fields and controls on the Single button presence page.
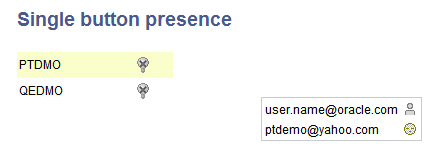
The single presence icon represents a collective presence of all screen names. When a user moves the mouse pointer over a single presence icon, it will open a menu with all user screen names and their presence. If any of the screen names are online, you can click the online icon and it will launch the corresponding IM Messenger to send IM messages. When the user clicks on an email icon, it will launch default configured email client. When you click on Skype, it will launch Skype application and allow you to login to Skype and if skype is not installed there appears a dialog box with two buttons to download or upgrade skype
To develop a sample application with Single Presence Button:
Create a new page with two hidden HTML areas, one Hidden HTML area(as in, MCF_XMPPHEADER) is for keeping Javascript content, and the other HTML area (as in, MCF_IM_HTMLAREA) is for showing the presence icon.
Ensure that all screen names are in the required format and that they are available in a record (as in,MCF_IMSCRNAMES).
Write page PeopleCode for the page activate event:
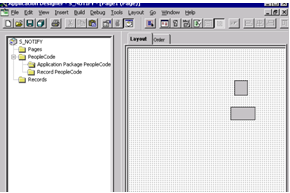
Image: Application Designer — page activate event
This example illustrates the page activate event in Application Designer for writing PeopleCode.
import PT_MCF_IM:*;

Global PT_MCF_IM:MCFIMSingleButton &single;
Local Rowset &RS1;

&single = create PT_MCF_IM:MCFIMSingleButton();
/* Number of milliseconds that we want to show sliding window even after we   */
/* remove cursor from single presence button.                                 */

&single.hideDelay = 5325;
&RS1 = CreateRowset(Record.MCF_IMSCRNNAMES);
/* &RS1 have all screen names, right is direction of sliding window. 190 is   */
/* X coordinate of top left corner of sliding window, 200 is Y coordinate of  */
/* top left corner of sliding window, 350 is height of sliding window, 450    */
/* is width of sliding window,  1 is some unique no of sliding window on that */
/* page. If there are many single presence icons on page, then it would be    */
/* useful for uniqness.                                                       */

RECORDNAME.MCF_IM_HTMLAREA.Value = &single.generateHTML(&RS1, "right", 190, 200, 350, 450, 1);
RECORDNAME.MCF_XMPPHEADER = &single.generateJavaScript();