Creating System Definitions and Objects for Branding
This topic provides an overview of branding objects and discusses how to:
Create and maintain HTML objects.
Create and maintain JavaScript objects.
Create and maintain style sheet objects.
Add and edit branding objects.
Upload and maintain images.
Add and edit images.
Define element types.
Define user attribute types.
PeopleTools branding allows you to create and maintain branding objects such as HTML, JavaScript, free form style sheets, and images without requiring access to Application Designer. These objects can then be used in places such as branding system definitions, headers or footers, custom layout objects for pagelets and classic homepage tabs, and in other definitions.
While you can create and maintain HTML, JavaScript, free form style sheet objects, and images in Application Designer, these Application Designer objects are not accessible to be viewed or maintained through portal branding. But, if you enter the same name as an existing Application Designer object and if you have edit permissions on the managed object, then you will be prompted as to whether you want to overwrite the existing object through portal branding. However, objects that you create through portal branding can be viewed and updated in Application Designer.
Note: You can use Application Designer to migrate these portal branding objects from a test environment to a production environment. However, these objects will be treated as regular managed objects in the new system, and will not be accessible from these portal branding pages in the new system.
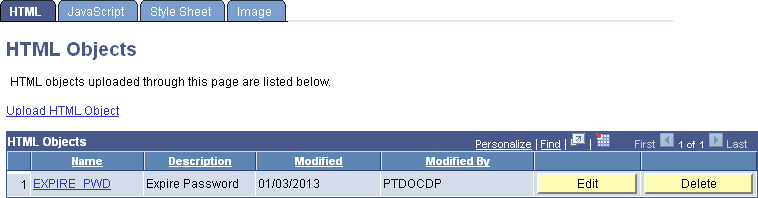
Use the HTML Objects page to upload and maintain HTML objects used for branding.
Navigation
Image: HTML Objects page
This example illustrates the fields and controls on the HTML Objects page. You can find definitions for the fields and controls later on this page.
|
Field or Control |
Definition |
|---|---|
| Upload HTML Object |
Click the link to create a new HTML object. |
| Name |
Click the object name link for an existing HTML object to view the object details including the HTML code. |
| Description |
Displays the object’s description. |
| Edit |
Click the Edit button to modify the description or stored HTML code. |
| Delete |
Click the Delete button to delete the object from the database. |
Note: The link to view the HTML object is displayed only if the user has read permissions on the object. The Edit and Delete buttons are displayed only if the user has read/write permissions on the object.
HTML objects created in Application Designer cannot be viewed or edited in portal branding. However, HTML objects created in portal branding can be viewed and modified in Application Designer.
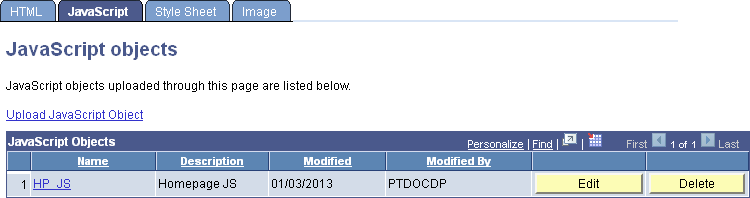
Use the JavaScript objects page to to upload and maintain JavaScript objects used for branding.
Navigation
.
Select the JavaScript tab.
Image: JavaScript objects page
This example illustrates the fields and controls on the JavaScript objects page. You can find definitions for the fields and controls later on this page.
|
Field or Control |
Definition |
|---|---|
| Upload JavaScript Object |
Click the link to create a new JavaScript object. Note: JavaScript is stored as an HTML object in the database. |
| Name |
Click the object name link for an existing JavaScript object to view the object details including the JavaScript code. |
| Description |
Displays the object’s description. |
| Edit |
Click the Edit button to modify the description or stored JavaScript code. |
| Delete |
Click the Delete button to delete the object from the database. |
Note: The link to view the JavaScript object is displayed only if the user has read permissions on the object. The Edit and Delete buttons are displayed only if the user has read/write permissions on the object.
JavaScript objects created in Application Designer cannot be viewed or edited in portal branding. However, JavaScript objects created in portal branding (and stored as HTML objects) can be viewed and modified in Application Designer.
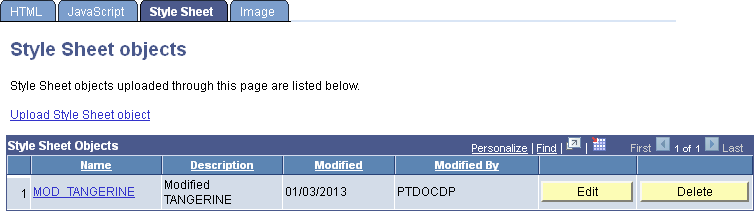
Use the Style Sheet objects page to to upload and maintain free form style sheet objects used for branding.
Navigation
.
Select the Style Sheet tab.
Image: Style Sheet objects page
This example illustrates the fields and controls on the Style Sheet objects page. You can find definitions for the fields and controls later on this page.
|
Field or Control |
Definition |
|---|---|
| Upload Style Sheet Object |
Click the link to create a new free form style sheet object. |
| Name |
Click the object name link for an existing free form style sheet object to view the object details including style definitions. |
| Description |
Displays the object’s description. |
| Edit |
Click the Edit button to modify the description or stored style definitions. |
| Delete |
Click the Delete button to delete the object from the database. |
Note: The link to view the style sheet is displayed only if the user has read permissions on the object. The Edit and Delete buttons are displayed only if the user has read/write permissions on the object.
Style sheet objects created in Application Designer cannot be viewed or edited in portal branding. However, free form style sheet objects created in portal branding can be viewed and modified in Application Designer.
Use the Add/Edit Branding Object page to add or edit a branding object.
Navigation
On the HTML Objects page, JavaScript objects page, or Style Sheet objects page, either click the Upload Object link or click the Edit button for an existing object.
Image: Add/Edit Branding Object page
This example illustrates the fields and controls on the Add/Edit Branding Object page (for an HTML object). You can find definitions for the fields and controls later on this page.

|
Field or Control |
Definition |
|---|---|
| Object Name |
Enter an ID for the new object. Important! If you specify the name of an existing object of this type whether it was created in portal branding or through Application Designer, you will be prompted to overwrite the existing object after you click the Save button. However, if you have no permissions or read-only permissions on an Application Designer object, a duplicate ID error message will be displayed, and you will need to enter a different object ID. Warning! Just as you must not update PeopleTools-delivered objects in Application Designer, do not use portal branding to update these PeopleTools-delivered objects. |
| Description |
Enter a descriptive name for the object. |
| (unlabeled) |
Enter the HTML, JavaScript, or free form style sheet code. |
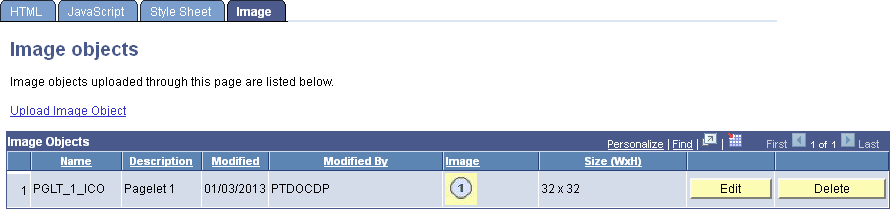
Use the Image objects page to upload and maintain image objects used for branding.
Navigation
.
Select the Image tab.
Image: Image objects page
This example illustrates the fields and controls on the Image objects page. You can find definitions for the fields and controls later on this page.
|
Field or Control |
Definition |
|---|---|
| Upload Image Object |
Click the link to upload a new image file. |
| Name |
Displays the image object’s name. |
| Description |
Displays the object’s description. |
| Edit |
Click the Edit button to modify the image including uploading a new image file. |
| Delete |
Click the Delete button to delete the object from the database. |
Note: The link to view the image is displayed only if the user has read permissions on the object. The Edit and Delete buttons are displayed only if the user has read/write permissions on the object.
Image objects created in Application Designer cannot be viewed or edited in portal branding. However, image objects created in portal branding can be viewed and modified in Application Designer.
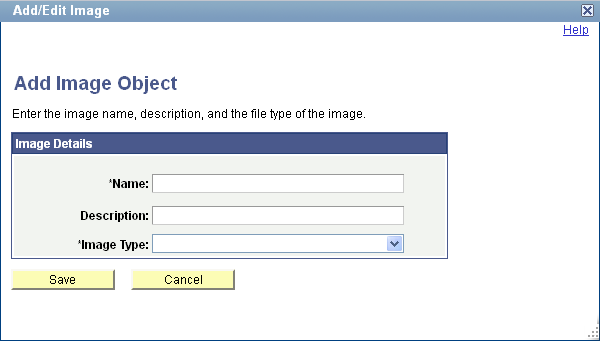
Use the Add/Edit Image page to add or edit an image.
Navigation
On the Image objects page, either click the Upload Image Object link or click the Edit button for an existing image. Alternatively, on the Pagelet Branding page, click the Upload new image link.
Image: Add/Edit Image page
This example illustrates the fields and controls on the Add/Edit Image page. You can find definitions for the fields and controls later on this page.
|
Field or Control |
Definition |
|---|---|
| Name |
Enter an ID for the new image object. Important! If you specify the name of an existing image object whether it was created in portal branding or through Application Designer, you will be prompted to overwrite the existing object after you click the Save button. |
| Description |
Enter a descriptive name for the object. |
| Image Type |
Important! Some database platforms, such as DB2 UDB for OS/390 and z/OS, limit the file size to 32 KB. Select one of the following image formats to access the File Attachment dialog box to browse and select the file to upload:
Note: The File Attachment dialog box does not filter your browsing by the selected file type. However, if you attempt to upload a file that does not match the specified format, then an error message will be generated and the upload will not occur. |
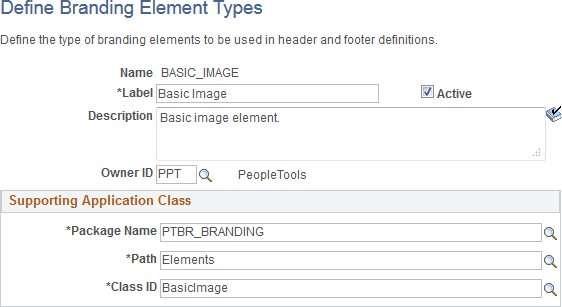
Use the Define Branding Element Types page to create and maintain the types of branding elements to be used in header and footer definitions. Each branding element type is mapped to a supporting PeopleCode application class definition.
Navigation
Image: Define Branding Element Types Page
This example illustrates the fields and controls on the Define Branding Element Types page.
|
Field or Control |
Definition |
|---|---|
| Name |
Displays the unique identifier for this element type. |
| Label |
Enter a short name for the element type, which will be displayed when an element of this type is selected to be used in a header or footer definition. |
| Active |
This check box is selected by default. Deselect this check box to make the element type inactive. No new elements of inactive types can be added to header or footer definitions. Moreover, existing elements of inactive element types in existing header or footer definitions are ignored. |
| Description |
Enter a description for the element type. |
| Owner ID |
Select which product, feature, or application owns this element type definition. |
| Package Name |
Select the name of the application package that contains the application class that defines this element type. |
| Path |
Select the names of each subpackage in the application class hierarchy that define the location of the application class. Separate subpackage names by a colon. If the class is defined in the top-level application package, enter or select the colon. |
| Class ID |
Select the name of the application class that defines this element type. |
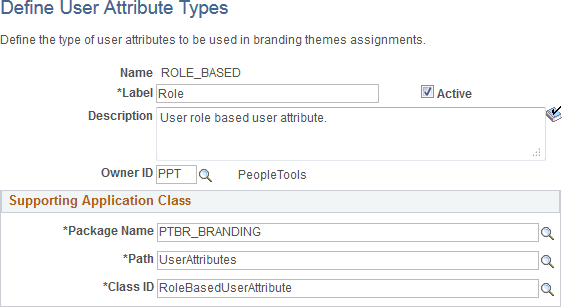
Use the Define User Attribute Types page to create and maintain the types of user attributes to be used in branding theme assignments. Each user attribute type is mapped to a supporting PeopleCode application class definition.
Navigation
Image: Define User Attribute Types Page
This example illustrates the fields and controls on the Define User Attribute Types page.
|
Field or Control |
Definition |
|---|---|
| Name |
Displays the unique identifier for this user attribute type. |
| Label |
Enter a short name for the user attribute type, which will be displayed when this type is selected to be used in a theme assignment. |
| Active |
This check box is selected by default. Deselect this check box to make the user attribute type inactive. An inactive user attribute type cannot be selected for use in a branding theme assignment. Moreover, existing theme assignments with inactive user attribute types are ignored. |
| Description |
Enter a description for the user attribute type. |
| Owner ID |
Select which product, feature, or application owns this user attribute type definition. |
| Package Name |
Select the name of the application package that contains the application class that defines this user attribute type. |
| Path |
Select the names of each subpackage in the application class hierarchy that define the location of the application class. Separate subpackage names by a colon. If the class is defined in the top-level application package, enter or select the colon. |
| Class ID |
Select the name of the application class that defines this user attribute type. |