3 Creating Arrival/Departure Notice
There are two Data Submission methods for eNOAD
-
Submit by Web
The generated data is submitted to eNOAD Web Services directly based on the setup in Submission Setup. This is the preferred method for electronic data submission.
-
Submit by File
The generated data is in an XML file format and you can submit the file and notify the eNOAD authorities via email.
The following section describes the steps to create the ENOAD file for submission.
-
Run ENOAD UK.exe
-
Select ENOAD Transfer, ENOAD File Creation from the menu option.
-
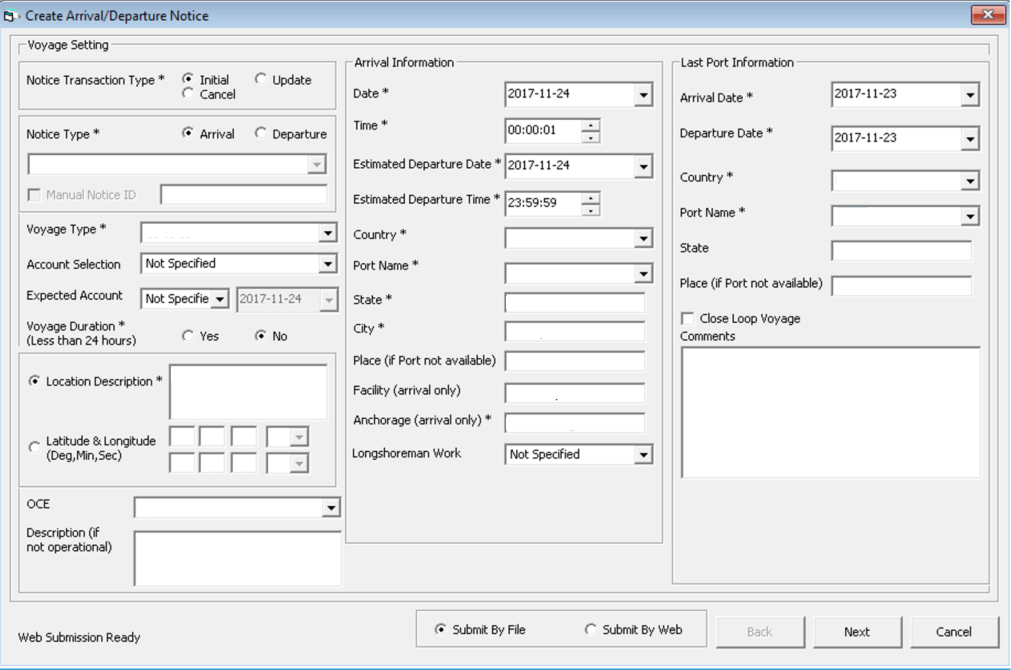
At the Create Arrival/Departure Notice screen, update all the fields required by APIS and then click Next.
Figure 3-1 Create Arrival/Departure Notice

-
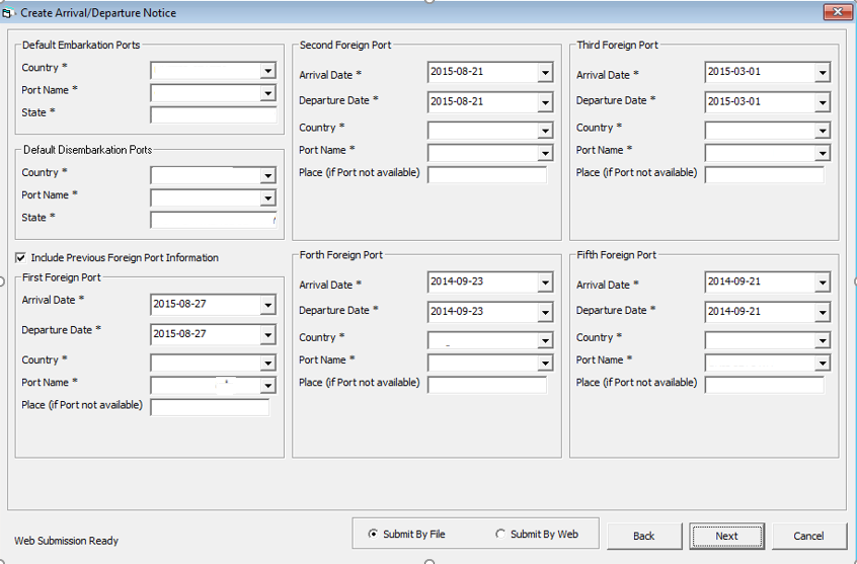
Select and update all the mandatory fields in Default Embarkation Port, including the information of previous five ports and then click Next.
Figure 3-2 Create Arrival/Departure Notice – Previous Port Information

-
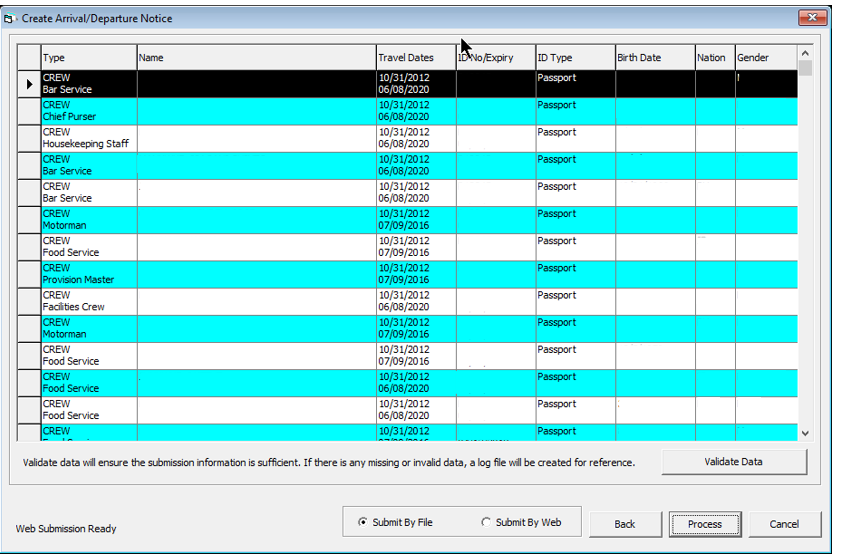
At the result grid, click Validate Data to validate and ensure all information is sufficient for submission.
Figure 3-3 Create Arrival/Departure Notice Validation

-
The system creates and saves the log file to a user-defined local folder or network path folder defined in the parameter, if the information supplied is insufficient. If you have provided all the mandatory information and the data validation complete successfully, the systems prompts a confirmation message “There is no missing/incorrect data. Do you wish to proceed to file submission?” .
-
Click Yes on the confirmation prompt to continue.
-
Choose to submit the report by file or web, or then click Process.
-
You will receive a notification prompt that the file is created and submitted successfully. Click OK to close the window.