2 Setting Up the Device
The iCrew is a native iOS application that runs on iOS 10 and later, and the recommended devices are iPod Touch and iPad.
Device Configuration
To configure and use the iCrew application, connect your iOS device to the internet and download the application from the Apple Store.
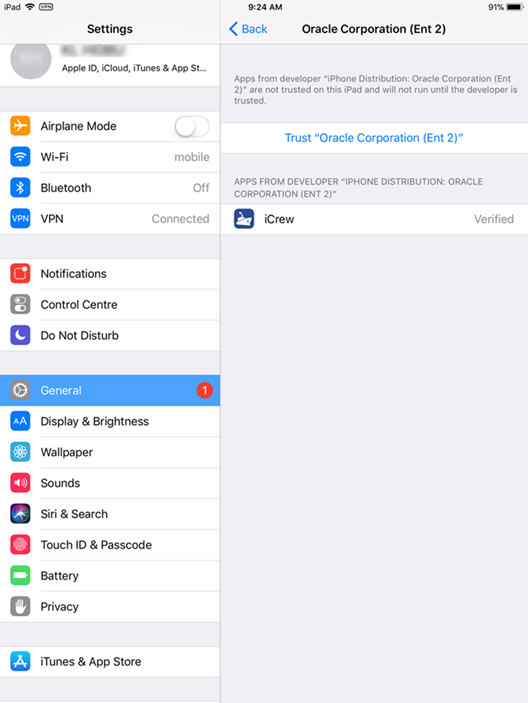
When you are done with the installation, go to Settings, General, Device Management page to grant the trust to the application. In the Enterprise App, select the Oracle Corporation (Ent 2) and grant the trust. Once the trust is granted, the iCrew Application will show as “Verified”. If the application cannot be verified, you need to delete the application and re-download.
Figure 2-1 Verifying the Application
SPMS User Access Rights
Before using the application, you must have a valid SPMS user login with the iCrew access privileges and below are the steps to create a user.
-
Login to Launch Panel and select the Utilities tab.
-
Double-click the User Security module.
-
Select the Security Group.
-
In the List of Security Access, select iCrew from the drop-down list.
-
Grant the user rights by selecting the respective Privilege check boxes.
-
Click Exit to return to the Launch Panel.
iCrew App Settings
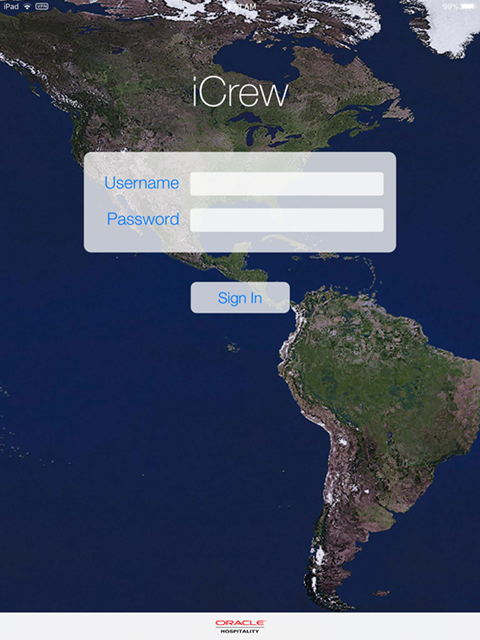
Figure 2-2 Application Login Page
-
Start the application from the device login screen.
-
Enter your username and password, and click Sign In.
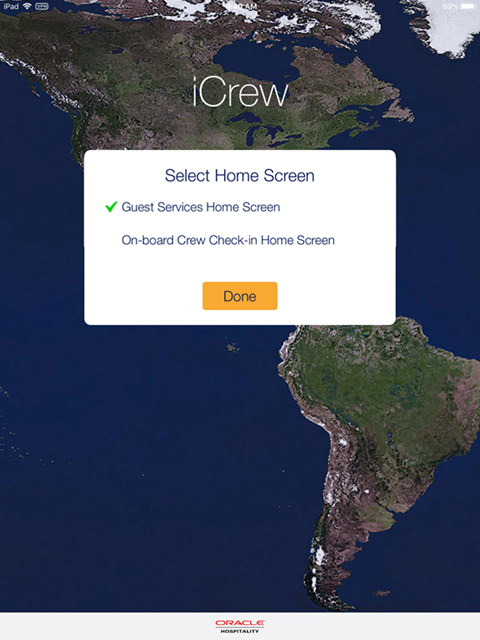
Figure 2-3 Application Home Page
-
At the Select Home Screen, select the default home screen to begin and press Done.
-
Press the Menu option of the application home screen, and select Settings.
-
The default application features are automatically set to Enabled. Slide the button to turn the features on or off. See below table for details.
-
Press the <Back button to return to the home screen.
Table 2-1 iCrew Settings
| iCrew Settings | Description |
|---|---|
|
Service |
|
|
Services |
Web Server of SPMS Transactions Service |
|
SilverWeb |
Web Service for example Bkstg_dining DB schema |
|
Request Timeout (sec) |
Time out for connecting SPMS Transactions Service |
|
Design |
|
|
Show iPod / iPhone design |
Disabled when using iCrew in iPad |
|
Show RFID design |
Enabled if embedded with RFID features. |
|
Live Camera enabled |
Enables a live camera preview of Check-In search result if no guest photo exists for fast picture taking. |
|
Fast Picture |
Fast picture taking |
|
Show Memory Usage |
Displays the memory usage on screen. |
|
RFID Settings |
|
|
RFID Active Cards |
Quick Encode mode related setting: If True, Only allow to copy (encode) active cards belongs to the valid guests on board. |
|
HK Section Validation |
Quick Encode mode related setting: If True, Only allow to copy (encode) guest cards belongs to the Housekeeping (HK) section assigned to this crew member. |
|
Linea Idle Timeout |
To save Linea sleeve battery energy, enabling this setting to 5 or 10 minutes will turn Linea sleeve scanner into off mode based on IDLE timeout interval. |
|
Sign In |
|
|
Save Login and Password |
You do not need to enter login id and password after logout |
|
Messages |
|
|
Vibration |
Turns on vibration when login user received a message |
|
Notification |
Turns on to show message delivered |
|
Default Subject |
Shows subject of the message |
|
Update |
Refreshes the message flow every x minute |
|
Task Overview |
|
|
Status Colour Mode |
SPMS Task Colour or Cabin Status Colour |
|
Hide AME/SRT Data |
Hides/Shows Special Request or Amenity data in Housekeeping section |
|
Enable Delta Mode |
HK tasks overview information can be delivered in “delta” mode with every automatic / manual HK tasks overview screen refresh, for example, to return only the HK tasks changes based on last refresh data and time, and to save bandwidth where it is required due to network speed / limitations. Applies to next web service SearchHouseKeeping method parameter: pdChangeModDate | Date |Last Change Date from the last iCrew refresh. |
|
Offline Mode |
|
|
Synchronization |
Synchronization for the Offline Work Order, Guest Comment, Housekeeping |
|
Log Out |
|
|
Local Idle Time Out |
Log outs after an X minute of idle |
|
Image Quality |
|
|
Guest |
Guest photo saved quality |
|
Other |
Saves quality of other images such as work order, housekeeping and guest comment. |
|
Signature |
Signature image saved quality |
|
IMedia |
|
|
Bar Code Reader |
Barcode reader device |
|
Credit Card Reader |
Credit card reader device |
|
Default Printer |
|
|
Full Invoice |
Default printer for guest invoice |
|
Individual Invoice |
Default printer for guest invoice |
|
Bill Image |
Default printer for bill image |
|
Credit Card Receipt |
Default printer for credit card receipt |
|
Linea Barcode Settings |
|
|
Barcode Scan Mode |
To support different available scan mode. For example, the Linea Motion control is to save energy and only turn on the laser where there is a card containing the bar code movement is detected. It is also possible to have the bar code scan as always turned ON, and when it is OFF, you need to click on Linea or Verifone sleeve bar code scan button when to scan a card. |
|
Linea Kiosk Mode |
Linea sleeve requires this setting enabled when it works in Kiosk mode. In this mode Linea is always charging by using a different cable (there is a special cable for Linea in Kiosk mode available on market) so it is important for hardware to know. |
|
Gangway |
|
|
Display Guest Information |
Shows guest details in Gangway |
|
Passport |
|
|
Mask Passport Number |
Enables masking for passport number |
|
Auto Increment |
|
|
Enable Auto Increment |
This is use on Work order maintenance to increment the WO document number by default. |
|
Auto Increment Value |
Work order document No Auto incremental value shift (normally 1). |
Creating a Configuration Profile and Web Clip
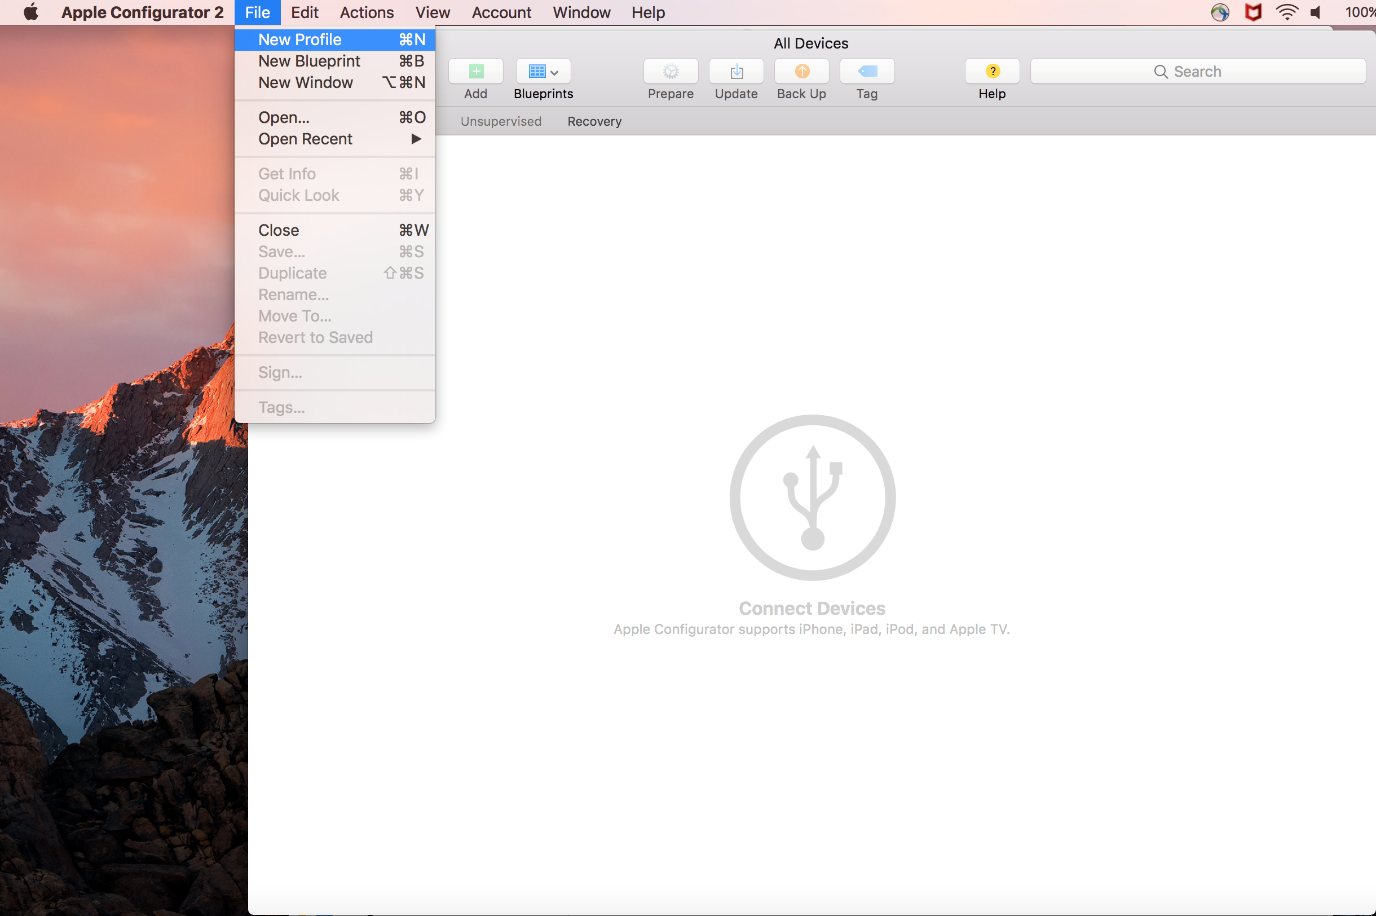
Figure 2-4 Profile and Web Clip Configuration
-
Open Apple Configurator 2 on your machine (MacOS)., select File, and click New Profile to create a new profile.
-
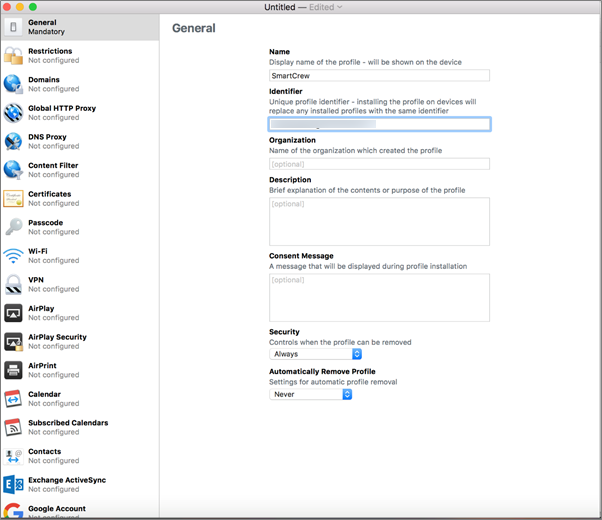
Once a profile is created, enter the following details in the General tab:
-
Name
-
Identifier – This should be unique or different from the profiles you installed on the devices.
-
The remaining fields are optional.
Figure 2-5 Profile ID in General Setting Page
-
-
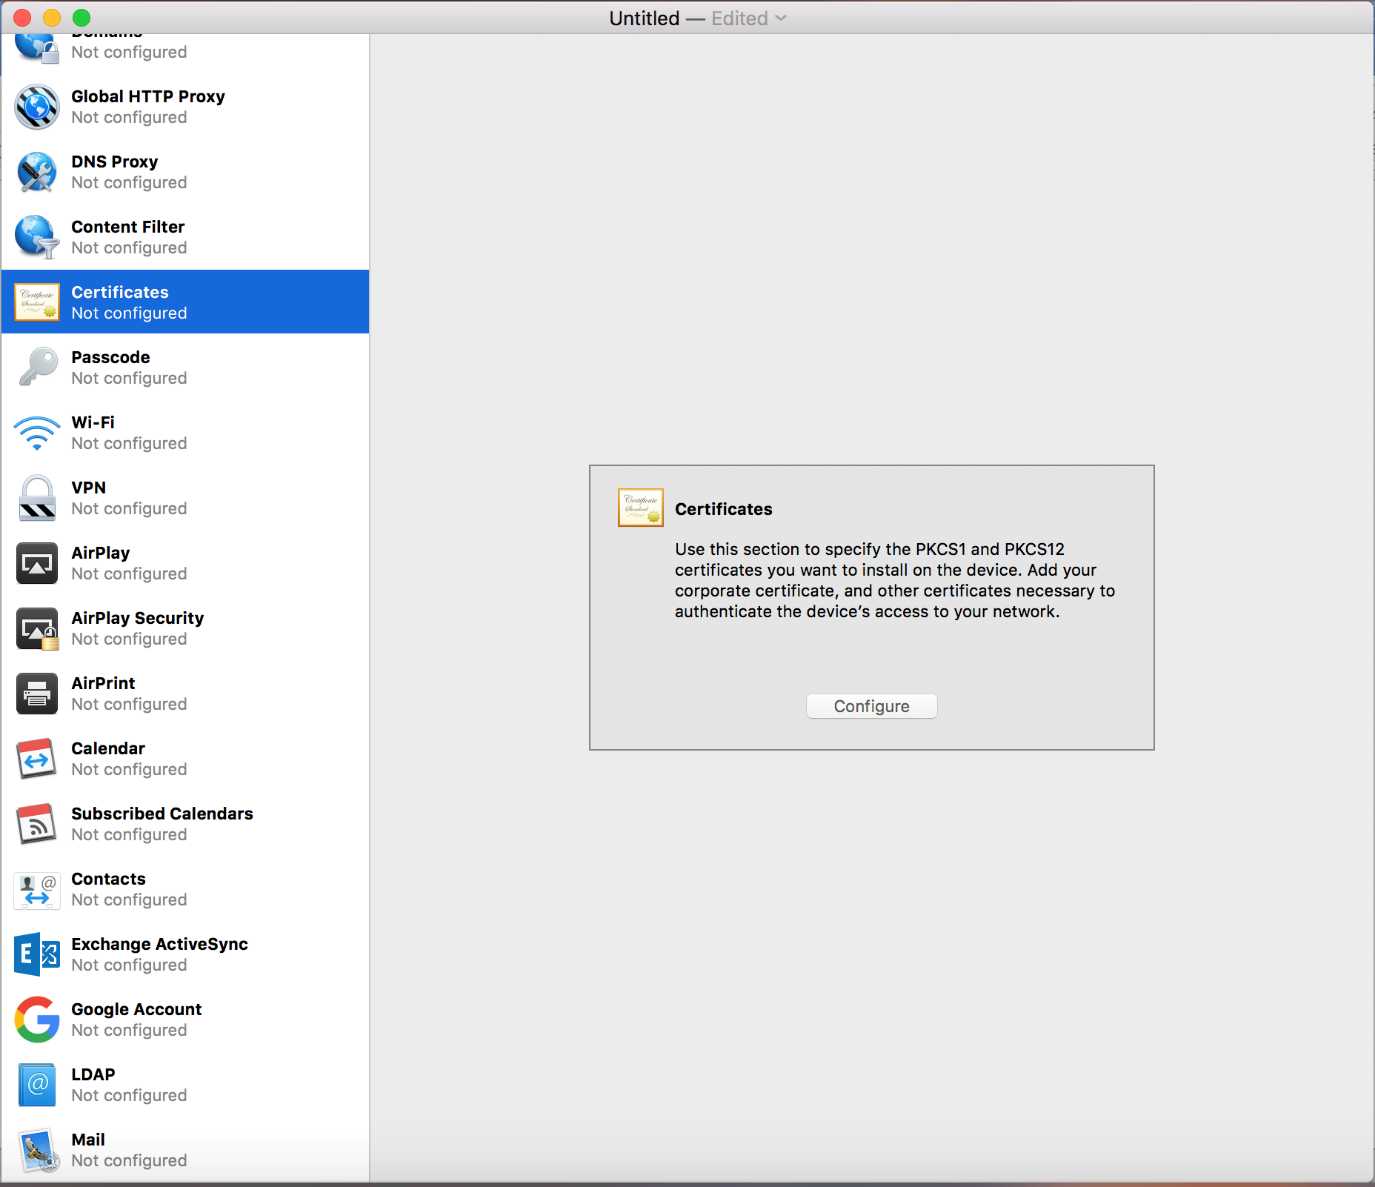
If you are using a secure connection (https), select your root certificate. This will be installed on the device along with your profile.
Figure 2-6 Certificate Configuration Page
-
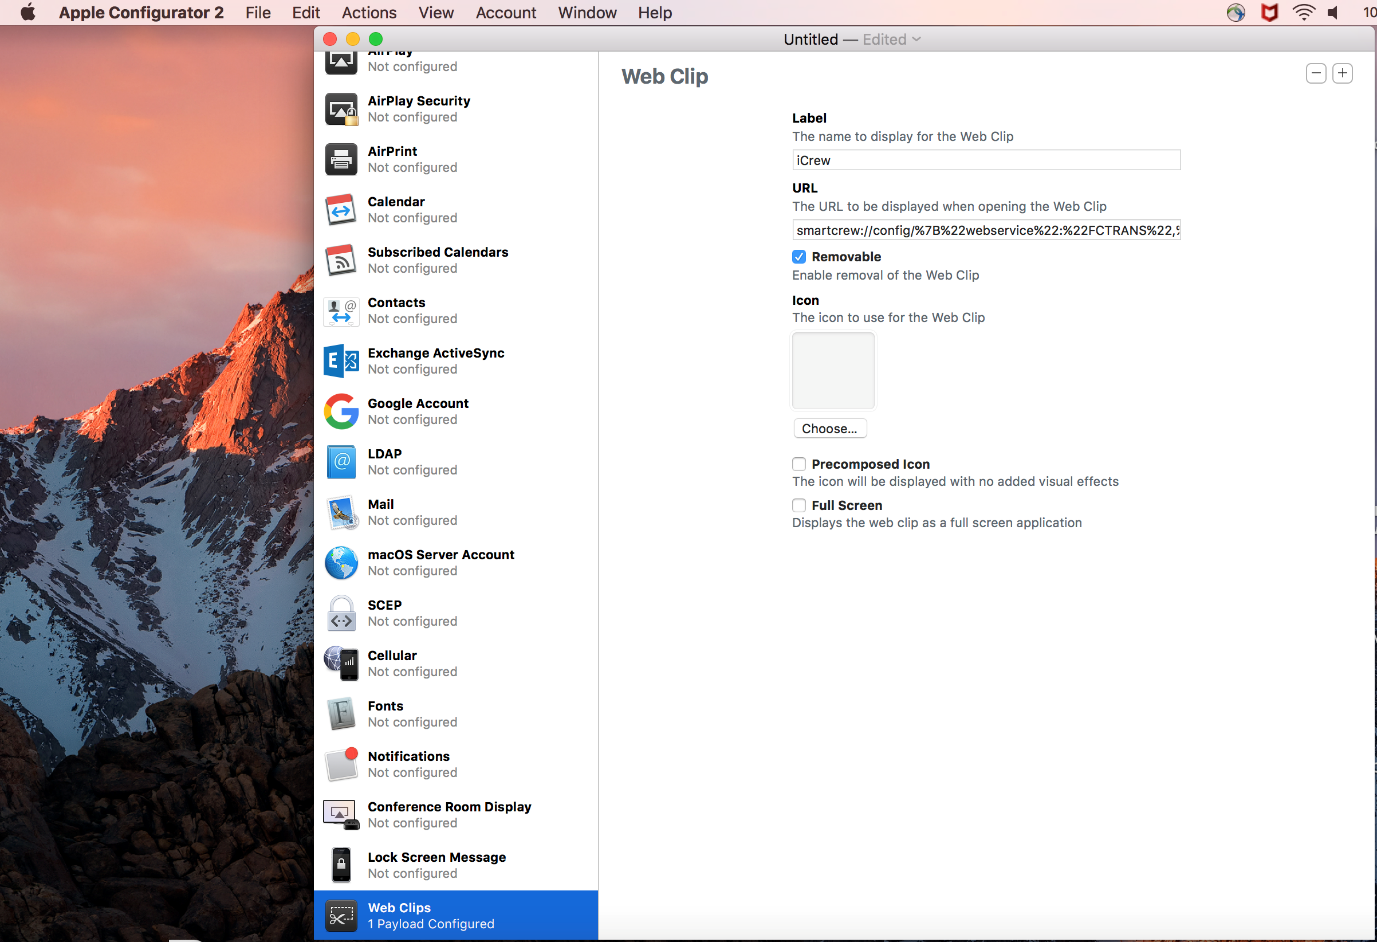
To configure, scroll down and select Web Clips.
Figure 2-7 Web Clip Configuration
-
Enter the following details for Web Clips tab.
-
Label - Enter the display name for the Web clip.
-
URL - Enter the services endpoint URL of your SPMS server. Use the URL in the format mentioned below:
smartcrew://config/%7B%22webservice%22:%22FCTRANS%22,%22url%22:%22http://example.com/FCTransactionsService/FCTransactionsService.asmx%22%7D
Replace ‘example.com’ in the highlighted URL part with your actual server name or IP of the IIS Server. If you on SPMS 8, replace ‘FC’ with ‘OHC’ according to the web service name of that version (only in the highlighted part, 2x). If you use a secure connection and have added your certificate earlier in the process, replace ‘http’ with ‘https’.
-
-
When you are done with the changes, save your file.