3 Guest Services
The Guest Services screen hosts functions such as Guest Lookup, Group Lookup, Check-In Services, Guest Comments, and Add-on Apps.
Navigation Keys in Guest Services
Figure 3-1 Navigation Keys
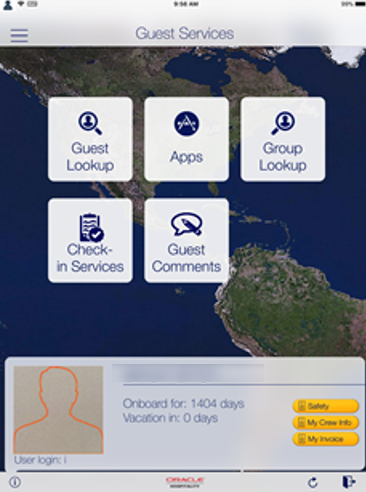
Table 3-1 Navigation Icon
| Icon | Function |
|---|---|
|
|
Opens the menu panel. |
|
|
Displays the information of user currently login. |
|
|
Refreshes and download the new cache |
|
|
Logout from the current session |
Guest Lookup
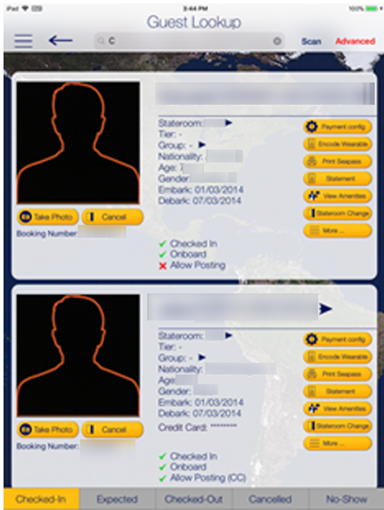
The Guest Lookup function allows you to look up a guest information by scanning the Set Sail Pass or search using a cabin number, name, or booking number.
-
At the home screen, press the Guest Lookup button.
-
At the bottom of the Guest Lookup screen, select the type of guest to search.
-
To search guest using a bar code scanner, press the Scan button. This also enables the camera function.
-
To search by name, cabin number, or booking number, enter the information at the Search bar, and press the Search button on the keyboard.
-
Use the Advanced button to search by Embarkation Date, Cabin Category, Nationality, VIP Status or Loyalty Status.
Figure 3-2 Search Results Page
-
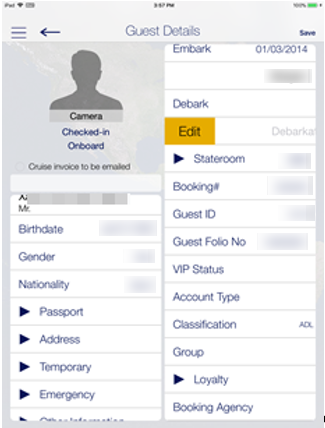
Select a name to open the Guest Details screen. To edit the information, tap or slide to the right of the selected field, and press the Edit button.
Figure 3-3 Guest Details Page
-
Select or enter the new information and press Done.
-
Press the Save button to save the information and return to the previous screen.
-
To delete or clear the field information from the Guest Details screen,
-
Slide to the left and then press the Delete button.
-
Tab on the big X on the top left in the Edit screen to clear the field.
-
Use the keyboard back button on direct edit fields.
-
Editing Guest Information
-
Repeat the steps 1 to 5 of Guest Lookup.
-
At the Guest Lookup list, select from the option on the right, for example Payment Config.
-
To add an item, press the “+” next to the button.
-
To delete an item, press and slide to the left until you see the Delete button.
Invoice Statement/Adding a Posting
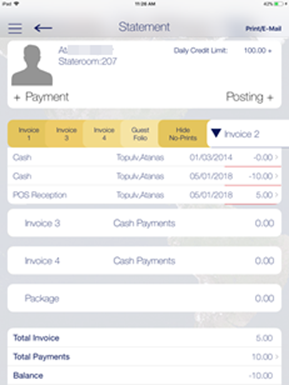
Figure 3-4 Statement Page
-
Repeat the steps 1 to 5 of Guest Lookup.
-
At the Guest Lookup list, press the Invoice Statement button.
-
At the Statement screen, press Payment to add a payment or Posting to post a charge.
-
Select the payment method and the invoice, then insert the amount and press Pay or Pay & Print or Post to Account, depending on the selection in step 3.
-
To move a payment/posting to another invoice, view the guest folio or hide the posting from printing, press and slide to the right and select the invoice to move to.
-
Press the arrow next to the invoice to expand the invoice details.
-
Select Print/E-mail to print or email.
Adding Luggage Tag
-
Repeat the steps 1 to 5 of Guest Lookup.
-
At the Guest Lookup list, select Luggage from the Services option on the right.
-
Select the luggage tag filter and press Tracking Info or History to view luggage status.
-
Press Add new luggage to scan or input a new tag id manually.
Group Lookup
- At the home screen, press the Group Lookup button.
- At the bottom of the Guest Lookup screen, select the type of group status such as Checked In, Expected, Checked Out or All.
- At the search bar, enter the group name or ID.
- To view the group information, select the group name from the result list.
- Press the Group Name on the Group Information screen to display the cruise details.
- Press the Group Members option to display the member names and the cabin numbers.
- Select a member name or cabin number to display the booking and personal information.
- Press Edit at the Information screen to edit the booking information.
- To view other information such as Group Discount, Group Routing and Group Invoice, select the option in the More Information section.
Check-In Services
The Check-In Services has features such as Check-In, Template Overview, Statistic Overview, and Group Information.
Check-In
You can search for guest reservations, update guest information, take a guest photo, and check in the guest by using the Check-In Services features.
-
At the home screen, press the Check-in Services button.
-
At the Check-in Services, Mobile Check-In section, select Check-in.
-
Select the check in status to display. For example, Embark Today or Expected.
-
Insert a name into the search bar and press the Search button on the keyboard, or use the Advanced button to search using the Embarkation Date, Cabin Category, Nationality, VIP Status, or Loyalty Status.
-
Press the Start Wizard to check in using the wizard mode. To use the wizard mode, you need to select a guest or multiple guests before proceeding.
-
In the Wizard Step 1 - Immigration screen, press the +Scan Document to scan travel document. This starts the camera function for scanning.
Figure 3-5 Wizard Step 1
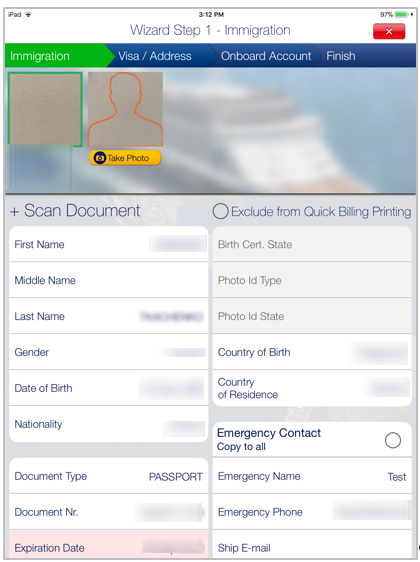
Figure 3-6 Wizard Step 2
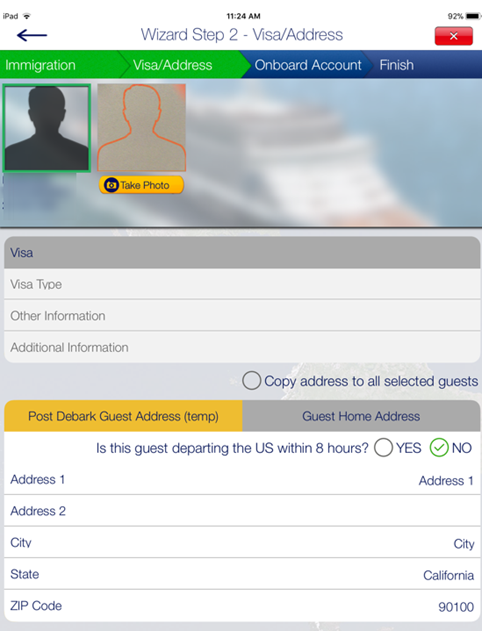
Figure 3-7 Wizard Step 3
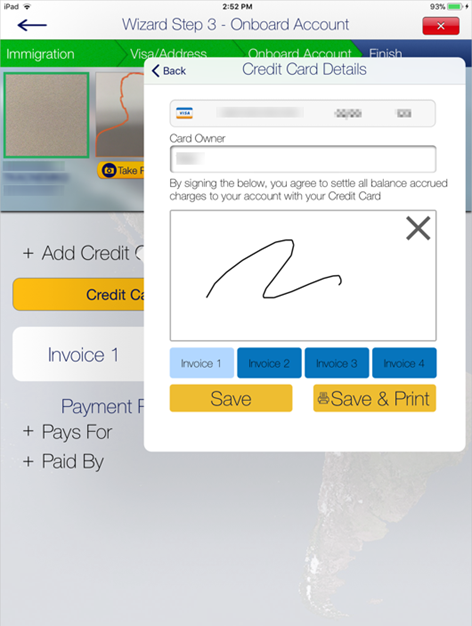
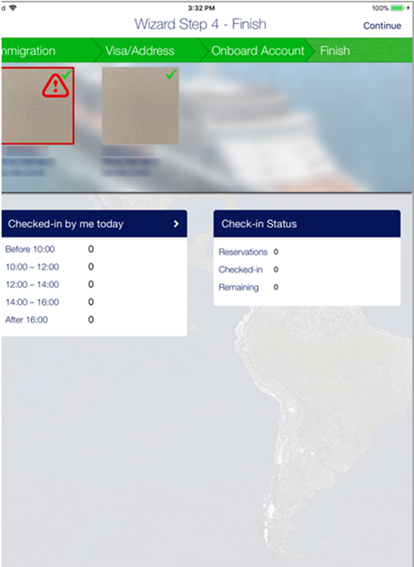
Figure 3-8 Wizard Step 4
-
Before navigating to the next screen, ensure the mandatory fields highlighted in pink contain a valid information.
-
Press the Visa/Address tab to go to the next screen and enter the necessary information.
-
Press Onboard Account to add the payment information by pressing the +Add Credit Card, and enter the credit card details and press Save.
-
Press +Pays For or +Paid By to add a routing instruction. Select the guest and press Save.
-
Press the Take Photo button to take a new photo.
-
Press the Finish button to complete the registration and press the Continue button to exit the wizard.
Mobile Template Overview
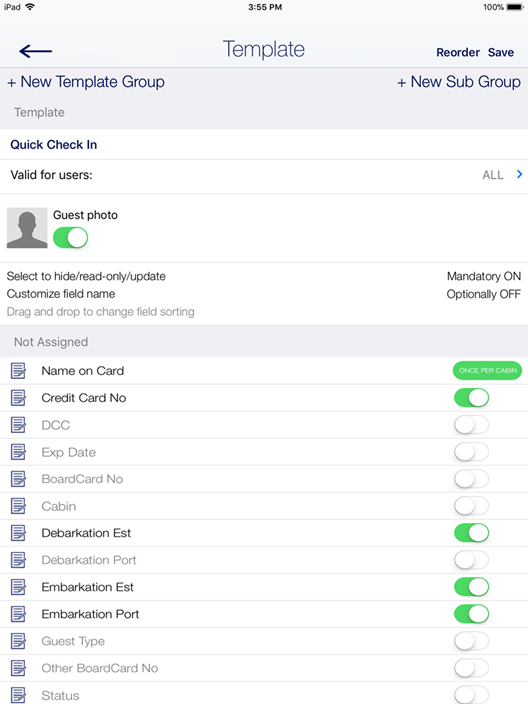
The Mobile Template Overview enables you to add a new template and defines the mandatory fields used in each form.
Figure 3-9 Mobile Template
-
At the home screen, press the Check-in Services button.
-
At the Check-in Services, Mobile Check-In section, select Mobile template overview.
-
In the Template Overview screen, press the “+” to add a new template.
-
Insert a template name under Template.
-
At the field name, slide to enable the field as mandatory.
-
Press the Reorder to navigate to the Reorder screen, which allows you to arrange the fields shown in Wizard screen.
-
Press Save.
Statistic Overview
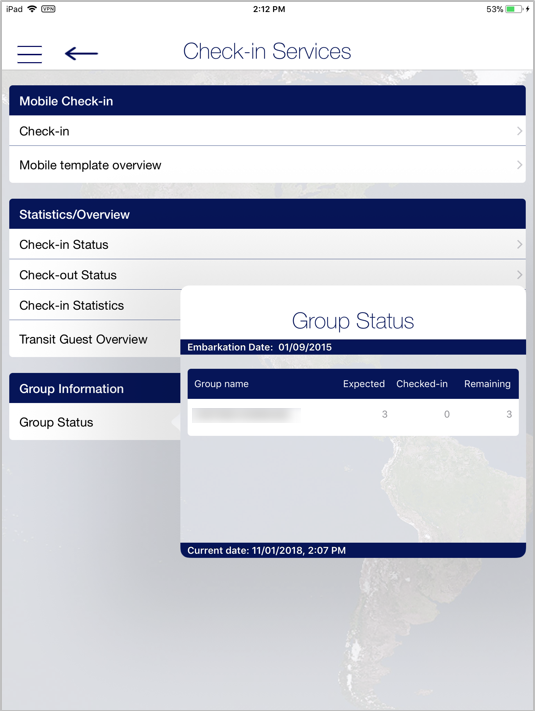
The Statistic Overview displays the Check-In Status, Check-Out Status, Check-In Statistic, and Transit Guest.
-
Check-in Status: Displays the number of reservations, actual checked-in and remaining check in.
-
Check-out Status: Displays the number of expected check out, actual check out, and remaining to check out for the day.
-
Check-in Statistic: Displays the statistic of check-in.
-
Transit Guest Overview: Lists the guests that are in transit from current cruise to the next.
Group Status
Figure 3-10 Group Information/Status
Guest Complaints/Comments
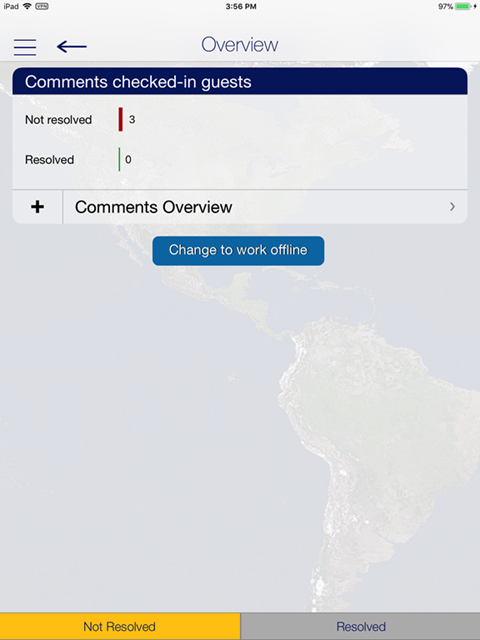
Guest Complaints/Comments provides an overview of a number of comments resolved and yet to be resolved, and adding a new comment.
Figure 3-11 Guest Complaint/Comments Page
-
On the Comments screen, press Comments Overview button.
-
Press “+” besides the Add New Comment button to start the wizard.
-
At the Guest Selection screen, search the guest from the Search Guest option and then press Save.
-
Select the Comment criteria from the Comment for section and press 2.Comment.
-
Select the Comment Code and Comment Category from the menu and press 3.Details.
-
Select an option when you are prompt to overwrite the description with the default text.
-
Enter the description and remarks in the field provided, press Return on the keyboard and select tab 3.Details.
-
At the Details + Finish screen, select the report type, urgency, sensitivity, need to resolve by, and department involved from the options list.
-
Insert the reported by, cost, and external code if any.
-
Press Finish to complete the comment.
Advanced Search
The Advanced Search function searches for comments based on the criteria entered.
-
At the Comments Overview screen, press Advanced.
-
Select the search criteria from the available options and then press Search.
-
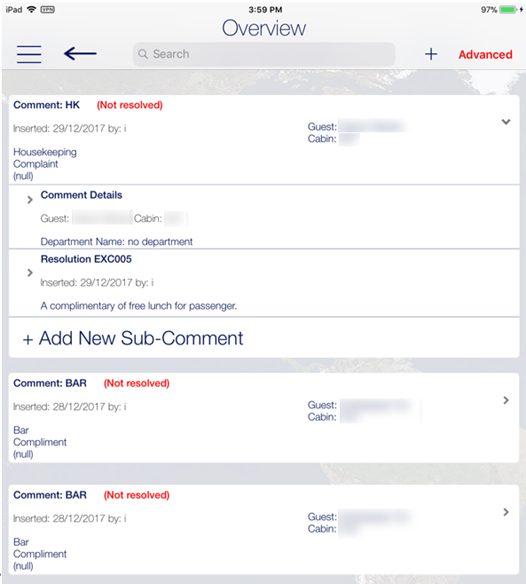
The comment summary is displayed on the Comment Overview screen. Select the comment to expand the view.
Figure 3-12 Guest Comment Overview
-
In the expanded view, press Comment Details to open the Guest Comment form. Press Edit to edit the comment.
-
To add a resolution, press Add Resolution.
-
Press Save to save the change and exit from the comment.