4 Assigning Discount Level in Quick Check-In Module
The assignment of discounts in the Quick Check-in module varies, depending on the layout.
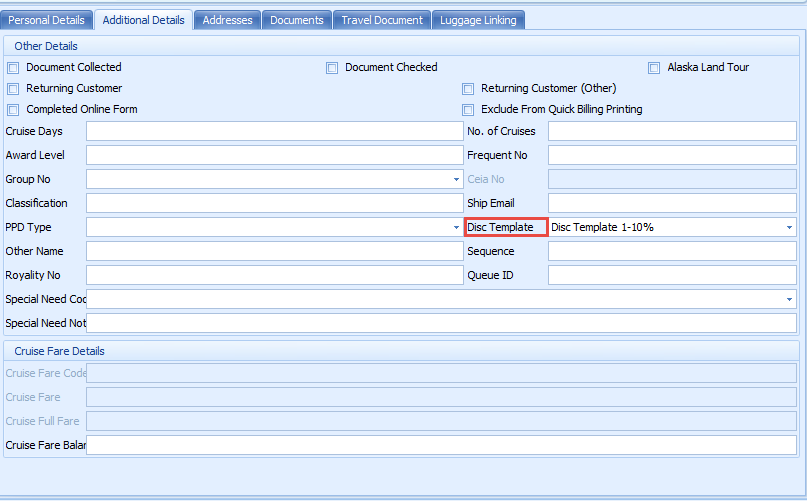
To set the Disc Template drop-down list as visible in ONE TAB, TWO TABS, or FOUR TABS format, make sure the field column UXP_A_LOYALTY is set to Visible, Editable in AQCI Setup, Field Definition, Additional Details tab.
Figure 4-1 AQCI Discount Template Field

Importing Reservation with POS Discount Level using Data Import
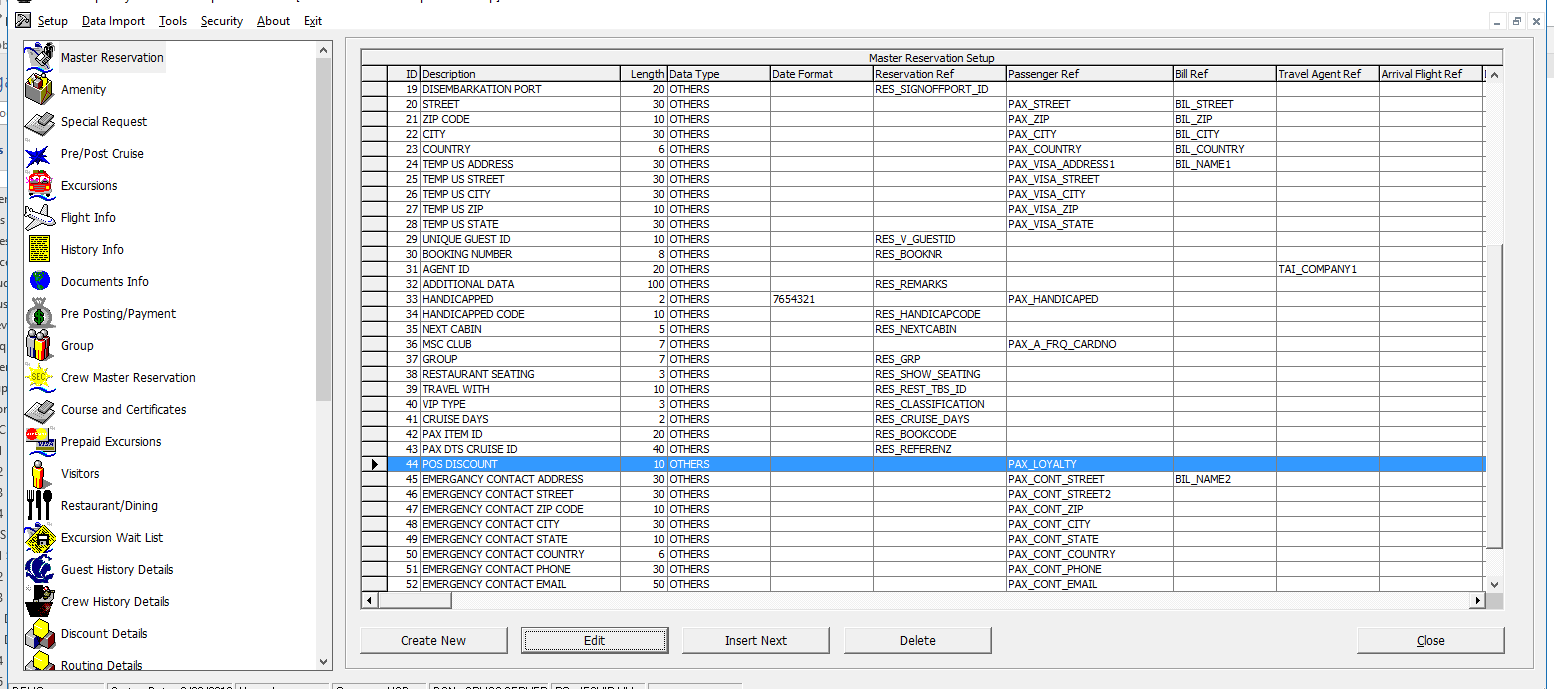
Figure 4-2 Data Import

-
Open the Data Import application.
-
In the Setup menu, select Reservation Related from the drop-down list.
-
In the Master Reservation window, select a line and click Insert Next to add a new field.
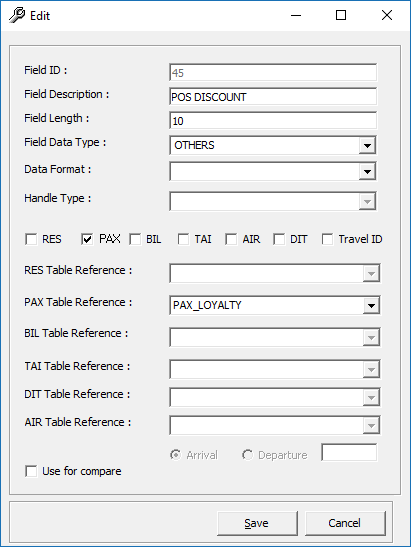
Figure 4-3 Edit Data Import Fields

-
Enter the required information.
-
Check the PAX checkbox, and in the PAX Table Reference drop-down list, select PAX_LOYALTY.
-
Click Save and click Close to exit.
Note:
The reservation manifest should contain the POS Discount code, for example, FIRST, ONE, TWO, THREE, FOUR, and FIVE for reservation with POS Discount status.