1 MICROS POS Discount Setup
-
Log in to MICROS EMC module and go to the Configurator menu.
-
Select Discounts from the System Information section.
-
Select a discount record that you want to a POS discount to apply automatically on a guest check.
-
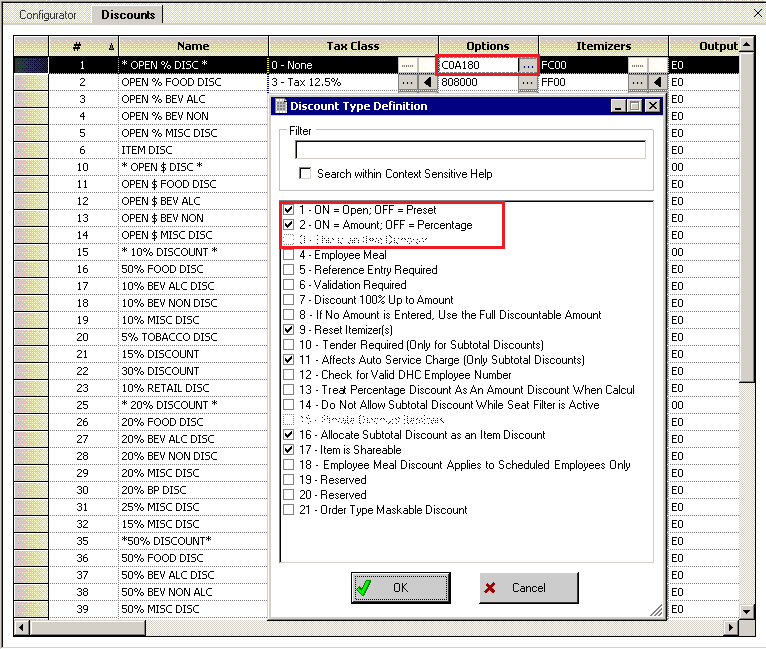
Under the Option column, click the Ellipsis (...) button to open the Discount Type Definition window.
-
Select each check box as needed.
Figure 1-1 MICROS EMC Discount Record Setup

-
1 — ON = Open OFF (Selected)
-
2 — ON = Amount OFF (Selected)
-
3 — This is an Item Discount (Deselect)
-
-
Click OK to save.
-
Launch the Administration module.
-
Go to the Administration, POS Discount, POS Discount Rate (Advance) setup window.
-
Expand the Discount Rate, select a revenue center and a MICROS Discount Record (Only Open Amount Subtotal Discount) from the drop-down list to link a discount record.
-
Click Apply to save.
Setting Up POS Discount Key
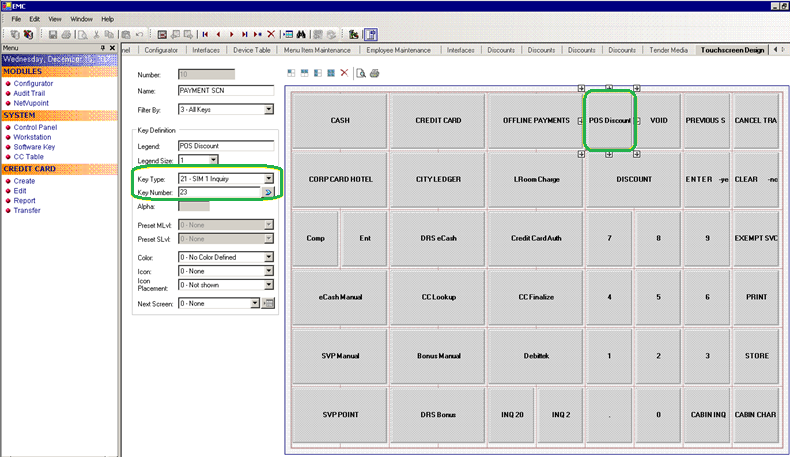
Figure 1-2 MICROS EMC Payment SCN Window

-
Log in to MICROS EMC module and go to the Configurator menu.
-
From the Touchscreens and Keyboard section, select a Workstations Design.
-
Double-click the Payment SCN to open the Touchscreen Design window.
-
Enter a new key ‘POS Discount’ on the Payment window and enter all the required details.
-
The Key Type must be set to “21 — SIM 1 Inquiry”, and enter the respective inquiry type using the below INQ number.
-
INQ 22: Loyalty Discount — Net Off Manual Discount (Discount by itemizer)
-
INQ 23: Advance Loyalty Discount — Net Off Manual Discount
-
INQ 24: Loyalty Discount (Discount by itemizer)
-
INQ 25: Advance Loyalty Discount
You can create four discount keys and assign them to a different discount handling.
-
-
Click OK to save.
Discount Itemizer Setting (PCWS)
-
Log in to MICROS SERver
-
Go to
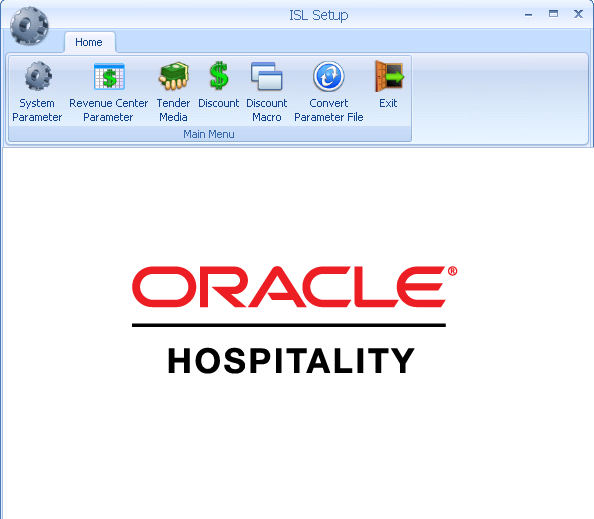
\\Micros\LES\POS\9700\etcfolder.Figure 1-3 SPMS ISL Setup Window

-
Run ISLSetup.exe.
-
Click the Discount icon on the ribbon bar to open the Discount Maintenance window.
-
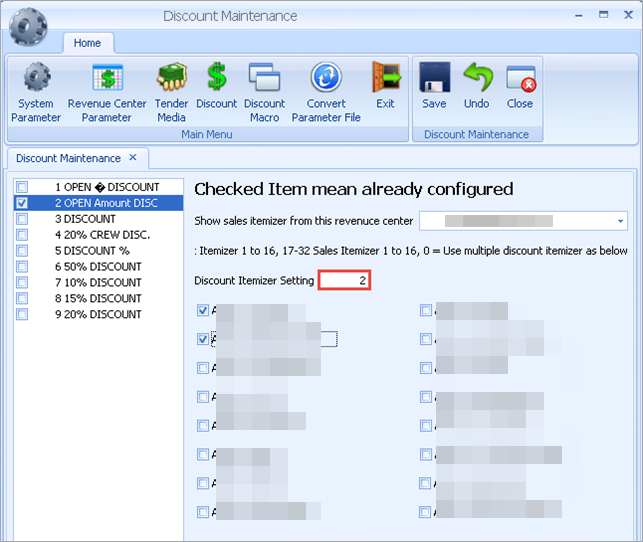
Select a discount record that has POS Discount set up in the Administration module, POS Discount Rate/POS Discount Rate (Advance) setup.
-
Enter the Discount Itemizer number of the Revenue Center sub-department code (debit) in the Discount Itemizer Settings field.
Figure 1-4 ISL Discount Itemizer Setting

-
Select the applicable Itemizer checkebox and click Save.
-
Click Close to exit the ISL Setup.