1 Setup
System Setup
Figure 1-1 Database Parameters
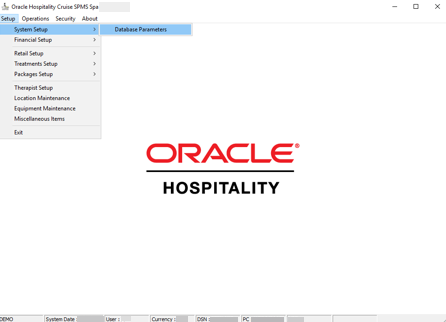
The system uses the parameters stored in the PAR table.
To update the parameters, click Administration module and choose Database Parameters from the System Setup menu.
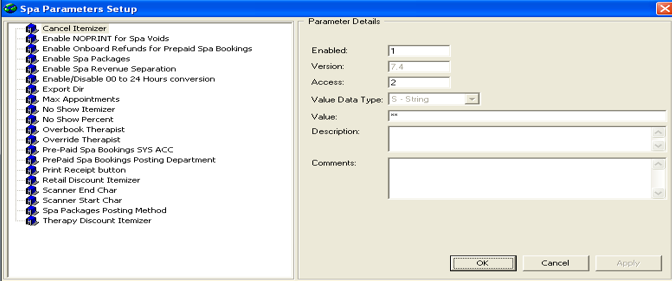
The parameters have the following definitions and acceptable values.
Table 1-1 Description of the Options that Appear on the Database Parameters
| Option | Description |
|---|---|
|
Max Appointments |
Used as the upper bound on appointments for a single day and Spa location. The parameter needed to improve processing speed by setting up the number of appointments at the start-up of the system. Suggest 500 as the initial value. |
|
Itemizers |
Appended to the partial Department ID from Location Maintenance to create a full posting department for a charge for discounts, cancellations and no shows. See Spa Itemizers and Location Prefixes Setup for more information. |
|
Start/End Scanner Characters |
Characters used by the system to determine that bar code scanner code follows. |
|
No Show Percent |
The percent of the service charge that applies to a no-show guest. |
Figure 1-2 Spa Parameters
Financial Setup
Figure 1-3 Financial Setup
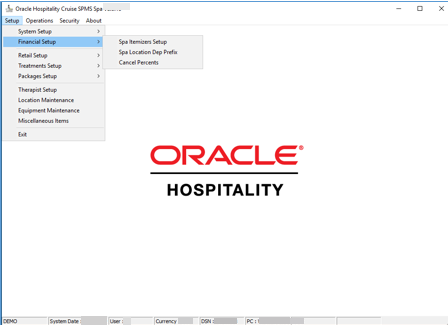
Enter the Department prefix in the first field of the Description, a description for the prefix in the second field and click Apply.
Figure 1-4 Spa Dept Prefix Setup

-
Right-click the code in the tree view.
-
Make the modifications and click Apply.
Deleting an Entry
-
Right-click the code from the tree view and select Remove.
-
A message box will display “Are you sure to want to delete this entry?” Click Yes.
Note:
Only the Spa Department Prefixes that are not in use can be deleted.Right-click on the tree view allows you to add an itemizer. To delete, you need to right-click on the itemizer then choose the option.
Retail Setup
Retail Items, Groups and Lines
Figure 1-5 Retail Setup
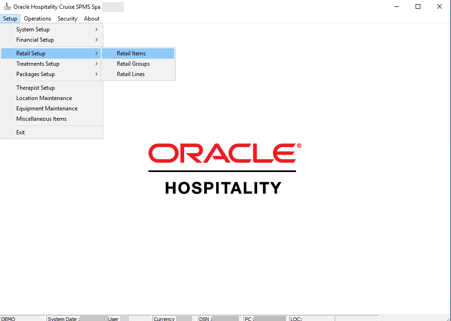
Retail Group defines the type of Retail Item. Retail Group is the Retail Line which defines the manufacturer or the sub-type of item. Retail Groups are maintained by selecting the Retail Group from the Retail Setup menu.
-
To add a new group, right-click on the tree view and select Add New from the option menu.
-
Enter the Code, Description and Comments.
-
Click OK.
-
Select the group to delete from the tree view.
-
Right-click and select Remove from the context menu.
-
Select the group from the tree view.
-
Click Update.
-
General — Displays General Information about each Retail Item.
-
Pricing & Sales — Displays Pricing Period information.
-
Bar Codes — Displays all available Bar Codes assigned to each Retail Item.
Table 1-2 Description of the Options that Appear on the Retail Lines Setup Screen
| Option | Description |
|---|---|
|
Group |
The Retail Group to which this item belongs. |
|
Shore Code |
The SKU number for this item. Based on recent discussion, this field will expand so that an unlimited number of SKU’s can be defined for an item. |
|
MMS Code |
MMS or external F&B system Item Code (Crunch Time). |
|
Active |
If this field is checked, then the item is available for sale. |
|
Name |
The short name of the item. |
|
Descriptions |
A longer name or description for the item. |
|
Line |
The Retail Line for this item. |
|
Prepaid Itemizer |
The Prepaid posting suffix for this item (For Prepaid Retail). Items imported using the Data Import module. |
Table 1-3 Description of the Options that Appear on the Retail Lines Setup Screen (Bar Codes Tab)
| Option | Description |
|---|---|
|
Bar Code ID |
Multiple Bar Codes associated with this item |
Table 1-4 Description of the Options that Appear on the Retails Lines Setup Screen (Pricing and Sales Tab)
| Option | Description |
|---|---|
|
From Date |
The starting date for a new Price. |
|
To Date |
The ending date for a new Price. |
|
Price |
The price to apply for the period specified from The Starting Date to the Ending Date. |
|
Price Grid |
A list of all active prices for this item. The item must always have a price for all dates from today through Dec 31, 2099. |
Treatment Setup
Treatment Items and Groups
Figure 1-6 Treatments Setup
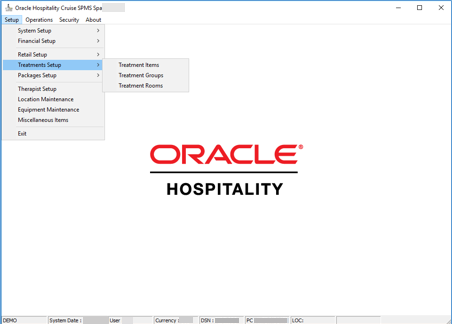
Treatments are assigned to a Treatment Group for ease of search for specific Treatments. To make changes to Treatment Groups, select Treatment Groups from the Treatments Setup menu.
-
To add a new group, right-click on the tree view and select Add New from the options menu.
-
Enter the Code, Description and Comments and then click OK.
-
Select the group from the tree view.
-
Right-click and select Remove from the context menu.
-
To update the description of a group, select it from the tree view, make any changes required and click Apply or OK.
-
To update a Treatment, select Treatment Items from the Treatment Setup menu. Treatment Group and Treatment Name tree view is displayed. Make the required changes and click Update.
-
To add or delete a treatment, right-click on the Treatment from the tree view and select Add New or Remove. To update a treament, click on the tree view and make the required change, then click Update.
Figure 1-7 Treatment Items Setup
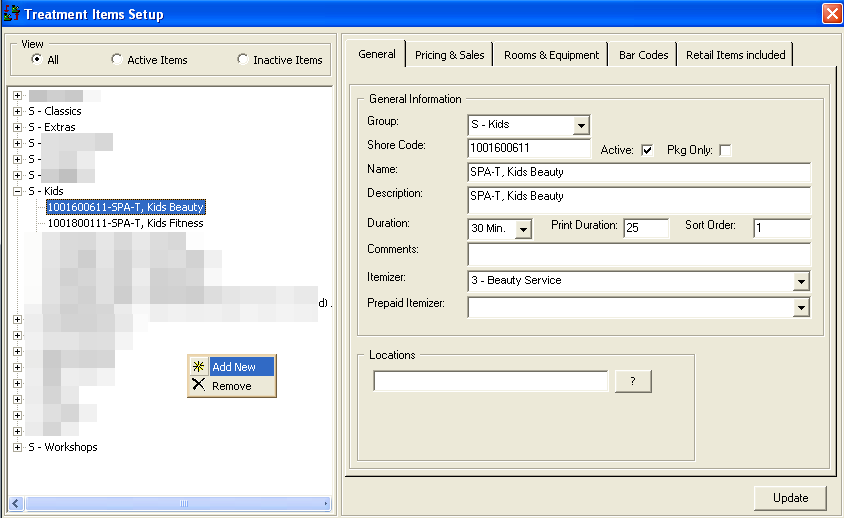
-
General — displays Pricing Periods information.
-
Pricing & Sales — displays Pricing Periods information.
-
Rooms & Equipment — displays Pricing Periods information.
-
Bar Codes — displays all available Bar Codes assigned to each Retail Item.
-
Retail Items Included — displays retail items.
Table 1-5 Description of the Options that Appear on the Retail Lines Setup Screen (General Tab)
| Option | Description |
|---|---|
|
Group |
The treatment group to which this item belongs. |
|
Shore Code |
The SKU number for this item. This field will expand so that an unlimited number of SKUs can be defined for an item. |
|
Active |
If this field is checked, then the item is available for sale. If it is not checked, then this item is no longer available for sale. |
|
Name |
The short name for the item. |
|
Description |
A longer name or description for the item. |
|
Duration |
The number of minutes to block on the calendar for this treatment. Must be devisable by fifteen (15). |
|
Print Duration |
The number of minutes to print on the guests’ reservation ticket. For example, a treatment may have a print duration of fifty (50) minutes, but sixty (60) minutes must be blocked in the Booking Calendar to account for the required cleanup of the room after the treatment is completed. |
|
Sort Order |
The order to display this treatment within a treatment group on the Booking Calendar. |
|
Comments |
Any additional comments or requirements for the Treatment. |
|
Itemizer |
The posting suffix for this item. |
|
Prepaid Itemizer |
The Prepaid-posting suffix for this item (For Prepaid Treatment Reservations imported using the Data Import module). |
Table 1-6 Description of the Options that Appear on the Retail Lines Setup Screen (Room &Equipment Tab)
| Option | Description |
|---|---|
|
Rooms |
Default Rooms assigned to be for selected treatment. |
|
Equipment |
Default Equipment and its quantities assigned to be used with selected treatment. |
Table 1-7 Description of the Options that Appear on the Retail Lines Setup Screen (Bar Codes Tab)
| Option | Description |
|---|---|
|
Bar Code ID |
Multiple Bar Codes associated to this item. |
Retail Items Included
Retail Items can either be suggested or Included based on the Include check box. Items that are suggested appear on the Suggested Item grid on the Posting form.
Figure 1-8 Pricing & Sales (Add Price)
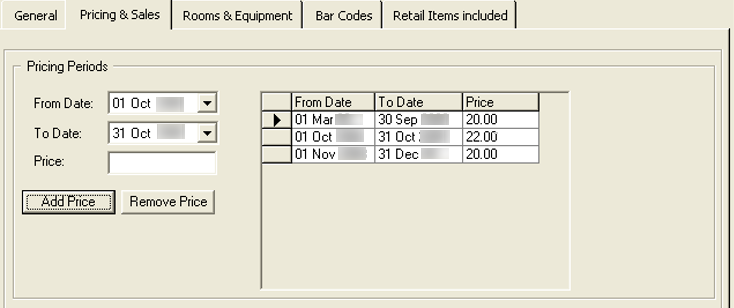
Once a price has been added to an item, you can directly update the new price in the grid for that date range by typing over the old price and clicking the Update.
Treatment Rooms
Each treatment in the Spa Management System must be assigned to a predefined Treatment Room. The application ensures that you do not over book the available rooms with bookings. For example, the system will keep track of the room availability for a specific time and then warn the crewmember making a reservation when an appointment will over book a specific room. The descriptions are updated by selecting Treatment Rooms from the Treatments Setup menu.
-
Right-click on the tree view.
-
Select Add New.
-
Click Insert.
-
Select the Room on the tree view.
-
Right-click and select Remove.
-
Click on the tree view and the information for that equipment is displayed.
-
Make the changes, if any and click Update.
Table 1-8 Description of the Options that Appear on the Treatment Rooms Setup
| Option | Description |
|---|---|
|
Code |
Short name for this room. |
|
Description |
Long name for this room. |
|
Active |
If this field is checked, then the room is available for treatment. |
|
Bookings |
If it is not checked, then this room is no longer available for treatment bookings. |
|
Comments |
Any additional comments for this room. |
Packages and Packages Groups Setup
This is the area where you create and maintain the Spa Packages.
-
To add, click Setup, Packages Setup.
-
Before you can assign any Treatment and/or Retail Items to the Package, you will need to save the Package definition by clicking the Insert. This tab contains the necessary controls to assign Treatment and/or Retail Items to the Package and maintain its package prices.
-
-
To assign a new Treatment Item to the Package, select the Item Type.
-
Choose the correct Treatment Item from the list box and click the Add Item. The selected Treatment Item will be assigned to the Package and appear onto the Packaged Items Linking grid. Repeat the above steps to assign to the Package all the necessary Treatment and/or Retail Items.
Packaged Items Price Definition
For a specific Package to be valid for sale, all items assigned to the Package must also have their Package Prices assigned separately.
To view, edit, create or remove Pricing periods, select the Item from the grid. All previously assigned Pricing periods will appear in a new grid.
-
Add the starting and ending dates of the pricing period and the price and the price and click Add Price.
-
Click Update to save all pricing definition for this item.
Therapists Setup
To maintain Spa Therapists, select Therapist Setup from the main Setup menu.
Figure 1-9 Therapist Maintenance
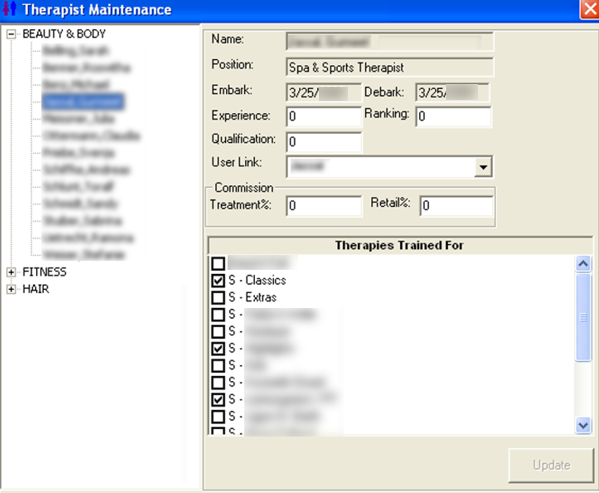
Depending on the operational positions you have assigned earlier in Location Maintenance into Crew POS, the screen will list all assigned Crew members as Therapists.
-
Qualification Level
-
Experience Level
-
Guest Satisfaction Rating
-
Assign Commission percentage (%) each therapist receives on Therapy and/or Retail sales.
-
Assign Therapies that each Crew member has the skills and is qualified to perform.
Location Maintenance
A Spa Location is associated with a main revenue area within the Spa facilities. Usually a Spa is divided between Hair/Nail, Treatments and Fitness, but some ships may have additional locations, or some may only have one (1).
The Spa location is maintained in Location Maintenance from the main Setup menu.
Figure 1-10 Location Maintenance
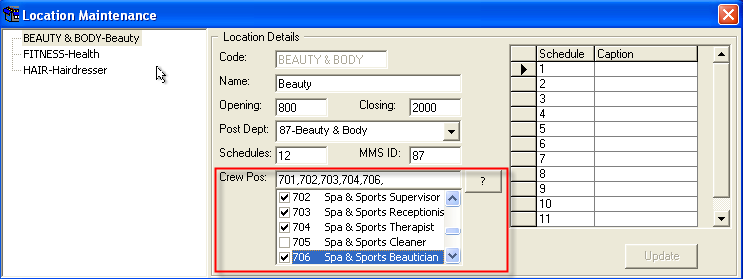
Adding a New Location Maintenance
Right-click on the tree view, select Insert, complete the form and click the Insert.
Deleting a Location Maintenance
Select on the tree view, right-click and select Delete.
Table 1-9 Description of Available Options on Location Maintenance Setup
| Option | Description |
|---|---|
|
Code |
Short name for this location. |
|
Name |
Long name for this location. |
|
Opening |
The default opening time for this location in military time without a semicolon. |
|
Closing |
The normal time for this location in military time without a semicolon. If the location closes after midnight, the system accepts time beyond 2400 as closing time in the morning of the next day. |
|
Post Dept |
The “Departmental Prefix” – SDL for this location. This code prefixes itemizers to determine the Department ID to which a change is to be posted. This is a view name to store the SPA Department Prefix. The ‘Post Dept’ in the Location Maintenance Setup search for the setup in the Financial Setup – Spa Location Department Prefix, where the setup will store in Typ_SDL. For example: Spa Dept Prefix is 87, the item charges will post into department where the POS Revenue Center = 87. |
|
Schedules |
The default number of schedules associated with this location. A schedule represents the calendar of appointments for a single therapist. |
|
MMS_ID |
MMS or external F&B system Department itemizer (Crunch time). |
|
Crew Pos |
A list of Operational Positions that are assigned to work at this location. Clicking question mark (‘?’) button will open the list-box that lists all Crew Operational Positions. Check the boxes to select the Crew Position. |
|
Schedule/Caption Grid |
For each Schedule, enter the default caption for the Schedule. This caption appears on the booking calendar to help the crew member taking reservations find a suitable therapist for a service. |
Equipment Maintenance
-
The system does not book individual resources when making an appointment. Instead, it ensures that the bookings do not overuse the available equipment.
-
Equipment descriptions are updated by selecting Equipment Maintenance from the Setup menu.
Figure 1-11 Equipment Maintenance
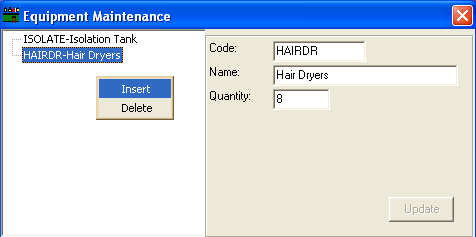
Inserting an Equipment
-
Right-click on the tree view.
-
Select Insert.
-
Complete the form and click Update.
Deleting an Equipment
-
Select the equipment on the tree view.
-
Right-click and select Delete.
Updating an Equipment
-
Click on the tree view and the information for that equipment will display.
-
Make the changes, if any, and click Update.
Table 1-10 Description of Available Options on Equipment Maintenance Setup
| Option | Description |
|---|---|
|
Code |
Short name for this equipment. |
|
Name |
Longer name for this piece of equipment. |
|
Quantity |
The number of pieces of equipment useable on board the Ship. |
Miscellaneous Items
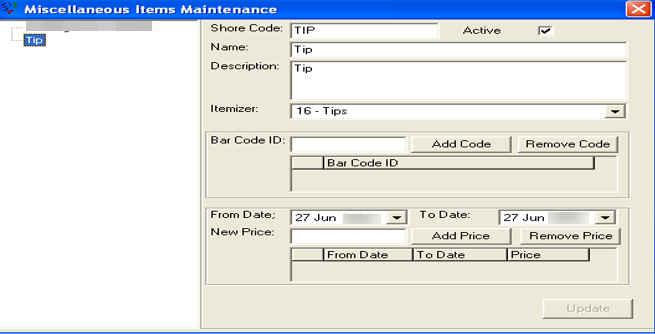
Other than the Treatment and Retail Items, the Spa module also provides the functionality to maintain and use various items that cannot be accounted for as Treatment or Retail Items, for example Tips. Such items are the various Tips that can be used in the Posting screen while posting other Treatments and/or Retail Items
Similarly, the setup of Treatments and Retail Items, which can be defined by various Bar Codes and Sales Price periods, as well as for Miscellaneous Items.
Figure 1-12 Miscellaneous Items Maintenance
