5 Event Entrance Management
Figure 5-1 Event Entrance Management
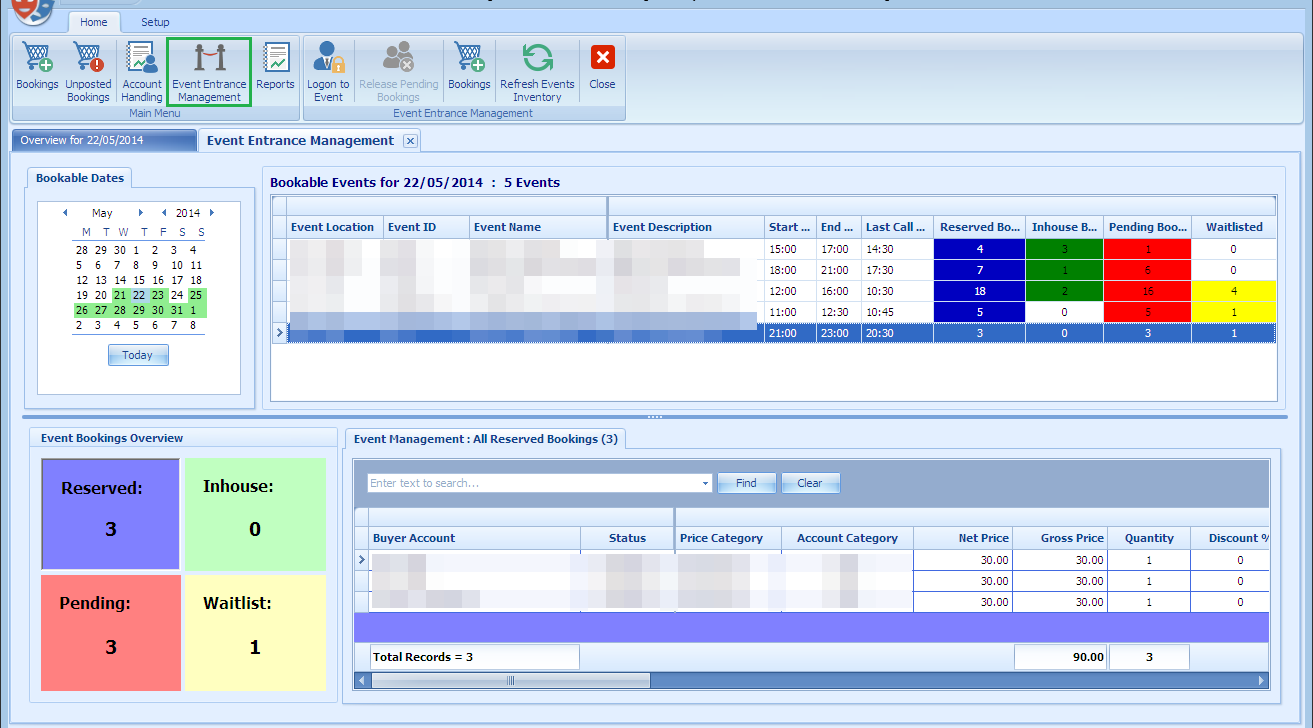
The Event Entrance Management function allow you to pre-register the guest before the show starts. Not only it allow you to release sold tickets that did not show up, it gives you the flexibility to accept and confirm the waitlist bookings. It also provides you an overview of the event by color coding the statuses such as Reserved, In-house, Pending and Waitlist, and brings up the corresponding guest list when selected.
If the event is a fixed seating type, additional columns such as Layout Level, Seating Zone, Seat Code are available in the Reserved, In House, Pending Bookings tabs. The Waitlist tab will only have two additional columns, which is the Layout Level and Seating Zone.
Registering a Guest
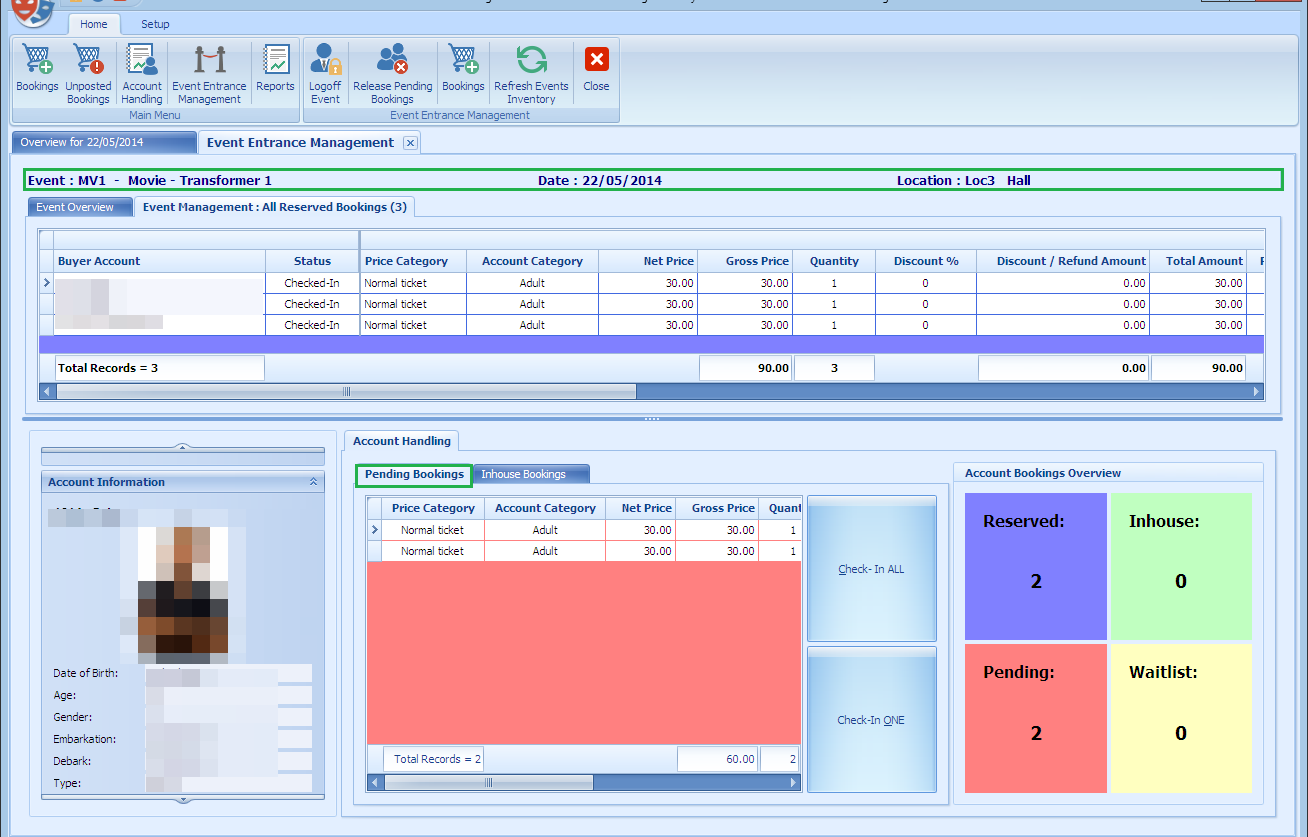
Figure 5-2 Pending Bookings
-
Select the guest cabin number.
-
The bookings list shown corresponds to the number of Reserved / Pending Bookings.
-
Select the record to Check-In.
-
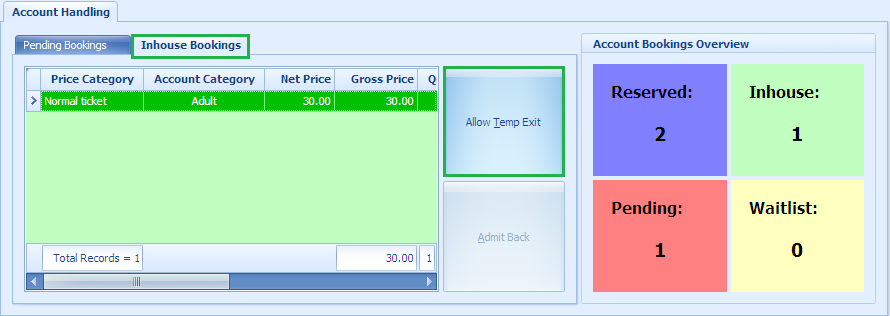
Choose either Check-In All or Check-In One. Once the guest is checked in, the number of Pending record decreases whilst the number in the Inhouse increases. The checked in tickets is displayed at Inhouse Bookings tab.
-
Selecting the Inhouse Bookings records will illuminate the Allow Tempt Exit, which permits a temporarily exit from the event.
-
Selecting the Allow Temp Exit sets the record line to red color.
-
To re-admit the guest, select the record and the click Admit Back.
Figure 5-3 Pending Booking — Inhouse Bookings Tab
Release Pending Bookings
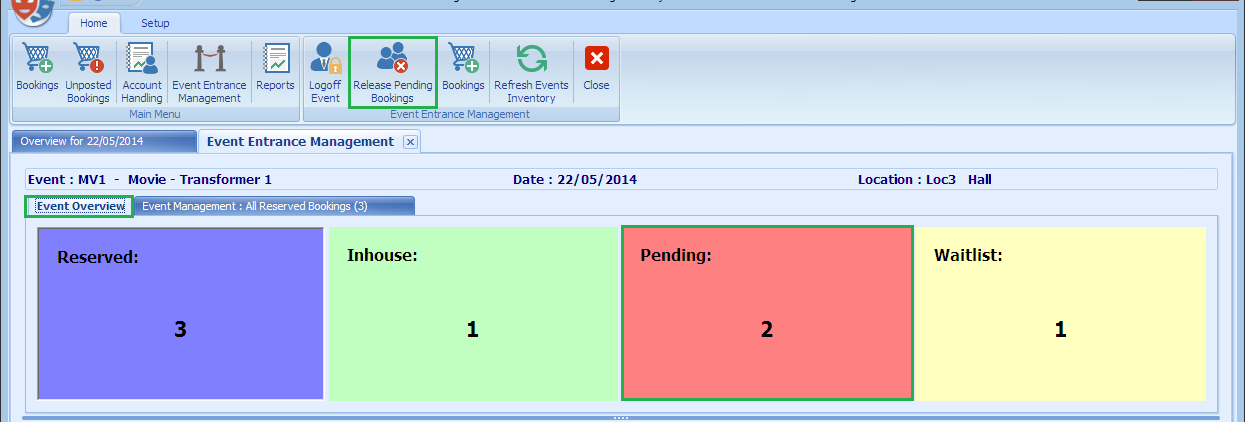
This function releases all the pending bookings of the selected event, enabling you to confirm a waitlist booking, if any.
Figure 5-4 Release Pending Bookings
-
Click the Release Pending Bookings.
-
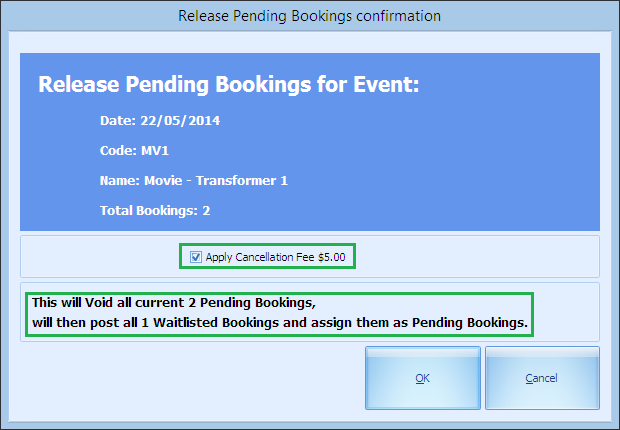
The system prompts the number of bookings to release.
-
The Apply Cancellation Fee is checked by default. Uncheck if fee is not applicable.
Figure 5-5 Release Pending Booking Fee
-
Click OK to process the release.
WARNING:
You cannot reverse the process once the system released the pending booking other than rebooking. The system will convert the Waitlisted booking to Pending, if any. -
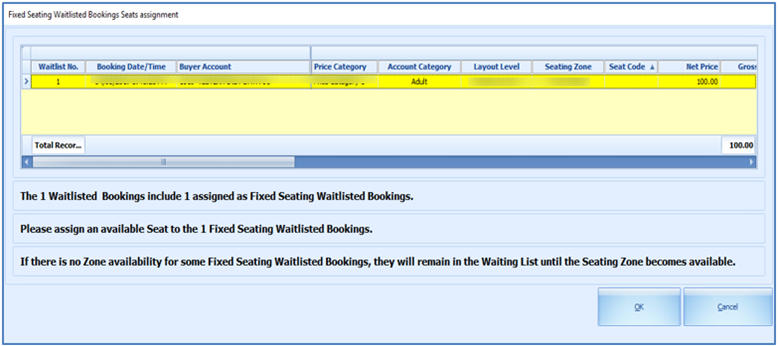
The below seat assignment window shall prompt if you are releasing booking from a Fixed Seating event.
Figure 5-6 Waitlisted Booking Seat Assignment
-
Right-click the waitlisted booking from the grid and select Assign Seat option. This launches Step 2: Select Seats wizard.
-
Proceed to select a seat and confirm the booking. This releases all pending bookings and moves the waitlisted booking to pending bookings.
-
The rules to move waitlisted booking to pending bookings is same as Free Seating event.