Configuring the Integration Broker Gateway and Target Nodes
To use the Feed Publishing Framework, you must first configure your PeopleSoft system to support feed publication and consumption.
To configure the Integration Broker gateway and target nodes:
Select
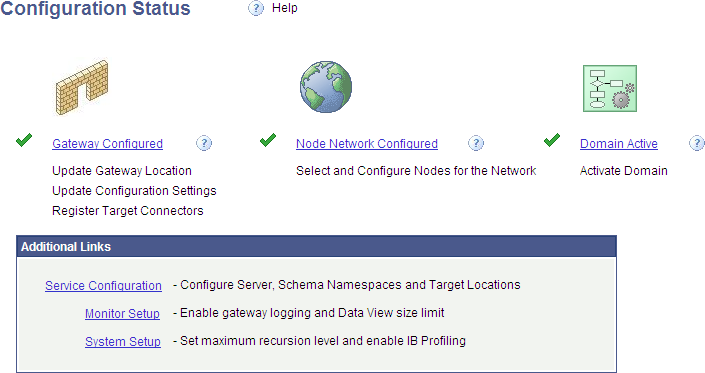
The Configuration Status page appears.
Image: Configuration Status page showing that the Integration Network is not configured
This example illustrates the fields and controls on the Configuration Status page showing that the Integration Network is not configured.
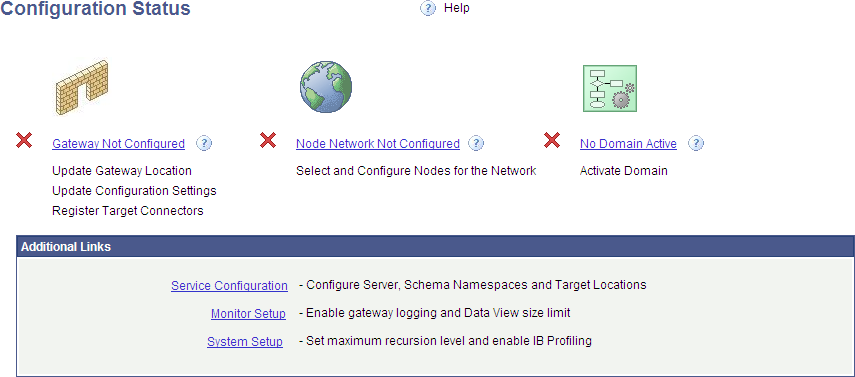
Click the Gateway Not Configured link.
The Gateways page appears.
See Verifying and Managing Integration Gateway Configuration.
Configure the integration gateway:
Enter the machine name and complete URL to the PeopleSoftListeningConnector in the Gateway URL field:
Image: Gateways page with the gateway URL configured.
This example illustrates the fields and controls on the Gateways page with the gateway URL configured.
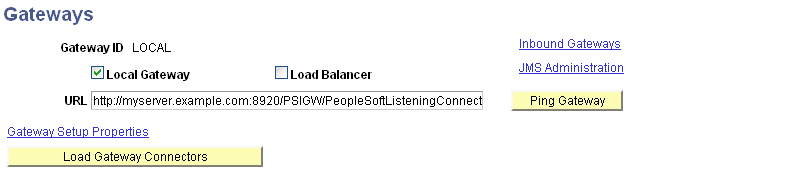
Click the Ping Gateway button.
The status should return as active.
Click the Load Gateway Connectors button to load the gateway connectors.
Image: Gateways page with connectors loaded
This example illustrates the fields and controls on the Gateways page with connectors loaded.
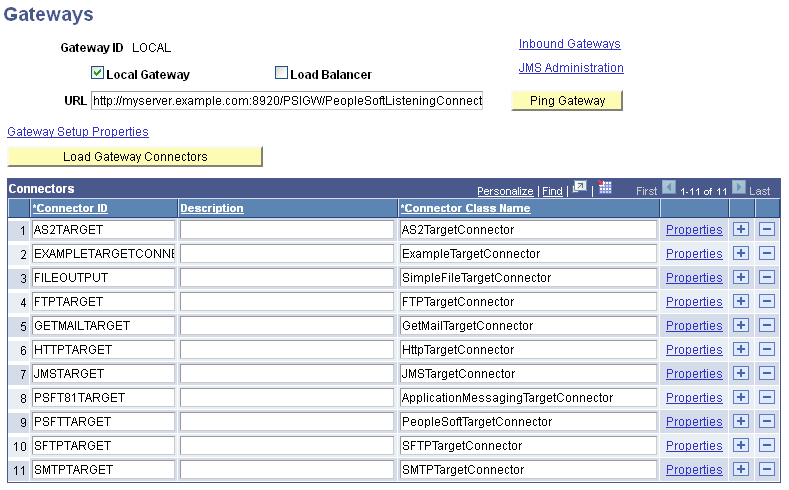
Click the Save button to save your changes.
Click the Gateway Setup Properties link.
Log in on the Gateway Properties page.
The PeopleSoft Node Configuration page appears.
See Setting Oracle Jolt Connection Properties.
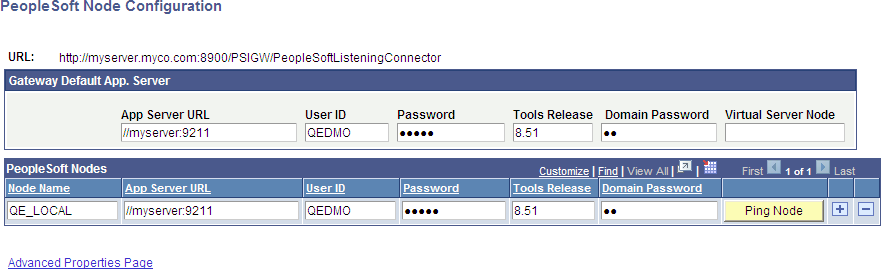
Enter values for your environment. Enter a default target node in the Gateway Default App Server group box and the local target node in the PeopleSoft Nodes group box.
Image: PeopleSoft Node Configuration page
This example illustrates the fields and controls on the PeopleSoft Node Configuration page.
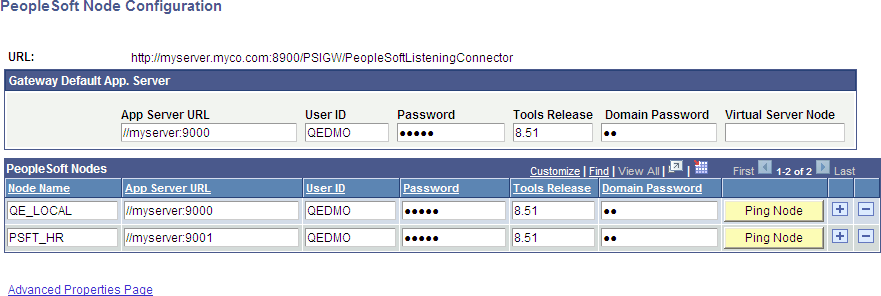
For a shared gateway, also enter remote target nodes (the default local node on the remote system) in the PeopleSoft Nodes group box.
Image: PeopleSoft Node Configuration page (shared gateway configuration)
This example illustrates the fields and controls on the PeopleSoft Node Configuration page with a shared gateway configuration.
Click the Save button.
Click the Ping Node button for each node.
The status should return as success.
Note: If you receive an Integration Broker authentication error, the default local node requires that the authentication option be set to password or certificate. See the troubleshooting topic for more information.
On the Ping Node Results page, click the Return button.
On the PeopleSoft Node Configuration page, click the Advanced Properties Page link.
The Gateway Properties page appears.
See .
Enter the full path to the keystore file and enter the encrypted keystore password:
Image: Gateway Properties page
This example illustrates the fields and controls on the Gateway Properties page (setting the keystore location and encrypted password).
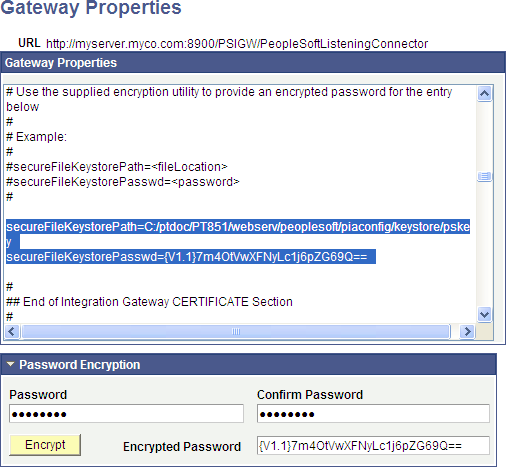
See Configuring Security and General Properties, Encrypting Passwords.
Click the OK button.
On the PeopleSoft Node Configuration page, click the Save button again.
Click the OK button.
On the Gateways page, click the Return to Configuration Status link.
The information on the Configuration Status page should indicate that the gateway is now configured.
The Configuration Status page might also indicate that the node network is configured. If the default local node is the only Integration Broker node that has been configured, then the Configuration Status page will indicate that the node network is complete. If additional Integration Broker nodes have been configured, then the Configuration Status page will indicate that the node network is not complete. However, for feed publishing and consumption, it is not necessary to complete the node network.
Click the No Domain Active link.
The Domain Status page appears.
Image: Domain Status page
This example illustrates the fields and controls on the Domain Status page with no active domains.
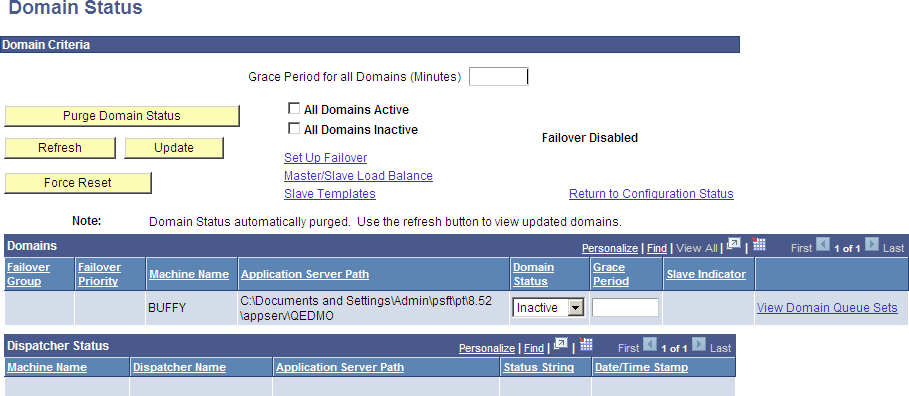
In the Domains group box, set the status for this machine to Active.
Also in the Domains group box, set the status for any pub/sub domains to Active to support scheduled feeds.
Note: The pub/sub domain must be enabled first in the application server configuration through psadmin.
Click the Update button to update the domain status.
Return to the Configuration Status page.
The status should show that all steps have been completed and that your gateway and Integration Network are configured.
Image: Configuration Status page
This example illustrates the Configuration Status page showing a completed configuration.