Setting Up Report Requests
This section describes how to:
Create report requests.
Configure delivery templates.
Use portal folders.
Copy report requests.
Set advanced options.
To access the nVision Report Request page (NVS_REPORT_RQST):
Select from PIA.
The Report Request search page appears.
Search for an existing business unit, or enter a new one.
The nVision Report Request page appears.
Image: nVision Report Request page
This example illustrates the fields and controls on the nVision Report Request page.
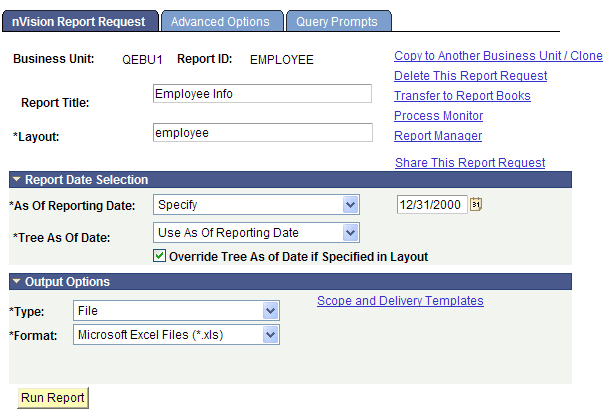
By default, report requests you create are secure, meaning that they are available only to you and to any users or groups you assign. You can make a report request public and allow access to any user.
The report request security options are configurable using the PeopleTools Options page.
See Creating Report Requests, Securing and Sharing Report Requests in PIA, PeopleTools Options.
Searching Report Requests
When you search for report requests, the search returns only the reports to which you have access. These include your own report requests, any to which you have been given access by other users, and any that are public.
Use the nVision File / Printer Output page (NVS_RQST_FILE_SBP) to configure the nVision delivery templates.
To configure nVision delivery templates:
Select from PIA.
Search for an existing business ID, or enter a new one.
Click the Scope and Delivery Templates link on the nVision Report Request page.
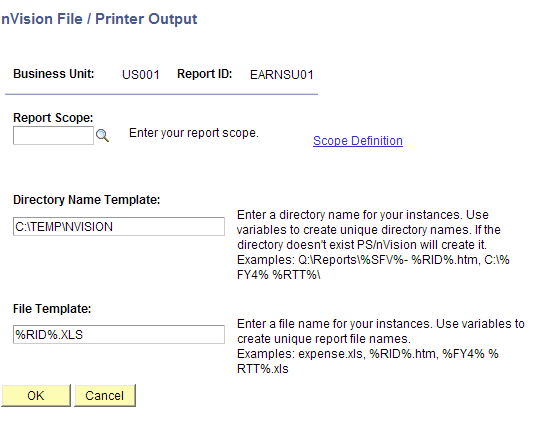
Image: nVision File / Printer Output page
This example illustrates the fields and controls on the nVision File / Printer Output page.
Using the Retention Day in the nVision Web Output Page
Report retention days are the number of days a report is stored in the report repository before it is expired and purged by the purge process. Beginning from PeopleTools 8.51, you are able to set the values of retention days for:
nVision reports at different level: System Settings page, Process Level, Process Type, and Job.
nVision reports that have the Web output type when you run Report Book.
An individual nVision report request (that has the Web output type) in PIA using the nVision Web Output page.
nVision drilldown reports using the System Settings page and the process type DRILLDWN.
See “Setting the Value of Retention Days for Drilldown Reports” in Using the PS/nVision DrillDown on the Web and “Using the Retention Day in the nVision Web Output Page” in Setting Up Report Requests.
Note: The value of retention days for a Report Request is inherited by all the report instances that are created by the scope attached to the report. The value of retention days set at the Report Request level overrides the settings at the Process Type, Process, Job, and System Settings levels.
The value of retention days set at the Distribution Detail page overrides the value of retention days set at the Report Request page.
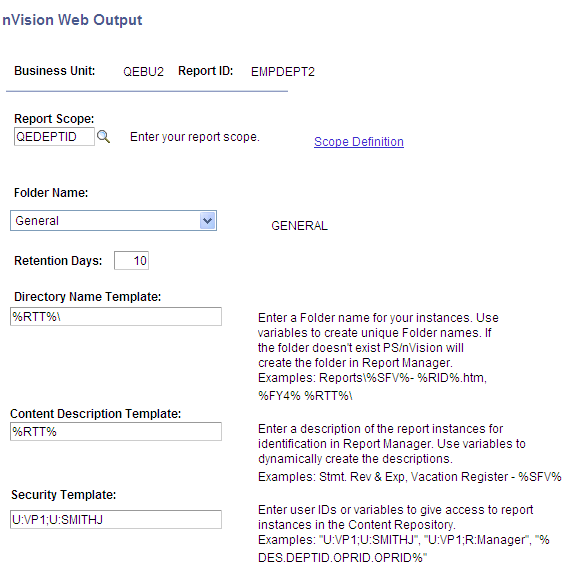
Image: nVision Web Output page
This example illustrates the fields and controls on the nVision Web Output page (NVS_RQST_WEB_SBP).
To set the value of the retention days using the nVision Web Output page:
Select from PIA.
Search for an existing business ID, or enter a new one.
The nVision Report Request page appears.
In the Type drop-down list box, select the Web option.
In the Format drop-down list box, select the Microsoft Excel File (.xls) option.
Click the Scope and Delivery Templates link.
The nVision Web Output page appears.
Enter an appropriate value in the Retention Days field.
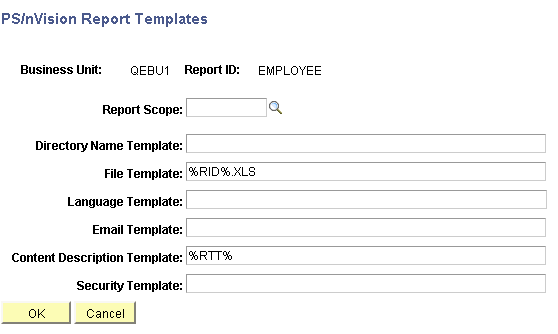
Report request template options enable you to use PS/nVision variables or static text to specify report delivery options, including using portal folders. Using the nVision File / Printer Output page, you can also specify scope fields to personalize reports. Template options are displayed dynamically based on your output type on the PS/nVision Web Output page—only the options that you must specify for that output type appear. By combining scope and DES variables in templates, you can have different instances of the same report delivered to different email addresses, or posted to individual users in Report Manager.
To see all available template options:
Select from PIA.
Search for an existing business unit, or enter a new business unit.
Select the Advanced Options tab from the nVision Report Request page.
Click the Scope and Delivery Templates - View All link from the nVision Report Request – Advanced Options page.
The PS/nVision Report Templates page appears.
Image: PS/nVision Report Templates page
This example illustrates the fields and controls on the PS/nVision Report Templates page (NVS_RQST_TEMPL_SBP).
You can use portal folders to organize nVision report results into meaningful groups. When creating a report request with the output option of Web or Window, you can select the top level folder, and then define a subfolder where the report result will be posted. Sub-folders can be created dynamically by using nVision variables to generate the folder names, or statically by entering the actual folder name. Sub-folders are created under the selected top level folder and can be viewed from Report Manager.
To create a subfolder in PIA:
Select
Enter report request information.
Select the Web or the Window option as the type in the Output Options section.
Click the Scope and Delivery Templates link to display the nVision Web Output page.
Select the Top Level Folder option from the Folder Name drop-down list.
Enter the name of your subfolder in the Directory Name Template field.
You can use variables to create unique folder names. If the folder does not exist, PS/nVision creates the folder in Report Manager. For example,
Reports\%SFV%- %RID%\My
Folder\Finance Reports
.
Selecting Portal Folders
You can select portal folders from:
Distribution Detail page.
Select report request and run report. Change Output Type to Web or Window, and then click the Distribute To icon.
Scope and Delivery Templates - nVision Web Output page.
Process Definition page.
Select
Select Process Type as nVision-Report and enter NVSRUN as the Process Name.
Select the Destination tab.
Note: Sub-folders can only be created from the Enter Delivery Options - nVision Web Output page.
At runtime, Process Scheduler creates the top-level folder based on the following priority order:
Distribution Detail page.
Enter delivery Options - nVision Web Output page.
Process Definition page.
If a folder has not been selected on any of the above pages, Process Scheduler will use the default folder defined by the administrator.
To access the Copy Report Request page (NVS_RQST_BUCPY_SBP):
Select
Enter report request information.
Select the Copy to Another Business Unit/Clone link from the nVision Report Request page.
The Copy Report Request page appears.
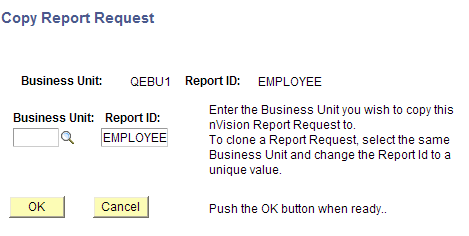
Image: Copy Report Request page
This example illustrates the fields and controls on the Copy Report Request page. Definitions for the fields and controls appear following the example.
|
Field or Control |
Definition |
|---|---|
| Business Unit |
Select a business unit to copy the report request to. To clone the request, select the same business unit as the original request. |
| Report ID Text Box |
Enter a new report ID to copy the report request to another business unit. To clone the request, enter the same report ID. |
Security and Copying Report Requests
When you copy a secure report request, all the groups and users associated with that request are copied from the original request to the new copy:
If you copy a report request to another existing report request, the existing request must either be public or you must have access to it.
If you do not have access, an error message will display.
If you copy a report request to another report request, only those users and groups with access to the original will have access to the target after the copy.
Any users or groups who had access to the target prior to the copy but not the original are removed from the access list; if you want them to have access, you must reassign it after the copy is complete.
For example, assume users A and B have access to Report Request 1, and users A and C have access to Report Request 2. If User A copies Report Request 1 to Report Request 2, then following the copy only users A and B will have access to Report Request 2—user C no longer has access.
Use the nVision Report Request – Advanced Options page (NVS_REPORT_RQST3) to change high level specifications for your report request.
Navigation
Select
Enter report request information.
Select the Advanced Options tab from the nVision Report Request page.
Image: nVision Report Request – Advanced Options page
This example illustrates the fields and controls on the nVision Report Request – Advanced Options page.

Use the Query Prompts page (PTNVSREPORTRQST4) to view all run-time parameters of queries that are used in the layout.
Note: The Query Prompts page is available if the Report Layout uses query as data source.
Navigation
Select in PIA.
Select an existing report or add a new one.
Select the Query Prompts tab.
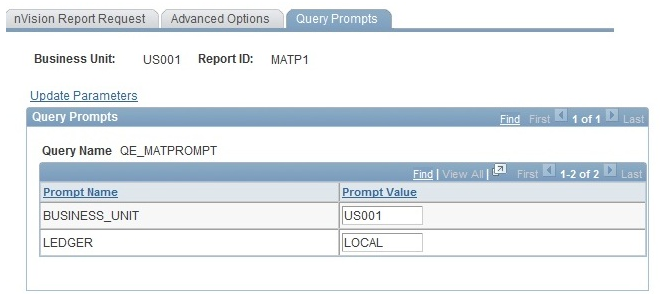
Image: Query Prompts page
This example illustrates the fields and controls on the Query Prompts page. Definitions for the fields and controls appear following the example.
|
Field or Control |
Definition |
|---|---|
| Update Parameters |
Click to access a subpage where you can update the query prompts values with the most updated parameters of the query. The Update Parameters link does not appear when the user creates and saves a new query based nVision Report Layout. Do one of the following after creating and saving a new query based nVision Report Layout:
Thereafter, the Update Parameters link appears in the Query Prompt section and the user can run the layout by clicking on this link. |
| Prompt Value |
Enter prompt values that are used for mapping the parameter with the query at runtime. |
A query report that runs from PIA and requires run-time prompt input may receive the following errors:
Missing bind value.
Indicates that the query used in the report layout is modified or a different query was used (there are mismatches between prompt details).
Empty bind value.
Indicates that an empty value was provided for a prompt in PIA.
Invalid bind value.
Indicates that there is an invalid value for a prompt.