Specifying User Profile Attributes
This section discusses how to:
Set general user profile attributes.
Set ID type and attribute value.
Set roles.
Specify workflow settings.
View when a user profile was last updated.
Display additional links.
Run user ID queries.
Access the User Profiles - General page (select and click the General tab).
Image: User Profiles - General page
This example illustrates the fields and controls on the User Profiles - General page.
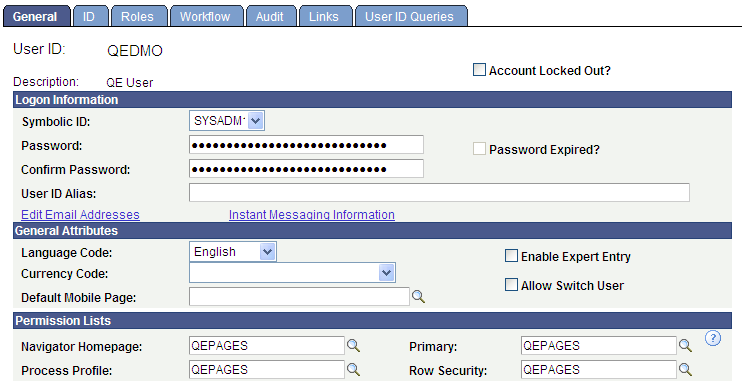
Logon Information
|
Field or Control |
Definition |
|---|---|
| Account Locked Out? |
Select this check box to deactivate a user profile for any reason. The user cannot sign in until you have deselected this option. Note: The system automatically selects this check box if you are using password controls and the user exceeds the maximum number of failed logon attempts. The administrator needs to manually open the user profile and deselect this check box to reinstate the user. |
| Symbolic ID |
Enter a value to retrieve the appropriate encrypted access ID and access password. This value determines which access ID and password are used to log the user onto the database after the system validates the user ID. The access ID is required only when a user needs to connect directly to the database (in two-tier), and when users submit jobs using Process Scheduler. The access ID is not required with the portal or if you use a Lightweight Directory Access Protocol (LDAP) directory server to manage user IDs. With PeopleSoft Pure Internet Architecture, the application server maintains the connection to the database, so the application server must submit an access ID. |
| Password and Confirm Password |
Enter the password string that the user must supply when signing in. The value in the Confirm Password field must match that in the User Password field. The maximum password length is 32 characters. Note: These values are required to sign in to the system, but you can save the profile without populating these fields. |
| Password Expired? |
If you are using PeopleSoft password controls, this option enables you to force users to change their passwords in the following situations:
Note: To use this option, you must enable the Password Expires in 'x' Days PeopleSoft password control. When a user's password has expired, the Password Expired check box becomes enabled and selected. By deselecting the check box and saving the change, you can renew the password, although we do not recommend this practice. |
| User ID Alias |
Enter a fully qualified email ID (email address) as a user ID alias. For example, tom.x.sawyer@oracle.com could be the user ID used to sign in to the system. The maximum character length is 70. |
| Edit Email Addresses |
If a user is part of the workflow system or you have other systems that generate email for users, click this link to enter an email address for a user. You can enter multiple email addresses for a user, but you must select one as the primary email address. The system allows only one email address per type. For example, you cannot enter two home email addresses. The Email Addresses interface has the following controls:
|
General Attributes
|
Field or Control |
Definition |
|---|---|
| Language Code |
Select a value. The language code on the User Profile page has a limited use. For example, when a user runs a batch job, the system needs to know in which language to generate the reports for the user who submitted the job. In PeopleSoft Pure Internet Architecture, the user’s language preference is based on the selection that the user makes on the signon page. For Microsoft Windows workstations, the user’s language preference is derived from the Display tab in PeopleSoft Configuration Manager. For the Microsoft Windows environment, the value specified as language code in the user profile acts as a default in case the language code is not specified in PeopleSoft Configuration Manager. |
| Currency Code |
If the user works with international currencies, select a currency code to reflect the native or base currency. Values will appear in the currency with which the user is familiar. |
| Default Mobile Page |
Select the mobile homepage that should appear after users sign in to their mobile device. Important! PeopleSoft Mobile Agent is a deprecated product. These features exist for backward compatibility only. |
| Enable Expert Entry |
Select to specify that some users, such as expert or power users, can defer all processing of the data that they enter. This selection enables users to reduce the number of trips to the server for data processing, regardless of how the developer set field deferred or interactive processing. You enable this option in a component in Application Designer, and you specify which users have this option using the Enable Expert Entry check box. Deselect this check box to prevent a user from specifying deferred processing. |
| Allow Switch User |
Select this option to designate users who can change identities in a PeopleSoft system. This feature applies only when accessing PeopleSoft applications using a browser; it has no effect on two-tier or three-tier connections. The default for this feature is hidden. You display this check box by changing the Enable Switch User options on the PeopleTools Options page. |
Permission Lists
|
Field or Control |
Definition |
|---|---|
| Navigator Homepage |
Enter a value associated with PeopleSoft Workflow. |
| Process Profile |
Displays a value that contains the permissions that a user requires for running batch processes through PeopleSoft Process Scheduler. For example, the process profile is where users are authorized to view output, update run locations, restart processes, and so on. Note: Only the process profile comes from this permission list, not the list process groups. |
| Primary and Row Security |
Displays which data permissions to grant a user by examining the primary permission list and row security permission list. Which one is used varies by application and data entity (employee, customer, vendor, business unit, and so on). Consult your application documentation for more details. The system also determines mass change (if needed), and definition security permissions from the primary permission list. |
Access the User Profiles - ID page (select and click the ID tab).
Image: User Profiles - ID page
This example illustrates the fields and controls on the User Profiles - ID page.
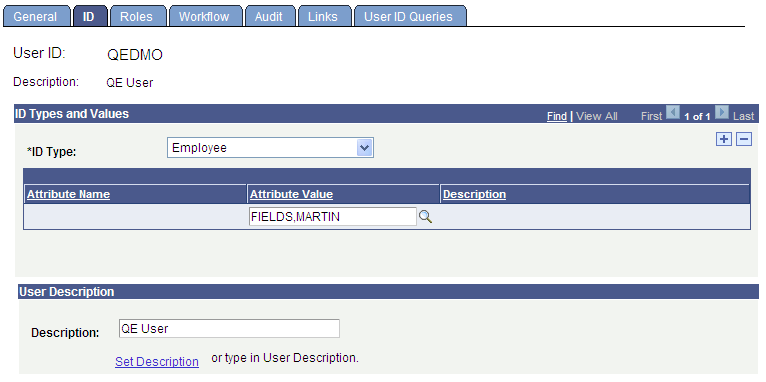
ID Types and Values
|
Field or Control |
Definition |
|---|---|
| ID Type and Attribute Value |
Select the ID type and attribute value. Separating user profiles by ID type enables you to have multiple categories of user profiles with ID numbers all within a range of 1–1000, for example, and it also enables you to grant data permission by entity (customer, employee, and so on). When users sign in to your benefits or payroll deductions application, they see only information that applies to them. A user profile is a set of data about an entity—a user—who interacts with the system. The human resources (HCM) system, which keeps track of your employee data, is designed to focus more on your employee user types. On the other hand, your financials system is designed to keep track of customer and supplier user types. ID types enable you to link user types with the records that are most relevant when a user interacts with the system. In the Attribute Value field, select the value associated with the attribute name. In this case, the value reflects the employee number, but it could be a customer number or vendor number. |
User Description
The User Description section enables you to help identify the user.
|
Field or Control |
Definition |
|---|---|
| Description |
Add a description, such as the name of an individual or an organization, for the user profile. |
| Set Description |
Click this link to populate the field with a description from the database. |
Note: Before you assign a user type to a user, you must create user types.
Access the User Profiles - Roles page (select and click the Roles tab).
Image: User Profiles - Roles page
This example illustrates the fields and controls on the User Profiles - Roles page.
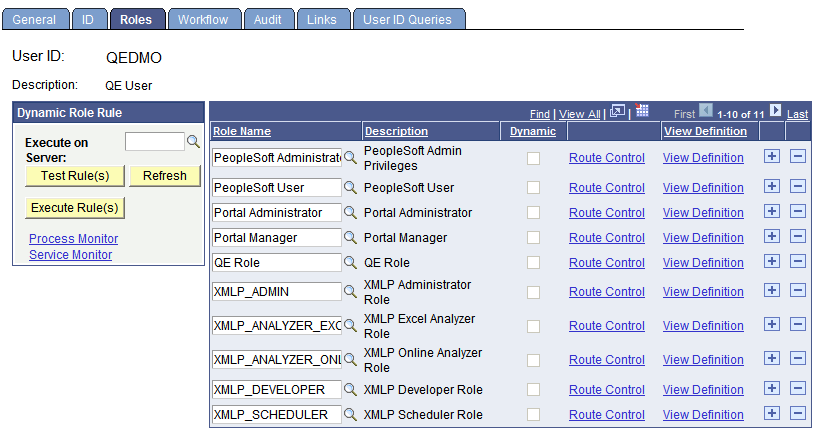
Note: You cannot overwrite roles in the Roles grid. To add a role click the Add Row button (+). To delete a role click the Delete row button (-).
|
Field or Control |
Definition |
|---|---|
| Role Name |
Displays the name of the role added to the user profile. |
| Description |
Displays a description of the role added to the user profile. |
| Dynamic |
Selected if the system assigned a particular role dynamically. |
| Route Control |
Specify a route control profile for each role assigned to a user. For example, suppose that you have a role named EXPENSE_REP. If you want a particular expense representative to handle all of the expense reports submitted by people whose last names begin with A, you could assign the user a specific route control profile to send the user reports submitted by individuals with last names beginning with A. |
| View Definition |
Click to view the role definition associated with this user profile. |
See Understanding Route Control Development.
See Using the PeopleSoft Administrator Role.
Dynamic Role Rule
Use these options to test and manually carry out business rules for dynamically updating roles and assigning them to user profiles. You design your role rules using Query Manager, PeopleCode, or LDAP directory rules.
|
Field or Control |
Definition |
|---|---|
| Execute on Server |
Select the Process Scheduler server that should run your role rule. |
| Test Rule(s) |
Click to test the rules and verify if they will produce the desired results for a particular user. None of the roles are actually assigned, but the system provides you a report as to what roles will be assigned when you run the rule. Note: The Test Rules button returns total number of members that are assigned both statically and dynamically. Therefore, the count of dynamic members assigned via the Execute Rule may not match the count that the Test Rules button returned. |
| Execute Rule(s) |
Click to launch the DYNROLE_PUBL application engine program, which executes the rule(s). The application engine program runs through PeopleSoft Process Scheduler. After the DYNROLE_PUBL application engine program runs the rule, it publishes a message, ROLESYNCHEXT_MSG, that contains a list of users in the role. Note: The successful completion of the dynamic roles program does not ensure that your roles were updated; the associated message must also be published successfully. You can also execute dynamic role rules for all roles and users. |
| Process Monitor |
Click to view the status of the DYNROLE_PUBL application engine program in the Process Scheduler Monitor. |
| Service Monitor |
Click the link to check the status of the publication of the ROLESYNCHEXT_MSG message in the Service Operations Monitor. |
Access the User Profiles - Workflow page (select and click the Workflow tab).
Image: User Profiles - Workflow page
This example illustrates the fields and controls on the User Profiles - Workflow page.
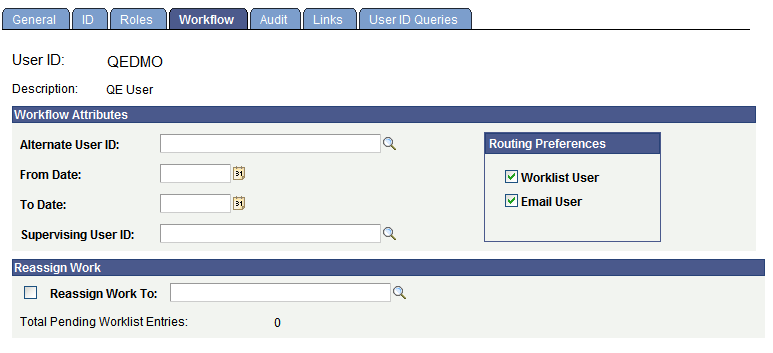
Workflow Attributes
|
Field or Control |
Definition |
|---|---|
| Alternate User ID |
Select an alternate role user to receive routings sent to this role user. Use this option when the role user is temporarily out (for example, on vacation or on leave). If the field contains a role user name, the system automatically forwards new work items for whoever is assigned as the current role user to the alternate role user. Note: The system forwards new work items to the alternate role user. It does not reassign items already in the user’s worklist. Note: When applying an alternate user ID in your workflow settings, make note of the fact that the system only sends workflow routings to the immediate alternate user ID. The system does not send routings down multiple levels of alternate user IDs. For example, assume user A specifies user B as the alternate user ID while user A is out of the office. Also assume that user B is out of the office at a time during user A’s absence, and user B specifies user C as an alternate user ID for this time. In this case, the system does not send workflow routings originally intended for user A to user C. Note: The Alternate User ID routing functionality works only with role-based applications, such as Virtual Approver (VA) Workflow in PeopleTools, and Enterprise Component Approval Framework. In VA Workflow, the route is to roles, not specific users. And where the Enterprise Component Approval Framework worklist uses roles, the Alternate User ID routing functionality works. The workflow field mapping must be mapped to a role or a role query in order for alternate user to work. |
| From Date and To Date |
Enter the date on which the current role user is going to begin and return from a temporary vacancy. This field specifies the time period that the alternate user ID is used. |
| Supervising User ID |
Select the user ID of the user’s supervisor from this drop-down list box. The system uses this value when it needs to forward information to the user’s supervisor. The system uses the JOB record to determine the user’s supervisor. Note: If you are using PeopleSoft Human Capital Management (PeopleSoft HCM) applications, this field should not appear. If it does, you must set your workflow system defaults. |
| Routing Preferences |
Specify the routing types that this role user can receive. The Routing Preferences box shows the two places where the system can deliver work items: to a worklist or to an email mailbox. If the user does not have access to one or both of these places, deselect the check box. For example, if this person is not a PeopleSoft user, deselect Worklist User. |
Reassign Work
|
Field or Control |
Definition |
|---|---|
| Reassign Work To |
Use to reassign pending work for this role user if positions change or a user is temporarily out, such as on leave or on vacation. If this user has work items waiting (as shown by the Total Pending Worklist Entries in your Workflow interface), select this check box and select the user to whom work items should be forwarded from the drop-down list box. When you save the page, the system reassigns existing worklist entries to the specified user. Note: If you don’t reassign pending work items, they remain unprocessed. |
| Total Pending Worklist Entries |
Displays the number of worklist items that require a user's attention. |
Access the User Profiles - Audit page (select and click the Audit tab).
Image: User Profiles - Audit page
This example illustrates the fields and controls on the User Profiles - Audit page.
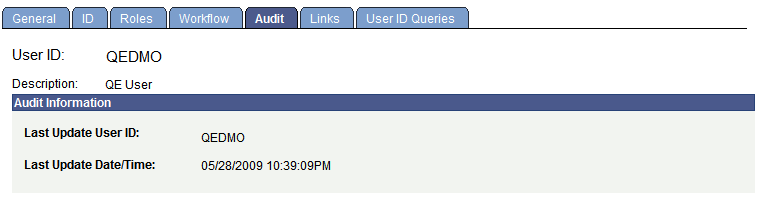
The User Profiles - Audit page is a display-only page that lists:
When a profile was last updated.
Who updated the profile.
Access the User Profiles - Links page (select and click the Links tab).
Image: User Profiles - Links page
This example illustrates the fields and controls on the User Profiles - Links page.
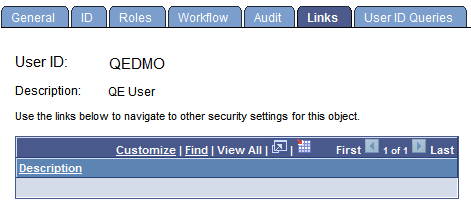
Use this page to access links to other pages within your PeopleSoft system. For example, perhaps a PeopleSoft application requires a specific security setting to be associated with a user profile. If this application-specific setting appears on a page not in PeopleTools Security, add a link to the application page so that anyone updating the user profile can easily navigate to the page.
Note: The Links page is read-only. You create the inventory of links to pages that exist outside of PeopleTools Security by using the Security Links component.
If you added links for user profiles in the Security Links component, they appear on the Links page.
Access the User Profiles - User ID Queries page (select and click the User ID Queries tab).
Image: User Profiles - User ID Queries page
This example illustrates the fields and controls on the User Profiles - User ID Queries page.
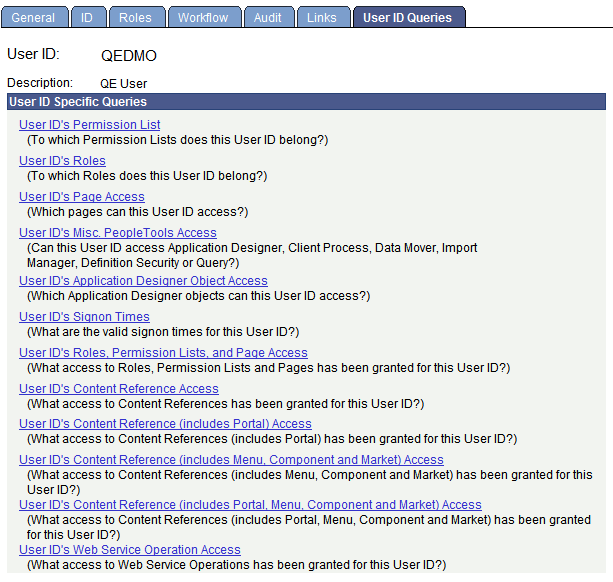
User ID queries enable you to run queries that provide detailed information about a user profile, such as the permission lists and roles associated with the user profile. The available queries are documented on the page.
To run a user ID query:
Click the link associated with the query that you want to run.
This action invokes a new browser window.
View the information that the query returns to the new browser window or select a download option.
For downloading, you have the following options:
Excel Spreadsheet: Downloads the query results as an Excel spreadsheet (.xls) file.
CSV Text File (comma-separated values text file): Downloads the query results as a CSV (.csv) file.
XML file: Downloads the query results as an xml (.xml) file.