Defining EDI Transactions
This topic provides an overview of defining EDI transactions and discusses how to:
Create transaction IDs.
Define partner profiles.
Set profile defaults.
When you receive an EDI transaction from a trading partner, the first record of the transaction includes a transaction ID that identifies the transaction type. The EDI agent uses the transaction ID, in conjunction with the trading partner ID, to determine which inbound map to use to process the transaction data. Similarly, when you initiate an outbound transaction, the EDI agent puts the appropriate transaction ID in the first transaction record so that the recipient knows what kind of transaction you have sent.
In PeopleSoft EDI Manager, you must identify the transactions that your system is prepared to process. You also must specify, for each of your trading partners, the transactions that they are authorized to perform. After you complete these steps, you must assign the profiles to your trading partners.
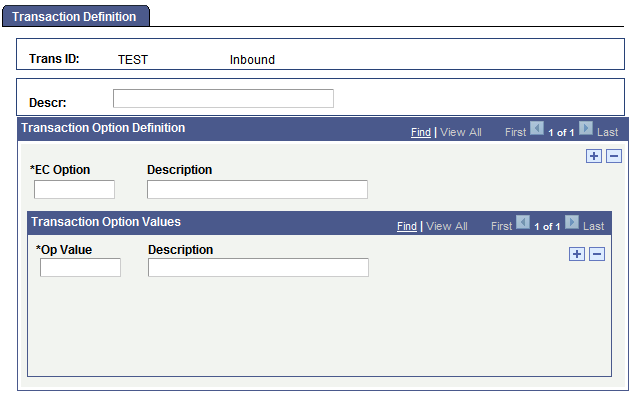
Access the Transaction Definition page.
Image: Transaction Definition page
This example illustrates the fields and controls on the Transaction Definition page.
To define a transaction:
Add a new value and enter a unique EC transaction ID as it will appear in PeopleSoft business documents.
Specify whether you are setting up an ID for inbound or outbound transactions.
Note: If you support both inbound and outbound transactions of the same transaction type, you must define two transaction IDs.
Click the Add button.
The Transaction Definition page appears. You use this page to define the transaction and specify any special transaction parameters.
Enter a description of the transaction in the Descr (description) text box.
The description appears in list boxes when you need to select a transaction ID.
Enter the name of a transaction option that the application load or application extract process uses.
Use the EC Option text box to specify a transaction parameter that the system will use when it copies data from the electronic commerce staging tables to the transactional application tables.
Enter the valid transaction option values for the transaction option.
List the valid values in the Op Value field for the transaction option that you specified in the previous step. Add a row for each option value. When you define a trading partner, you will specify which of these values to use for that partner. In this way, the application load or application extract process can handle the transaction differently depending on the trading partner that it comes from.
Repeat steps 5 and 6 to define additional transaction options.
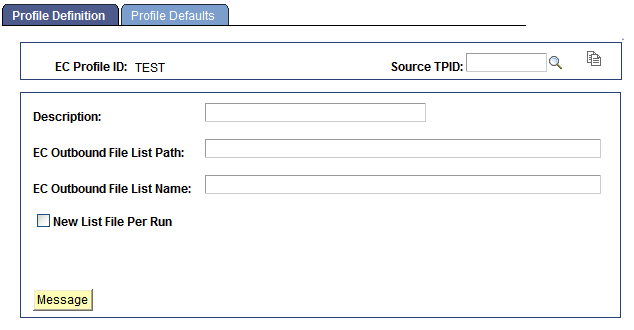
Access the Partner Profile - Profile Definition page.
Image: Partner Profile - Profile Definition page
This example illustrates the fields and controls on the Partner Profile - Profile Definition page.
To define a partner profile:
(Optional) Copy the definition of a similar partner profile.
If the profile that you are creating is similar to an existing profile, you can copy the details of the existing profile definition into this component. Then, you can change just the parts that are different.
Select the existing Source TPID, and then click theEC Copy Profile Function button. The system copies the values from the selected profile.
Specify the directory where you want the EDI agent to write outbound transaction files for partners with this profile.
Enter the directory path in the EC Outbound File List Path text box.
Note: If PeopleSoft EDI Manager runs on a server under MVS, it ignores this setting. Instead, it looks in the JCL for a DDNAME matching the file name that you specify in the next step.
Enter a name for the file that lists all pending outbound transaction files.
As the EDI agent creates transaction files, it adds the names of those files to a list file, the name of which you enter in the EC Outbound File List Name text box.
The transaction files themselves are automatically named 1.DAT, 2.DAT, and so on, except on MVS servers. On MVS, the files are named using the first eight characters of the external trading partner ID.
(Optional) Select New List File Per Run if you want a new list generated every run.
(Optional) Click the Message button to insert a standard message header or footer in the file.
Access the Partner Profile - Profile Defaults page.
Image: Partner Profile - Profile Defaults page
This example illustrates the fields and controls on the Partner Profile - Profile Defaults page.
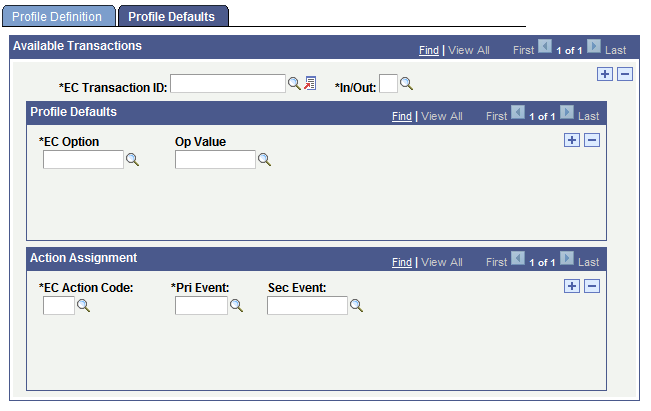
Use this page to specify which transactions a partner with this profile can perform and how the EDI agent converts event codes into action codes for each transaction. If a transaction has transaction options associated with it, you also specify which value to assign to that option for partners with this profile.
To set profile defaults:
Select a transaction type that partners with this profile can perform.
Select the transaction ID in the EC Transaction ID field. Specify whether it is an inbound or outbound transaction by selecting I or O in theIn/Outfield.
If the transaction type has transaction options associated with it, specify which value to use for each one in the Profile Defaults group box.
When you define a transaction type, you can specify transaction options that the system uses when it copies data between the electronic commerce staging tables into the transactional application tables. If the transaction type that you are adding includes options, specify which of the available values for that option the EDI agent should use for partners with this profile.
Note: Most transaction types do not have any options, and you can bypass this step.
Select the option in the EC Option field. Then, select one of its valid values in theOp Value field. Repeat this step for each defined transaction option.
Specify which action code to use for each pair of primary and secondary event codes.
The controls in the Action Assignment group box enable you to specify how the EDI agent translates between the event codes in a PeopleSoft business document and the action codes in the electronic commerce staging tables.
Select one of the defined action codes in the EC Action Code field, and then select the primary and secondary event codes that map to this action code. If this transaction type uses only a primary event code (Pri Event field), you can leave the Sec Event (secondary event) box empty.
Repeat this step to define each possible action code and combination of primary and secondary event codes for this transaction type.
Repeat steps 1 through 3 for each transaction type that partners with this profile can perform.