Enabling Unifier Users and User Security for CIC Analytics
To bring Unifier users and user security into CIC Analytics:
- Sign in to Unifier.
- Grant access to Analytics in Unifier:
- For all company-sponsored shells, select the following options: Unifier, Company workspace tab,
 Switch to Admin Mode, User Administration, Access Control, User Mode Access, Company Workspace, Non-Navigational Nodes, and then select Analytics.
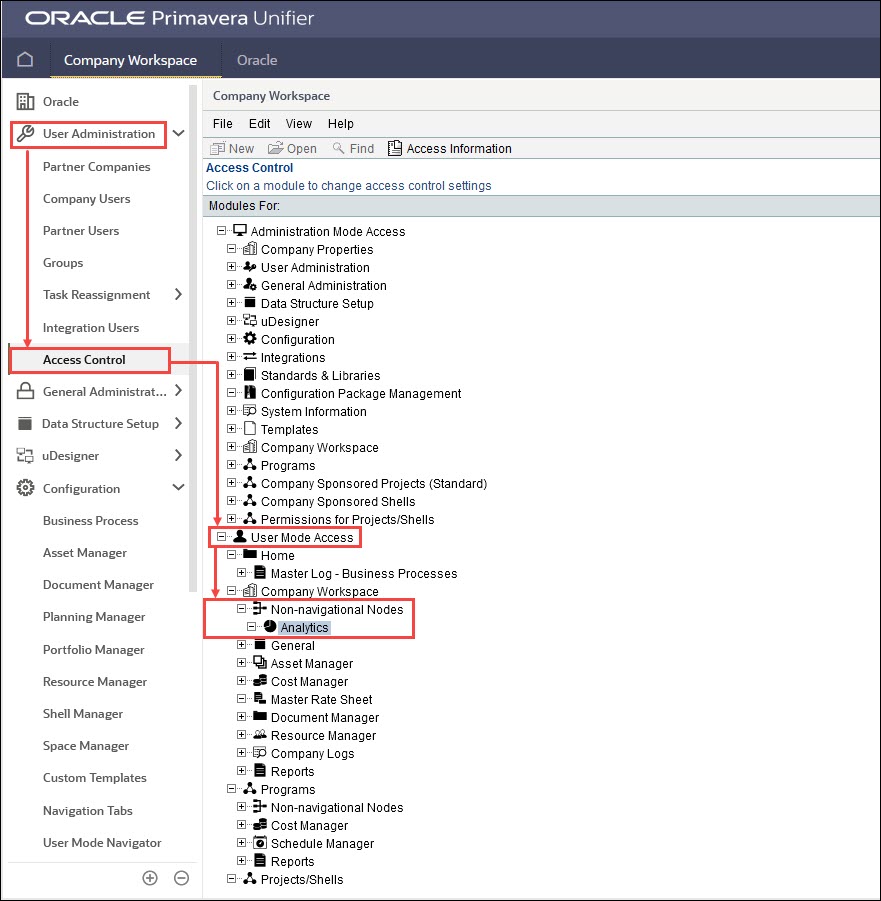
- For all company-sponsored projects (standard), select Unifier, Company workspace, Switch to Admin Mode, Access Control, User Mode Access, Project/Shells, Non-Navigational Node, and then select Analytics.

- For shell-specific permissions, select a <Shell Name>, and then select Switch to Admin Mode, Access Control, User Mode Access, Non-Navigational Nodes, and then select Analytics, as shown above.
- For all company-sponsored shells, select the following options: Unifier, Company workspace tab,
- Click Add Users / Groups.
- From the Users / Groups window, select the intended users and / or groups and click Add.
- For individual users or multiple users with same permissions, review the Permission Settings, adjust as needed, and click OK.
- For multiple users with different permissions, click OK to return to the Permission Settings window.
- In the upper area, select users or groups.
- In the lower area, select Modify or View access for the selected user or group.
- Click OK.
- Click Apply to save changes and keep the window open.
or
Click OK to save changes and close the window.
- In the left pane, select Access Control, Administration Mode Access, and then expand either Company Sponsored Projects (Standard) or Company Sponsored Shells as applicable.
- Open the desired project.
- Select Add, select the desired users, and modify permissions as needed.
Note: After permissions are setup the access doesn’t get reflected in CIC Analytics immediately.
- To add all users into CIC Analytics:
- Once all the desired users are added, select Company Workspace, Analytics and then run the Schedule to publish changes to staging tables. For more details, see Setting Up a Publishing Schedule For Unifier Data.
- Run the Unifier Publication service followed by the STARETL run for the permissions get reflected in Unifier staging tables.
- Once the user is present in the staging tables, rerun the Data Warehouse ETL to bring the user permission information into the W_USER_S table.
Related Topics
Last Published Friday, December 8, 2023