5 Check-In Wizard Functions
The Check-In Wizard (CIW) function facilitates a quick and effective check-in and record passenger’s information at the same time.
The presentation of the screen may vary depending on the parameter defined in Advance QCI, Wizard - Show Upon Startup.
Check In Guest with CIW
The CIW is a check in process comprised of six screens.
Welcome Screen
Figure 5-1 Check In Wizard
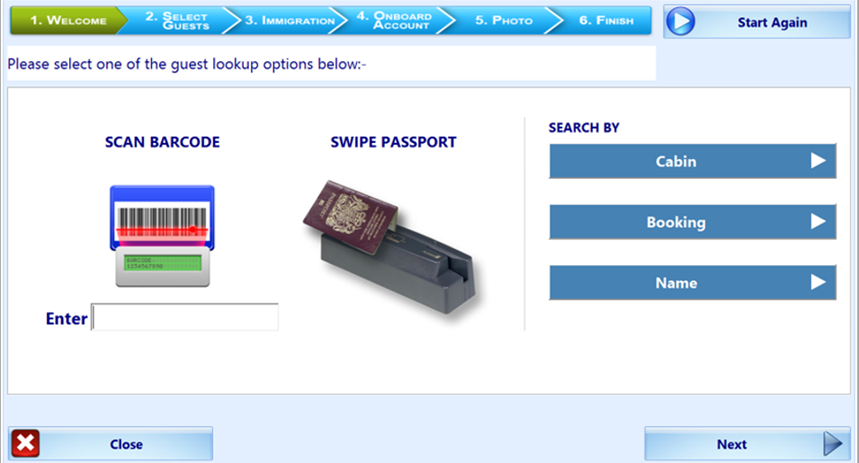
The Welcome Screen is the first of six processes in the CIW. It provides you a guest information look-up by scanning a barcode, swiping or scanning a passport through a passport reader or search by cabin, and booking number or name.
Search Guest Using Scan Barcode
Scan the document barcode with the barcode scanner or manually enter the external code in the field below the scan barcode image, and then click Enter.
The passenger’s information appears in process 2. Select Guests. In the event the external number is not found, then a warning message “Guests not found. Please try again” appears.
Search Guest Using Swipe Passport
Swipe the passport through the passport reader. The passenger’s information appears in process 2. Select Guests. In the event the passport number is not found, a warning message “Guests not found. Please try again” appears.
Search Guest Using Cabin, Booking Number or Name
-
At the Welcome Screen, click the Cabin, Booking or Name icon, and enter the corresponding information into the respective field.
-
Click Next. The passenger’s information appears in process 2. Select Guests. In the event the passport number is not found, a warning message “Guests not found. Please try again” appears.
Selecting a Guest
The Select Guests screen is the second of six processes in CIW. It displays the earlier searched guests that are due to embark. The following section describes the usage within the Select Guests screen.
Figure 5-2 CIW — Select Guests
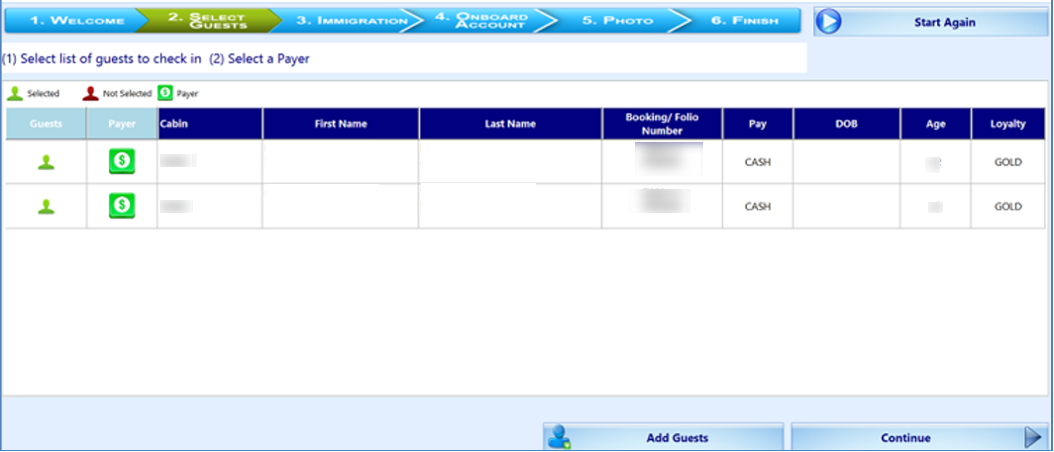
Table 5-1 Select Guests Screen Field Definition
| Field Name | Descriptions |
|---|---|
|
Guest |
Indicates whether the guest account is selected or not, and by default it is shown as Selected. |
|
Payer |
Indicates whether the guest is a payer for the account. |
|
Cabin |
Displays the cabin number assigned. |
|
First Name |
First Name of the guest. |
|
Last Name |
Last Name of the guest. |
|
Booking/Folio Number |
Displays the guest booking number and is defaulted to RES_BOARDCC_EXT field. The guest folio number is the user defined field, for example RES_ACC. |
|
Pay |
Displays the payment method use. |
|
DOB |
Displays the guest date of birth. |
|
Age |
Displays the age of the guest. |
|
Loyalty |
Displays the discount category entitled during the cruise. |
Selecting a Guest to Select/Deselect a guest account
To select/deselect the guest, click the icon in the Guest column. Multiple selection is permissible when selecting guests to check in.
Adding Guest to Check-In
You can add guests to the selection list using the Add Guest function. Upon clicking Add Guest, the system returns to the Welcome screen, enabling you to add a guest to the list by repeating the earlier process.
Selecting/Deselecting a Payer
-
To deselect a payer from the guest account, click the Dollar symbol under Payer column. This removes the symbol from the column.
-
To select a payer for the account, click the blank space in the Payer column to turn on the Dollar symbol.
If the account has routing instructions, the payer account will display the Dollar symbol under Payer column, the guest he/she is paying for will be blank in the Payer column and the letter R appears in Pay column.
The system always process the first payer on the grid. It processes the next payer when more than one payer account is selected before it processes the non-payer account.
Figure 5-3 Payer Routing Selection

Promotion Eligibility
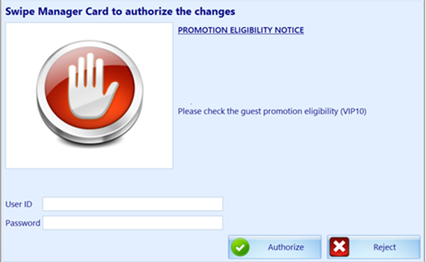
If the guest is entitled to a promotion, you are prompted by a Promotion Eligibility Notice requesting Authorization from the user. If the sign-on user is assigned with the user security rights, #4510 – Allow Authorize RCL Check-In Hard Stop, you can immediately authorize/reject the eligibility. If the sign-on user does not have the above user security right, then further authorization from a supervisor level is required.
Figure 5-4 Promotion Eligibility Notice
Guest Messages
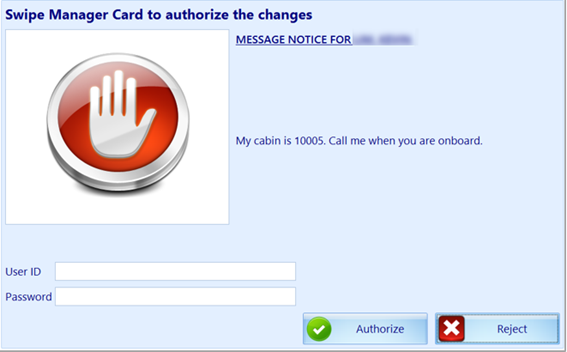
The system prompts the following when there is a message waiting to be delivered to the guest. The Message Notice prompt is set off in Guest Message Delivery mode, 1 – Deliver at Advance ACI Wizard.
-
If the guest has undeliverable messages, a Message Notice shall appear, requesting an authorization to mark the message as delivered. If you are assigned the user security right #4510 – Allow Authorize RCL Check-In Hard Stop, you can immediately authorize or reject delivery of the message.
-
If you are a regular user, then further authorization from a supervisor level is required.
Figure 5-5 Guest Message Notification
-
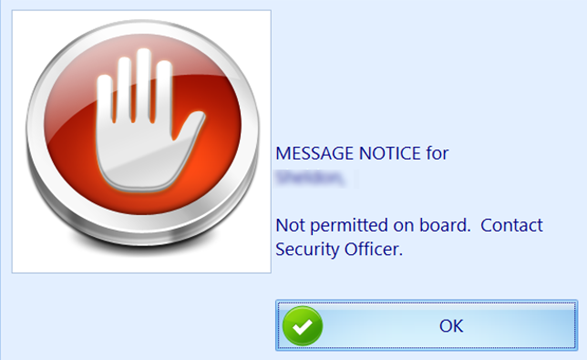
If the message is a warning notice that prevents the guest from embarking, then check-in is prohibited.
Figure 5-6 Guest Message Warning Prompt
Checking In Selected Guest
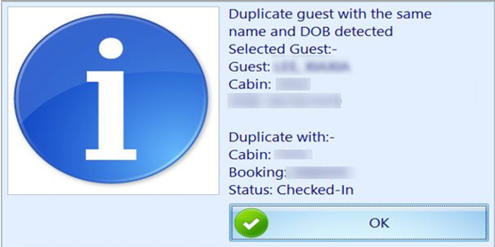
Once the guest is selected and the you click Continue, the system automatically navigates to the next process, which is the Immigration Screen. If the system found the booking to be a duplicate, check-in is not allowed until the duplicate booking is resolved.
Check-In Multiple Guest
-
Mark the guests to check in.
-
Click Continue and the system automatically navigate to the next process, which is the Immigration Screen.
Edit/View a Check-In Guest
Viewing/editing the guest account or printing a Set Sail pass after the guest checks-in is possible with the Check-In Wizard, available in the Select Guests screen
To edit/view guest account
-
Repeat the steps in Welcome Screen. On Select Guests screen, guest that has checked-in are highlighted in green.
-
Click the Booking/#Folio field to edit or view the account.
-
Select one of the following options when prompted.
-
View: Does not permit you to change any of the guest details.
-
Edit: You are allowed to edit the guest details, and save the changes in a later process.
-
Print: This function prints the Set Sail pass to the report printer assigned in General Setup, Hardware.
-
-
If you select View, you are not allowed to change guest details. If you select Edit, the system automatically navigates to the Immigration screen where editable fields are enabled.
-
Update the guest details, and click Next to update the Visa requirements, if any.
-
Continue to click Next until reaching the process 5. Photo screen.
-
Click Save.
Edit/View a Check-In Guest Payment
To edit/view a checked-in guest payment method:
-
Repeat the process from the Welcome Screen. The guests that have been checked-in are highlighted in green on the Select Guests screen.
-
Click the Payment Type in the Pay column to edit or view the account. The system automatically navigate to the process 4. Onboard Account screen.
-
Click the Credit Card, Cash or None image to change the payment type.
-
Click Save to save the changes. You can add or remove a routing assignment in this section. See Routing Assignment for steps on how to add/remove a routing.
Immigration
The Immigration screen is the third of six processes in CIW and has two sections; one that captures guest details and a Visa screen that stores the travel visa information. Typically, this information is uploaded during data import, and can manipulate certain data based on the travel rules defined in Travel Rules Setup.
Before you can check in a subsequent guest, you must first complete the Immigration information and Onboard Account of the first guest. The system repeats this process until the last guest is updated and then lets you move to the next process, which is Photo.
Table 5-2 Immigration Screen Field Definition
| Field Name | Descriptions |
|---|---|
|
First Name, Middle Name, Last Name |
First and Last Name of the guest. The fields are non-editable. Information auto-populates fields when the travel document is swiped.
|
|
Chinese First Name, Last Name |
Chinese First and Last Name of the guest. These fields are editable and mandatory when they match the nationality defined in the Advance QCI - Wizard - Nationalities With Chinese Names parameter. Travel document information auto-populates when scanned with the 3M passport scanner. |
|
Nationality |
Information populates during passport swipe. The field is non-editable unless you click Manual which enables the drop-down selection list. |
|
Document Type |
Information populates during passport swipe. The options on the drop-down list are based on the selected nationality and conditions defined in Travel Rules Setup. |
|
Document Number |
Information populates during passport swipe. The field is editable or mandatory depending on the conditions defined in Travel Rules Setup. |
|
Date of Birth |
Information populates during passport swipe. The field is non-editable unless you click the Manual button next to Nationality. |
|
Expiry Date |
Information populates during passport swipe. The field is editable or mandatory depending on the conditions defined in Travel Rules Setup. |
|
Birth Cert state |
Information populates during passport swipe. The field is editable or mandatory depending on the conditions defined in Travel Rules Setup. For US Citizens, select the US States from the drop-down list. |
|
Gender |
Information populates during passport swipe. The field is editable or mandatory depending on the conditions defined in Travel Rules Setup. |
|
Photo ID Type |
Field is editable or mandatory depending on the conditions defined in Travel Rules Setup. |
|
Photo ID State |
Field is editable or mandatory depending on the conditions defined in Travel Rules Setup. |
|
Country of Birth |
This is a mandatory field. |
|
Country of Residence |
This is a mandatory field. |
|
Emergency Contact Name |
This is a free text field. |
|
Emergency Phone |
This is a mandatory field, and the minimum number is seven digits. Sequential and repeating numbers are not acceptable. |
|
Copy to All |
This function copies input numbers to other guests if you select Multiple Guest. |
|
Ship Email. |
This field is enabled when the Advance QCI, Wizard Show Ship Email Address parameter is active. You must have access rights 4689 – Allow to Change Email address. |
|
Exclude From Quick Billing Printing |
This field is enabled when the Advance QCI, Wizard Show Quick Billing Printing Option parameter is active. You must have access rights 4688 – Allow to Change Quick Billing Printing Option. |
|
National ID |
National ID number of contact person. |
|
FIN Number |
Foreign Identification Number. |
|
Notice and Consent |
Mandatory field. Indicates that passenger accepts the Notice and Consent terms. |
Some of these fields are mandatory and validate when you click Next. The examples are as follows:
Date of Birth
Figure 5-7 Year Setting Affecting Travel Documents
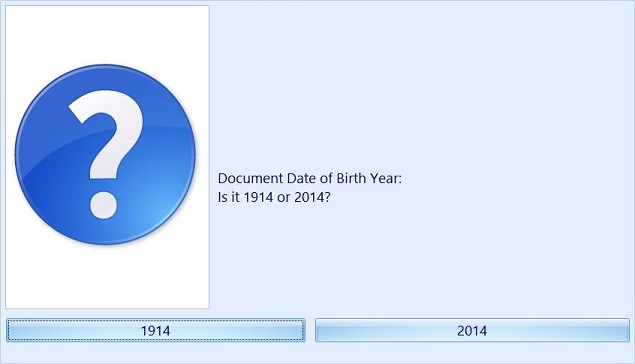
- If the PC Regional Setting year is set to a 2-digit year format, the system prompts for confirmation of the correct year. Select the correct year to update.
Figure 5-8 Year Setting Affecting Guest Age
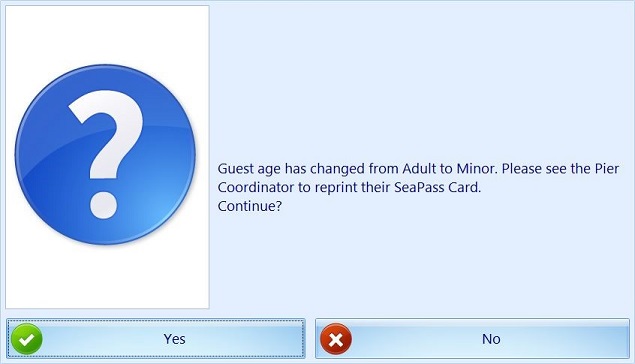
-
If a changed date is within the minor age group or vice versa, you will receive another prompt requesting for the SeaPass Card to be reprinted.
Expiry Date
-
Similar to Date of Birth, the system validates the expiry year based on the PC Regional Settings.
-
If the selected document type is a Passport, the system validates the expiry date based on the following parameters in Advance QCI:
-
Passport Expiry Validation.
-
Passport Expiry Validation Disembark Date In Day.
-
Passport Expiry Validation Disembark Date In Month.
-
Passport Expiry Validation Hard Stop.
-
Passport Expiry Validation In Day.
-
Passport Expiry Validation In Month.
-
Emergency Phone
Repeating numbers or numbers in sequential order is not accepted as Emergency Phone number, for example 12345678 or 1111111.
Notice and Consent
The system prompts a warning message if this check box is deselected and prevents you from continuing. Click OK to return to the previous screen.
Adding Visa Information
On the Visa section, the required Visa Type is dependent on the Travel Rules Setup.
Figure 5-9 Visa Requirements
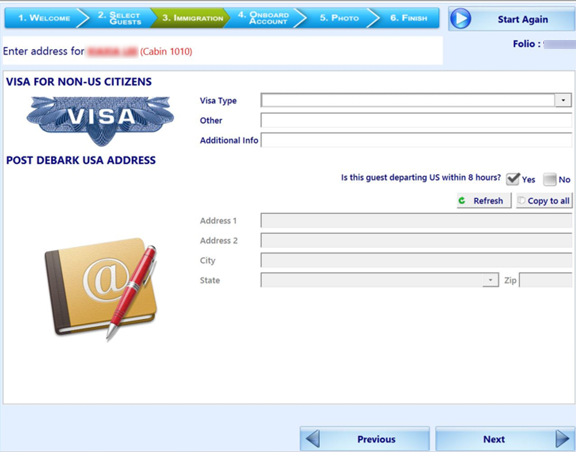
Table 5-3 Visa Screen Field Definition
| Field Name | Descriptions |
|---|---|
|
Visa Type |
Field is editable or mandatory depending on the conditions defined in Travel Rules Setup. |
|
Other |
Free text field. |
|
Additional Information |
Free text field. |
|
Is this guest departing US within 8 hours?: Yes/ No |
Field is editable or mandatory depending on the conditions defined in Travel Rules Setup. By default, Yes is selected. |
|
Refresh |
Button resets the screen to default selection. |
|
Copy to All |
This function copies input numbers to other guests if you select Multiple Guest. |
|
Address 1 / 2, City, State and Zip |
Field editable if you select NO to the question “Is this guest departing US within 8 hours?”. Zip code must not be less than five digits. |
Entering Visa Information
-
Select the type of visa from the drop-down list.
-
Use the Other field to enter the Visa Number and the Additional Info field for other information.
Entering Post Debark US Address
-
Select No on the question “Is this guest departing US within 8 hours?”.
-
Fill in the US Address, City, State and Zip code.
-
Click Next to continue.
Onboard Account
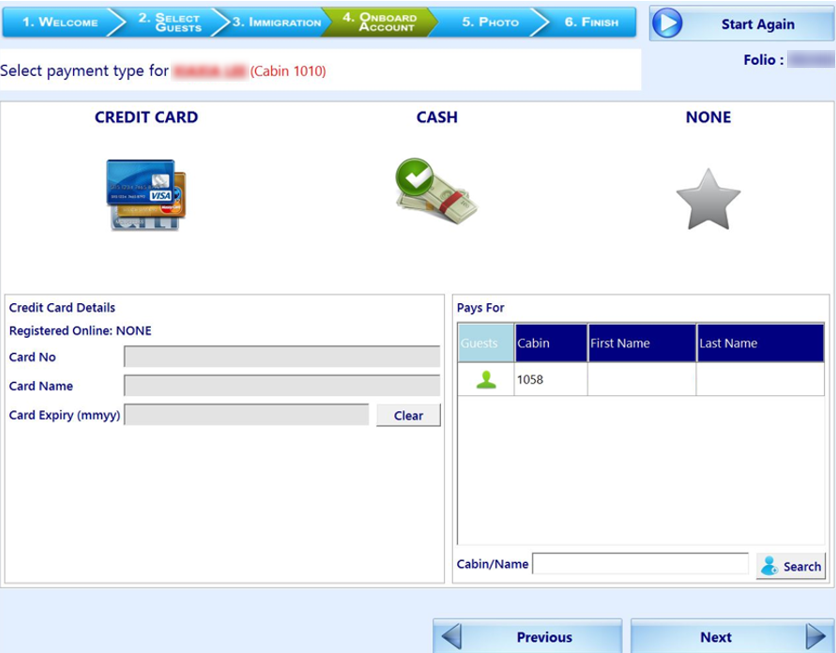
The Onboard Account screen is the fourth of six processes in CIW, and it stores the guest payment type, with the selected payment type indicated by a green checkmark on the icon.
-
Click the appropriate image to select a payment type. Options are: Credit Card, Cash, and None.
-
If the guest has a registered credit card, the card details appear below the card section with its credit card number masked.
-
It also allows you to route an account to the guest.
Figure 5-10 Onboard Account
Updating the Credit Card Details
To update or swipe the card for details,
-
Click the Credit Card image.
-
Swipe the credit card through the reader or manually enter the credit card number, name, and expiry date.
-
Click Clear to reset the information entered.
-
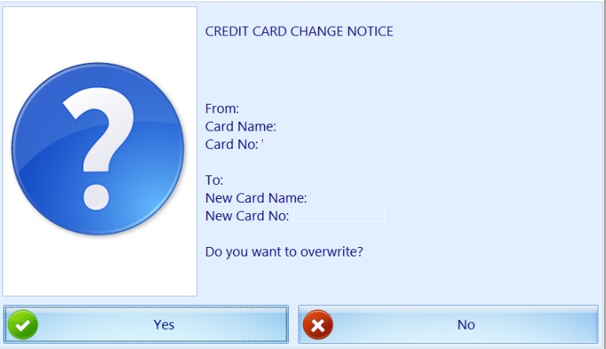
If the card name or credit card number registered online differ from the card, the system prompts a Change Notice.
Figure 5-11 Credit Card Change Notice
-
Click Yes to overwrite the information with new information or No to retain current information and disable the previously registered credit card. If the credit card is registered twice, you are prompted with the message: “This credit card is already registered in the system. Please use another credit card”.
Note:
The above validation requires the ‘General’,’Check Credit Card Registration’=1 parameter.
Dynamic Currency Conversion (DCC) Handling
The Check-In Wizard supports Dynamic Currency Conversion (DCC) as part of the credit card payment type. When the guest uses a foreign based credit card, the guest has an option to choose whether to use the home base currency or dynamic currencies during settlement.
This handling requires the following parameters: ‘General’, ‘Enable Credit Card DCC’=1 and ‘General’, ’DCC Base Country’=NULL, and default the ‘DCC Enabled’ to Yes.
To opt in a settlement using Dynamic Currency Conversion:
-
Click the Credit Card image.
-
Swipe the credit card through the card reader or manually enter the credit card number, name, and expiry date, and click Next.
By default, the Ship currency is checked. Select a Currency Type when prompt, and click OK to save.
Selecting Other Payment Type
-
Click the Cash image.
-
Click Save to save the changes.
-
Click the None image. This sets off a prompt, “You have selected NONE as payment method, do you want to continue?”.
-
Click Yes to proceed to the next step, or click No to return the current screen.
Figure 5-12 DCC Handling

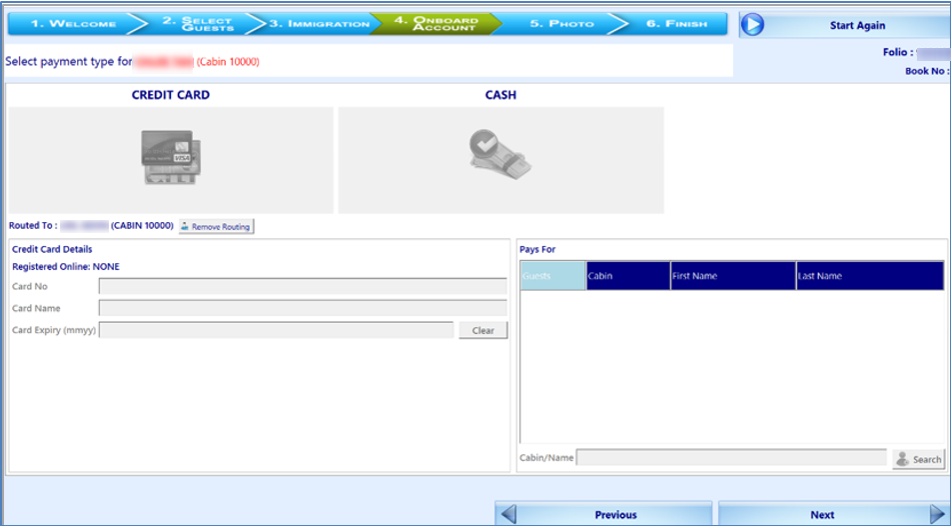
Routing Assignment
The Routing function is enabled when the current selected guest is the payer.
-
On the Onboard Account screen Pays for section, search the buyer’s last name or cabin number.
-
On the searched list, click the Guest column to select the account. This action changes the color from red to green.
-
Click Save to save the routing.
If more than one guest is selected in Select Guests screen, the system returns to the Immigration screen automatically, allowing you to complete the next guest information and payment option.
Figure 5-13 Onboard Account Routing
Photo
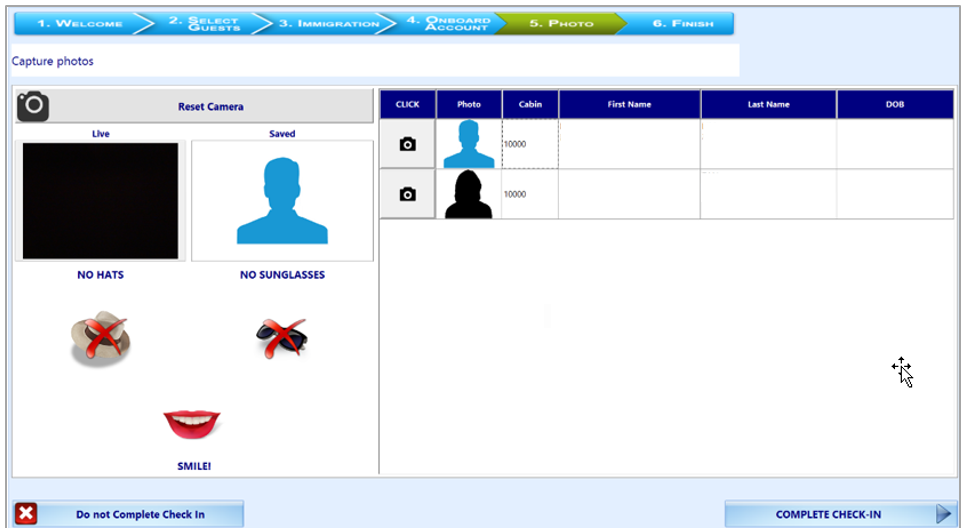
The Photo screen is the fifth of six processes in Check In Wizard (CIW). It stores a copy of the guest photo captured with the live camera attached to the PC. This function requires the ‘Quick Check In’, ‘Take Photo Before Checkin’=1 parameter.
With the above parameter, taking a picture is mandatory before you can proceed to the next step when a camera is detected to be working. You will be prompt with the message: “Guest photo must be taken before you can continue’”. If no camera is detected, or if the camera is not working, then photo taking is not required.
Saving Live Photo to Guest Account
-
At the guest list, click the Camera icon under the Click column of the guest you wish to capture in the photo. The photo taken appears in the Saved column.
-
To retake the picture, repeat step 1.
-
If the camera becomes non-responsive, click the Reset Camera.
-
Click Complete Check-In to save the photo and advance to the Finish screen, which lists all successfully checked-in guests.
Figure 5-14 Photo Screen
